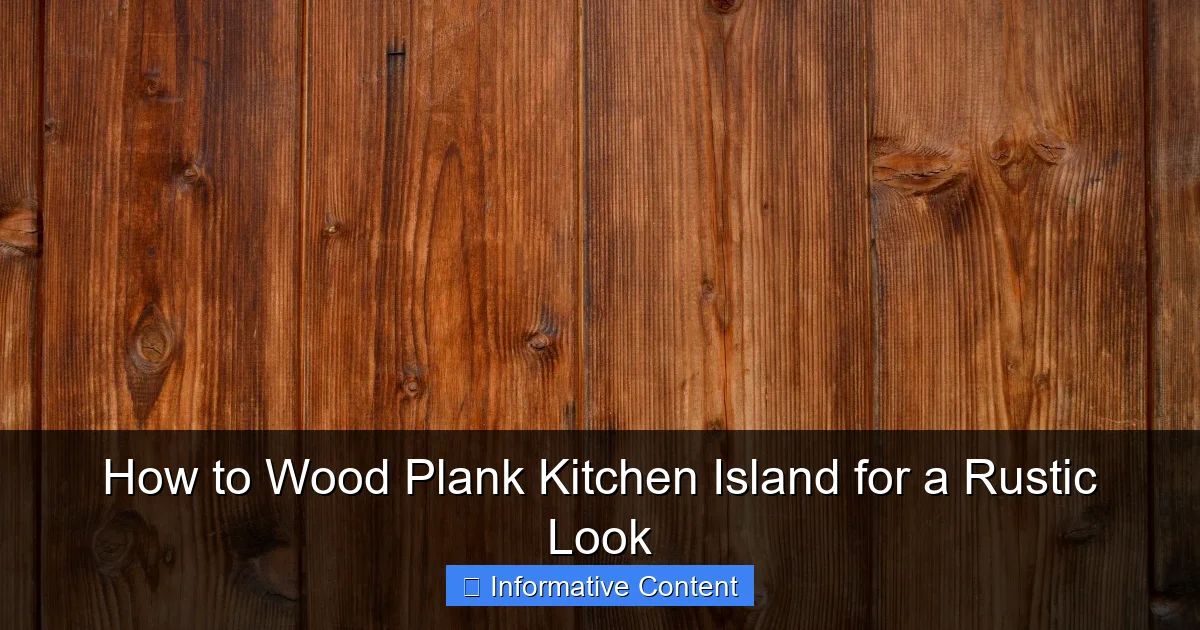
Featured image for how to wood plank kitchen island
Image source: c.pxhere.com
Transform your kitchen island with wood planking for an instant rustic charm by selecting quality, pre-sanded planks and securely attaching them with construction adhesive and finish nails. Seal the wood with a matte polyurethane to enhance durability and highlight the natural grain, ensuring a long-lasting, farmhouse-style focal point.
Key Takeaways
- Choose quality wood: Opt for durable, rustic-grade planks like pine or reclaimed wood.
- Prep the surface: Sand and clean the island base for better plank adhesion.
- Plan your layout: Stagger plank seams for a natural, seamless appearance.
- Secure planks tightly: Use nails or adhesive to prevent warping or gaps.
- Seal for protection: Apply a clear sealant to resist moisture and stains.
- Highlight imperfections: Embrace knots and grain for authentic rustic charm.
📑 Table of Contents
- How to Wood Plank Kitchen Island for a Rustic Look
- Choosing the Right Wood for Your Plank Kitchen Island
- Designing Your Rustic Kitchen Island
- Preparing and Installing Wood Planks
- Finishing and Sealing for Durability
- Common Mistakes and How to Avoid Them
- Cost and Time Estimates: What to Expect
- Final Thoughts: Embrace the Imperfections
How to Wood Plank Kitchen Island for a Rustic Look
There’s something undeniably cozy about a rustic kitchen. Maybe it’s the warm tones, the natural textures, or the way it feels like home the moment you walk in. One of the most effective ways to bring that charm into your space is by adding a wood plank kitchen island. I remember when I first tackled this project in my own home—I was nervous, to be honest. I’d never worked with reclaimed wood before, and I wasn’t sure if I could pull off the look without it looking like a DIY disaster. But after some trial, error, and a few extra trips to the hardware store, I ended up with a centerpiece that gets compliments every time someone walks in.
Whether you’re building a new island or upgrading an existing one, wood planking is a game-changer. It adds character, warmth, and a timeless appeal that’s hard to replicate with paint or laminate. The best part? You don’t need to be a master carpenter to do it. With the right tools, materials, and a little patience, you can transform your kitchen island into a rustic showstopper. In this guide, I’ll walk you through every step—from choosing the right wood to sealing the finish. We’ll cover design ideas, common pitfalls, and even how to make it kid-friendly if your household is anything like mine.
Choosing the Right Wood for Your Plank Kitchen Island
The foundation of any great wood plank kitchen island starts with the wood itself. It’s not just about looks—it’s about durability, grain, and how the wood will age over time. I’ve learned that not all wood is created equal, and the type you pick can make or break the final look.
Visual guide about how to wood plank kitchen island
Image source: c.pxhere.com
Solid Wood vs. Engineered Wood
Solid wood is the gold standard for a rustic look. It’s authentic, ages beautifully, and can be sanded and refinished multiple times. Popular choices include:
- Reclaimed barn wood – Full of character, with natural weathering, nail holes, and a rich patina. It’s eco-friendly and adds instant vintage charm.
- Pine – Affordable and easy to work with, but softer, so it can dent easily. Great for a lived-in, shabby-chic look.
- Oak – Harder and more durable, with a pronounced grain. It’s a bit pricier but holds up well in high-traffic kitchens.
- Walnut or Cherry – For a richer, darker tone. These are more expensive but offer a luxurious, deep grain.
Engineered wood, like plywood with a veneer, is more budget-friendly and dimensionally stable (less likely to warp). However, it lacks the depth and authenticity of solid wood. If you’re going for a truly rustic vibe, I’d recommend sticking with solid planks—even if it means a slightly higher upfront cost.
Width, Length, and Thickness
Most wood planks for kitchen islands range from 4 to 8 inches wide. Wider planks (6”+) give a bold, farmhouse feel, while narrower ones (4–5”) look more traditional. For thickness, aim for at least ¾ inch—thinner planks can feel flimsy and may warp over time.
Pro tip: Mix plank widths for a more organic, handcrafted look. I used a mix of 5” and 7” planks on my island, and it added visual interest without being too busy.
Pre-Finished vs. Raw Wood
Pre-finished planks save time but limit your customization. Raw wood lets you stain or paint exactly how you want. If you’re staining, make sure the wood is sanded smooth and free of dust. I once used pre-finished planks and ended up with a patchy stain because the factory finish repelled the new coat. Lesson learned: raw wood gives you full control.
Designing Your Rustic Kitchen Island
Once you’ve chosen your wood, it’s time to think about design. The goal is to create a cohesive, functional island that enhances the rustic aesthetic without clashing with your kitchen’s overall style.
Matching Your Kitchen’s Vibe
Ask yourself: Is your kitchen modern-rustic, farmhouse, industrial, or cottage-style? Your island should complement—not compete with—the existing design.
- Farmhouse kitchens pair well with white or cream cabinets and a dark-stained oak or walnut island.
- Modern-rustic spaces might use a light gray stain with black metal hardware for contrast.
- Cottage-style kitchens look lovely with whitewashed or painted planks (think soft blue or sage green).
I once saw a kitchen where the owner painted the island planks in a bold teal—it worked because the rest of the kitchen was neutral, and the color tied in with the backsplash. So don’t be afraid to add a pop of color if it fits!
Layout and Plank Direction
Most people lay planks horizontally across the island’s face, but you can also go vertical for a taller, more dramatic look. Horizontal planks make the island feel wider and more grounded, which is great in smaller kitchens. Vertical planks draw the eye upward, adding height—ideal if you have low ceilings.
For the top, consider a butcher block or a continuous plank surface. I went with a 1.5” thick maple butcher block for my island top—it’s sturdy, easy to clean, and develops a lovely patina over time.
Hardware and Accents
The right hardware can elevate your rustic island. Think:
- Black or oil-rubbed bronze pulls and knobs
- Wrought iron brackets or corbels for added support
- Exposed corner joints or dovetail detailing (if you’re building from scratch)
I added simple iron bar pulls and a few vintage-style hooks for hanging towels. It’s the small details that make it feel truly custom.
Preparing and Installing Wood Planks
Now comes the fun part—installing the planks! This is where your island starts to take shape. But before you start nailing, there are a few critical prep steps.
Acclimating the Wood
Wood expands and contracts with humidity. If you install it without letting it acclimate, you could end up with gaps or buckling. Store your planks in the kitchen for at least 48 hours (72 is better) before installation. This allows the wood to adjust to the room’s temperature and moisture levels.
Prepping the Surface
If you’re working with an existing island, clean the surface thoroughly. Sand it down to remove old paint or varnish, and fill any gaps or holes with wood filler. For a new build, make sure the frame is square and sturdy—wobbly frames lead to crooked planks.
Pro tip: Use a stud finder to locate the island’s frame supports. You’ll want to nail the planks into solid wood, not just drywall or thin plywood.
Installation Techniques
There are two main ways to attach planks: face-nailing or hidden fasteners.
- Face-nailing – Nails go directly through the plank’s surface. It’s the most authentic look (think old barns) and works well with rustic styles. Use 8d finish nails and a nail set to drive them below the surface.
- Hidden fasteners – Use cleats, biscuits, or a tongue-and-groove system. This gives a cleaner look but requires more precision. I used a simple cleat method: I attached 1×2 strips to the island frame, then screwed the planks into the cleats from the back.
For gaps between planks, aim for 1/8” to 1/4”—this allows for expansion and gives a more natural, hand-laid appearance. Use spacers (like popsicle sticks) to keep gaps consistent.
Cutting and Fitting
Measure twice, cut once! Use a miter saw for clean edges and a jigsaw for curves or notches around outlets or supports. Sand all edges smooth to prevent splinters.
I made the mistake of rushing this step once and ended up with a plank that was 1/2” too short. It looked awkward and had to be replaced. Take your time—precision matters.
Finishing and Sealing for Durability
A beautiful wood plank island is only as good as its finish. Without proper sealing, it can absorb spills, warp, or develop stains. Here’s how to protect your work.
Staining (Optional)
If you’re using raw wood, staining is the first step. Choose a stain that matches your desired tone:
- Light oak or pine → golden or honey stains
- Reclaimed wood → dark walnut or ebony for contrast
- Whitewash → a mix of paint and water for a weathered look
Test the stain on a scrap piece first. Apply with a brush or rag, let it sit for 5–15 minutes (depending on the brand), then wipe off excess. I prefer oil-based stains—they penetrate deeper and last longer.
Sealing for Protection
This is non-negotiable. The kitchen is a high-moisture, high-traffic area. You need a finish that’s water-resistant, scratch-resistant, and food-safe.
- Polyurethane (water-based) – Dries clear, low odor, and easy to apply. Apply 2–3 coats, sanding lightly between coats. It’s my go-to for kitchen projects.
- Tung oil – Natural, food-safe, and gives a soft, matte finish. But it requires more maintenance (reapplication every 6–12 months).
- Wax – Adds a subtle sheen but isn’t very durable. Best for decorative pieces, not high-use islands.
For the island top, I used 3 coats of water-based polyurethane. For the sides, I did 2 coats since they get less direct contact. Always apply in a well-ventilated area and let each coat dry completely.
Maintenance Tips
Even sealed wood needs care:
- Clean with a damp (not wet) cloth and mild soap.
- Wipe up spills immediately.
- Reapply sealer every 2–3 years, or when water starts soaking in instead of beading up.
- Avoid abrasive cleaners or steel wool—they can scratch the finish.
My island has survived spilled coffee, sticky fingers, and even a toddler’s crayon masterpiece (thanks to the sealer!).
Common Mistakes and How to Avoid Them
Even the best-laid plans can go sideways. Here are the pitfalls I’ve learned the hard way—and how you can avoid them.
Skipping the Acclimation Step
Installing wood without letting it adjust to the room’s humidity is a recipe for disaster. I once rushed a project and ended up with gaps between planks six months later. Let the wood breathe first!
Overlooking Expansion Gaps
Wood expands across the grain (width), not length. Leave small gaps between planks—don’t butt them tightly together. I use 1/8” spacers and it’s been perfect.
Using the Wrong Nails or Fasteners
Regular nails can split the wood or rust over time. Use galvanized or stainless steel finish nails. For hidden fasteners, make sure the cleats are securely attached to the frame.
Choosing a Finish That’s Too Delicate
Wax or shellac might look nice, but they won’t hold up in a kitchen. Stick to polyurethane or a commercial-grade sealer. I once used a natural oil on a countertop—it looked great for a month, then started staining from coffee rings.
Ignoring Safety
Wear safety goggles, a dust mask, and ear protection when cutting or sanding. I learned this the hard way when a wood chip flew into my eye. Not fun.
Forgetting About Function
An island should be practical. Make sure there’s enough overhang for bar stools, and consider adding outlets or USB ports. I added a small charging station in mine—best decision ever.
Cost and Time Estimates: What to Expect
Let’s talk numbers. A wood plank kitchen island can be a budget-friendly upgrade or a major investment, depending on your choices.
Here’s a rough breakdown of costs (based on a standard 4’x6’ island):
| Item | Low-Cost Option | Mid-Range Option | High-End Option |
|---|---|---|---|
| Wood Planks (reclaimed, pine, oak) | $150–$300 | $300–$600 | $600–$1,200+ |
| Butcher Block Top | $100–$200 | $200–$400 | $400–$800 |
| Stain & Sealer | $30–$50 | $50–$100 | $100–$200 |
| Hardware & Fasteners | $50–$100 | $100–$200 | $200–$400 |
| Tools (if not owned) | $100–$300 | $300–$600 | $600+ |
| Total Estimated Cost | $430–$950 | $950–$1,900 | $1,900–$3,600+ |
Time-wise, expect to spend:
- 1–2 days for prep (acclimating, sanding, cutting)
- 1–2 days for installation
- 1–2 days for staining and sealing (with drying time)
Total: 3–6 days for a DIYer with moderate experience. If you’re new to woodworking, add a day or two.
The best value? Reclaimed wood. It’s eco-friendly, full of character, and often cheaper than new lumber—especially if you source it from salvage yards or online marketplaces.
Final Thoughts: Embrace the Imperfections
Creating a wood plank kitchen island is more than just a home improvement project—it’s a chance to infuse your kitchen with personality. The beauty of rustic design is that it celebrates imperfections. A knot in the wood, a slightly uneven plank, or a weathered edge—these aren’t flaws. They’re features.
When I stand back and look at my island now, I don’t see the mistakes or the extra hours I spent sanding. I see a piece that tells a story. It’s where my kids do homework, where we gather for weekend pancakes, and where I’ve hosted countless dinners. It’s warm, inviting, and uniquely ours.
So if you’re considering a wood plank kitchen island, go for it. Take your time, enjoy the process, and don’t stress over perfection. The best rustic designs are the ones that feel lived-in and loved. And remember—if you make a mistake? Sand it down, try again, and call it “character.” That’s the magic of wood.
Frequently Asked Questions
What type of wood is best for a wood plank kitchen island?
For a rustic look, reclaimed wood, pine, or oak are excellent choices due to their durability and natural grain patterns. Reclaimed wood adds character with its weathered appearance, while pine and oak offer a balance of affordability and strength.
How do I prepare the wood planks before assembling the kitchen island?
Sand each plank thoroughly to remove rough spots, then apply a wood conditioner to prevent uneven staining. Seal with a clear coat or stain to enhance the rustic look and protect against moisture and wear.
Can I install a wood plank kitchen island on my own, or do I need a professional?
DIY installation is possible with basic tools and carpentry skills, especially if you’re using pre-cut planks. For complex designs or structural support, hiring a professional ensures safety and precision.
How do I maintain the rustic look of my wood plank kitchen island over time?
Regularly clean with a damp cloth and mild cleaner, avoiding harsh chemicals that can strip the finish. Reapply sealant or wax every 6–12 months to preserve the wood’s texture and color.
What tools are needed to build a wood plank kitchen island?
Essential tools include a saw, drill, sander, clamps, measuring tape, and level. A nail gun or pocket-hole jig can help secure planks efficiently for a seamless, professional-looking finish.
How can I add a distressed finish to my wood plank kitchen island for a more rustic feel?
Use sandpaper or a wire brush to wear down edges and corners, then apply a dark wax or glaze to highlight grooves. Layering light and dark stains can also enhance the aged, weathered appearance.