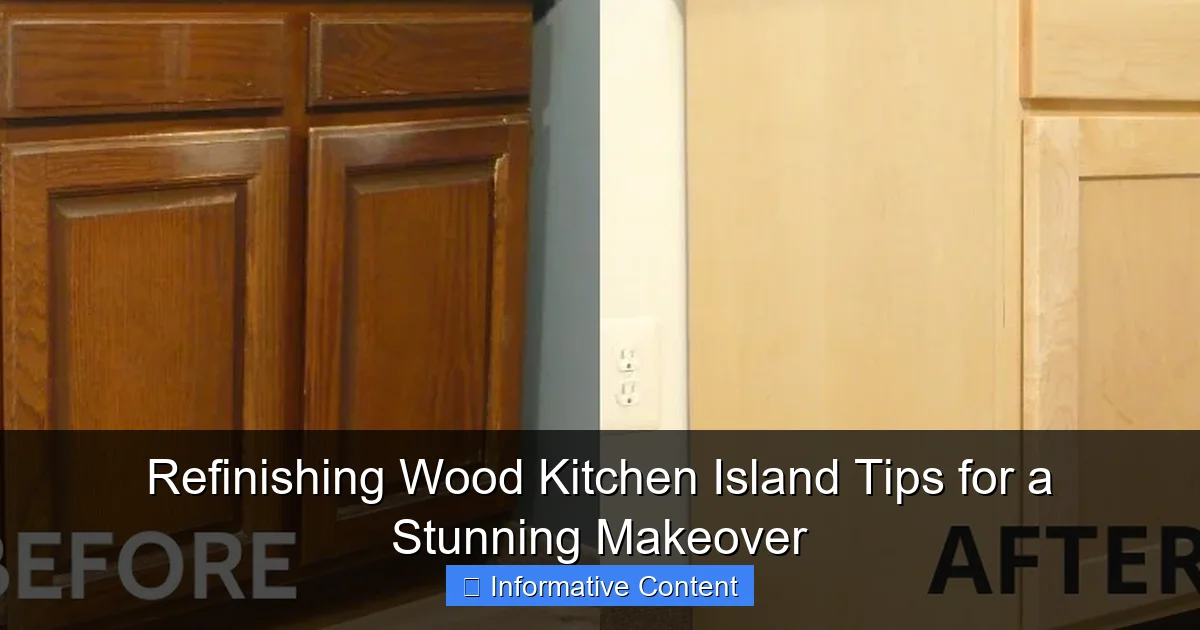
Featured image for refinishing wood kitchen island
Image source: wisewoodveneer.com
Refinishing a wood kitchen island breathes new life into your space without the cost of a full replacement. With proper sanding, stain selection, and a durable topcoat, you can achieve a showroom-quality finish that enhances both style and functionality. This simple DIY upgrade transforms worn surfaces into a stunning focal point.
Key Takeaways
- Prep thoroughly: Sand and clean the surface for better stain adhesion.
- Choose quality finishes: Opt for durable, food-safe sealants like polyurethane.
- Test colors first: Apply stain samples to hidden areas before committing.
- Work in sections: Refinish one area at a time to ensure consistency.
- Protect surroundings: Cover floors and cabinets to avoid dust and spills.
- Maintain post-refinish: Reapply sealant annually to preserve the island’s look.
📑 Table of Contents
- Why Refinishing Your Wood Kitchen Island Is Worth the Effort
- Assessing Your Wood Kitchen Island: What You Need to Know Before Starting
- Step-by-Step Guide to Refinishing Your Wood Kitchen Island
- Choosing the Right Finish: Stain, Paint, or Clear Coat?
- Common Mistakes to Avoid When Refinishing a Wood Kitchen Island
- Aftercare and Maintenance: Keeping Your Refinished Island Looking Like New
- Cost Comparison: Refinishing vs. Replacing Your Kitchen Island
- Final Thoughts: Your Island, Your Style
Why Refinishing Your Wood Kitchen Island Is Worth the Effort
Let’s face it—your kitchen island is more than just a countertop. It’s the heart of your home, where morning coffee is poured, homework is done, and late-night snacks are enjoyed. Over time, though, even the most beautiful wood kitchen island can start to show its age. Scratches, water rings, faded finishes, and outdated stains can make it look tired and neglected. But here’s the good news: refinishing a wood kitchen island is one of the most rewarding DIY projects you can tackle. Not only is it budget-friendly, but it also gives you the power to completely transform the look and feel of your kitchen without replacing the entire island.
I learned this firsthand when I inherited my grandmother’s oak kitchen island. It had sentimental value, but the finish was worn, with water stains from decades of use. Instead of tossing it, I decided to refinish it. The process took a weekend, cost under $150, and the result? A stunning, modern centerpiece that looks brand new. Whether you’re aiming for a farmhouse vibe, a sleek modern look, or a cozy cottage feel, refinishing lets you customize your island to match your style. And the best part? You don’t need to be a professional woodworker to pull it off. With the right tools, patience, and a few insider tips, anyone can achieve a professional-looking finish.
Assessing Your Wood Kitchen Island: What You Need to Know Before Starting
Before you grab your sandpaper and paintbrush, take a moment to assess your island. Not all wood is created equal, and understanding your island’s current condition will save you time, money, and frustration down the line. Think of this step as the foundation for your entire project—skip it, and you might end up with a finish that peels, bubbles, or just doesn’t look right.

Visual guide about refinishing wood kitchen island
Image source: i.pinimg.com
Identify the Wood Type and Current Finish
Start by identifying what type of wood your island is made from. Common kitchen island woods include oak, maple, pine, cherry, and walnut. Each has unique grain patterns, hardness, and stain absorption, which will influence your refinishing approach. For example, oak has prominent grain that takes stain beautifully, while pine is softer and more prone to dents and uneven staining.
Next, determine the current finish. Is it polyurethane, lacquer, wax, or paint? A simple water test can help: place a drop of water on an inconspicuous area. If it beads up, it’s likely a sealed finish like polyurethane. If it soaks in, it might be wax or an old, worn finish. This matters because different finishes require different prep methods. For instance, wax finishes need to be completely stripped before refinishing, while polyurethane can often be sanded and recoated.
Check for Damage and Structural Issues
Inspect your island for deep scratches, dents, water damage, or loose joints. Minor surface scratches are easy to fix during sanding, but deeper gouges or water stains may require wood filler. If you find soft, spongy areas, it’s a sign of rot—address this before refinishing, or the damage will worsen over time. Also, check if the island is structurally sound. Wobbly legs or loose countertops should be tightened or reinforced before you start refinishing. There’s no point in giving it a beautiful finish if it’s going to fall apart in a few months!
Decide: Refinish or Replace?
Sometimes, despite your best efforts, refinishing might not be the best option. If the wood is severely water-damaged, cracked, or structurally compromised, replacing it might be more cost-effective in the long run. But if the core is solid and the damage is mostly cosmetic, refinishing is absolutely worth it. I once met a homeowner who was ready to replace a $1,200 island because the finish was worn. After refinishing, they saved over $800 and ended up with a custom look they loved. So ask yourself: Is the island’s frame and structure worth saving? If yes, refinishing is the smarter choice.
Step-by-Step Guide to Refinishing Your Wood Kitchen Island
Now that you’ve assessed your island, it’s time to dive into the refinishing process. I’ll walk you through each step, from prep to final coat, with practical tips to avoid common pitfalls. Remember, patience is key—rushing through any step can lead to a less-than-perfect finish.
Step 1: Remove Hardware and Clean the Surface
Start by removing all hardware—drawer pulls, cabinet knobs, hinges, and even the sink if your island has one. This ensures you can sand and refinish every inch evenly. Next, clean the entire surface with a degreaser or a 50/50 mix of white vinegar and water. Grease, dust, and grime can interfere with adhesion, so don’t skip this step. I once rushed through cleaning and ended up with a sticky finish that peeled off in sheets—lesson learned!
Step 2: Strip the Old Finish (If Needed)
If your island has multiple layers of old finish or a wax coating, you’ll need to strip it first. Use a chemical stripper (I like CitriStrip for its low odor) and a plastic scraper. Apply the stripper with a brush, let it sit for 15–30 minutes, then gently scrape off the old finish. For tight corners, use a toothbrush or steel wool. Always work in a well-ventilated area and wear gloves and a mask. Pro tip: Test the stripper on a small area first to ensure it won’t damage the wood.
Step 3: Sand, Sand, Sand
Sanding is where the magic happens. Start with 80–100 grit sandpaper to remove the old finish and level the surface. Always sand with the grain to avoid scratches. Once the surface is smooth, switch to 120–150 grit for finer sanding, then finish with 220 grit for a silky-smooth base. Use a sanding block for flat surfaces and a detail sander for corners and edges. After each sanding stage, wipe the surface with a tack cloth to remove dust. I learned the hard way that skipping the tack cloth leads to a gritty finish—don’t make the same mistake!
Step 4: Fill Gaps and Repair Damage
Inspect the surface for dents, cracks, or gaps. Use a high-quality wood filler (I recommend Minwax High Performance Wood Filler) to fill in imperfections. Apply it with a putty knife, let it dry, then sand it smooth. For deep gouges, you may need multiple applications. This step ensures a seamless, professional-looking finish.
Step 5: Choose and Apply Your New Finish
Now comes the fun part—choosing your new finish! Options include:
- Stain: Enhances the wood’s natural grain. Test on a hidden area first, as stain can look different on various woods.
- Paint: Perfect for a bold, modern look. Use a high-adhesion primer (like Zinsser Bullseye 1-2-3) before painting.
- Clear sealer: Protects the wood while keeping its natural color. I love water-based polyurethane for its low odor and quick drying time.
Apply your chosen finish with a high-quality brush, foam roller, or sprayer. For stain, wipe off excess after 5–10 minutes to avoid blotchiness. For paint or sealer, apply thin, even coats, sanding lightly with 220 grit between coats for a glass-smooth finish. Most projects require 2–3 coats.
Choosing the Right Finish: Stain, Paint, or Clear Coat?
One of the most exciting parts of refinishing your wood kitchen island is deciding how to finish it. But with so many options, it’s easy to feel overwhelmed. Let’s break down the pros, cons, and best uses for each finish type so you can make an informed decision.
Wood Stain: Enhance the Natural Beauty
Stain is ideal if you love the look of real wood and want to highlight its grain. It’s available in a wide range of colors—from light honey to dark espresso—and can be layered for depth. However, stain requires careful application. If you don’t wipe off the excess properly, it can look blotchy, especially on porous woods like pine. I recommend using a pre-stain wood conditioner (like Minwax Pre-Stain) to ensure even absorption. Stain also doesn’t hide imperfections as well as paint, so your sanding and prep work need to be top-notch.
Best for: Oak, cherry, and walnut islands where you want to preserve the wood’s natural character.
Paint: Bold, Modern, and Hides Imperfections
Paint is perfect if you want a dramatic transformation or need to hide dents and scratches. It’s also a great way to add a pop of color to your kitchen. I once painted a dated oak island a soft sage green, and it completely transformed the space. For a durable finish, use a high-quality cabinet paint (like Benjamin Moore Advance or Sherwin-Williams Emerald Urethane Trim Enamel). These paints are designed for high-traffic areas and resist chipping and staining.
Pro tip: Always use a primer before painting, especially on bare wood. It ensures better adhesion and a smoother finish. I skipped primer once and ended up with a streaky, uneven coat—never again!
Best for: Pine, maple, or any island with surface imperfections you want to conceal.
Clear Coat: Protection Without Color Change
If you love your island’s current color and grain, a clear coat is the way to go. It protects the wood from moisture, scratches, and UV damage while keeping its natural look. Options include polyurethane (oil- or water-based), lacquer, or wax. Water-based polyurethane is my go-to because it dries quickly, has low odor, and yellows less than oil-based versions. Apply 2–3 thin coats, sanding between each for a flawless finish.
Best for: Islands with beautiful, undamaged wood that just needs a refresh.
Hybrid Options: Stain + Paint, or Two-Tone Designs
Feeling creative? Consider a two-tone design—paint the base and stain the countertop, for example. Or, try a whitewash or pickling technique for a rustic, weathered look. I once did a navy blue base with a whitewashed oak countertop, and it became the focal point of the kitchen. Just ensure the finishes are compatible (e.g., don’t apply oil-based stain over water-based paint).
Common Mistakes to Avoid When Refinishing a Wood Kitchen Island
Even seasoned DIYers make mistakes when refinishing wood. I’ve been there—rushing through sanding, skipping prep steps, or choosing the wrong finish. Here are the top pitfalls to watch out for, along with how to avoid them.
Skipping the Prep Work
Prep work is 80% of a successful refinishing project. Skipping cleaning, sanding, or priming can lead to peeling, bubbling, or uneven finishes. I once tried to refinish an island without sanding properly, and the paint peeled off within a month. Lesson learned: always sand to bare wood or a smooth, clean surface before applying any new finish.
Using the Wrong Sandpaper Grit
Sanding is not one-size-fits-all. Using too coarse a grit can gouge the wood, while too fine a grit won’t remove the old finish. Follow the sequence: 80–100 grit for stripping, 120–150 for smoothing, and 220 for finishing. And always sand with the grain—cross-grain scratches are hard to fix and will show up in the final finish.
Applying Thick Coats of Finish
Thick coats of stain, paint, or sealer can drip, pool, or dry unevenly. Always apply thin, even coats and follow the manufacturer’s drying times. For paint, use a foam roller to avoid brush marks. For stain, wipe off excess after 5–10 minutes. I once applied a thick coat of polyurethane and ended up with a sticky, uneven mess—thin coats are the way to go!
Ignoring Ventilation and Drying Time
Refinishing involves strong fumes and long drying times. Work in a well-ventilated area (open windows, use fans) and wear a respirator if you’re sensitive to fumes. Also, allow ample drying time between coats—rushing can ruin your finish. For example, oil-based polyurethane needs 24 hours between coats, while water-based dries in 2–4 hours.
Forgetting the Details
Small details make a big difference. Don’t forget to sand and refinish the sides, edges, and underside of the island. Also, reattach hardware carefully—misaligned drawer pulls or wobbly legs can detract from your hard work. I once forgot to sand the edges and had to redo the entire project—double-check every inch!
Aftercare and Maintenance: Keeping Your Refinished Island Looking Like New
Congratulations—your wood kitchen island is now stunning! But to keep it looking that way, you’ll need to care for it properly. Here’s how to maintain your refinished island and protect your investment.
Daily Cleaning Tips
For daily cleaning, use a soft cloth and a mild cleaner (like a 1:1 mix of water and white vinegar). Avoid harsh chemicals, abrasive scrubbers, or excessive water, which can damage the finish. I keep a microfiber cloth and a spray bottle of vinegar solution under the sink for quick wipe-downs.
Protecting Against Water and Heat
Water rings and heat damage are the enemies of refinished wood. Use coasters under glasses and trivets under hot pots. If your island has a sink, wipe up spills immediately. For added protection, consider applying a food-safe wax (like Howard Feed-N-Wax) every 6–12 months to repel moisture.
Touch-Ups and Repairs
Even with the best care, your island may get minor scratches or dents over time. Keep leftover paint or stain for touch-ups. For small scratches, use a wax filler stick (like Minwax Wood Finish Repair) that matches your finish. For deeper scratches, lightly sand the area and apply a new coat of finish.
When to Refinish Again
With proper care, a refinished island can last 10–15 years. But if you notice the finish is dull, peeling, or scratched, it’s time for another refinishing. The process will be much quicker the second time since you’ve already done the prep work!
Cost Comparison: Refinishing vs. Replacing Your Kitchen Island
Let’s talk numbers. Refinishing is significantly cheaper than replacing, but how much can you save? Here’s a quick comparison of costs for a typical kitchen island (36″ x 60″):
| Task | Cost (DIY) | Cost (Professional) |
|---|---|---|
| Materials (sandpaper, stain, sealer, etc.) | $50–$150 | $200–$400 |
| Tools (sander, brushes, etc.) | $50–$100 (one-time) | Included |
| Labor | Free (your time!) | $300–$800 |
| New island (mid-range) | N/A | $1,000–$3,000+ |
| Total | $100–$250 | $1,500–$4,200+ |
As you can see, refinishing saves you thousands of dollars. Plus, you get the satisfaction of a custom, one-of-a-kind island that fits your style perfectly.
Final Thoughts: Your Island, Your Style
Refinishing your wood kitchen island is more than a DIY project—it’s a way to breathe new life into the heart of your home. Whether you choose a rich stain, a bold paint color, or a clear protective coat, the result will be a stunning, personalized space that reflects your taste and hard work. And the best part? You’ll save money, reduce waste, and create a piece that’s truly yours.
So, what are you waiting for? Grab your sandpaper, pick your favorite finish, and start transforming your island today. Remember, every scratch and dent is a story, and with a little patience and care, your kitchen island can have a beautiful new chapter. Happy refinishing!
Frequently Asked Questions
How do I refinish a wood kitchen island without damaging the surface?
Start by sanding the island lightly with medium-grit sandpaper to remove the old finish, then clean the surface with a tack cloth. Always use a wood-safe stripper and work in a well-ventilated area to avoid damaging the wood or inhaling fumes.
What tools do I need for refinishing a wood kitchen island?
Essential tools include sandpaper (various grits), a paint stripper, a putty knife, a tack cloth, a foam brush, and your choice of stain or paint. A power sander can speed up the process but isn’t mandatory for smaller islands.
Can I refinish a wood kitchen island without sanding it first?
While it’s possible to refinish without sanding using a liquid deglosser, sanding ensures better adhesion for the new finish. Skipping sanding may lead to peeling or uneven results over time.
How long does it take to refinish a wood kitchen island?
The refinishing process typically takes 2–4 days, including drying time between coats. Prep (sanding, cleaning) takes a day, staining/painting takes another, and sealing requires at least 24 hours to cure.
What type of finish is best for a refinished wood kitchen island?
For durability, use a polyurethane or lacquer finish, especially if the island sees heavy use. Matte finishes hide imperfections well, while satin or gloss offers a polished look and easier cleanup.
How do I match the new finish to my kitchen’s existing woodwork?
Bring a wood sample to a paint store for color-matching or test stains on an inconspicuous area of the island. Natural lighting is key—compare samples to your existing woodwork during daylight for accuracy.