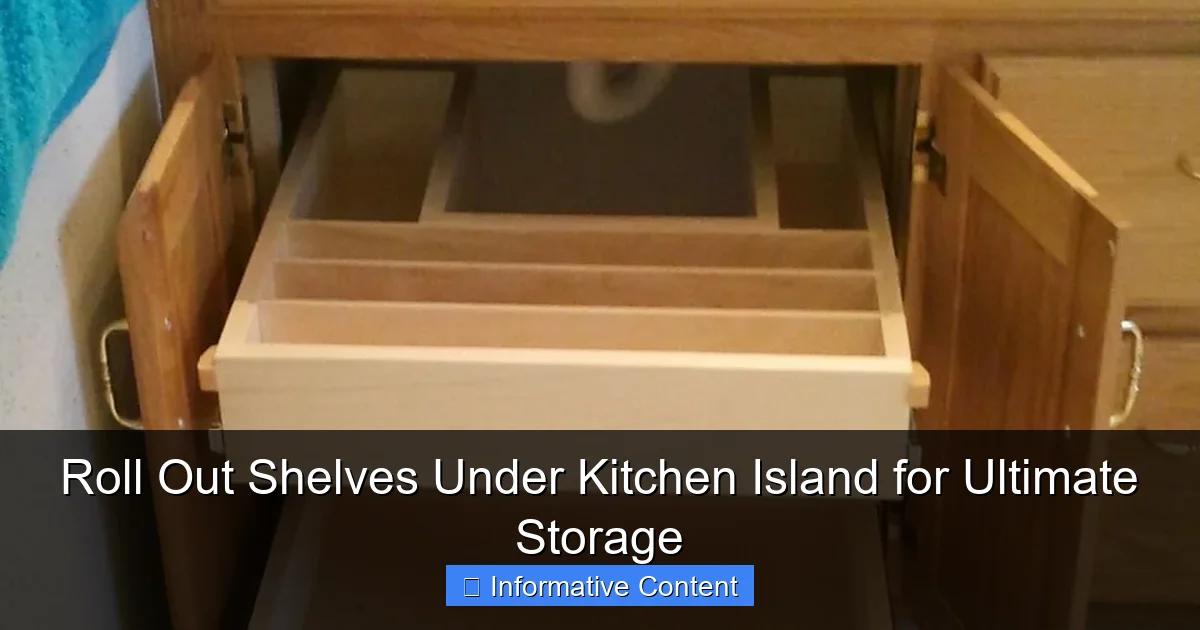
Featured image for roll out shelves under kitchen island
Image source: helpyourshelves.com
Maximize your kitchen island’s storage potential with roll out shelves—designed for seamless access and clutter-free organization. These durable, easy-glide shelves make use of under-island dead space, keeping pots, pans, and pantry staples within reach but out of sight. Perfect for busy kitchens, they combine smart functionality with a sleek, custom-built look.
Key Takeaways
- Maximize storage: Roll out shelves utilize under-island space efficiently.
- Easy access: Pull-out design simplifies reaching pots and pans.
- Customizable fit: Choose sizes to match your kitchen island dimensions.
- Reduce clutter: Keep countertops clear with organized hidden storage.
- Durable materials: Opt for hardwood or stainless steel for longevity.
- DIY-friendly: Simple installation with basic tools and instructions.
📑 Table of Contents
- Why Roll Out Shelves Under Kitchen Island Are a Game-Changer
- What Are Roll Out Shelves and How Do They Work?
- Top 5 Benefits of Adding Roll Out Shelves to Your Kitchen Island
- Installation Guide: DIY vs. Professional Help
- Choosing the Right Roll Out Shelves: Materials, Brands, and Features
- Creative Ways to Use Roll Out Shelves Beyond Pots and Pans
- Final Thoughts: Is It Worth the Investment?
Why Roll Out Shelves Under Kitchen Island Are a Game-Changer
If your kitchen island feels more like a cluttered catch-all than a functional space, you’re not alone. Many of us have faced the daily frustration of digging through deep, dark cabinets to find that one pan or spice jar buried in the back. I remember one chaotic morning trying to find my favorite cast-iron skillet while pancakes burned on the stove—only to discover it wedged behind three other pots, unreachable without a full cabinet overhaul. That moment sparked my quest for a smarter solution, and it led me straight to roll out shelves under kitchen island units. These sliding shelves aren’t just a trendy upgrade—they’re a practical, life-changing addition that transforms underutilized space into organized, easy-to-access storage.
Kitchen islands are often the heart of the home, but their storage potential is frequently overlooked. While upper cabinets and drawers get all the attention, the base of the island is prime real estate for maximizing efficiency. That’s where roll out shelves come in. By installing pull-out trays beneath your island, you gain direct access to pots, pans, baking sheets, small appliances, and even bulk pantry items—without the need to crouch, stretch, or dismantle your entire setup. Whether you’re remodeling your kitchen or simply looking to improve functionality, this simple upgrade can dramatically reduce stress and streamline your cooking routine. And the best part? You don’t need to be a DIY expert to see real results.
What Are Roll Out Shelves and How Do They Work?
Understanding the Mechanics of Pull-Out Shelving
At their core, roll out shelves under kitchen island are sliding trays mounted on heavy-duty rails or glides. Think of them like drawer inserts, but designed specifically for the deeper, often underutilized cavities beneath your island. Most systems use ball-bearing or soft-close glides that allow the shelf to extend fully, giving you 100% access to the contents. Unlike fixed shelves, which create a “black hole” effect where items disappear into the back, roll out shelves bring everything forward with a gentle pull.
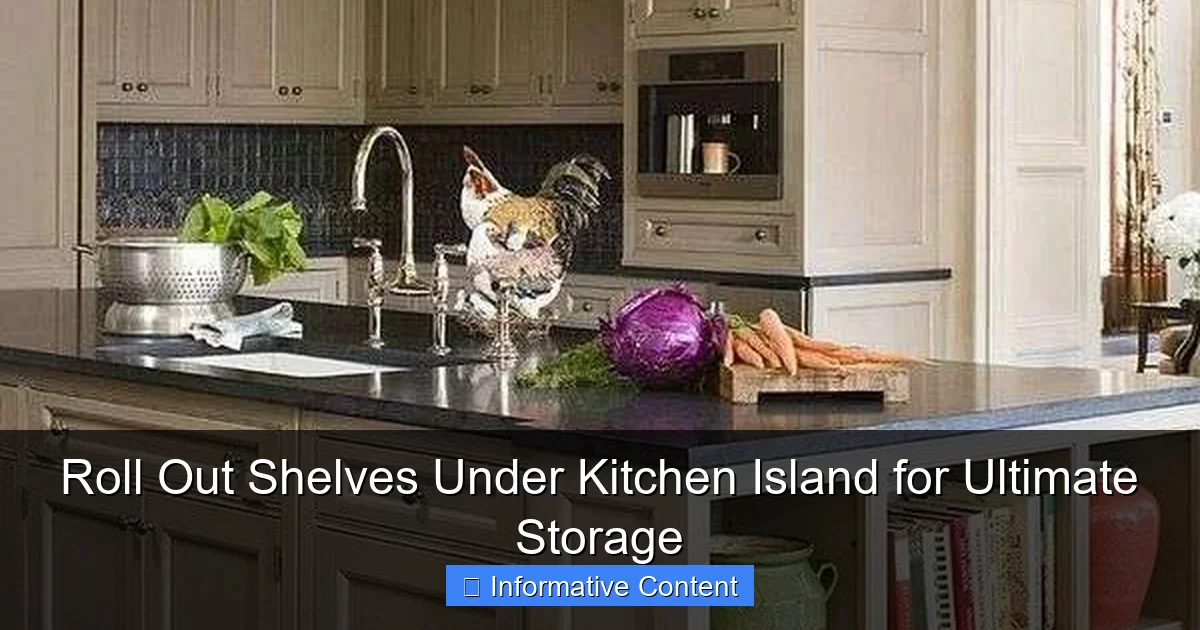
Visual guide about roll out shelves under kitchen island
Image source: deavita.net
These shelves are typically made from durable materials like solid wood, plywood, or high-quality melamine, and they’re built to support significant weight—often 75 to 100 pounds per shelf, depending on the brand. The rails attach to the cabinet frame or the island’s internal structure, ensuring stability and smooth operation. Many models also include anti-tip mechanisms or locking features to prevent the shelf from accidentally sliding out when you open a nearby drawer.
Types of Roll Out Systems: Custom vs. Retrofit
There are two main ways to add roll out shelves to your kitchen island: custom-built during a remodel or retrofit kits for existing cabinets. Each has its pros and cons.
- Custom roll out shelves: These are built into the island during construction or a full renovation. They offer a seamless, built-in look and can be tailored to your exact cabinet dimensions, material preferences, and weight needs. For example, if your island has a unique depth or includes a built-in wine rack, a custom solution ensures perfect integration. However, they’re more expensive and require professional installation.
- Retrofit kits: These are aftermarket solutions designed to fit into standard cabinet sizes. Brands like Rev-A-Shelf, Hafele, and Cabinet Parts offer adjustable kits that can be installed in a few hours with basic tools. They’re budget-friendly and perfect for renters or those not ready for a full remodel. Some even come with templates and video guides to simplify the process.
One homeowner I spoke with, Sarah from Austin, opted for a retrofit kit when she realized her island’s lower cabinets were collecting dust. “I was skeptical at first—would it really fit? But the kit came with a measuring guide, and within an afternoon, I had two full-extension roll out shelves. It’s like my kitchen doubled in storage.”
How They Differ from Standard Drawers
It’s easy to confuse roll out shelves with deep drawers, but they serve different purposes. Drawers are great for smaller items like utensils, cutlery, or dish towels, but they’re limited in height. Roll out shelves under kitchen island are designed for bulky, heavy, or awkwardly shaped items. Imagine storing a Dutch oven, a stand mixer, or a stack of baking sheets—items that would topple or get stuck in a standard drawer. Roll out shelves provide a flat, stable surface that can handle weight and volume without sacrificing access.
Additionally, roll out shelves often have lower side walls (or none at all), making it easier to lift heavy items in and out. Some even include built-in handles or finger pulls for better grip. This design difference makes them ideal for the lower zones of your island, where you need strength and visibility more than containment.
Top 5 Benefits of Adding Roll Out Shelves to Your Kitchen Island
1. Eliminate the “Black Hole” Problem
Let’s be honest: deep cabinets are a storage nightmare. Without roll out shelves, items at the back become invisible and inaccessible. You end up buying duplicates (“Wait, I already had that garlic press?”) or simply avoid using certain tools altogether. Roll out shelves solve this by bringing every item to you. With a gentle pull, your entire collection of pots, lids, or mixing bowls appears—no more guessing or digging.
For example, Mark from Seattle installed roll out shelves beneath his island and noticed a dramatic shift: “I used to have three spatulas because I couldn’t find the others. Now, I see all my utensils at a glance. It’s like my kitchen became smarter overnight.”
2. Maximize Space in Small or Narrow Kitchens
Not all kitchens have sprawling islands. In compact spaces, every inch counts. Roll out shelves allow you to use the full depth of your island without sacrificing functionality. Instead of leaving the back third of your cabinet empty (or worse, using it as a “junk zone”), you can store frequently used items right where you need them—within arm’s reach.
One clever trick: install a narrow roll out shelf for baking sheets and cutting boards. These thin, flat items take up minimal vertical space but are often stored vertically, taking up valuable room. A horizontal roll out tray keeps them flat, organized, and easy to slide out when prepping a meal.
3. Reduce Physical Strain and Improve Ergonomics
Bending, squatting, and reaching into deep cabinets can take a toll on your back and knees—especially if you’re cooking multiple meals a day. Roll out shelves bring everything to waist or countertop level, minimizing strain. This is especially helpful for older adults, people with mobility issues, or those recovering from injury.
Studies show that ergonomic kitchen design can reduce household injuries by up to 30%. By eliminating the need to reach or crouch, roll out shelves contribute to a safer, more accessible kitchen. One user, a retired chef, told me, “After my knee surgery, I couldn’t bend over to get my pots. These shelves let me cook like I used to—without the pain.”
4. Keep Heavy Items Secure and Accessible
Heavy cookware like cast iron skillets, stockpots, or blenders are hard to store safely. If placed on fixed shelves, they can shift or fall when you open the cabinet. Roll out shelves with high weight ratings (75+ lbs) keep these items stable and secure. The full-extension glides ensure you don’t have to lift the item out blindly—you can see and grip it properly.
Bonus tip: Use non-slip mats or shelf liners to prevent sliding. A simple piece of rubberized drawer liner keeps your pots from shifting during use.
5. Boost Kitchen Aesthetics and Resale Value
Let’s face it—clutter makes a kitchen feel chaotic. Roll out shelves promote a clean, organized look. When everything has a place, your island feels more spacious and inviting. Plus, well-organized storage is a major selling point for homebuyers. Real estate agents often note that kitchens with smart storage solutions can increase a home’s value by 5–10%.
Even if you’re not planning to sell, a tidy kitchen just feels better. As one homeowner put it, “I didn’t realize how much mental clutter I was carrying until I organized my island. Now, I actually enjoy cooking again.”
Installation Guide: DIY vs. Professional Help
When to DIY: Simple Retrofit Kits
If your island has standard-sized cabinets (typically 12″, 15″, 18″, or 24″ wide), a retrofit roll out kit might be perfect for DIY installation. Most kits include:
- Two side rails with mounting brackets
- A shelf platform (wood, melamine, or metal)
- Screws and installation template
- Step-by-step instructions or video guide
Here’s a quick step-by-step:
- Empty the cabinet and measure the interior width and depth.
- Choose a kit that matches your dimensions (most are adjustable).
- Use the template to mark drill holes for the rails on the cabinet floor.
- Secure the rails with screws, ensuring they’re level.
- Slide the shelf onto the rails and test for smooth operation.
One thing to watch for: make sure the cabinet door clears the extended shelf. Some kits require you to adjust the door hinges slightly to prevent rubbing.
When to Call a Pro: Custom or Complex Installations
For non-standard cabinet sizes, built-in islands with unique features (like a cooktop or sink), or custom materials (like glass or granite), professional installation is recommended. A contractor or cabinet maker can:
- Custom-cut shelves to fit irregular spaces
- Integrate soft-close or push-to-open mechanisms
- Match existing cabinet finishes for a seamless look
- Ensure structural integrity for heavy-duty use
For example, if your island includes a built-in wine rack or a pull-out trash can, a pro can design roll out shelves that don’t interfere with these features. They can also install multiple shelves in a tiered configuration for maximum storage.
Common Installation Mistakes (and How to Avoid Them)
Even simple DIY projects can go wrong. Here are a few pitfalls to watch for:
- Incorrect measurements: Always measure twice. Use the cabinet’s interior width, not the door.
- Uneven rails: Use a level to ensure both sides are aligned. A crooked rail will cause binding or jamming.
- Overloading: Check the weight rating of your shelf. Exceeding it can damage the glides or cabinet frame.
- Ignoring door clearance: Test the shelf’s extension before finalizing. You may need to adjust hinges or use a door bumper.
One user, Jen, shared a cautionary tale: “I installed a shelf without checking the door clearance. When I pulled it out, it scraped the door every time. A quick hinge adjustment fixed it, but it could’ve been avoided.”
Choosing the Right Roll Out Shelves: Materials, Brands, and Features
Material Matters: Wood, Melamine, or Metal?
The material of your roll out shelf affects durability, weight capacity, and appearance. Here’s a quick breakdown:
- Solid wood: Durable and attractive, but heavier and more expensive. Ideal for high-end kitchens. Can warp if exposed to moisture.
- Plywood: Strong and stable. Often used in custom builds. Resists warping better than solid wood.
- Melamine: Affordable and easy to clean. Available in many colors and finishes. Slightly less durable but great for retrofits.
- Metal (aluminum or steel): Extremely strong and lightweight. Often used in commercial kitchens. Can feel cold or industrial in a home setting.
Top Brands and What They Offer
| Brand | Best For | Key Features | Price Range |
|---|---|---|---|
| Rev-A-Shelf | Retrofit kits, wide variety | Soft-close glides, adjustable widths, non-slip liners | $50–$200 |
| Hafele | Custom installations, premium quality | Full-extension ball-bearing glides, push-to-open options | $100–$300 |
| Cabinet Parts | Budget-friendly, DIY-friendly | Easy installation, multiple sizes, melamine shelves | $40–$120 |
| Blum | High-end, custom builds | Tandembox glides, silent close, 100+ lb capacity | $150–$400 |
When choosing a brand, consider your budget, cabinet size, and desired features. For example, if you cook frequently and need to access heavy pots daily, a Blum or Hafele system with 100-lb capacity is worth the investment. If you’re on a tight budget, Cabinet Parts offers solid performance at a lower price.
Must-Have Features to Look For
Not all roll out shelves are created equal. Here’s what to prioritize:
- Full-extension glides: Ensure the shelf pulls out completely, giving access to the entire depth.
- Soft-close or push-to-open: Prevents slamming and adds a premium feel.
- Non-slip surface: Keeps items in place during use.
- Adjustable width: Allows for minor measurement errors.
- High weight rating: At least 75 lbs for heavy cookware.
One user, David, chose a Rev-A-Shelf model with soft-close glides: “The quiet closing is a game-changer. I don’t wake up my partner when I grab a pan at midnight.”
Creative Ways to Use Roll Out Shelves Beyond Pots and Pans
Store Small Appliances with Ease
Blenders, air fryers, and Instant Pots are heavy and bulky. Instead of leaving them on the counter or hiding them in a deep cabinet, use a roll out shelf to store them at waist level. This makes them easy to access, plug in, and return—no more lifting or searching.
Tip: Install a shelf near an outlet or use a power strip on the shelf for easy plug-in access.
Organize Baking Supplies and Sheet Pans
Baking sheets, muffin tins, and cooling racks are awkward to store vertically. A roll out shelf lets you lay them flat, preventing warping and making them easy to grab. Add dividers or bins to keep smaller items like measuring cups and spatulas organized.
Create a Coffee or Tea Station
Use a narrow roll out shelf to store your coffee maker, mugs, beans, and filters. When you’re ready for your morning brew, simply pull out the shelf—everything you need is right there. Bonus: it keeps your countertop clutter-free.
Store Bulk Pantry Items or Cleaning Supplies
If your island is near your pantry or sink, use roll out shelves for bulk items like flour, sugar, or rice. They’re easier to access than deep shelves and keep pests out. For cleaning supplies, a roll out shelf under the sink island keeps spray bottles and scrubbers organized and out of reach of kids.
As one mom shared, “I keep my cleaning caddy on a roll out shelf. When I need to clean, I just pull it out—no more dragging the bucket across the floor.”
Final Thoughts: Is It Worth the Investment?
Adding roll out shelves under kitchen island isn’t just about storage—it’s about transforming how you interact with your kitchen. From reducing physical strain to eliminating clutter, the benefits are real and lasting. Whether you choose a DIY retrofit kit or invest in a custom installation, the payoff is a more functional, enjoyable space.
I’ve seen firsthand how this simple upgrade can change daily routines. No more digging, no more duplicates, no more frustration. Just a kitchen that works with you, not against you. And while the initial cost might seem like a splurge, consider it an investment in your comfort, safety, and sanity. After all, you spend so much time in the kitchen—shouldn’t it be a place that makes life easier?
If you’re on the fence, start small. Install one roll out shelf for your most-used items and see how it feels. Chances are, you’ll be pulling out the drill for the second shelf before the week is over. Your future self—and your back—will thank you.
Frequently Asked Questions
What are roll out shelves under kitchen island, and how do they work?
Roll out shelves under a kitchen island are sliding storage solutions that maximize space by allowing easy access to items stored at the back. They glide smoothly on rails, making it simple to retrieve pots, pans, or pantry goods without straining.
Can I install roll out shelves in my existing kitchen island?
Yes, many roll out shelves are designed for retrofitting into existing kitchen islands with minimal modifications. Ensure your island has enough depth and clearance to accommodate the sliding mechanism.
How do roll out shelves under kitchen island improve storage efficiency?
They eliminate dead space by transforming deep, hard-to-reach areas into accessible storage. The sliding design keeps items visible and organized, reducing clutter in cabinets or countertops.
What materials are best for roll out shelves under kitchen islands?
Durable options like solid wood, plywood, or stainless steel are ideal for heavy-duty use. Choose moisture-resistant materials if storing cookware or frequently used items to ensure longevity.
Are roll out shelves suitable for small kitchen islands?
Absolutely! Compact roll out shelves can be customized to fit narrow or shallow islands, maximizing every inch of space. Look for slim-profile designs tailored to smaller dimensions.
How much weight can roll out shelves under a kitchen island support?
Most high-quality roll out shelves support 50–100 pounds, depending on the material and hardware. Check weight ratings before loading heavy cookware or appliances to avoid damage.