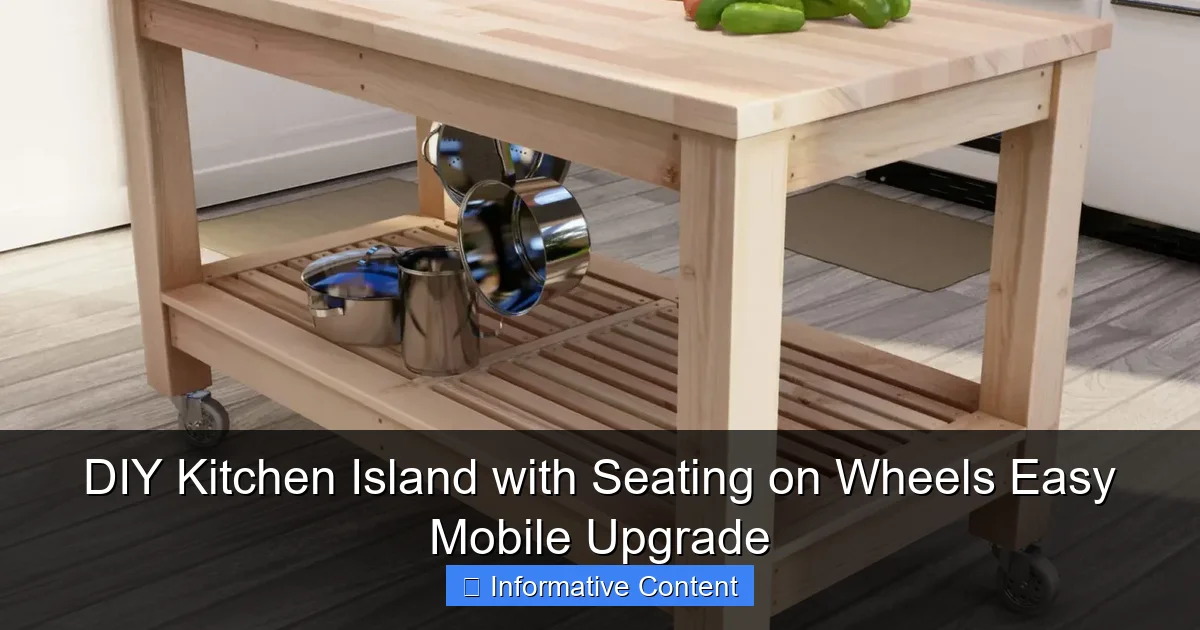
Featured image for diy kitchen island with seating on wheels
Image source: gooddiyplans.com
Transform your kitchen with a DIY island on wheels that adds seating, storage, and unmatched mobility—no renovation required. This easy-to-build, customizable project lets you create a functional, stylish centerpiece that rolls wherever you need it, perfect for small spaces or entertaining. With basic tools and affordable materials, you can complete this weekend upgrade and enjoy a professional look without the hefty price tag.
Key Takeaways
- Choose sturdy wheels: Ensure mobility and stability with locking casters.
- Maximize seating: Add foldable stools or built-in benches for space efficiency.
- Use lightweight materials: Simplify movement with wood or prefab countertops.
- Prioritize storage: Incorporate shelves or drawers for clutter-free functionality.
- Measure carefully: Confirm fit under cabinets and around kitchen traffic zones.
- Add personal style: Customize with paint, trim, or unique hardware finishes.
📑 Table of Contents
- Why a DIY Kitchen Island with Seating on Wheels is a Game-Changer
- Planning Your DIY Kitchen Island: Size, Style, and Mobility
- Materials and Tools: What You’ll Need for the Build
- Step-by-Step Assembly: Building Your Mobile Island
- Customization Ideas: Make Your Island Uniquely Yours
- Maintenance and Long-Term Care for Your Mobile Island
- Conclusion: A Mobile Upgrade That Pays Off
Why a DIY Kitchen Island with Seating on Wheels is a Game-Changer
Let me take you back to a time when my kitchen felt cramped, chaotic, and anything but welcoming. I loved to cook, but the lack of counter space and a proper place to sit while prepping meals or enjoying a quick breakfast made the whole experience frustrating. Then, one weekend, I stumbled upon the idea of building a DIY kitchen island with seating on wheels. It was a revelation. Suddenly, I had more prep space, a cozy breakfast nook, and the freedom to move it around as needed—all without spending a fortune or knocking down walls.
The beauty of a mobile kitchen island lies in its versatility. Unlike fixed islands, which require permanent installation and often a hefty budget, a rolling island can be customized to fit your space, style, and storage needs. Plus, the added seating? A total win for small kitchens where every inch counts. Whether you’re hosting a dinner party, need extra workspace for baking, or just want a spot to sip coffee in the morning, this project delivers. And the best part? You don’t need to be a master carpenter to pull it off. With some basic tools, a few materials, and a weekend’s worth of effort, you can create a functional, stylish, and mobile kitchen island that transforms your space.
Planning Your DIY Kitchen Island: Size, Style, and Mobility
Assess Your Kitchen Layout and Needs
Before you start hammering away, take a step back and evaluate your kitchen. Ask yourself: Where do I need more space? Is it prep area, storage, or seating? Measure your kitchen to determine the ideal size for your island. A general rule of thumb is to leave at least 36–42 inches of clearance around the island for easy movement. If you’re tight on space, a smaller island (around 30×30 inches) with two stools can still make a big difference.
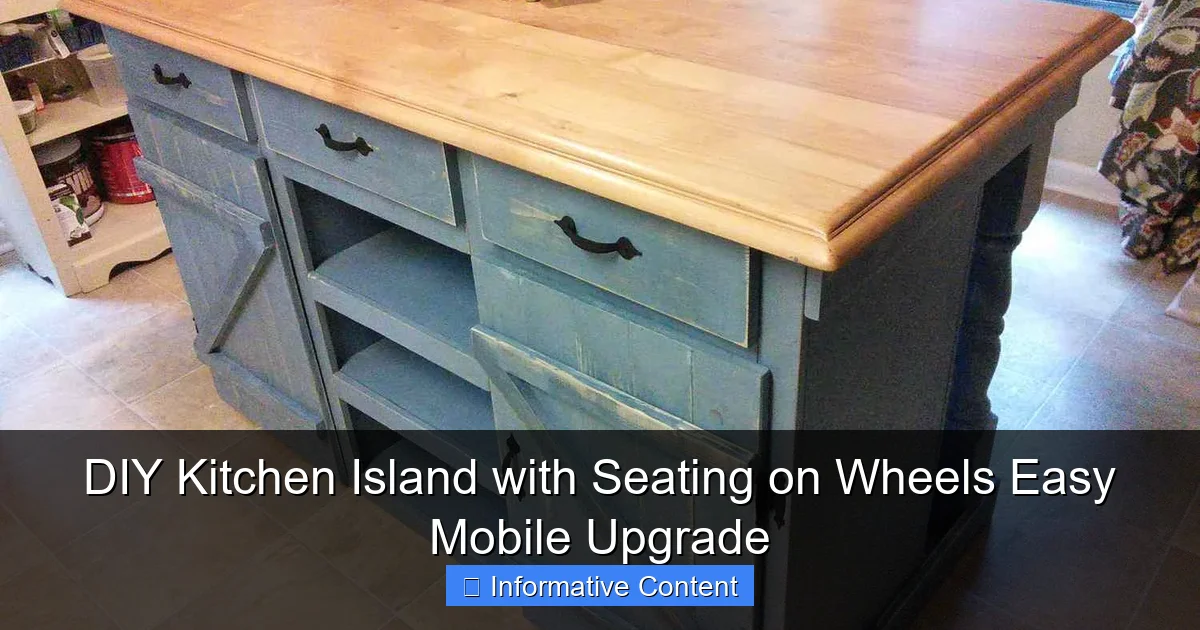
Visual guide about diy kitchen island with seating on wheels
Image source: thespruce.com
For example, I have a galley kitchen, so I opted for a 36×30-inch island with two stools. It fits perfectly between my counter and dining table, and I can roll it out of the way when I need more room. Think about how you use your kitchen daily. Do you cook often? You’ll want a durable countertop. Do you entertain? Consider a larger island with space for three or four stools. Your needs will guide your design.
Choose the Right Wheels for Smooth Mobility
Not all casters are created equal. For a kitchen island, you’ll need heavy-duty locking casters (wheels) that can handle the weight of the island, countertop, and people sitting on it. Look for casters rated for at least 100–150 pounds each. I recommend dual-wheel locking casters for stability and ease of movement. They’re pricier than basic wheels, but they’re worth it—no wobbling, no scratching your floors, and they lock securely when you’re done moving.
- Tip: Test the wheels before installing them. Roll them across your kitchen floor to ensure they glide smoothly and don’t catch on grout lines or uneven tiles.
- Pro move: If you have hardwood or laminate floors, opt for soft rubber wheels to prevent scratches.
Style and Aesthetic: Match Your Kitchen’s Vibe
Your island should complement your kitchen’s style, not clash with it. If you have a modern kitchen, go for clean lines, a minimalist countertop (like quartz or butcher block), and sleek stools. For a farmhouse kitchen, a reclaimed wood countertop with vintage-style stools and open shelving underneath adds charm. I went with a mix of modern and rustic—white cabinets, a butcher block top, and black metal stools—to blend with my eclectic kitchen.
Don’t forget about color and finish. A bold island can become a focal point, while a neutral one blends seamlessly. Consider painting the base a contrasting color to your cabinets for visual interest. Or, if you’re feeling adventurous, use peel-and-stick wallpaper on the side panels for a pop of pattern.
Materials and Tools: What You’ll Need for the Build
Essential Materials List
Here’s what I used for my island (adjust quantities based on your size):
- 4x 2×4 lumber (for the frame)
- 1x ¾-inch plywood sheet (for shelves and sides)
- Butcher block countertop (36×30 inches)
- 4x heavy-duty locking casters (150 lbs capacity each)
- Wood screws (2.5-inch and 1.25-inch)
- Wood glue
- Sandpaper (120 and 220 grit)
- Wood stain or paint (optional)
- Polyurethane sealant (for countertop protection)
- 2x bar stools (or materials to build your own)
Pro tip: Buy extra lumber and screws. Mistakes happen, and it’s better to have spares than to run to the hardware store mid-project.
Tools You’ll Need
You don’t need a full workshop, but these basics are essential:
- Measuring tape
- Circular saw or miter saw
- Drill/driver with drill bits
- Clamps (to hold pieces together while assembling)
- Level (to ensure your island is perfectly flat)
- Sander (or sanding block)
- Pencil (for marking cuts)
If you don’t own a saw, many home improvement stores offer free cutting services when you buy lumber. Just bring your measurements and let them cut it for you—saves time and ensures precision.
Budget-Friendly Alternatives
Not everyone wants to splurge on a butcher block top. Here are some affordable options:
- Laminated countertop: Durable and easy to clean, but less heat-resistant.
- Reclaimed wood: Eco-friendly and full of character (just sand and seal it well).
- Concrete overlay: Mix your own concrete for a modern, industrial look.
- DIY stools: Use crates, old chairs, or build simple stools from scrap wood.
I saved money by using a leftover piece of butcher block from another project, but if I were buying new, I’d opt for a laminated top to stay under $100.
Step-by-Step Assembly: Building Your Mobile Island
Step 1: Build the Frame
Start by cutting your 2x4s to size. For a 36×30-inch island, you’ll need:
- 2x long sides (36 inches)
- 2x short sides (30 inches)
- 2x vertical supports (34 inches, to leave room for casters)
- 1x center brace (30 inches, for added stability)
Assemble the frame using wood screws and wood glue. Clamp the pieces together, drill pilot holes to prevent splitting, then screw them in place. Add the center brace between the long sides for extra strength. Use a level to ensure everything is perfectly square—no one wants a wobbly island!
Step 2: Add Shelves and Panels
Cut your plywood to fit the bottom shelf (34×28 inches) and side panels (30×34 inches). Attach the shelf to the frame using screws, leaving the top open for the countertop. For the side panels, I left the front open to create a “floating” look, but you can add a panel if you prefer closed storage.
Pro tip: If you want open shelving, cut a few 12-inch-wide plywood pieces for smaller compartments. I added one shelf for cookbooks and another for mixing bowls.
Step 3: Attach the Casters
Flip the frame upside down and mark where the casters will go. Position them at least 2 inches from each corner for balance. Drill pilot holes, then screw the casters in place. Test the island by rolling it around—it should move smoothly and lock securely. If it wobbles, adjust the casters or add shims under the legs.
Step 4: Install the Countertop
Place the countertop on the frame. If it’s slightly larger, let it overhang evenly (1–2 inches on each side). Secure it with wood screws from underneath, pre-drilling holes to prevent splitting. For butcher block, sand the edges and apply 2–3 coats of polyurethane to protect it from spills and stains.
Warning: Don’t skip the sealant! I learned the hard way when a spilled smoothie left a stain on my first island. A good sealant saves you from future regrets.
Step 5: Add Seating
Place your stools in front of the island. If they’re too tall or short, adjust the island’s height by adding shims under the casters or choosing shorter stools. I used stools with a 24-inch seat height, which paired perfectly with my 36-inch countertop. For a custom look, build your own stools using scrap wood and a simple design (search “DIY bar stool plans” for inspiration).
Customization Ideas: Make Your Island Uniquely Yours
Storage Solutions for Every Need
Storage is the secret weapon of a great kitchen island. Here are some ideas to maximize it:
- Open shelves: Great for frequently used items like cookbooks, spices, or fruit baskets.
- Closed cabinets: Hide clutter with small doors or drawers. I added a drawer for utensils and a cabinet for my stand mixer.
- Hanging hooks: Attach hooks to the side for towels, aprons, or oven mitts.
- Wine rack: A built-in rack adds function and style (perfect for entertaining).
For small kitchens, prioritize vertical storage. A pegboard on the side panel can hold knives, measuring cups, and other tools—saving precious counter space.
Lighting and Electrical Add-Ons
A mobile island can double as a dining or workspace with the right lighting. Consider:
- Pendant lights: Hang them above the island for task lighting (use battery-operated or plug-in versions to avoid hardwiring).
- Under-cabinet LED strips: Stick them under the countertop for ambient lighting.
- Power strip: Install a small power strip on the side for charging phones or using small appliances.
I added a USB charging station on the back panel—it’s a lifesaver when I’m prepping meals and need my phone handy.
Style Upgrades: Paint, Hardware, and Decor
Personalize your island with these easy upgrades:
- Paint: A fresh coat of paint (like navy blue or sage green) can make your island stand out.
- Hardware: Swap out basic knobs for vintage or modern drawer pulls.
- Backsplash: Add a peel-and-stick backsplash behind the countertop for a finished look.
- Greenery: A small potted herb plant on the countertop brings life to your kitchen.
I painted my island’s base a soft gray and added gold drawer pulls—simple changes that elevated the whole design.
Maintenance and Long-Term Care for Your Mobile Island
Cleaning and Protecting the Countertop
Your countertop is the star of the show, so treat it well:
- Butcher block: Clean with mild soap and water. Reapply oil (like mineral oil) every 3–6 months to prevent drying.
- Laminate: Wipe with a damp cloth and non-abrasive cleaner. Avoid harsh chemicals.
- Concrete: Seal annually with a food-safe sealant to prevent stains.
Pro tip: Use trivets for hot pots and cutting boards for chopping—it preserves your countertop’s finish.
Wheel Maintenance and Floor Protection
Wheels need TLC to last. Every few months:
- Wipe off dust and debris from the wheels.
- Tighten any loose screws.
- Check the locking mechanism for wear.
For floor protection, place a small rug or mat under the island when it’s in place. I use a 2×3-inch rug to catch spills and reduce noise.
Troubleshooting Common Issues
Even the best-built islands have hiccups. Here’s how to fix them:
- Wobbly island: Tighten all screws and check if the floor is uneven. Add shims under the casters if needed.
- Sticking wheels: Clean the wheels and floor. If they still stick, replace them.
- Scratched countertop: Light scratches can be sanded out and re-sealed. Deep scratches may need a professional repair.
I once had a caster break after a year of heavy use. Swapping it out took 10 minutes and cost $15—much cheaper than replacing the whole island.
Conclusion: A Mobile Upgrade That Pays Off
Building a DIY kitchen island with seating on wheels isn’t just about adding space—it’s about reclaiming your kitchen. It’s the freedom to move, the joy of extra seating, and the satisfaction of creating something with your own hands. Whether you’re a seasoned DIYer or a first-timer, this project is totally doable. And the best part? It grows with you. Need more storage? Add a drawer. Want better lighting? Hang a pendant. Your island adapts to your life, not the other way around.
So, grab your tools, pick a weekend, and get building. Your dream kitchen is closer than you think—and it rolls on wheels. Happy crafting!
Frequently Asked Questions
What materials do I need to build a DIY kitchen island with seating on wheels?
You’ll need plywood or solid wood for the countertop, base cabinets or storage units, heavy-duty casters (wheels), seating brackets, screws, wood glue, and basic tools like a drill, saw, and level. For seating, consider pre-made bar stools or build custom benches with backrests.
How do I ensure my DIY kitchen island with seating on wheels is stable?
Use locking casters and reinforce the frame with cross-bracing or corner braces. Ensure the base is wider than the seating area to prevent tipping, especially when guests are sitting.
Can I customize the seating height for my DIY kitchen island with seating on wheels?
Yes! Standard countertop height is 36″, so pair it with 24″–26″ stools. For a taller island (42″), use 30″–32″ stools. Adjust leg lengths or add risers to match your preference.
What type of wheels work best for a mobile kitchen island with seating?
Opt for heavy-duty locking casters (rated for 100+ lbs each) with swivel wheels for easy movement. Rubber or polyurethane wheels protect floors and reduce noise.
How do I add storage to my DIY kitchen island with seating on wheels?
Install pull-out shelves, drawers, or open cubbies in the base. Use vertical dividers for cookware or spice racks on the sides to maximize space without sacrificing mobility.
Can I build a kitchen island with seating on wheels without advanced carpentry skills?
Absolutely! Use pre-assembled cabinets as the base and attach a countertop and wheels. Add stools or simple bench seats—no complex joinery required for a functional, mobile upgrade.