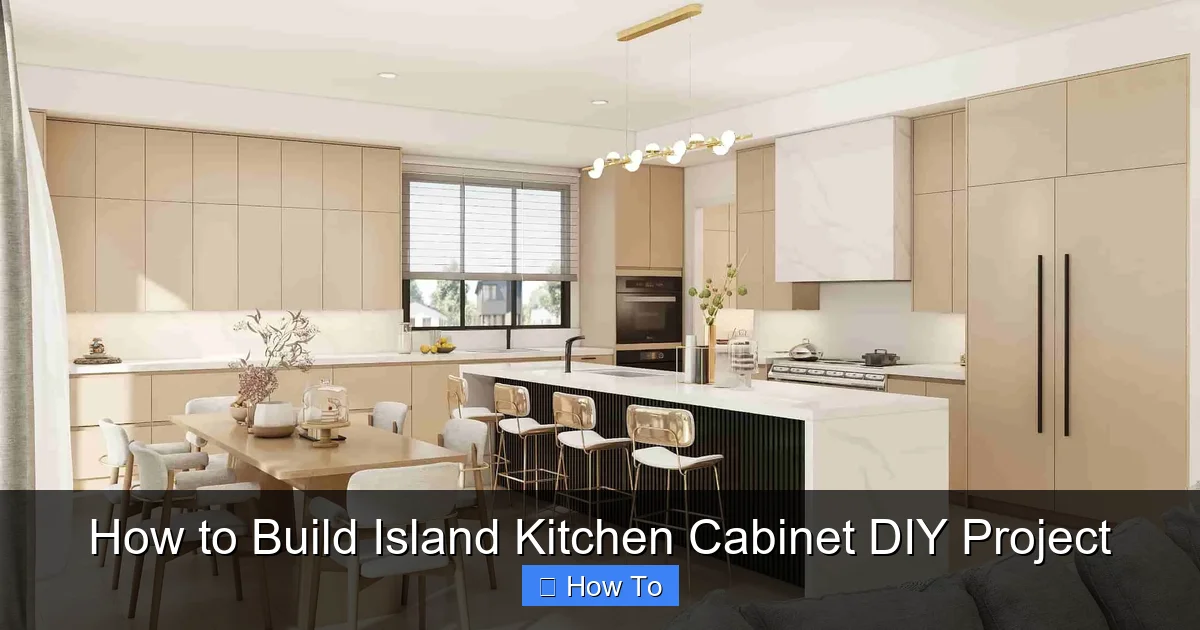
Featured image for this comprehensive guide about how to build island kitchen cabinet
Image source: pakitchen.com
The kitchen isn’t just a place to cook; it’s the heart of the home, a gathering spot, and often, the most bustling area. And at the center of many dream kitchens? The magnificent island. A kitchen island offers unparalleled functionality, from providing extra prep space and storage to serving as a casual dining area or a dedicated homework station. While bespoke islands can come with a hefty price tag, the good news is that you don’t need to be a professional carpenter to achieve your vision. With a bit of planning, the right tools, and a can-do attitude, you can learn how to build island kitchen cabinet yourself, saving thousands and creating a truly custom piece that perfectly suits your needs and style.
Embarking on a DIY project like building your own kitchen island cabinet is incredibly rewarding. Not only do you get to infuse your personal aesthetic into every detail, but you also gain a deeper understanding of your home and develop valuable skills. Imagine the satisfaction of pointing to your stunning, functional island and proudly saying, “I built that!” This comprehensive guide will walk you through every step of the process, from initial design concepts and material selection to construction, finishing, and final installation. Get ready to transform your kitchen and create a functional masterpiece.
Whether you’re looking for more counter space, better storage, or a new focal point for your kitchen, learning how to build island kitchen cabinet is an achievable goal. We’ll cover everything you need to know, providing actionable tips and insights to help you navigate each stage of the construction process. Let’s turn your kitchen island dreams into a tangible reality!
Quick Answers to Common Questions
What’s the very first step when I want to build an island kitchen cabinet?
Before you pick up any tools, the absolute first step is planning and design! Decide on its size, function (storage, seating, appliances), and exact placement in your kitchen.
Do I need a workshop full of expensive tools to build an island kitchen cabinet?
Not at all! While some power tools make it faster, you can build a sturdy island kitchen cabinet with basic hand tools like a measuring tape, saw, drill, and clamps.
What kind of wood is best for building an island kitchen cabinet?
Plywood (especially cabinet-grade hardwood plywood) is an excellent and cost-effective choice for the cabinet box itself due to its stability and strength. For doors and drawer fronts, you might consider solid wood or MDF.
Is it really cheaper to build an island kitchen cabinet myself than to buy one?
Generally, yes! Building your own island kitchen cabinet can save you a significant amount, especially if you source materials wisely and already own some basic tools.
How much time should I set aside to build an island kitchen cabinet?
The time commitment varies based on your skill level and the complexity of your design, but a basic island kitchen cabinet project might take anywhere from a few weekends to a couple of weeks to complete.
📋 Table of Contents
- Planning Your Dream Kitchen Island: The Blueprint for Success
- Building the Core Structure: How to Build Island Kitchen Cabinet Frame
- Customizing Your Island: Storage and Functionality
- Finishing Touches: Cabinet Doors, Drawers, and Panels
- Securing the Countertop and Final Installation
- Conclusion: Enjoy Your Custom-Built Kitchen Island
Planning Your Dream Kitchen Island: The Blueprint for Success
Before you pick up a single tool, meticulous planning is paramount. A well-thought-out plan is the foundation for a successful and satisfying DIY project. This initial phase will define the purpose, size, and style of your kitchen island, ensuring it integrates seamlessly into your existing space and meets all your functional needs.

Learn more about how to build island kitchen cabinet – How to Build Island Kitchen Cabinet DIY Project
Image source: build-basic.com
Assessing Your Space & Needs
Start by evaluating your kitchen’s layout and traffic patterns. The size of your island will largely depend on the available floor space. A crucial rule of thumb is to maintain adequate clearance around the island for comfortable movement and appliance access. Generally, you’ll want at least 36-42 inches (90-105 cm) of clear space on all sides where there’s traffic flow. If you have a primary thoroughfare, aim for 42-48 inches (105-120 cm).
| Project Stage/Component | Estimated Time (Hours) | Material Cost (Avg. USD) | Skill Level Required |
|---|---|---|---|
| Planning & Material Acquisition | 4-10 | $50 – $150 | Beginner |
| Building Cabinet Frames & Base | 12-24 | $300 – $700 | Intermediate |
| Constructing Drawers & Doors | 16-30 | $200 – $500 | Intermediate to Advanced |
| Finishing (Sanding, Painting/Staining) | 10-20 | $150 – $400 | Intermediate |
| Countertop Installation (DIY options) | 6-15 | $250 – $900 | Intermediate to Advanced |
- Measure, Measure, Measure: Use a tape measure to determine the maximum dimensions your island can be without obstructing pathways. Map it out on your floor with painter’s tape to visualize the footprint.
- Define its Purpose: Will it primarily be for food prep, additional storage, a breakfast bar, or include a sink or cooktop? This decision will dictate the internal structure and external features of your custom kitchen island.
- Consider Existing Layout: How will the island interact with your existing cabinetry, appliances, and windows? Ensure it doesn’t block natural light or create awkward access points.
Design Considerations & Style
Your kitchen island should complement your kitchen’s overall aesthetic. Do you want it to blend in seamlessly or stand out as a focal point? Consider the following:
- Style Match: If your kitchen is traditional, a classic paneled island might be best. For a modern kitchen, sleek, flat-panel designs are ideal.
- Material Choices: Plywood is an excellent, stable, and cost-effective choice for the cabinet carcass. For facings, you might use solid wood, MDF, or even reclaimed materials for a unique look. The countertop material (butcher block, laminate, quartz, granite) will also heavily influence the final appearance.
- Features and Functionality:
- Storage: Drawers, open shelving, pull-out pantry, spice racks, trash pull-outs.
- Seating: Will it have an overhang for bar stools? If so, factor in legroom (typically 12-15 inches overhang).
- Appliances: Sink, dishwasher, cooktop, microwave drawer – these require specific cutouts, plumbing, and electrical considerations.
Budgeting for Your DIY Project
One of the main reasons to build island kitchen cabinet yourself is cost savings. However, it’s essential to set a realistic budget. Your budget will influence material choices, countertop options, and the complexity of your design.
Here’s an estimated cost breakdown for a typical DIY kitchen island:
Table: Estimated Material Costs for a DIY Kitchen Island Cabinet (Mid-Range)
- Plywood (Cabinet Carcass): $100 – $300 (depending on grade and number of sheets)
- Lumber (Face Frames, Trim): $50 – $150
- Hardware (Hinges, Drawer Slides, Pulls): $50 – $200
- Fasteners (Screws, Glue, Pocket Hole Screws): $20 – $50
- Finishing Materials (Paint, Stain, Sealer): $50 – $150
- Countertop: $200 – $800+ (laminate, butcher block, granite remnants – highly variable)
- Optional (Electrical, Plumbing Fixtures): $50 – $300+
- Total Estimated Range: $520 – $1950+
*Note: These are estimates. Actual costs vary significantly based on material quality, local prices, and island complexity. Professional installation of countertops or electrical/plumbing work will add to these figures.
Gathering Your Tools and Materials
Having the right tools makes the job safer and more efficient. Here’s a list of essentials:
Essential Tools:
- Circular Saw or Table Saw (for accurate cuts)
- Miter Saw (for precise crosscuts)
- Drill/Driver (cordless is best)
- Kreg Jig (for strong pocket hole joinery)
- Measuring Tape, Speed Square, Level
- Clamps (essential for assembly)
- Router (for dados, rabbets, or decorative edges)
- Sander (orbital or block)
- Safety Glasses and Hearing Protection
Key Materials:
- ¾-inch Plywood (cabinet grade for durability)
- 1×2, 1×3, 1×4 Lumber (for face frames, trim)
- Wood Glue
- Cabinet Screws (1 ¼-inch, 2-inch)
- Pocket Hole Screws
- Drawer Slides (full extension recommended)
- Cabinet Hinges (concealed or visible)
- Cabinet Pulls/Knobs
- Sandpaper (various grits)
- Paint, Stain, or Clear Coat
Building the Core Structure: How to Build Island Kitchen Cabinet Frame
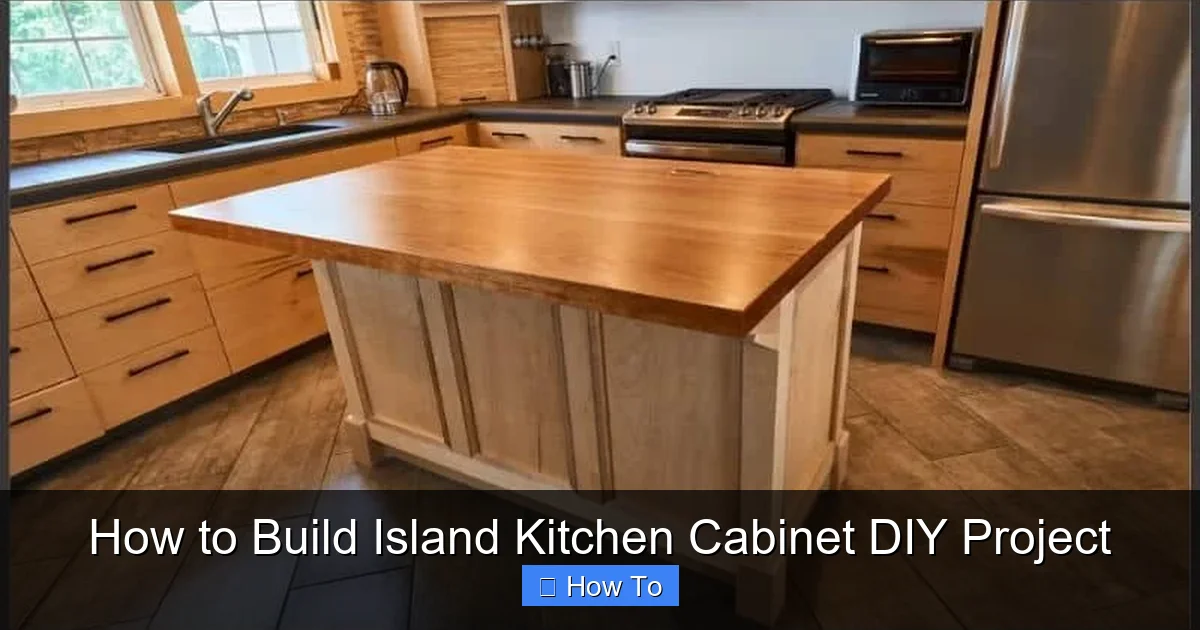
The core structure is the skeletal system of your island. A sturdy, square, and level frame is crucial for the longevity and functionality of your finished piece. This is where your precise measurements and cutting skills come into play to build island kitchen cabinet effectively.
Learn more about how to build island kitchen cabinet – How to Build Island Kitchen Cabinet DIY Project
Image source: onekitchenreview.com
Cutting Your Cabinet Components
Begin by creating a detailed cut list based on your design plans. This will include all the plywood panels for the sides, bottom, top stretchers, and any internal dividers. Remember the age-old carpenter’s adage: “measure twice, cut once.”
- Break Down Plywood Sheets: Use a circular saw with a guide or a table saw to rip your ¾-inch plywood sheets into the necessary widths for your island components (e.g., 24-inch wide strips for standard depth cabinets).
- Crosscut to Length: Then, use a miter saw or table saw to crosscut these strips into the exact lengths for your side panels, bottom panels, and internal shelves.
- Label Everything: As you cut, label each piece clearly (e.g., “Left Side,” “Bottom,” “Shelf 1”) to avoid confusion during assembly.
Accuracy here is critical. Any slight discrepancies will compound, leading to an out-of-square cabinet.
Assembling the Base Cabinets
Most kitchen islands are constructed by building one or more individual cabinet boxes and then joining them to form a larger, cohesive unit. This modular approach makes it easier to handle and ensures rigidity.
- Prepare Panels for Joinery: For strong, invisible joints, pocket holes are often preferred by DIYers. Drill pocket holes along the edges of your bottom panels and any fixed shelves, where they will attach to the side panels.
- Assemble the Box: Apply a bead of wood glue to the joining edges. Clamp the side panels to the bottom panel, ensuring they are flush and square. Drive pocket hole screws to secure the joint. Repeat this process for any fixed shelves or internal dividers.
- Add Back Panel (Optional): For additional rigidity and to keep dust out, you can add a ¼-inch plywood back panel. Route a dado on the inner sides and bottom, or simply attach it to the back with screws and glue. If your island will be open on one side, this back panel becomes an exposed finished surface.
- Repeat for Multiple Cabinets: If your island design uses multiple cabinet boxes, build each one individually and ensure they are identical in dimensions.
Focus on maintaining squareness throughout assembly. Use a framing square frequently to check your corners.
Constructing the Island Frame
Once your individual cabinet boxes are assembled, it’s time to join them and build out the overall island frame. This is where your island truly starts to take shape.
- Join Cabinet Boxes: If using multiple boxes, clamp them together. Ensure the front edges are perfectly flush. Drill pilot holes and use 1 ¼-inch cabinet screws to join them through the face frame or through the side panels from the inside.
- Add Face Frames: Face frames are strips of solid wood (usually 1×2 or 1×3 lumber) that trim the front edges of your cabinet boxes, providing a finished look and a strong surface for attaching doors and drawers. Cut face frame pieces to size, using pocket holes or biscuits to join the stiles (vertical pieces) and rails (horizontal pieces). Glue and clamp the assembled face frame to the front of your cabinet box, then secure with brad nails or screws from the inside.
- Build a Sturdy Base/Toe Kick: The toe kick is the recessed area at the bottom of the cabinet, allowing you to stand closer without stubbing your toes. You can build this as a separate frame that the cabinets sit on, or integrate it into the bottom of your cabinet boxes. Ensure it’s level and robust.
- Reinforce for Support: For larger islands, especially those supporting heavy countertops, add additional blocking or cross bracing inside the cabinet at the top. This provides a solid surface for countertop attachment and prevents bowing.
A well-built frame is critical. Statistics show that kitchen islands are among the most heavily used areas in a kitchen, often experiencing significant wear and tear. A robust internal structure will ensure your DIY island stands the test of time.
Customizing Your Island: Storage and Functionality
This is where you infuse your island with the specific features that make it uniquely yours and incredibly functional. Thinking beyond basic shelves can significantly enhance your kitchen’s efficiency when you build island kitchen cabinet.
Designing for Optimal Storage
Think about what you need to store and how you’ll access it. This could include:
- Drawers: Perfect for utensils, dishtowels, and smaller items. Consider different depths and widths. Building drawers involves cutting sides, front, back, and bottom panels, then assembling them with screws or dado joints, and finally installing drawer slides.
- Pull-Out Shelves/Bins: Excellent for pots and pans, small appliances, or even a hidden trash can. These require specialized hardware but offer fantastic accessibility.
- Open Shelving: Ideal for displaying cookbooks, decorative items, or frequently accessed dishes.
- Wine Racks or Beverage Centers: If entertaining is a priority, incorporating these features can elevate your island’s appeal.
Plan the placement of these features carefully. For instance, a trash pull-out near the primary prep area is incredibly convenient. Ensure all internal components are sized correctly to fit their intended use.
Adding Electrical Outlets
Incorporating electrical outlets into your kitchen island is a game-changer for convenience, allowing you to use small appliances without cords stretching across the floor. This is a common and highly recommended feature when you build island kitchen cabinet.
- Safety First: All electrical work should be done by a qualified electrician or by yourself if you are knowledgeable and comfortable, adhering strictly to local building codes. You will likely need GFCI (Ground Fault Circuit Interrupter) protected outlets.
- Location: Outlets should be easily accessible but not directly on the top surface where liquids could spill. Side panels or pop-up outlets are popular choices.
- Wiring: Plan for the electrical conduit to run from a nearby wall or floor junction box, up into the island. This usually involves drilling through the subfloor or running wires along the floor before the island is secured.
Failing to plan for electrical early can lead to costly retrofits later. According to the National Electrical Code (NEC), kitchen islands typically require at least one receptacle outlet. If the island is 24 inches or wider and 12 inches or longer, it may require two or more. Always check your local codes!
Incorporating Plumbing (If Applicable)
If your island design includes a sink or dishwasher, you’ll need to account for plumbing lines (hot and cold water supply, drain) and proper venting. This is significantly more complex than adding electrical and often requires professional help.
- Drainage and Venting: A sink will require a P-trap and proper venting to prevent sewer gases from entering your home. This might involve extending existing plumbing lines or creating new ones.
- Access Panels: Plan for an access panel within the cabinet under the sink for future maintenance.
It’s often recommended to consult a plumber at the planning stage if your island will include water features.
Preparing for Countertop Installation
The top of your island needs a solid, level surface for the countertop. Ensure your cabinet carcass is perfectly level and square.
- Support Bracing: Add solid wood blocking or plywood strips along the top edges of your island frame, flush with the top, to provide ample surface area for securing the countertop.
- Leveling: Use shims under the toe kick or base of the island to achieve perfect levelness. This is critical for preventing cracks or unevenness in your countertop.
If your countertop material is heavy (like granite or quartz), ensure the island’s structure can bear the weight. You might need additional internal reinforcement.
Finishing Touches: Cabinet Doors, Drawers, and Panels
With the core structure built and functional elements in place, it’s time to focus on the aesthetics that will make your DIY island truly shine. This stage is all about precision and attention to detail, creating a professional look for your custom island cabinet.
Installing Drawer Slides and Drawers
Smooth-operating drawers are a sign of quality craftsmanship. Take your time with this step.
- Mount Drawer Slides: Follow the manufacturer’s instructions carefully. Typically, the cabinet-side slides are mounted first, ensuring they are perfectly level and parallel to each other. Use a spacer block to achieve consistent height for multiple drawers.
- Assemble Drawers: Construct your drawer boxes from ¾-inch plywood for the sides and ½-inch plywood for the bottom. Pocket hole joinery or dado joints work well here. Ensure they are square.
- Install Drawers: Attach the drawer-side slides to your assembled drawer boxes. Then, slide the drawers into the cabinet, testing for smooth operation. Adjust as needed.
- Attach Drawer Fronts: This is often done separately to allow for precise alignment. Use double-sided tape to temporarily position the drawer front onto the drawer box, checking for even gaps around it. Once satisfied, secure it from the inside of the drawer box with screws.
Full-extension drawer slides are highly recommended, as they allow complete access to the drawer’s contents, maximizing storage efficiency.
Attaching Cabinet Doors and Hinges
Doors complete the cabinet’s look and hide clutter. There are various types of hinges, but concealed (European-style) hinges are popular for their adjustability and clean appearance.
- Prepare Doors: If you’re building your own doors (e.g., shaker style), ensure they are perfectly square and sized correctly for the openings, leaving a small, consistent gap (usually 1/8 inch or 3mm) around all sides.
- Drill Hinge Cups: If using concealed hinges, you’ll need a 35mm Forstner bit to drill cup holes in the back of the doors. Use a jig for accuracy.
- Mount Hinges: Attach the hinge cups to the doors and then mount the hinge plates to the inside of the cabinet face frame or side panel.
- Adjust Doors: Most concealed hinges offer three-way adjustment (up/down, in/out, side-to-side), allowing you to achieve perfect alignment and even gaps.
Properly hung doors can make a DIY island look professionally installed.
Applying End Panels and Trim
End panels and trim pieces provide a polished, finished look, covering any exposed plywood edges or construction seams. This is a critical step to ensure your DIY kitchen island looks integrated and high-end.
- Side Panels: If your island’s side panels are exposed and not covered by doors, consider adding decorative end panels. These can be sheets of finished plywood, beadboard, or even custom-built paneled sections to match your existing cabinetry. Attach them with glue and finish nails.
- Decorative Trim/Molding: Add crown molding, base molding, or decorative trim pieces to hide seams, add architectural interest, and give the island a built-in feel. Miter corners for a seamless look.
- Toe Kick Finish: Cover the raw toe kick area with a finished piece of plywood or solid wood, matching your chosen finish.
Sanding and Finishing Your Island Cabinet
This is where your island transitions from raw wood to a beautiful, finished piece. Don’t rush this stage.
- Sanding: Start with a medium-grit sandpaper (e.g., 120-grit) to remove any imperfections or glue squeeze-out. Progress to finer grits (e.g., 180 or 220-grit) for a smooth, ready-to-finish surface. Always sand in the direction of the wood grain.
- Clean: Thoroughly wipe down all surfaces with a tack cloth or a damp cloth to remove all dust particles.
- Apply Finish:
- Paint: Apply a high-quality primer, then two or more coats of durable cabinet-grade paint. Lightly sand between coats for a smooth finish.
- Stain: Apply wood conditioner first, especially on plywood, to ensure even stain absorption. Apply your chosen stain, wiping off excess.
- Sealer/Topcoat: If staining or painting, apply a protective topcoat (e.g., polyurethane, lacquer, or a water-based clear coat) for durability and easy cleaning. Apply multiple thin coats, sanding lightly with a very fine grit (e.g., 320-grit) between coats for maximum smoothness.
A high-quality finish not only looks great but also protects your island from daily wear and tear, making it a truly resilient piece you built yourself.
Securing the Countertop and Final Installation
The final steps involve placing and securing your chosen countertop and permanently installing the island, bringing your vision to completion. This stage solidifies all your hard work on how to build island kitchen cabinet.
Choosing Your Ideal Countertop
The countertop is a major aesthetic and functional component of your island. Your choice will depend on budget, durability needs, and desired look.
- Laminate: Budget-friendly, wide range of patterns, relatively easy to install DIY.
- Butcher Block: Warm, natural look; can be DIY installed. Requires regular oiling/sealing.
- Solid Surface (e.g., Corian): Seamless appearance, repairable, but often requires professional fabrication.
- Quartz: Non-porous, durable, consistent patterns; typically professionally installed.
- Granite/Marble: Luxurious, unique patterns, durable; requires professional installation and sealing.
If you choose a heavy or complex material, plan for professional templating and installation to ensure proper fit and safety.
Professional Installation vs. DIY Countertop
For DIY-friendly options like butcher block or laminate, you can often cut and install them yourself. Here’s how to secure them:
- Prepare Surface: Ensure the top of your island cabinet is clean, level, and free of any debris.
- Position Countertop: Carefully place the countertop onto the island. Check for overhangs and alignment.
- Secure: From underneath the island, drive screws up through the cabinet’s top stretchers and blocking into the underside of the countertop. Use screws that are long enough to penetrate the countertop but not so long that they poke through the top surface (e.g., 1 ¼-inch screws for a 1 ½-inch thick countertop). Avoid overtightening.
- Caulk Edges: Use a clear or color-matched silicone caulk to seal any gaps between the countertop and adjacent walls or cabinets.
For heavier stone countertops, professional installers will use silicone adhesive and possibly clips for a secure fit. Never attempt to lift heavy stone countertops alone.
Final Placement and Securing the Island
Your beautiful, finished island is almost ready for action! The final step is to permanently position and secure it.
- Position: Carefully move the island into its final location. Ensure it is perfectly centered and aligned according to your plans.
- Leveling: Use a long level to check the top of the island in all directions. Make any final adjustments with shims under the toe kick or base to ensure it’s perfectly level. This prevents your countertop from being uneven and your island from wobbling.
- Anchor to Floor: For safety and stability, especially with heavier islands or those with seating, it’s crucial to anchor the island to the floor. Open up a base cabinet and drill pilot holes through the toe kick or the bottom panel of the cabinet into the subfloor. Use appropriate screws (e.g., 3-inch long construction screws) to secure it. If you have radiant heating or plumbing in the floor, exercise extreme caution or consult a professional.
- Connect Utilities: If you included plumbing or electrical, now is the time for final connections. This should be done by or inspected by qualified professionals to ensure safety and compliance with local codes.
- Install Hardware: Attach all cabinet pulls and knobs.
Congratulations! You have successfully learned how to build island kitchen cabinet and brought a custom, functional centerpiece to life in your kitchen.
Conclusion: Enjoy Your Custom-Built Kitchen Island
You’ve done it! From the initial dream to the final screw, you’ve meticulously planned, constructed, and finished a beautiful and highly functional DIY kitchen island. The process of learning how to build island kitchen cabinet is not just about saving money, though that’s a significant benefit; it’s about the satisfaction of creating something with your own hands, perfectly tailored to your home and lifestyle.
Your new island isn’t just a piece of furniture; it’s a testament to your hard work, creativity, and determination. It will serve as a hub for family meals, a workstation for culinary adventures, and a focal point that adds significant value and appeal to your kitchen. So, take a moment to admire your craftsmanship, gather your loved ones, and start enjoying the enhanced functionality and beauty your custom-built kitchen island brings to your home.
Remember that every successful DIY project is a journey of learning. You’ve gained invaluable skills and a deeper appreciation for the craftsmanship involved in home renovation. Now that you know how to build island kitchen cabinet, the possibilities for future home improvement projects are limitless. Happy cooking and happy living in your beautifully transformed kitchen!
Frequently Asked Questions
What are the first steps when planning to build an island kitchen cabinet?
Begin by accurately measuring your kitchen space to determine the ideal size and placement for your island kitchen cabinet. Consider its primary function – will it be for food prep, seating, storage, or all of the above – as this will influence your design choices and features.
What materials are best for building a durable island kitchen cabinet?
Cabinet-grade plywood is an excellent choice for the main box structure due to its stability and strength. For face frames, doors, and drawer fronts, solid hardwood like maple, oak, or cherry will provide a durable, attractive finish that can withstand daily use.
What essential tools will I need for this DIY island kitchen cabinet project?
You’ll definitely need a miter saw or circular saw for accurate cuts, a drill for assembling components, and a Kreg Jig for strong pocket-hole joinery. A router can also be very useful for creating decorative edges or dados, ensuring a professional look for your island kitchen cabinet.
How do I ensure my custom island cabinet is sturdy and level?
Use plenty of wood glue in addition to screws for every joint to maximize structural integrity. Once assembled, use shims to perfectly level the cabinet base on the floor, which is crucial for a stable countertop and proper door/drawer alignment.
What’s the best way to attach a countertop to a newly built island cabinet?
For most countertop materials, you’ll attach it from underneath using L-brackets or small wooden blocks screwed into the inside of the cabinet frame. Always pre-drill pilot holes through these brackets or blocks into the countertop to prevent splitting, and use appropriate screws for the counter material.
How can I achieve a professional-looking finish on my DIY island cabinet?
Thorough sanding is key; start with a coarser grit and gradually move to finer grits until the surface is perfectly smooth. Apply a high-quality primer before painting, or use a wood conditioner before staining to ensure even color absorption and a durable, beautiful finish.