Featured image for this comprehensive guide about how to design a functional kitchen layout with an island
Image source: visualmodo.com
The kitchen, often hailed as the heart of the home, has evolved from a purely utilitarian space into a multi-functional hub for cooking, dining, entertaining, and even working. At the center of many modern kitchen dreams lies the island – a versatile, often majestic, feature that promises extra counter space, storage, and a social focal point. However, the allure of a kitchen island can sometimes overshadow the fundamental need for functionality. A poorly designed island, no matter how beautiful, can hinder workflow, create bottlenecks, and ultimately frustrate its users.
Designing a functional kitchen layout with an island isn’t just about aesthetics; it’s about creating an efficient, ergonomic, and enjoyable space that perfectly suits your lifestyle. It requires thoughtful planning, an understanding of space dynamics, and an appreciation for the intricate dance of cooking and entertaining. This comprehensive guide will walk you through every critical step, from initial considerations to the finest design details, ensuring your kitchen island isn’t just a pretty centerpiece, but a true workhorse that elevates your entire kitchen experience.
Whether you’re embarking on a full kitchen renovation or simply looking to optimize your existing space, mastering the art of the functional kitchen island layout is key. Let’s dive in and transform your kitchen into a highly efficient and beautiful culinary haven.
Quick Answers to Common Questions
What’s the absolute first step for a functional kitchen layout with an island?
Begin by analyzing your lifestyle and how you actually use your kitchen. Understanding your daily routines and entertaining habits is key to designing a functional kitchen layout with an island that truly works for you.
How much clearance do I need around my kitchen island for it to be functional?
A good rule of thumb is to allow at least 36-42 inches (90-105 cm) of clear walkway around all sides of your island. This ensures smooth traffic flow and comfortable access to cabinets and appliances, making your functional kitchen layout with an island truly accessible.
Can I still have a functional kitchen layout with an island if my kitchen isn’t massive?
Absolutely! For smaller spaces, consider a narrower island, a mobile cart, or a peninsula that extends from a wall. The goal is to maximize workspace and storage without sacrificing crucial pathways, creating a functional kitchen layout with an island that feels just right.
What’s the “kitchen work triangle” and how does it fit into a functional kitchen layout with an island?
The work triangle connects your refrigerator, sink, and cooktop, aiming to minimize steps between these key areas. In a functional kitchen layout with an island, the island often cleverly incorporates one of these elements, centralizing your prep, cooking, and clean-up zones.
What are some must-have features for a truly functional kitchen island?
Beyond countertop space, think about integrated storage like deep drawers or pull-out bins, and essential electrical outlets for small appliances. These thoughtful additions are vital for a functional kitchen layout with an island that boosts efficiency and convenience every day.
📋 Table of Contents
- The Allure of the Island: More Than Just a Countertop
- Laying the Foundation: Essential Considerations Before You Design
- The Heart of the Matter: Mastering the Kitchen Work Triangle (or Zone System)
- Design Specifics: Dimensions, Clearance, and Ergonomics for Optimal Functionality
- Beyond the Surface: Storage, Appliances, and Lighting Integration
- Advanced Tips & Customizations for a Truly Functional Island
- Conclusion
The Allure of the Island: More Than Just a Countertop
A kitchen island holds a unique place in contemporary home design, often serving as the central anchor of an open-plan living space. Its popularity isn’t accidental; the island offers a multitude of benefits that extend far beyond simply adding more counter space. For many, it embodies the dream of a versatile and dynamic kitchen.

Learn more about how to design a functional kitchen layout with an island – How to Design a Functional Kitchen Layout with an Island
Image source: uploads-ssl.webflow.com
One of the primary appeals of a kitchen island is its ability to create a natural gathering spot. Imagine friends and family congregating around it during parties, sharing appetizers, or simply chatting while you prepare a meal. It transforms the kitchen from a solitary workspace into a vibrant social hub. Parents often appreciate the island as a place where children can do homework or crafts while remaining within sight, fostering a sense of togetherness even amidst daily tasks.
| Design Element | Recommended Standard | Functional Benefit | Key Consideration |
|---|---|---|---|
| Main Aisle Clearance | 42-48 inches (107-122 cm) minimum | Allows comfortable movement, full appliance door swing, and multiple users to pass easily. | Less than 36 inches is highly restrictive; 48+ inches ideal for high-traffic zones or multi-cook kitchens. |
| Minimum Island Size | Approx. 40×40 inches (102×102 cm) for basic prep | Provides adequate working surface for chopping and food preparation. | Larger islands (7-10 ft long) often integrate sinks, cooktops, and seating, requiring more space. |
| Seating Overhang Depth | 12-15 inches (30-38 cm) for counter-height seating | Ensures comfortable knee and leg room for individuals seated at the island. | Bar-height seating can be slightly less (9-10 inches), but less than 10 inches is generally uncomfortable. |
| Work Triangle Integration | Island often serves as a primary prep zone (sink/counter) | Optimizes workflow between the sink, refrigerator, and range, minimizing steps. | Each leg of the triangle should ideally be 4-9 feet (1.2-2.7 m); the total sum 13-26 feet. |
| Island Task Lighting | Pendant lights 30-36 inches (76-91 cm) above the countertop | Provides focused illumination for food preparation and other tasks, reducing eye strain. | Combine with general ambient lighting to avoid harsh shadows and create a welcoming atmosphere. |
Beyond its social prowess, a well-designed island dramatically enhances the practicality of a kitchen. It provides additional surface area for meal preparation, a crucial asset for avid cooks or large families. This extra workspace can be dedicated to chopping vegetables, kneading dough, or plating dishes, effectively expanding your culinary real estate. Moreover, islands are prime candidates for incorporating specialized storage solutions, from deep drawers for pots and pans to open shelving for cookbooks or decorative items. They can house everything from small appliances to recycling bins, significantly de-cluttering your main kitchen area.
The flexibility of island design also contributes to its allure. An island can be customized to include integrated sinks, cooktops, dishwashers, or even wine fridges, further streamlining your workflow and tailoring the space to your specific needs. It’s an opportunity to inject personality and style into your kitchen, acting as a design statement with unique materials, colors, and textures. Ultimately, when executed correctly, a kitchen island isn’t just an addition; it’s an enhancement that can redefine the entire character and utility of your kitchen.
Laying the Foundation: Essential Considerations Before You Design
Before you even think about countertop materials or cabinet finishes, the most critical step in creating a functional kitchen layout with an island is thorough planning. Skipping this foundational stage can lead to costly mistakes and a kitchen that looks great but performs poorly. Here’s what you need to consider:
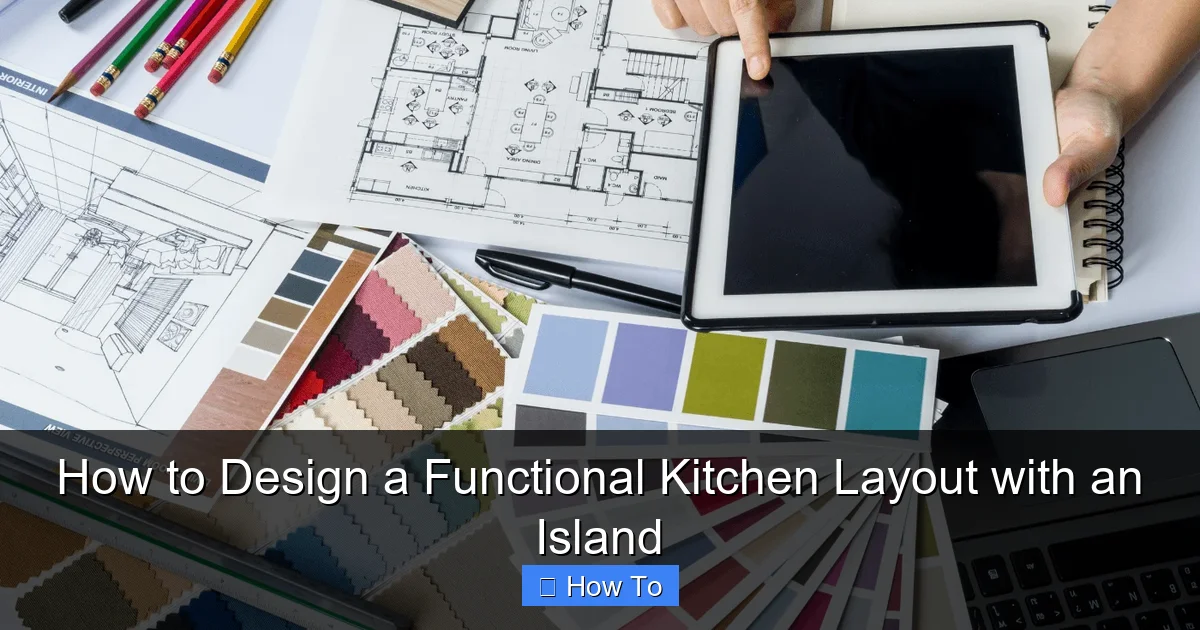
Learn more about how to design a functional kitchen layout with an island – How to Design a Functional Kitchen Layout with an Island
Image source: studiofain.com
Assessing Your Space and Traffic Flow
The size and shape of your kitchen are the ultimate determinants of whether an island is feasible and, if so, what size and configuration it should take. A common mistake is forcing an island into a space that’s too small, resulting in cramped walkways and a dysfunctional layout. Industry standards and ergonomic principles dictate specific clearance zones to ensure comfortable movement and safe appliance usage.
- Minimum Kitchen Dimensions: Generally, a kitchen needs to be at least 10×10 feet (3×3 meters) to comfortably accommodate a modest island, and often larger for an island with seating or integrated appliances.
- Walkway Clearances: The National Kitchen & Bath Association (NKBA) recommends a minimum of 42 inches (107 cm) of clear space for walkways in a one-cook kitchen, and 48 inches (122 cm) in a multi-cook kitchen or a kitchen with heavy traffic. This is crucial around the island, especially if it’s opposite appliances like an oven or dishwasher, where doors need to open freely.
- Traffic Patterns: Observe how people naturally move through your kitchen. Is it a thoroughfare to other rooms? A well-placed island should enhance, not impede, these natural pathways.
Defining Your Island’s Primary Purpose
What do you envision your island doing most? This single question will heavily influence its design. Is it primarily for:
- Food Preparation: You’ll need ample clear counter space, perhaps a prep sink, and easy access to your main sink and cooktop.
- Dining/Seating: Sufficient overhang for comfortable legroom (at least 15 inches for counter-height seating, 12 inches for bar height) and appropriate seating arrangements.
- Storage: Focus on cabinets, drawers, open shelving, or even specialized storage like wine racks or pull-out pantry units.
- Cooking: Integration of a cooktop, range hood, and adequate landing space on either side.
- Entertaining: A clear, unobstructed surface for serving, perhaps a beverage fridge, and comfortable guest interaction.
- A Combination: Most islands serve multiple purposes. Prioritize the most important functions to guide your design choices. For example, a “prep and eat” island might have a dedicated work zone with a prep sink on one end and a raised bar area for seating on the other.
Budgeting for Your Dream Island
The cost of a kitchen island can vary dramatically based on size, materials, integrated appliances, and installation complexity. Establish a realistic budget early on to avoid disappointment later. Consider:
- Materials: Countertops (granite, quartz, butcher block, stainless steel), cabinet finishes, and hardware.
- Appliances: Prep sinks, dishwashers, cooktops, downdraft vents, beverage fridges, and electrical/plumbing hookups.
- Labor: Installation of cabinets, countertops, plumbing, and electrical work.
- Lighting: Pendants, recessed lighting.
- Customization: Specialized storage features or unique shapes will add to the cost.
Having a clear budget helps you make informed decisions, prioritizing features that offer the most value for your investment in a functional kitchen island layout.
The Heart of the Matter: Mastering the Kitchen Work Triangle (or Zone System)
At the core of any truly functional kitchen layout lies the concept of efficiency in movement. For decades, this has been epitomized by the “kitchen work triangle.” While modern kitchen design has evolved, the underlying principle remains paramount, especially when integrating an island.
The Classic Work Triangle Explained
The traditional kitchen work triangle connects the three main activity centers: the refrigerator (food storage), the sink (food preparation and cleaning), and the stove/cooktop (cooking). The idea is to create an imaginary triangle between these three points, with the sum of the three legs ideally ranging between 12 and 26 feet (3.6 to 7.9 meters). Each leg should be between 4 and 9 feet (1.2 to 2.7 meters). The goal is to minimize steps between these frequently used stations, creating an ergonomic and efficient workflow.
- Refrigerator: Where you retrieve ingredients.
- Sink: Where you wash and prepare ingredients.
- Stove/Cooktop: Where you cook the ingredients.
An uninterrupted path between these three points is crucial. Avoid placing tall cabinets or appliances that block the flow within the triangle.
Adapting for Open-Plan Layouts and Islands
While the work triangle is a powerful guideline, modern kitchens, particularly those with islands and open-plan designs, often benefit from a more flexible “work zone” approach. Here, the kitchen is divided into distinct zones based on activity:
- Preparation Zone: Centered around the main sink or a dedicated prep sink, this area needs ample counter space.
- Cooking Zone: The cooktop/range area, requiring landing space on either side for hot pots and pans.
- Storage Zone: Refrigerator and pantry, ideally near the prep zone for easy access.
- Cleaning Zone: Main sink and dishwasher, often adjacent to the prep zone for seamless cleaning.
- Serving/Entertaining Zone: Often the island itself, offering clear space for plating and guest interaction.
When designing a kitchen layout with an island, the island often becomes an integral part of one or more of these zones, or even houses one leg of the traditional work triangle:
- Island as Prep Zone: By incorporating a prep sink, the island becomes a dedicated preparation area, often forming one side of a triangle with the main sink and cooktop, or with the refrigerator and cooktop. This is a highly efficient setup for multi-cook households.
- Island as Cooking Zone: Placing a cooktop on the island requires careful planning for ventilation (e.g., a downdraft vent or overhead range hood) and sufficient landing space around the cooking surface. It often makes the island the central point of the work triangle.
- Island as Cleaning Zone: While less common as the primary cleaning spot, a dishwasher or even the main sink can be integrated into the island, especially in U-shaped or L-shaped layouts where the island completes the “U” or extends the “L.”
The key is to ensure that wherever the island is placed, it enhances the flow between these critical zones rather than disrupting it. Think about the sequence of tasks – retrieving food, washing, chopping, cooking, serving, and cleaning – and design your island’s role to support this natural progression. This thoughtful integration is what truly creates a functional kitchen island layout.
Design Specifics: Dimensions, Clearance, and Ergonomics for Optimal Functionality
Once you’ve established your island’s purpose and how it integrates with your workflow, it’s time to delve into the nitty-gritty details of dimensions and clearances. These precise measurements are non-negotiable for ensuring your kitchen island design is truly ergonomic and functional.
Essential Island Dimensions
The ideal size of your island will depend on your kitchen’s overall footprint and the island’s intended functions. There are, however, some common guidelines:
- Minimum Island Length: For a purely functional island without seating, a minimum of 4 feet (1.2 meters) in length is often recommended to provide decent workspace. For an island with a sink or cooktop, more length is needed.
- Minimum Island Depth: A minimum of 24 inches (61 cm) is needed for a single-sided work surface. If you plan to have cabinets on both sides (a deeper island), aim for 36-48 inches (91-122 cm).
- Maximum Size: There’s no strict maximum, but an island shouldn’t dominate the room or impede movement. It should always be proportionate to the kitchen.
- Standard Countertop Height: Most islands are 36 inches (91 cm) high, matching standard kitchen counters, which is ideal for food prep.
Crucial Clearance Zones
These are perhaps the most vital measurements for a functional kitchen island:
- Walkways (Primary Traffic): As mentioned, aim for 42-48 inches (107-122 cm) of clear space between the island and adjacent counters or appliances. This allows two people to pass comfortably or for appliance doors (like oven or dishwasher) to open without obstruction.
- Walkways (Secondary Traffic): For areas with less frequent movement, a minimum of 36 inches (91 cm) is often acceptable, but more is always better for comfort.
- Appliance Clearance: Ensure adequate space for opening refrigerator doors fully, pulling out dishwasher racks, and accessing ovens without bumping into the island. Remember to measure from the appliance handle to the island.
Seating Considerations
If your island will include seating, careful planning is essential for comfort and functionality:
- Counter Height Seating (36 inches island height): Requires stools typically 24-26 inches (61-66 cm) high.
- Bar Height Seating (42 inches island height, with a raised bar): Requires stools typically 28-30 inches (71-76 cm) high.
- Table Height Seating (30 inches island height, less common): Requires chairs typically 18 inches (46 cm) high.
- Counter Overhang: For comfortable legroom, allow a minimum of 15 inches (38 cm) of overhang for counter-height seating and 12 inches (30 cm) for bar-height seating.
- Width Per Seater: Allocate at least 24 inches (61 cm) of width per person for comfortable seating at the island. This prevents elbows from bumping and allows for ample personal space.
- Seating Depth: Consider the depth of your chosen stools or chairs. Ensure they can be tucked away neatly when not in use to maintain clear walkways.
By meticulously planning these dimensions and clearances, you’ll ensure your functional kitchen island layout is not only beautiful but also a joy to use, allowing for effortless movement and comfortable interaction.
Beyond the Surface: Storage, Appliances, and Lighting Integration
A truly functional kitchen island layout goes beyond its footprint and surface. What’s inside and above the island often determines its real utility. Integrating smart storage solutions, strategically placed appliances, and effective lighting can transform an ordinary island into the beating heart of your kitchen.
Smart Storage Solutions
One of the most valuable contributions an island can make is providing additional storage, helping to keep your main kitchen cabinets uncluttered. Think creatively about how to maximize every inch:
- Deep Drawers: Ideal for pots, pans, lids, and even small appliances. Their accessibility often surpasses traditional base cabinets.
- Pull-Outs and Roll-Out Shelves: Perfect for pantry items, spices, or recycling bins, making contents easy to see and reach.
- Open Shelving: Great for displaying cookbooks, decorative items, or frequently used dishware, adding a personal touch.
- Cabinetry with Doors: Standard cabinets offer versatile storage for larger items or things you prefer to keep out of sight. Consider glass-front doors to add visual interest.
- Specialized Storage: Wine racks, plate racks, vertical dividers for baking sheets, or even a pet food station can be cleverly integrated.
- Hidden Charging Stations: Integrate a drawer with power outlets for charging phones and tablets, keeping unsightly cords off the counter.
Integrating Appliances
Incorporating appliances into your island can significantly streamline your workflow, especially for specific tasks. Here are common considerations:
- Prep Sink: A small sink with a garbage disposal can make food preparation incredibly efficient, eliminating constant trips to the main sink. Ensure it’s large enough for your needs and has dedicated landing space.
- Cooktop/Range: Placing the cooktop on the island allows the cook to face guests, enhancing the social aspect. However, it requires a robust ventilation system (either an overhead hood or a downdraft vent) and ample non-combustible counter space on either side for safety and usability.
- Dishwasher: Often placed next to an island sink for easy loading and unloading. Consider its placement relative to the main sink and dish storage.
- Microwave Drawer: A popular choice for islands, freeing up counter space and providing an accessible height for all users.
- Beverage Fridge/Wine Cooler: Perfect for entertaining, keeping drinks readily available without cluttering the main refrigerator.
- Trash Compactor/Recycling Bins: Integrate these into pull-out cabinets for convenient waste management.
Remember that integrating appliances will require plumbing and electrical work, which should be planned early in the design process.
Layered Lighting for Ambiance and Task
Lighting is paramount for both the aesthetics and functionality of your island. A layered approach ensures your island is well-lit for tasks and beautifully illuminated for ambiance:
- Task Lighting: Pendant lights are a popular choice, providing direct illumination over the island’s work surface. Ensure they are hung at an appropriate height (usually 30-36 inches above the countertop) to avoid glare or obstruction. Recessed lighting can also provide excellent task illumination.
- Ambient Lighting: Overall kitchen lighting (e.g., recessed lights or flush mounts) contributes to the general brightness of the area, making the island feel part of the larger space.
- Accent Lighting: LED strip lights under the island overhang or inside glass-front cabinets can create a warm glow, highlight materials, and add a touch of sophistication, especially in the evenings.
A dimmer switch for island lighting is a wise investment, allowing you to adjust the mood from bright task lighting to soft ambient glow, perfecting your kitchen design ideas for any occasion.
Advanced Tips & Customizations for a Truly Functional Island
Once the fundamental elements are in place, consider these advanced tips and customization options to elevate your island from simply good to truly exceptional, ensuring it perfectly supports your lifestyle and aesthetic preferences. These details can transform your kitchen layout with island into a bespoke masterpiece.
Material Matters: Choosing Your Surfaces Wisely
The choice of materials for your island’s countertop and base can significantly impact both its functionality and visual appeal. Consider durability, maintenance, and how it complements your overall kitchen design:
- Countertops:
- Quartz: Highly durable, non-porous, and available in a vast array of colors and patterns. Excellent for heavy-use areas.
- Granite: Natural stone, heat-resistant, and unique patterns. Requires sealing but offers timeless beauty.
- Butcher Block: Warm, natural, and ideal for prep work. Requires regular oiling and can show knife marks, but offers a charming, organic look.
- Stainless Steel: Professional, hygienic, and highly durable. Perfect for a modern or industrial aesthetic.
- Concrete: Customizable, contemporary, and durable, though can be porous and heavy.
Consider using different materials for different zones on a larger island – for example, butcher block for a chopping area and quartz for a serving section.
- Base Finishes: Match your existing cabinetry for a cohesive look, or opt for a contrasting color or material (e.g., wood paneling, beadboard, shiplap) to make the island a distinct focal point.
Power Outlets and Charging Stations: The Modern Necessity
In today’s tech-driven world, easily accessible power is no longer a luxury but a necessity on a kitchen island. Plan for:
- Integrated Outlets: Install multiple electrical outlets on the sides or ends of your island. These are essential for small appliances like blenders, stand mixers, and coffee makers.
- Pop-Up Outlets: For a cleaner look, consider pop-up electrical outlets that retract into the countertop when not in use.
- USB Charging Ports: Incorporate USB ports directly into an outlet or a dedicated charging station to keep phones and tablets powered up without occupying main outlets.
- Wireless Charging: For the ultimate modern touch, some islands can integrate hidden wireless charging pads beneath the countertop surface.
Ensure all electrical work is done by a qualified electrician and meets local building codes.
Incorporating a Prep Sink or Cooktop: Advanced Workflow Integration
For serious cooks or large families, dedicating part of the island to a specific cooking or prep function can revolutionize kitchen efficiency:
- Prep Sink: As discussed, a secondary sink on the island dramatically reduces steps during meal preparation. Consider a small, deep sink to minimize splashes and a faucet that matches your main kitchen faucet for aesthetic continuity.
- Cooktop: An island cooktop makes the island the central hub of your cooking process, allowing you to face guests while you work. Remember the critical need for a powerful ventilation system (downdraft or overhead range hood) and sufficient landing space around the burners. Consider induction cooktops for their sleek look and precise control.
- Specialized Appliances: Think beyond the basics. A built-in steam oven, a dedicated warming drawer, or a small under-counter freezer for ice cream can all find a functional home within a well-planned island.
By thoughtfully considering these advanced tips and customization options, you can ensure your functional kitchen island layout not only meets your everyday needs but also enhances your cooking and entertaining experiences for years to come. Remember, the best design is one that is uniquely tailored to you.
Conclusion
Designing a functional kitchen layout with an island is an exciting journey that merges aesthetic vision with practical needs. It’s about much more than just placing a large block in the middle of your kitchen; it’s about orchestrating a symphony of movement, storage, and social interaction that enhances every aspect of your daily life. From the initial assessment of your space and defining your island’s core purpose to meticulously planning dimensions, clearances, and integrating smart solutions, every decision plays a crucial role in the island’s ultimate success.
We’ve explored the timeless wisdom of the kitchen work triangle and its modern evolution into flexible work zones, demonstrating how your island can seamlessly integrate into your culinary workflow. We’ve highlighted the critical importance of ergonomic dimensions and generous clearances to ensure comfort and safety. And we’ve delved into the myriad ways to maximize your island’s utility through clever storage, integrated appliances, and thoughtful lighting, alongside advanced customizations that add personal flair and cutting-edge convenience.
Remember, the most beautiful kitchen is one that works beautifully for you. By prioritizing functionality, optimizing flow, and tailoring every detail to your unique lifestyle, you won’t just design a kitchen island; you’ll create the heart of a home that inspires, entertains, and simplifies life for years to come. So, take these actionable tips, unleash your creativity, and embark on the rewarding journey of designing your perfect, functional kitchen island layout. Your dream kitchen awaits!
Frequently Asked Questions
How much clearance do I need around a kitchen island for a functional layout?
For a truly functional kitchen layout with an island, aim for at least 36 to 42 inches of clear walkway space on all sides. This clearance allows for comfortable movement, easy access to appliances, and the ability to open cabinet doors and drawers without obstruction.
What are the key elements of a functional kitchen island design?
A functional kitchen island design focuses on enhancing workflow and providing dedicated zones for tasks like food preparation, cooking, or dining. Consider incorporating storage, a prep sink, a cooktop, or ample counter space to support your primary kitchen activities and improve efficiency.
Where is the best placement for an island to optimize the overall kitchen layout and workflow?
The ideal placement for an island is typically within the “work triangle” formed by the sink, refrigerator, and stove, but without obstructing it. Ensure it facilitates smooth transitions between these key areas while also allowing clear pathways for traffic flow around it.
What common mistakes should I avoid when designing a functional kitchen layout with an island?
Avoid common pitfalls such as inadequate clearances around the island, making it too large for the space, or placing it in a way that disrupts the work triangle. Also, ensure you plan for necessary utilities like electrical outlets or plumbing if your island will house appliances or a sink.
What features can I integrate into my island to maximize its functionality?
To maximize your island’s functionality, consider integrating features like deep drawers for pots and pans, a built-in microwave, a dedicated waste disposal system, or even a small prep sink. Seating can also transform it into a social hub, making it a versatile addition to your functional kitchen layout.
Can an island be incorporated into any kitchen layout to create a functional space?
While an island can enhance functionality in many layouts, it works best in larger L-shaped, U-shaped, or single-wall kitchens with sufficient open space. A functional kitchen layout with an island depends heavily on having adequate room to maintain clear pathways and comfortable working zones around it.