
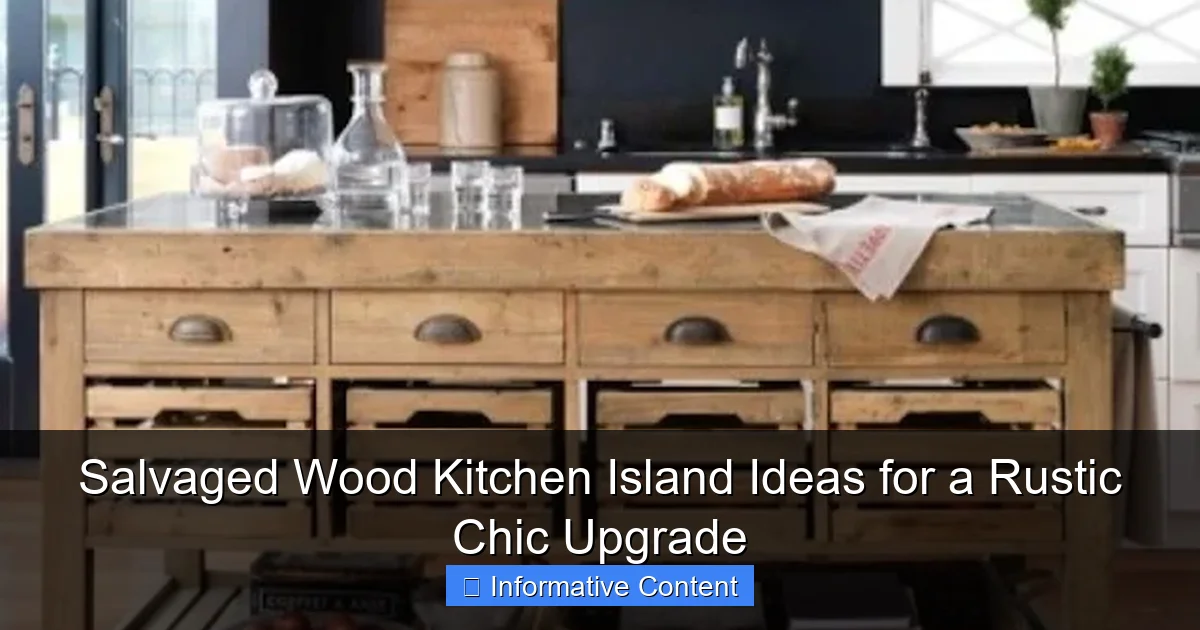
Featured image for salvaged wood kitchen island
Image source: images.squarespace-cdn.com
Transform your kitchen with a salvaged wood kitchen island that blends sustainability and rustic charm for a truly unique focal point. Each piece tells a story, offering rich textures, weathered character, and eco-friendly appeal that new materials simply can’t match—perfect for achieving a chic, farmhouse-inspired upgrade.
Key Takeaways
- Source responsibly: Use reclaimed wood from barns, pallets, or demolition sites for authenticity.
- Prioritize prep: Sand and seal salvaged wood to ensure durability and food-safe surfaces.
- Mix materials: Pair salvaged wood with metal or stone for balanced rustic chic style.
- Customize storage: Design open shelves or built-in racks to highlight wood’s natural charm.
- Highlight imperfections: Embrace knots and wear to amplify the island’s vintage character.
- Light strategically: Add pendant lights to accentuate the wood’s texture and warmth.
📑 Table of Contents
- Why a Salvaged Wood Kitchen Island Could Be Your Kitchen’s Best Upgrade
- The Allure of Salvaged Wood: Beauty with a Backstory
- Choosing the Right Salvaged Wood: What to Look For
- Design Ideas: How to Style Your Salvaged Wood Kitchen Island
- Finishing and Sealing: Protecting Your Investment
- Real-World Examples and Cost Considerations
- Final Thoughts: Is a Salvaged Wood Kitchen Island Right for You?
Why a Salvaged Wood Kitchen Island Could Be Your Kitchen’s Best Upgrade
Imagine walking into your kitchen and being greeted by a warm, inviting centerpiece that tells a story. That’s the magic of a salvaged wood kitchen island. Whether it’s a weathered barn beam, a reclaimed factory floor, or an old wine barrel stave, each piece of salvaged wood carries history, character, and soul. These aren’t just islands—they’re conversation starters. And if you’re looking to give your kitchen a rustic chic upgrade, this might be the perfect project.
I first fell in love with salvaged wood after visiting a friend’s farmhouse-style kitchen. Their island was built from 150-year-old oak beams pulled from a dismantled barn in Pennsylvania. The grain was deep, the color rich with time, and the slight imperfections? They weren’t flaws—they were features. That moment sparked a journey into the world of reclaimed materials, and I’ve never looked back. If you’re drawn to warmth, sustainability, and unique design, a salvaged wood kitchen island could be the heart your kitchen deserves.
The Allure of Salvaged Wood: Beauty with a Backstory
There’s something deeply satisfying about using materials that have already lived a full life. Salvaged wood isn’t just about aesthetics—it’s about honoring the past while creating something new. Unlike new lumber, which often looks uniform and “perfect,” reclaimed wood has character. It’s been shaped by decades of sun, rain, use, and even wear from tools or animals. And that history shows.
Visual guide about salvaged wood kitchen island
Image source: victoriaelizabethbarnes.com
Natural Character and Unique Features
One of the biggest draws of salvaged wood is its inherent uniqueness. No two pieces are the same. You might find:
- Knots, checks, and nail holes that add texture and authenticity
- Deep grain patterns from slow-growing trees in old-growth forests
- Natural patina—a soft, mellow tone that comes from years of exposure
- Tool marks or saw kerfs that hint at how the wood was originally processed
<
For example, I once used a salvaged pine floorboard from a 1920s schoolhouse. It had tiny pencil etchings from children and a few old carpet tack holes. Instead of sanding them away, I left them. They became part of the island’s story—and guests always asked about them.
Environmental Benefits: Good for Your Home and the Planet
Using salvaged wood is one of the most sustainable choices you can make in a kitchen remodel. Here’s why:
- Reduces deforestation—no new trees are cut down
- Minimizes waste—old buildings, barns, and factories often get demolished, and the wood ends up in landfills
- Lowers carbon footprint—no energy is used to grow, harvest, or mill new lumber
According to the Reclaimed Wood Council, using reclaimed wood can reduce a project’s embodied carbon by up to 70% compared to new materials. That’s a win for your conscience and the planet.
The Rustic Chic Aesthetic: More Than Just “Farmhouse”
“Rustic chic” isn’t just a trend—it’s a design philosophy. It blends the raw, unrefined beauty of natural materials with clean lines, modern functionality, and a touch of elegance. A salvaged wood kitchen island fits right in. It can:
- Anchor a modern farmhouse kitchen with warmth and contrast
- Add depth to a minimalist space without feeling sterile
- Bring soul to a Scandinavian design with its natural textures
- Elevate a coastal cottage with a weathered, driftwood-like finish
The key is balance. Pair your island with sleek countertops (like quartz or concrete), modern hardware, and soft lighting to keep it from feeling too “barn-like.”
Choosing the Right Salvaged Wood: What to Look For
Not all salvaged wood is created equal. Some types are better suited for kitchen islands than others. Here’s how to pick the right material—and avoid costly mistakes.
Wood Species: Strength and Durability Matter
Your island needs to withstand daily use: spills, heat, scratches, and heavy appliances. Not every reclaimed wood is up to the task. Here are the best options:
- Oak (white or red): Extremely durable, with tight grain that resists moisture. Great for countertops and base structures.
- Maple: Hard, dense, and smooth—ideal for surfaces that get a lot of wear.
- Douglas Fir: Strong and stable, often used in old barns and warehouses. Has a beautiful golden hue.
- Pine (especially old-growth): Softer than oak but rich in character. Best for decorative elements or lower-traffic areas.
- Heart Pine: A premium choice—dense, stable, and stunning. Often reclaimed from old textile mills.
Avoid using softwoods like spruce or cedar for the main surface unless you plan to seal them heavily. They dent easily and don’t hold up well to kitchen wear.
Source Matters: Where to Find Quality Reclaimed Wood
You can’t just grab any old wood and call it “salvaged.” The best pieces come from trusted sources. Here are a few reliable options:
- Salvage yards and architectural reclaimers: These specialize in deconstructing old buildings. They often clean, mill, and grade the wood. Examples: Urban Lumber Co., Salvage Works, or local barn demolishers.
- Online marketplaces: Websites like Etsy, Facebook Marketplace, or eBay often have reclaimed wood sellers. Always ask for photos and provenance.
- Local demolition crews: Some contractors save usable wood. Call around and offer to haul it away for free—they’ll often let you take it.
- Reclaimed wood suppliers: Companies like TerraMai or Reclaimed Space offer pre-milled, ready-to-use planks.
Pro tip: Always inspect the wood in person if possible. Look for signs of rot, insect damage, or chemical treatment (like creosote in railroad ties).
Condition and Prep: What Needs to Be Done Before Use
Salvaged wood isn’t ready to use right out of the barn. It needs prep work to ensure it’s safe, stable, and long-lasting.
- Remove nails, staples, and debris—use a metal detector and pliers. Old nails can damage your tools and create safety hazards.
- Clean thoroughly—use a pressure washer (outside) or a vinegar-and-water mix for indoor cleaning. Avoid harsh chemicals.
- Check for pests—look for exit holes or sawdust. If you’re unsure, have it heat-treated or fumigated.
- Dry and stabilize—if the wood is damp, let it acclimate in a dry, ventilated space for 2–4 weeks. This prevents warping later.
- Mill to size—use a planer, jointer, or table saw to create flat, even surfaces. This step is crucial for a smooth countertop.
I once skipped the drying step and ended up with a warped island top six months later. Lesson learned: patience pays off.
Design Ideas: How to Style Your Salvaged Wood Kitchen Island
Now that you’ve got your wood, it’s time to design. A salvaged wood kitchen island can be as simple or elaborate as you want. Here are some inspiring ideas—with practical tips to help you execute them.
Classic Farmhouse with Modern Touches
Think white shaker cabinets, a farmhouse sink, and a reclaimed oak island. But to keep it from feeling outdated, add:
- Black metal barstools for contrast
- Matte black hardware on the island drawers and doors
- Quartz or concrete countertop on the island (leave the wood for the base or sides)
- Open shelving with iron brackets to display ceramics or cookbooks
One of my favorite projects used a 12-foot reclaimed fir beam as the island top. We paired it with a waterfall edge in white quartz and black steel legs. The result? Rustic warmth with industrial edge.
Live-Edge Slab for a Statement Piece
If you want your island to be a true showstopper, consider a live-edge slab. These are large, uncut pieces of wood with the natural bark edge preserved. They’re dramatic, organic, and full of personality.
- Choose a thick, stable slab (at least 2” thick) to prevent warping
- Seal the live edge with epoxy to protect it from moisture and chipping
- Use metal hairpin legs or a steel base for a modern contrast
- Keep the rest of the kitchen simple—let the island be the star
Just remember: live-edge slabs are heavy. Make sure your floor can support the weight, and use a professional installer if needed.
Mixed Materials: Wood Meets Metal, Stone, or Tile
Don’t feel like you have to use salvaged wood for the entire island. Mixing materials creates visual interest and functionality.
- Wood base with a stone countertop: Great for durability and heat resistance. Try a reclaimed pine base with a honed black granite top.
- Wood and metal combo: Use salvaged wood for the top and a blackened steel base. The contrast is striking.
- Wood with a tile inlay: Create a custom backsplash or cutting board area using ceramic or encaustic tiles.
A client once wanted an island that could double as a baking station. We used salvaged heart pine for the base and added a removable marble slab for rolling dough. The marble stayed cool and was easy to clean—perfect for pastry work.
Built-In Features for Functionality
Your island shouldn’t just look good—it should work for you. Consider adding:
- Drawers or cabinets for storage (use soft-close hardware)
- Pull-out trash or recycling bins to keep the space tidy
- Open wine rack or spice shelves for easy access
- Integrated electrical outlets for blenders, mixers, or charging
- Drop-down leaf or extension for extra prep space or seating
One clever design I saw used salvaged barn wood for the island base but added a hidden drawer with a built-in knife block and cutting board. It was rustic on the outside, genius on the inside.
Finishing and Sealing: Protecting Your Investment
Salvaged wood is beautiful, but it’s also porous. Without proper sealing, it can absorb spills, stain easily, and harbor bacteria. Here’s how to protect your island and keep it looking great for years.
Choosing the Right Finish
The finish you choose will affect the look, feel, and maintenance of your island. Here are the most popular options:
- Food-safe mineral oil: Great for cutting boards or food prep areas. Needs reapplication every 3–6 months. Gives a natural, matte look.
- Tung oil: Water-resistant, food-safe, and enhances grain. More durable than mineral oil. Apply 3–5 coats for best results.
- Hardwax oil (e.g., Rubio Monocoat): Combines oil and wax for durability and ease of maintenance. Available in tinted versions for added color.
- Polyurethane (water-based): Highly durable and easy to clean. Best for high-traffic areas. Can give a slight sheen—choose matte if you prefer a natural look.
- Epoxy resin: Used for live-edge slabs or full countertops. Creates a glass-like, waterproof surface. More expensive and labor-intensive.
For most kitchen islands, I recommend tung oil or hardwax oil for the wood portions and polyurethane or epoxy for the countertop surface.
Sealing Tips for Longevity
No matter which finish you choose, follow these steps:
- Sand thoroughly—start with 80-grit, then 120, then 220. Wipe with a tack cloth between grits.
- Apply thin, even coats—don’t flood the wood. Let each coat dry completely.
- Sand lightly between coats (except with epoxy) to remove dust nibs.
- Let cure fully—tung oil and hardwax oil take 7–14 days to fully harden. Avoid heavy use during this time.
- Maintain regularly—wipe spills immediately, use cutting boards, and reapply oil every 6–12 months.
One mistake I see often? People seal the wood but forget the underside. Moisture can rise from the floor and cause warping. Always seal all six sides of any wood component.
Real-World Examples and Cost Considerations
Let’s talk numbers and real-life projects. How much does a salvaged wood kitchen island actually cost? And what can you expect from different approaches?
Cost Breakdown: DIY vs. Hiring a Pro
Here’s a realistic look at costs for a 6-foot island (approx. 36” x 72”):
| Component | DIY Cost (approx.) | Professional Cost (approx.) |
|---|---|---|
| Reclaimed wood (oak, 1.5” thick) | $300–$600 | $400–$800 (including prep) |
| Base structure (steel, wood, or MDF) | $100–$200 | $300–$500 (custom fabrication) |
| Countertop (quartz, granite, or epoxy) | $400–$1,000 | $800–$2,000 (including install) |
| Hardware (drawers, pulls, legs) | $100–$250 | $200–$400 |
| Finishes and sealants | $50–$100 | $100–$200 (labor + materials) |
| Labor (if hiring) | $0 | $1,500–$3,000 |
| Total | $950–$2,150 | $3,300–$6,900 |
DIY can save you thousands, but it requires time, tools, and skill. If you’re not confident in your carpentry abilities, hiring a pro ensures safety, durability, and a polished result.
Real Projects: What Worked (and What Didn’t)
- Project 1: The Barn Beam Island
A couple in Vermont used a 150-year-old white oak beam for their island top. They paired it with a black steel base and white quartz. The wood was sanded and sealed with Rubio Monocoat. Result: Stunning, durable, and a favorite spot for family meals. Lesson: Don’t rush the sealing process. - Project 2: The Live-Edge Slab
A live-edge walnut slab was used as a 7-foot island top. The client loved the look but underestimated the weight. The floor needed reinforcement. Result: Beautiful but costly. Lesson: Always check structural load capacity. - Project 3: The Mixed-Material Island
Salvaged pine base with a concrete countertop and brass inlay. The pine was sealed with tung oil. Result: Rustic yet modern. Lesson: Mixing materials adds depth—but keep the color palette cohesive.
Final Thoughts: Is a Salvaged Wood Kitchen Island Right for You?
At the end of the day, a salvaged wood kitchen island is more than a design choice—it’s a commitment to sustainability, storytelling, and craftsmanship. It’s not the easiest route, and it might cost more than a mass-produced island from a big-box store. But the payoff? A kitchen that feels alive, personal, and full of character.
You’ll need to invest time in sourcing, prep, and sealing. You’ll need to balance rustic charm with modern functionality. But when you see that island in your kitchen—its grain catching the light, its history whispering through the grain—you’ll know it was worth it. Whether you’re drawn to the environmental benefits, the aesthetic warmth, or the thrill of creating something truly one-of-a-kind, a salvaged wood kitchen island is a choice you won’t regret. Just remember: it’s not just wood. It’s legacy, reimagined.
Frequently Asked Questions
What is a salvaged wood kitchen island?
A salvaged wood kitchen island is a unique, eco-friendly centerpiece crafted from reclaimed wood sourced from old barns, factories, or other vintage structures. These islands blend rustic charm with modern functionality, offering a sustainable way to upgrade your kitchen’s aesthetic. The natural imperfections in the wood add character and warmth.
How do I style a salvaged wood kitchen island for a rustic chic look?
Pair your salvaged wood kitchen island with neutral countertops, vintage barstools, and wrought-iron hardware to enhance its rustic appeal. Add greenery, open shelving, and soft lighting to balance the raw texture of the wood while keeping the space inviting and cohesive.
Is salvaged wood durable enough for a kitchen island?
Yes, salvaged wood is often more durable than new lumber due to its age and dense grain structure. Properly sealed and maintained, it can withstand daily kitchen use while developing a beautiful patina over time.
Where can I find authentic salvaged wood for a kitchen island?
Authentic salvaged wood can be sourced from architectural salvage yards, reclaimed lumber suppliers, or online marketplaces specializing in eco-friendly materials. Always verify the wood’s history and condition to ensure quality and sustainability for your project.
Can I DIY a salvaged wood kitchen island, or should I hire a professional?
DIYing a salvaged wood kitchen island is possible if you have basic carpentry skills and tools, but working with reclaimed wood can be challenging due to its irregular shape and density. For complex designs or structural needs, hiring a professional ensures safety and precision.
How do I maintain and clean a salvaged wood kitchen island?
Clean your salvaged wood island with a damp cloth and mild soap, avoiding harsh chemicals. Reapply a food-safe sealant (like beeswax or mineral oil) every 6–12 months to protect the wood and preserve its rustic character.