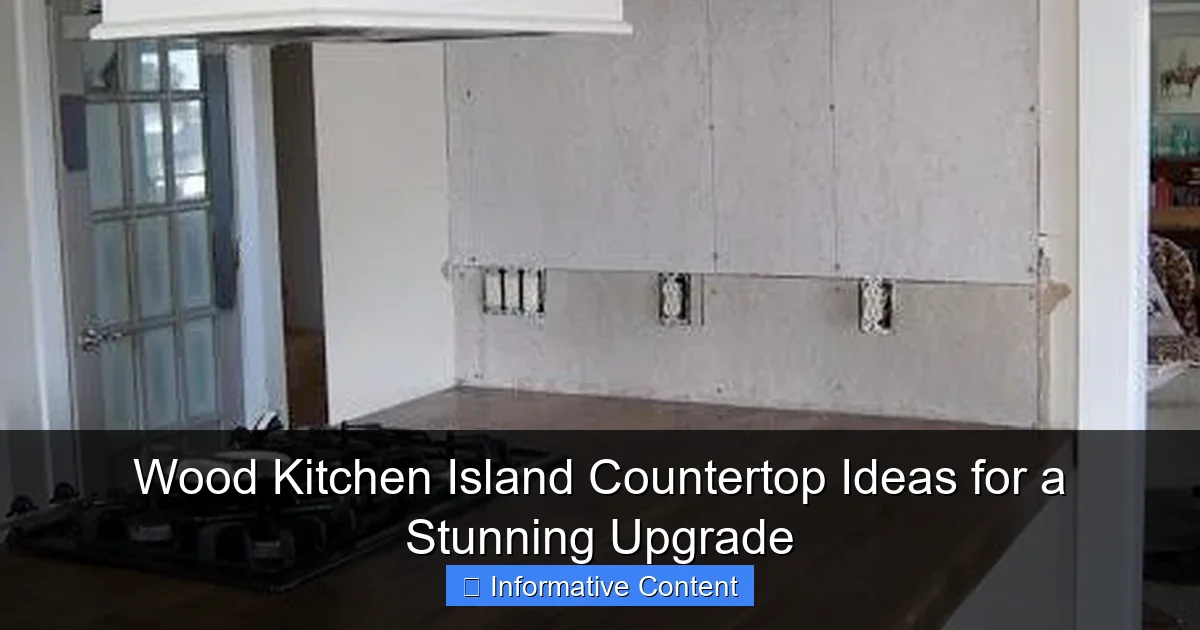
Featured image for wood kitchen island countertop
Image source: littleloveliesbyallison.com
Wood kitchen island countertops offer a timeless, natural elegance that instantly elevates any kitchen’s aesthetic. Available in a range of finishes—from rich walnut to light oak—these countertops combine durability, warmth, and versatility, making them ideal for both modern and rustic designs. Whether you prefer live-edge slabs for organic charm or sleek, sealed hardwoods for low-maintenance luxury, a wood countertop adds unmatched character and value to your space.
Key Takeaways
- Choose durable hardwoods: Opt for oak or maple for long-lasting, scratch-resistant surfaces.
- Seal properly: Apply food-safe sealant to protect against stains and moisture damage.
- Mix textures: Pair wood with stone or metal for a balanced, modern aesthetic.
- Maintain regularly: Clean with mild soap and reapply oil every 3-6 months.
- Consider grain direction: Align wood grain with island shape for visual harmony.
- Use contrasting colors: Dark wood countertops pop against light cabinets, and vice versa.
📑 Table of Contents
- Why a Wood Kitchen Island Countertop Could Be Your Home’s Best Upgrade
- Types of Wood for Kitchen Island Countertops: Matching Beauty with Practicality
- Pros and Cons of Wood Kitchen Island Countertops: The Honest Truth
- Creative Wood Kitchen Island Countertop Ideas for Every Style
- Sealing, Finishing, and Maintenance: How to Protect Your Wood Investment
- Cost and Installation: What to Expect (With Real-World Examples)
- Final Thoughts: Is a Wood Kitchen Island Countertop Right for You?
Why a Wood Kitchen Island Countertop Could Be Your Home’s Best Upgrade
Imagine walking into your kitchen and being greeted by the warm, natural glow of a rich wood island countertop. It’s not just a surface for chopping vegetables or mixing batter—it’s a statement. A wood kitchen island countertop can instantly transform the look and feel of your space, adding warmth, character, and a touch of timeless elegance. Whether you’re remodeling or just looking for a stunning focal point, wood offers a unique blend of beauty and functionality that few other materials can match.
I remember when I first considered swapping my cold, impersonal granite island for a reclaimed wood countertop. At first, I worried about durability and maintenance—would it stain? Would it warp? But after living with it for over a year, I can honestly say it’s one of the best design decisions I’ve made. The grain tells a story. The color deepens over time. And every scratch? It just adds character. If you’re on the fence about wood, let me walk you through the real-world pros, cons, and creative ideas that can help you make an informed, inspired choice for your own kitchen.
Types of Wood for Kitchen Island Countertops: Matching Beauty with Practicality
Not all wood is created equal—especially when it comes to kitchen countertops. The type of wood you choose will impact everything from aesthetics to longevity. Here’s a breakdown of the most popular and practical options, based on grain, hardness, and real-world performance.
Hardwood vs. Softwood: What’s the Real Difference?
Let’s start with the basics. Hardwood (like maple, oak, or walnut) comes from deciduous trees and is generally more durable, making it ideal for high-traffic kitchens. Softwood (like pine or cedar) is more affordable and easier to work with but is more prone to dents and scratches. For a wood kitchen island countertop, I always recommend hardwood—unless you’re going for a rustic, shabby-chic look where imperfections are part of the charm.
- Maple: Light in color, fine-grained, and extremely hard. Resists scratches well and is a favorite among chefs for its smooth cutting surface.
- Walnut: Rich, dark brown with a luxurious feel. Slightly softer than maple but still durable. Perfect for modern or farmhouse kitchens.
- Oak: Available in red and white varieties. Strong, with a prominent grain. White oak is more water-resistant, making it better for kitchens with frequent spills.
- Cherry: Smooth, warm reddish-brown that darkens beautifully over time. Softer than maple or oak, so best for low-impact areas or if you’re okay with a lived-in look.
- Reclaimed Wood: Eco-friendly and full of character. Each piece has history—nail holes, saw marks, weathering. Ideal for rustic, industrial, or eclectic kitchens.
Engineered Wood and Butcher Block: The Practical Alternatives
While solid wood is beautiful, engineered options like butcher block countertops offer a smart compromise. These are made from multiple layers of wood glued together in alternating grain directions, which makes them more stable and less likely to warp or crack. They’re also easier to install and often more affordable than solid slabs.
Butcher block is especially popular for islands because it’s thick, sturdy, and can be sanded down and refinished multiple times. I’ve seen families use the same butcher block island for over 15 years—refinishing it every few years to keep it looking fresh. One tip: always seal it properly (more on that later) and avoid letting water pool on the surface, especially at the seams.
Exotic Woods: Beauty with a Caution Sign
Woods like teak, wenge, or zebrawood bring bold, dramatic looks. Teak, for example, is naturally water-resistant and has a golden hue that ages to a silvery gray if left unsealed. But here’s the catch: exotic woods are often more expensive, harder to source, and may require special maintenance. Also, some species are endangered or harvested unsustainably.
If you love the idea of exotic wood, consider using it as an accent—like a small prep zone or a waterfall edge on your island—rather than the entire surface. That way, you get the visual impact without the high cost or environmental guilt.
Pros and Cons of Wood Kitchen Island Countertops: The Honest Truth
Before you fall in love with a beautiful walnut island, it’s important to understand what you’re signing up for. Wood is warm and inviting, but it’s not bulletproof. Let’s break down the real advantages and challenges based on years of homeowner feedback and my own experience.
The Pros: Why So Many Homeowners Swear by Wood
- Warmth and Aesthetics: Wood brings a natural, cozy feel that stone or laminate just can’t replicate. It softens modern kitchens and enhances farmhouse or rustic styles.
- Customizable: You can stain, seal, or paint wood to match any kitchen palette. Want a dark espresso island with light cabinets? No problem. Prefer a light, Scandinavian vibe? Go for maple or birch.
- Repairable: Unlike stone, which can crack irreparably, wood can be sanded and refinished. A deep scratch? Light sanding and resealing can fix it.
- Eco-Friendly Options: Reclaimed wood, FSC-certified hardwoods, and sustainably harvested timber make wood a greener choice than many alternatives.
- Functional for Prep Work: A smooth wood surface is gentler on knives than granite or quartz. It’s also quieter when you’re chopping or rolling dough.
The Cons: What You Need to Know Before Installing
- Susceptible to Water Damage: Wood expands and contracts with moisture. If not sealed properly, it can warp, crack, or develop mold. Never leave spills to sit overnight.
- Scratches and Dents: Even hardwoods like maple can dent under heavy impact (think: dropping a cast-iron pan). Knife marks are inevitable—some love this patina; others don’t.
- Maintenance Required: You’ll need to reseal your wood countertop every 6–12 months, depending on use and the type of finish. Oiling (with food-safe mineral oil or tung oil) is also common.
- Not Heat-Resistant: Wood can scorch from hot pots or pans. Always use trivets or hot pads.
- Higher Initial Cost for Premium Woods: Solid walnut or teak can cost $100–$200 per square foot, which is more than many stone options.
Here’s a personal tip: I use a “no bare metal” rule on my island. No knives left out, no metal bowls dragged across the surface. It’s a small habit that’s saved my countertop from unnecessary wear. Also, I keep a bottle of food-safe oil and a clean rag handy—a quick wipe every few weeks keeps the wood hydrated and looking rich.
Creative Wood Kitchen Island Countertop Ideas for Every Style
Now for the fun part—design inspiration! A wood island isn’t just a functional surface; it’s a canvas for creativity. Whether you love minimalist modern, cozy farmhouse, or bold industrial, there’s a wood island idea that fits your vision.
1. The Rustic Reclaimed Wood Island
This style is all about character. Think barn wood with knots, nail holes, and weathered finishes. Pair it with black metal legs or a steel base for an industrial twist. I once saw a kitchen where the island was made from 100-year-old oak beams—each plank had a unique story. The homeowner left the saw marks visible and sealed it with a matte finish to preserve the texture.
Pro tip: Use a wire brush to enhance the grain before sealing. It gives the wood a more authentic, hand-crafted look.
2. The Two-Tone Wood and Stone Combo
Can’t choose between wood and stone? Why not both? A popular trend is using wood for the main island surface and pairing it with a stone (like quartz or marble) for the sink or cooktop area. This gives you the warmth of wood with the durability of stone where it’s needed most.
For example: a walnut island with a quartz overhang on one side for bar seating. The wood handles food prep, while the quartz stands up to spills and heat. It’s a win-win.
3. The Live-Edge Wood Island
Live-edge slabs—where the natural bark and curve of the tree are preserved—create a dramatic, organic centerpiece. These are perfect for large islands or waterfall designs. I’ve seen live-edge maple islands in modern kitchens that look like they belong in a luxury lodge.
Note: Live-edge wood is more expensive and harder to seal evenly. Work with a skilled installer to ensure the bark is properly stabilized.
4. The Painted Wood Island
Love color? Paint your wood island! A navy blue, sage green, or even black-painted island can become the focal point of your kitchen. Use a high-quality, water-resistant paint (like chalk paint sealed with polycrylic) and sand between coats for a smooth finish.
One couple I know painted their island in a deep teal and paired it with brass hardware and white cabinets. The result? A vibrant, inviting space that feels both modern and cozy.
5. The Butcher Block with Integrated Prep Features
Take your wood island to the next level with built-in functionality. Add a pull-out cutting board, a built-in knife rack, or even a small spice shelf. Some islands even have a drop-leaf section for extra prep space or casual dining.
I love the idea of a butcher block island with a hidden compartment for a trash bin or compost. It keeps things tidy and maximizes utility.
6. The Floating Wood Island
For a sleek, modern look, consider a “floating” wood island—mounted on hidden brackets or a metal frame so it appears to hover. This design works especially well with light-colored woods like birch or ash. It creates a sense of openness and makes cleaning underneath a breeze.
Tip: Use LED strip lighting underneath to highlight the wood’s grain and add ambiance at night.
Sealing, Finishing, and Maintenance: How to Protect Your Wood Investment
You’ve chosen the perfect wood. Now, how do you keep it looking great for years? The secret is in the finish and the daily care. Here’s what you need to know.
Types of Finishes: Oil, Polyurethane, or Epoxy?
- Mineral Oil or Tung Oil: Food-safe, easy to apply, and gives a natural, matte finish. Requires reapplication every 4–6 weeks. Best for low-traffic prep areas.
- Water-Based Polyurethane: Durable, low odor, and dries quickly. Offers good water resistance and can be reapplied every 1–2 years. A solid choice for busy kitchens.
- Oil-Based Polyurethane: Thicker and more protective than water-based. Develops a warm amber tone over time. Needs longer drying time but lasts longer between coats.
- Epoxy Resin: Creates a glass-like, ultra-durable surface. Waterproof and heat-resistant. Great for high-traffic islands, but can look “plastic-y” if overused. Often used on live-edge slabs.
I personally use a water-based polyurethane on my island. It’s easy to touch up, doesn’t yellow, and gives just enough shine without looking artificial. But if you want a super-smooth, restaurant-style surface, epoxy might be worth the extra effort.
Daily and Long-Term Care Tips
- Wipe spills immediately—especially acidic liquids like lemon juice or vinegar.
- Use cutting boards—don’t chop directly on the wood, even if it’s sealed.
- Clean with mild soap and water—avoid harsh chemicals or abrasive scrubbers.
- Reapply finish as needed—check for dullness or water beading. If water soaks in, it’s time to reseal.
- Sand and refinish every 5–10 years—depending on wear. A light sanding with 220-grit paper followed by a fresh coat can make your island look brand new.
One homeowner told me she keeps a “wood care kit” under the sink: a bottle of oil, a soft cloth, a small sanding sponge, and a reminder calendar. It’s simple, but it works.
Cost and Installation: What to Expect (With Real-World Examples)
Let’s talk money. Wood kitchen island countertops can range from affordable to luxury-level expensive, depending on the wood, size, and installation method. Here’s a realistic breakdown based on current market prices and homeowner experiences.
Material Costs by Wood Type (Per Square Foot)
| Wood Type | Price Range (per sq ft) | Best For | Notes |
|---|---|---|---|
| Maple (Butcher Block) | $30–$60 | Everyday kitchens, DIY | Most affordable hardwood option |
| Walnut (Solid Slab) | $100–$150 | High-end, modern kitchens | Premium look, softer than maple |
| Reclaimed Oak | $80–$120 | Rustic, eco-conscious homes | Unique character, may need extra prep |
| Teak | $120–$200 | Water-prone areas, luxury | Naturally water-resistant, but pricey |
| Exotic (e.g., Zebrawood) | $150–$300+ | Statement pieces, accent zones | Use sparingly; high maintenance |
Installation Tips and Hidden Costs
Installation costs vary, but expect to pay $50–$100 per hour for a professional. DIY is possible with butcher block kits (available at home centers), but solid slabs require more skill. Hidden costs to watch for:
- Sealing and finishing supplies: $50–$150 depending on finish type.
- Support structure: Wood islands need strong cabinetry underneath. Weak bases can lead to sagging or cracking.
- Edge treatments: Rounded, beveled, or waterfall edges add $10–$30 per linear foot.
- Custom features: Built-in sinks, electrical outlets, or lighting increase labor and material costs.
One couple I spoke with spent $4,500 on a 4×6-foot walnut island with a waterfall edge and integrated lighting. It was a splurge, but they said it transformed their entire kitchen and became a daily joy to use.
Final Thoughts: Is a Wood Kitchen Island Countertop Right for You?
At the end of the day, a wood kitchen island countertop is more than just a surface—it’s a lifestyle choice. It says you value warmth, authenticity, and the beauty of natural materials. Yes, it requires care. Yes, it will show wear. But that’s part of its charm. Each scratch, each oil mark, tells the story of meals shared, cookies baked, and conversations held.
If you’re willing to embrace a little maintenance for a lot of character, wood is one of the most rewarding countertop choices you can make. Whether you go for a sleek walnut slab, a rustic reclaimed island, or a cheerful painted butcher block, your kitchen will feel more inviting, more personal, and more alive.
So, take your time. Explore samples. Talk to installers. And when you’re ready—take the leap. Your future self (and your guests) will thank you. After all, the heart of the home deserves a heart of wood.
Frequently Asked Questions
What are the best wood types for a kitchen island countertop?
Hardwoods like maple, walnut, and oak are top choices for wood kitchen island countertops due to their durability and resistance to scratches. For a budget-friendly option, birch or pine work well but may require more maintenance to prevent wear.
How do I maintain a wood kitchen island countertop?
Regularly clean with a damp cloth and mild soap, then apply food-safe mineral oil or beeswax every 3–6 months to prevent drying and cracking. Avoid harsh chemicals and excessive water to preserve the wood’s finish and longevity.
Can a wood countertop handle hot pots and pans?
While wood is heat-resistant, it’s best to use trivets or cutting boards to protect your wood kitchen island countertop from direct heat. Prolonged exposure to high temperatures can cause warping or discoloration over time.
Are wood countertops prone to stains and water damage?
Wood countertops can stain or warp if spills aren’t cleaned promptly, but sealing the wood with a high-quality finish (e.g., polyurethane) minimizes risks. Regular resealing every 1–2 years adds extra protection against moisture and stains.
How do I choose the right wood finish for my kitchen island?
Opt for a matte or satin finish for a natural look, or a gloss finish for easier cleaning and stain resistance. Consider your kitchen’s style—dark stains suit traditional designs, while light or natural finishes complement modern or rustic themes.
Can I install a wood countertop myself, or should I hire a professional?
If you’re experienced with DIY projects and have the tools, installing a pre-fabricated wood kitchen island countertop is doable. However, for custom designs or seamless integration, hiring a professional ensures precise fitting and finishing.