Featured image for diy pallet wood kitchen island
Image source: c.pxhere.com
Transform your kitchen with a stunning, budget-friendly DIY pallet wood kitchen island that’s easy to build and full of rustic charm. Using repurposed pallet wood, this project cuts costs without sacrificing style or functionality—perfect for adding storage, workspace, and character to your home. No advanced skills needed, just basic tools and a few hours to create a custom centerpiece that wows.
Key Takeaways
- Use pallet wood: It’s affordable, sustainable, and perfect for rustic kitchen islands.
- Sand thoroughly: Ensure a smooth, splinter-free surface for safety and aesthetics.
- Reinforce joints: Use wood glue and screws for a sturdy, long-lasting build.
- Add casters: Make your island mobile for flexible kitchen layouts.
- Seal the wood: Protect from moisture and stains with a food-safe finish.
- Customize storage: Include shelves or hooks to maximize utility and space.
📑 Table of Contents
- Why a DIY Pallet Wood Kitchen Island Might Be Your Next Weekend Project
- 1. Why Choose Pallet Wood for Your Kitchen Island?
- 2. Planning Your Pallet Wood Kitchen Island: Design & Measurements
- 3. Building Your Island: Step-by-Step Guide
- 4. Customization Ideas to Make Your Island Unique
- 5. Maintenance & Longevity: Keeping Your Island in Top Shape
- 6. Real Talk: Pros, Cons & Lessons Learned
Why a DIY Pallet Wood Kitchen Island Might Be Your Next Weekend Project
Let’s be honest—kitchen remodels can drain your wallet faster than you can say “granite countertop.” Between labor costs, materials, and design fees, it’s easy to feel stuck with a space that doesn’t quite work for you. That’s where the humble pallet wood kitchen island comes in. I remember standing in my cramped kitchen, staring at my tiny counter space, wondering how to add more prep room without knocking down walls. Then I stumbled on a photo of a rustic, weathered wood island made from reclaimed pallets. It wasn’t just functional—it had character, warmth, and a story. And the best part? It was built for under $200.
Now, I’m not a professional carpenter. I’ve got a decent set of tools, YouTube tutorials on speed dial, and a stubborn belief that I can build anything if I try hard enough. But if I can pull off a DIY pallet wood kitchen island, so can you. This project is perfect for beginners, budget-conscious homeowners, or anyone craving a custom kitchen upgrade without the custom price tag. Whether you need extra storage, more countertop space, or just want to add a cozy farmhouse vibe, this guide will walk you through every step—from sourcing free pallets to sealing your finished masterpiece. And yes, it really can be done in a weekend.
1. Why Choose Pallet Wood for Your Kitchen Island?
The Budget-Friendly Appeal of Reclaimed Pallets
Let’s start with the obvious: cost. A new kitchen island from a home improvement store can easily run $300–$800, and that’s before you add wheels, drawers, or a countertop. Pallets, on the other hand, are often free or nearly free. Many local businesses—hardware stores, grocery stores, or shipping warehouses—will give them away if you ask nicely (or even leave a note on their door). I once scored 10 pallets from a nearby nursery just by offering to pick them up on a Saturday morning.
Visual guide about diy pallet wood kitchen island
Image source: d1n3mvg6awjypi.cloudfront.net
But it’s not just about saving money. Pallet wood is sturdy, typically made from hardwoods like oak or pine, and designed to carry heavy loads. That means your island will be strong enough to hold a microwave, a stack of cookbooks, or even a small dog (don’t ask how I know).
Sustainability and Style in One Package
Beyond the price tag, there’s a deeper satisfaction in using reclaimed wood. Every scratch, nail hole, and weathered groove tells a story. When you build a DIY pallet wood kitchen island, you’re not just creating furniture—you’re recycling, reducing waste, and adding a touch of rustic charm to your home. Plus, the natural imperfections give your island a one-of-a-kind look that no factory-made piece can match.
I’ve seen islands built from pallets that look like they belong in a boutique Airbnb—distressed finishes, live-edge tops, and vintage hardware. But even if you keep it simple, the wood’s character shines through. And if you’re into upcycling, this project lets you repurpose materials that might otherwise end up in a landfill.
Common Concerns (and How to Address Them)
“But isn’t pallet wood dirty or unsafe?” It’s a fair question. Pallets can carry chemicals, pests, or mold, especially if they’ve been used for international shipping. Here’s how to stay safe:
- Look for the HT stamp: This means the wood was heat-treated, not chemically treated. Avoid pallets marked “MB” (methyl bromide).
- Inspect for damage: Avoid pallets with mold, deep stains, or splintered wood. A little weathering is fine; rot is not.
- Clean thoroughly: Use a stiff brush, soapy water, and a vinegar solution to remove dirt and kill any lingering microbes. Let it dry completely before building.
Pro tip: If you’re unsure about a pallet, use it for the base or interior frame, not the countertop. That way, you get the strength without the risk of food contact.
2. Planning Your Pallet Wood Kitchen Island: Design & Measurements
Step 1: Measure Your Space
Before you start dismantling pallets, take a hard look at your kitchen layout. Measure the area where you want the island to go, keeping in mind:
- Clearance: Allow at least 36–42 inches around the island for walking and opening cabinets.
- Height: Standard counter height is 36 inches. If you’re tall, consider a 40-inch “bar height” for extra comfort.
- Depth: 24–30 inches is ideal for prep space. If you’re tight on room, 20 inches still works for a slim island.
I made the mistake of building an island too deep for my galley kitchen. It blocked the fridge door! Now, I always sketch a quick floor plan on graph paper or use a free app like SketchUp Free to visualize the fit.
Step 2: Choose Your Design
Your island’s style depends on your needs and taste. Here are three popular options:
- Simple rectangular base: Great for small kitchens. Use 2–3 pallets stacked and secured with screws. Add a countertop and wheels for mobility.
- Open shelving + drawers: Use one pallet as the frame, then add reclaimed wood shelves and DIY drawer boxes. Perfect for storing pots, pans, or cookbooks.
- Butcher block top + storage: Pair your pallet base with a pre-made butcher block (~$50 at home stores) for a polished look.
For my first island, I went with a simple rectangle (24” deep x 48” long) with open shelves below. It gave me extra counter space and a spot to tuck away my stand mixer. Later, I added a drop-leaf extension for extra prep room during holidays.
Step 3: Gather Your Tools & Materials
Here’s what you’ll need for a basic DIY pallet wood kitchen island:
- Pallets: 3–5 (depending on size)
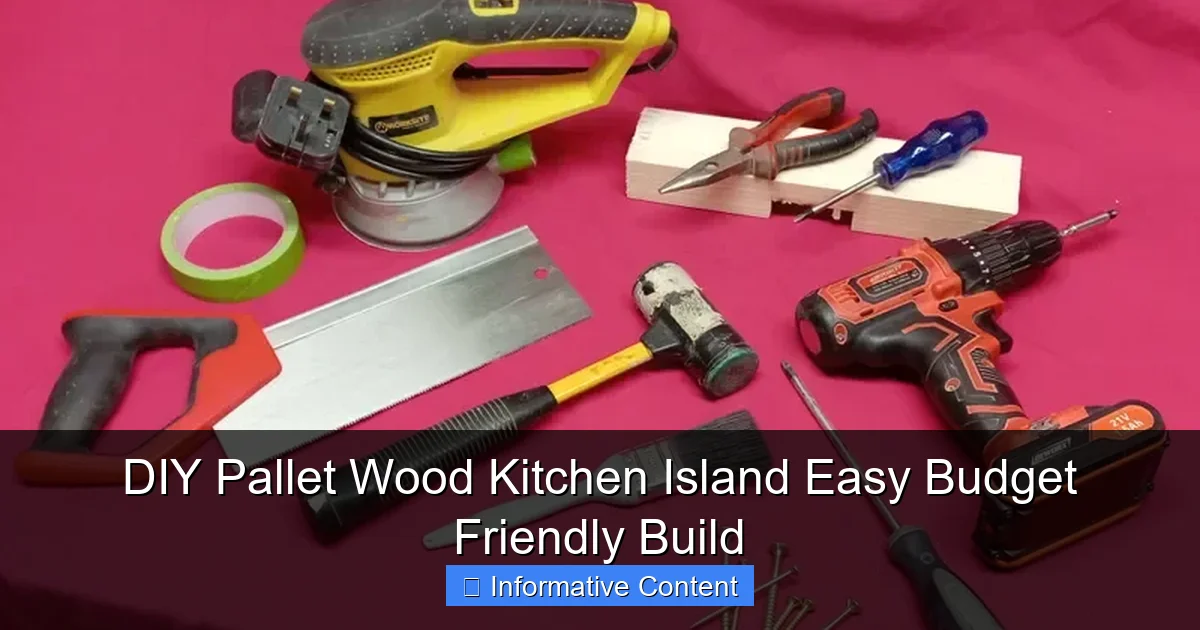
- Tools: Hammer, pry bar, drill, saw (circular or jigsaw), sander (orbital or hand), measuring tape, clamps
- Supplies: 2.5” wood screws, wood glue, sandpaper (80-220 grit), wood filler, casters (wheels, optional), countertop (butcher block, plywood, or more pallets)
- Finish: Food-safe sealant (like mineral oil, beeswax, or polyurethane)
Don’t have a drill? Borrow one from a neighbor or rent from a tool library. And if you’re short on time, pre-cut wood at a home store can save hours of dismantling.
3. Building Your Island: Step-by-Step Guide
Step 1: Dismantle the Pallets
This is the most time-consuming part, but also the most satisfying. Use a pry bar and hammer to remove the deck boards from the stringers (the thick side beams). Work slowly to avoid splitting the wood. I like to place the pallet on a workbench, then tap the pry bar under each board with a hammer. Once loose, wiggle it free.
Pro tip: Save the nails! You can reuse them for other projects or take them to a scrap metal recycler for a few extra bucks.
Step 2: Cut & Sand the Wood
Measure your island’s frame (e.g., 24” x 48”). Use a circular saw or handsaw to cut the pallet boards to size. For a smooth finish, sand each piece with 80-grit sandpaper first (to remove rough spots), then 120-grit, and finally 220-grit. Wipe away dust with a damp cloth.
I learned the hard way that skipping sanding leads to splinters. Now, I sand every board—even the ones that won’t be visible. It’s a small step that makes a big difference in comfort.
Step 3: Assemble the Frame
Build a rectangular base using 2x4s or the thickest pallet stringers. For stability, add cross braces every 16 inches. Secure with 2.5” screws and wood glue. If you’re adding shelves, attach them now using L-brackets or cleats.
For mobility, install casters (wheels) on the bottom. I use locking casters so the island stays put during meal prep. Just make sure they’re rated for at least 100 lbs per wheel.
Step 4: Add the Countertop
You have a few options here:
- Butcher block: Buy a pre-made slab (~$50–$100) and attach with screws from underneath.
- Pallet wood top: Arrange boards side-by-side, leaving 1/8” gaps for expansion. Secure to the frame with screws and glue.
- Plywood + veneer: Use a 3/4” plywood sheet, then cover with thin wood strips for a custom look.
<
I love the pallet wood top for its character, but it requires extra sealing to prevent warping. If you choose this route, seal both sides and edges before assembly.
Step 5: Add Finishing Touches
Fill any gaps or nail holes with wood filler, then sand smooth. For storage, add DIY drawers using reclaimed wood and full-extension slides. Or, install a towel bar or hooks for utensils.
Finally, apply 2–3 coats of food-safe sealant. I use mineral oil and beeswax (3:1 ratio) for a natural, non-toxic finish. For a glossier look, try water-based polyurethane.
4. Customization Ideas to Make Your Island Unique
Storage Hacks for Small Kitchens
Maximize every inch with smart storage:
- Pull-out spice rack: Attach a narrow drawer to the side for easy access.
- Magnetic knife strip: Glue magnets to the underside of the countertop for a sleek look.
- Hanging baskets: Add wire baskets under the counter for onions, garlic, or fruit.
My favorite? A drop-leaf extension. I used a piano hinge to attach a 12” board to the end, then added a fold-down leg. It’s perfect for extra seating or prep space when needed.
Styling Your Island for Visual Impact
Your island isn’t just functional—it’s a design feature. Try these ideas:
- Paint the base: A crisp white or navy base makes the wood top pop.
- Stain the wood: Use a gray or whitewash stain for a modern farmhouse vibe.
- Add lighting: Install under-cabinet LED strips for ambiance and task lighting.
I painted my island’s base a soft sage green and added vintage brass pulls. It ties in with my kitchen’s cottagecore aesthetic and gets compliments every time someone visits.
Mobility vs. Stability: Choosing the Right Casters
Wheels are great for rearranging, but not all casters are created equal. Here’s a quick guide:
| Caster Type | Best For | Weight Capacity | Price |
|---|---|---|---|
| Locking swivel | Frequent moving | 150–200 lbs | $15–$30/set |
| Fixed (non-swivel) | Permanent placement | 100–150 lbs | $10–$20/set |
| Furniture glides | Hardwood floors | 50–100 lbs | $5–$15/set |
For my island, I chose locking swivel casters with rubber wheels. They roll smoothly on my tile floor and lock securely when I need to chop veggies.
5. Maintenance & Longevity: Keeping Your Island in Top Shape
Daily Care for Pallet Wood
Unlike granite or quartz, pallet wood needs a little TLC. Here’s how to keep it looking great:
- Wipe spills immediately: Water can cause warping or staining.
- Use cutting boards: Avoid cutting directly on the wood to prevent scratches.
- Re-seal every 6–12 months: Especially if you use the island for food prep.
I keep a bottle of mineral oil near my sink. A quick wipe after cleaning adds shine and protects the wood.
Fixing Common Issues
Even the best builds have hiccups. Here’s how to troubleshoot:
- Wobbly island: Add corner braces or a diagonal support beam.
- Warped top: Place a heavy object (like a stack of books) on the high spot for 24–48 hours.
- Scratches: Rub with a walnut (seriously!) or use a wood touch-up marker.
My island’s top warped slightly in the humid summer. I fixed it by placing my cast-iron skillet on top overnight—the weight and heat did the trick!
When to Replace vs. Repair
Most issues are fixable, but sometimes it’s better to rebuild. Consider replacing your island if:
- The wood is cracked or rotting
- The frame is rusted or bent
- It no longer fits your kitchen’s needs
Even then, you can reuse the wood for a new project—like a herb garden box or a coffee table.
6. Real Talk: Pros, Cons & Lessons Learned
The Good: Why This Project Works
- Cost: Total cost for my island was $187 (mostly for wheels and sealant).
- Speed: I built it in two weekends, working 2–3 hours each day.
- Customization: It fits my kitchen perfectly and reflects my style.
- Skill-building: I learned basic woodworking skills I use in other projects.
The Not-So-Good: Where It Falls Short
- Time investment: Dismantling pallets takes longer than you think.
- Imperfections: The wood’s character means it’s not “perfect” like store-bought.
- Maintenance: Requires more care than stone or laminate.
Lessons from My First (and Second) Attempt
My first island was a learning experience. I didn’t sand enough, so I got splinters every time I leaned on it. The wheels were too small, so it wobbled. And I sealed it with regular varnish—which turned sticky in the heat.
For round two, I:
- Spent extra time on sanding
- Used larger, locking casters
- Switched to food-safe mineral oil
- Added a diagonal brace for stability
The result? A sturdy, beautiful island I still use daily.
Building a DIY pallet wood kitchen island isn’t about perfection—it’s about creating something that works for you. Whether you’re a beginner or a seasoned DIYer, this project offers a chance to save money, reduce waste, and add a personal touch to your kitchen. So grab those pallets, fire up your drill, and get building. Your dream kitchen island is just a weekend away.
Frequently Asked Questions
How do I build a DIY pallet wood kitchen island on a tight budget?
Start by sourcing free or low-cost pallets from local businesses, then sand and repurpose the wood for the frame and countertop. Use affordable hardware like casters and basic brackets to keep costs under $100 while achieving a rustic look.
Is pallet wood safe to use for a kitchen island?
Yes, but ensure the pallets are stamped “HT” (heat-treated) and not “MB” (methyl bromide) for food-safe use. Always sand thoroughly and seal with food-grade mineral oil or non-toxic sealant to prevent splinters and contamination.
Can I customize my DIY pallet wood kitchen island design?
Absolutely! Add shelves, drawers, or a built-in towel rack using scrap wood from the pallets. The modular nature of pallet wood lets you tailor the island’s size, height, and features to fit your kitchen layout.
How durable is a pallet wood kitchen island for daily use?
When properly assembled with reinforced joints and sealed wood, a pallet wood island can withstand daily wear. Opt for thicker pallet slats (1”+) and add a plywood backing for extra stability.
What tools do I need for this DIY pallet wood kitchen island project?
Basic tools include a hammer, drill, saw, sander, measuring tape, and clamps. A jigsaw helps cut curves, while pocket-hole jigs simplify hidden joinery for a polished finish.
How do I maintain a pallet wood kitchen island to prevent warping?
Reapply sealant every 3-6 months to protect against moisture, and wipe spills immediately. Store in a climate-controlled space to avoid extreme humidity or temperature changes that cause wood to warp.