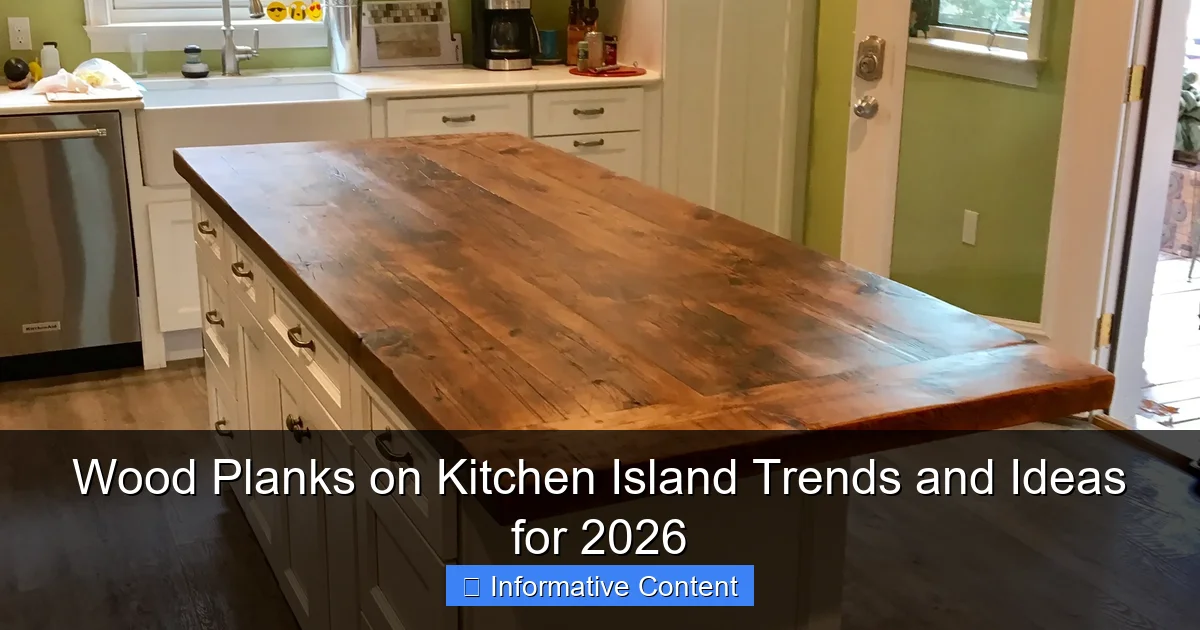
Featured image for wood planks on kitchen island
Image source: images.custommade.com
Wood planks on kitchen islands are emerging as a top design trend in 2026, blending warmth and texture with modern functionality. From reclaimed barn wood to sleek, matte-finished oak, homeowners are embracing natural grain patterns and sustainable materials to create focal points that balance rustic charm with contemporary style. This versatile upgrade offers both visual appeal and long-term durability, making it a smart investment for kitchen remodels.
Key Takeaways
- Choose sustainable wood: Opt for FSC-certified planks to align with 2026 eco-conscious trends.
- Mix textures creatively: Combine wood with stone or metal for striking visual contrast.
- Prioritize durable finishes: Use matte or satin sealants to protect against spills and scratches.
- Embrace warm tones: Select light oak or walnut for timeless, inviting island aesthetics.
- Install vertical planks: Add height and drama with vertical paneling on island sides.
- Pair with smart storage: Integrate hidden compartments for clutter-free wood surfaces.
📑 Table of Contents
- Why Wood Planks on Kitchen Islands Are the Heart of Modern Kitchens
- The Rise of Wood Planks on Kitchen Islands in 2026
- Top Wood Species for Kitchen Islands: Beauty Meets Durability
- Design Ideas: How to Style Wood Planks on Your Kitchen Island
- Installation Tips and Common Pitfalls to Avoid
- Maintenance, Longevity, and Eco-Friendly Considerations
- Real-World Examples and Cost Breakdown
- Final Thoughts: Is a Wood-Plank Island Right for You?
Why Wood Planks on Kitchen Islands Are the Heart of Modern Kitchens
Remember the first time you walked into a kitchen that felt like a cozy cabin, yet sleek and modern at the same time? Chances are, you were standing near a kitchen island with wood planks as its defining feature. There’s something deeply inviting about the warmth and texture of real wood—something that engineered materials just can’t replicate. In 2026, the trend of using wood planks on kitchen islands is evolving beyond rustic farmhouse looks into a sophisticated design statement that blends sustainability, craftsmanship, and timeless appeal.
From wide-plank oak to charred shou sugi ban finishes, wood is no longer just a flooring material—it’s a centerpiece. Whether you’re renovating your kitchen or building from scratch, integrating wood planks into your island design can elevate the space in ways you might not expect. But with so many options, styles, and maintenance concerns, how do you choose the right one? Let’s dive into the latest trends, practical ideas, and real-world insights to help you make a decision that feels both beautiful and functional for your home.
The Rise of Wood Planks on Kitchen Islands in 2026
Why Wood Is Making a Comeback (And Not Just for Rustic Homes)
Wood has always had a place in kitchens—think butcher block countertops or wooden cabinetry—but in 2026, we’re seeing a shift. Designers and homeowners alike are embracing wood planks on kitchen islands not just for their warmth, but for their ability to bridge modern and traditional aesthetics. It’s no longer about choosing between “farmhouse” and “contemporary.” Instead, wood acts as a unifying element.
Take Sarah and Mark, a couple in Portland who recently redesigned their open-concept kitchen. They wanted a modern feel but didn’t want to lose the cozy vibe of their 1920s bungalow. Their solution? A kitchen island with vertical wood planks in a light ash finish, paired with matte black hardware and quartz countertops. The result? A space that feels both fresh and grounded.
According to a 2025 Houzz kitchen trends report, 68% of kitchen renovations now include some form of natural material on the island, with wood leading the charge. Why? Because people are craving authenticity. In a world of stainless steel and high-gloss finishes, wood brings soul back into the kitchen.
Key Trends Driving the Popularity
- Biophilic design: The desire to bring nature indoors is stronger than ever. Wood planks connect us to the outdoors, reducing stress and improving mood—even while chopping veggies.
- Sustainability focus: Reclaimed wood, FSC-certified lumber, and low-VOC finishes are top priorities. Homeowners want materials that are kind to the planet.
- Mixed material kitchens: Combining wood with metal, stone, or concrete creates visual interest. A wood-clad island with a steel base? Yes, please.
- Textural contrast: Smooth countertops next to rough-hewn planks? That’s depth. It’s the kind of detail that makes a kitchen feel curated, not cookie-cutter.
And let’s not forget social media. Platforms like Instagram and Pinterest are flooded with kitchen island makeovers featuring wood planks—many with captions like “Worth every splint!” or “Finally, a kitchen that feels like *us*.” The emotional connection people have with wood is real.
Top Wood Species for Kitchen Islands: Beauty Meets Durability
Hardwood vs. Softwood: What You Need to Know
Not all wood is created equal. When it comes to wood planks on kitchen islands, durability is key—especially if you use your island for prep, dining, or entertaining. Let’s break down the most popular species and their pros and cons.
- White Oak: A top pick in 2026. It’s dense, water-resistant, and has a beautiful grain that ranges from subtle to bold. It ages gracefully and works well with both light and dark stains.
- Black Walnut: Luxurious and rich in color, walnut has a deep brown tone with purple undertones. It’s softer than oak, so it’s best for decorative cladding rather than heavy-duty prep surfaces.
- Maple: Extremely hard and durable, maple is ideal for islands with built-in cutting surfaces. Its light color brightens up dark kitchens, but it can yellow over time with exposure to sunlight.
- Cherry: Known for its warm red tones, cherry wood darkens beautifully with age. It’s softer than oak, so it’s better suited for vertical or horizontal cladding on the island’s sides.
- Reclaimed Barn Wood: A favorite for character. It’s full of history, with nail holes, weathering, and patina. But it’s not the most stable—check for warping and insect damage before installing.
Engineered vs. Solid Wood: Making the Right Choice
Here’s a common dilemma: solid wood feels more authentic, but engineered wood is more stable and often more affordable. Let’s compare.
Solid Wood Planks: These are milled from a single piece of lumber. They offer unmatched beauty and can be refinished multiple times. But they expand and contract with humidity, so they’re not ideal for full island cladding unless properly sealed and acclimated.
Engineered Wood Planks: These have a real wood veneer on top of a plywood or MDF core. They’re more dimensionally stable, less prone to warping, and often pre-finished. Great for full wrap-around island designs or in climates with high humidity.
For example, Jamie in Austin chose engineered walnut planks for her island because she lives in a hot, humid area. She wanted the look of real wood without the risk of cracking. “It looks just as rich as solid wood,” she says, “and I don’t have to worry about warping every summer.”
Pro tip: If you’re using solid wood, acclimate the planks in your home for at least 72 hours before installation. This reduces the chance of gaps or buckling.
Design Ideas: How to Style Wood Planks on Your Kitchen Island
Vertical vs. Horizontal Plank Orientation
The way you lay the planks can dramatically change the look and feel of your island. Let’s explore the two main styles.
Vertical Planks: These create height and draw the eye upward. They’re perfect for shorter islands or kitchens with low ceilings. A vertical wood-clad island can make a room feel more spacious. Think of it like wearing vertical stripes—they elongate.
Horizontal Planks: These emphasize width and grounding. They work well on large islands and add a modern, linear feel. Horizontal planks also highlight the wood’s grain, especially in species like oak or walnut.
Take the case of a small galley kitchen in Seattle. The homeowner used vertical wood planks on the island to create the illusion of more space. “It’s like magic,” she says. “The kitchen feels taller and more open, even though nothing else changed.”
Bonus idea: Mix orientations! A horizontal base with vertical accent panels on the sides can add visual interest without overwhelming the space.
Color and Finish Options That Work in 2026
Wood doesn’t have to be natural or stained dark. In 2026, we’re seeing bolder, more experimental finishes.
- Whitewashed or Limed Wood: Lightens up dark kitchens and gives a coastal or Scandinavian vibe. Works especially well with white or gray cabinetry.
- Charred Wood (Shou Sugi Ban): This Japanese technique involves burning the wood to create a blackened, textured surface. It’s ultra-durable, low-maintenance, and adds dramatic contrast. Pair it with white quartz or brass hardware for a high-end look.
- Two-Tone Islands: Use one wood species on the front and another on the sides. For example, white oak on the front with walnut inlays. Or combine wood with metal panels for a modern industrial feel.
- Glazed or Tinted Finishes: A light gray or blue tint on ash wood can give it a modern, almost concrete-like appearance while still retaining warmth.
One designer in Chicago created a two-tone island using bleached oak on the top and blackened ash on the sides. The result? A kitchen that feels both airy and dramatic—perfect for a minimalist who still wants warmth.
Pairing Wood with Other Materials
The magic happens when wood meets other textures. Here are some winning combos:
- Wood + Stone: A wood-clad base with a marble or quartzite countertop. The contrast is stunning and timeless.
- Wood + Metal: Think black steel legs with a reclaimed wood wrap. Adds an industrial edge.
- Wood + Concrete: A concrete countertop on a walnut island? Yes. It’s bold, modern, and surprisingly cozy.
- Wood + Tile: Use wood on the sides and tile on the front for a backsplash effect. Great for adding color or pattern.
Remember: balance is key. Don’t overdo it. One or two contrasting materials are usually enough to create interest without clutter.
Installation Tips and Common Pitfalls to Avoid
Prepping Your Island for Wood Plank Installation
Before you start nailing or gluing, there’s prep work to do. Skipping this step can lead to warping, gaps, or even structural issues.
- Check for moisture: Use a moisture meter. Ideal moisture content for indoor wood is 6–9%. Too high? Let it dry. Too low? Humidify the space.
- Sand and level the substrate: Whether it’s plywood, MDF, or metal, the surface must be smooth and flat. Any bumps will show through the wood.
- Use a moisture barrier (if needed): In humid climates, a vapor barrier between the substrate and wood can prevent moisture transfer.
- Plan your layout: Dry-fit the planks first. Consider where seams will fall and how they’ll align with countertops, legs, or overhangs.
Pro tip: Leave a 1/8-inch gap between planks for expansion. Wood moves—don’t fight it. Use a spacer tool to maintain consistency.
Best Installation Methods: Nail, Glue, or Click?
- Face-nailing: Traditional and secure, but leaves visible nail heads. Use finish nails and countersink them, then fill with wood filler. Great for rustic looks.
- Glue-down (construction adhesive): Ideal for engineered wood. Use a high-quality, flexible adhesive like PL Premium. Apply in a zigzag pattern and press firmly.
- Click-lock systems: Available for some engineered planks. Easy to install, no nails or glue. But less secure for heavy-duty use—best for decorative cladding.
- Hidden fasteners: Use a cleat system or biscuit joinery for a clean, seamless look. More labor-intensive, but worth it for a high-end finish.
One homeowner in Denver tried a click-lock system on a solid oak island. “It looked great at first,” she says, “but after a year, a few planks started lifting.” The lesson? Solid wood needs more secure fastening methods.
Common Mistakes (And How to Fix Them)
- Not sealing the wood: Even on the sides, wood needs protection. Use a water-based polyurethane or oil-based sealant. Apply 2–3 coats, sanding between each.
- Ignoring expansion gaps: If you butt planks tightly together, they’ll crack or buckle. Always leave room to move.
- Using the wrong finish for the location: High-traffic areas need durable finishes. Avoid wax or oil on prep surfaces—stick with polyurethane or epoxy.
- Overlooking lighting: Wood absorbs light. Make sure your island has adequate under-cabinet or pendant lighting to prevent it from looking dark or shadowy.
And here’s a real-world fix: A couple in Vermont noticed their wood island was developing a musty smell. Turns out, moisture was trapped behind the planks. They removed the back panel, added ventilation, and resealed everything. Problem solved.
Maintenance, Longevity, and Eco-Friendly Considerations
How to Care for Wood Planks on Your Island
Wood isn’t high-maintenance, but it does need attention. Here’s how to keep it looking great for years.
- Clean weekly: Use a damp microfiber cloth and a wood-safe cleaner (like Method Wood for Good). Avoid vinegar or ammonia—they can strip the finish.
- Wipe spills immediately: Especially water, wine, or citrus. Even sealed wood can absorb liquids if left too long.
- Reapply finish every 2–5 years: Depends on traffic and finish type. Lightly sand and re-coat to restore protection.
- Protect from heat and UV: Use trivets for hot pans. If your island is near a window, consider UV-blocking window film to prevent fading.
One family in San Diego uses a cutting board on their walnut island to protect the wood. “We love the look,” says the mom, “but we’re not reckless. A $20 board saves us from costly repairs.”
Sustainability: Choosing Eco-Conscious Wood
Not all wood is sustainable. Here’s what to look for:
- FSC Certification: Ensures the wood comes from responsibly managed forests.
- Reclaimed wood: Gives old wood a second life. Bonus: it’s often more stable and character-rich.
- Local sourcing: Reduces carbon footprint. Check with regional sawmills or salvage yards.
- Low-VOC finishes: Look for water-based polyurethanes or natural oils like tung or linseed.
A builder in Asheville, NC, sources all his wood from local storm-damaged trees. “We’re not cutting down forests,” he says. “We’re repurposing what nature already gave us.”
How Long Will Your Wood Island Last?
With proper care, a wood-clad island can last 20–30 years—or longer. Solid wood can be refinished multiple times. Engineered wood may need replacement sooner, especially if the veneer wears thin.
But longevity isn’t just about time. It’s about timelessness. Wood ages beautifully. Unlike trends that fade (remember avocado appliances?), wood only gets better with time.
Real-World Examples and Cost Breakdown
Let’s look at three real kitchen island makeovers using wood planks, including materials, labor, and outcomes.
| Project | Wood Species | Finish | Orientation | Cost (Materials + Labor) | Outcome |
|---|---|---|---|---|---|
| Modern Farmhouse (Nashville) | Reclaimed Oak | Natural Oil | Horizontal | $3,200 | Warm, rustic feel; guests love the character |
| Urban Loft (Brooklyn) | Blackened Ash (Shou Sugi Ban) | Matte Sealant | Vertical | $4,100 | Striking contrast; low maintenance; high-end look |
| Coastal Bungalow (Santa Cruz) | Whitewashed Pine | Water-Based Poly | Horizontal | $2,800 | Bright, airy; perfect for light-filled kitchen |
As you can see, costs vary based on wood type, finish, and labor. But even at $4,000, a wood-clad island is a fraction of the cost of a full kitchen remodel—and it can be the focal point that ties everything together.
Final Thoughts: Is a Wood-Plank Island Right for You?
Adding wood planks on kitchen island isn’t just a trend—it’s a design choice rooted in warmth, authenticity, and connection. In 2026, it’s not about choosing between modern and rustic. It’s about creating a kitchen that feels like *you*—a place where meals are made, conversations happen, and memories are built.
Whether you go for the bold drama of shou sugi ban, the timeless elegance of walnut, or the eco-friendly charm of reclaimed oak, wood brings something no other material can: soul. And in a world where kitchens are more than just functional spaces, that matters.
So take your time. Visit showrooms. Touch the wood. Ask questions. Think about how you use your kitchen—do you prep meals daily? Host dinner parties? Let your lifestyle guide your choice. And remember: wood isn’t perfect. It has knots, grain, and movement. But that’s what makes it real. That’s what makes it beautiful.
Your kitchen island isn’t just a piece of furniture. It’s the heart of your home. And with the right wood planks, it can beat a little stronger, a little warmer, and a lot more authentically.
Frequently Asked Questions
What are the best types of wood planks for a kitchen island?
Hardwoods like oak, walnut, and maple are top choices for wood planks on kitchen islands due to their durability, grain patterns, and resistance to wear. For a rustic or modern look, consider reclaimed wood or engineered hardwood for added stability.
How do I maintain wood planks on a kitchen island to prevent damage?
Regularly clean with a damp cloth and mild cleaner, then apply a food-safe sealant (like polyurethane or mineral oil) every 6–12 months to protect against spills and stains. Avoid excessive moisture to prevent warping or discoloration.
Are wood planks on kitchen islands still trendy for 2026?
Yes, wood planks on kitchen islands remain a sought-after trend for 2026, especially with mixed materials (e.g., wood paired with stone or metal). Designers favor organic textures and matte finishes for a modern yet timeless aesthetic.
Can I install DIY wood planks on an existing kitchen island?
Absolutely! Use pre-finished planks or adhesive-backed options for easy installation. Ensure the surface is clean and level, and secure planks with nails or construction adhesive for a seamless, custom look.
How do I match wood planks on my kitchen island to existing cabinetry?
Choose wood planks with a similar undertone (warm or cool) as your cabinets, or opt for a contrasting finish for visual interest. Test samples in your kitchen’s lighting to ensure harmony between materials.
What’s the average cost of adding wood planks to a kitchen island?
Costs vary widely, from $500–$2,000+, depending on wood type (e.g., walnut is pricier than pine) and labor. DIY installations can save money, while custom designs or exotic hardwoods increase the price.