Adding wood trim to a kitchen island in 2026 is the ultimate way to infuse warmth, texture, and timeless style into modern kitchen design. This simple yet impactful upgrade enhances visual appeal by blending natural materials with contemporary finishes, creating a custom, high-end look without a full renovation. From rich walnut to whitewashed oak, wood trim offers versatile design options that elevate both functionality and aesthetic charm.
Key Takeaways
- Choose quality wood: Opt for durable hardwoods like oak or maple for longevity.
- Match existing decor: Select wood tones that complement your kitchen’s color palette.
- Prep surfaces properly: Sand and clean the island before applying trim for better adhesion.
- Use precision tools: Ensure clean cuts with a miter saw or router for seamless edges.
- Seal the wood: Apply a protective finish to guard against moisture and wear.
- Consider DIY or pro: Simple trims are DIY-friendly; complex designs may need a pro.
- Boost resale value: This upgrade enhances aesthetics and can increase home value.
📑 Table of Contents
- Why Adding Wood Trim to Your Kitchen Island is a Timeless Move
- Understanding the Appeal of Wood Trim on Kitchen Islands
- Choosing the Right Wood for Your Island Trim
- Design Ideas and Placement Strategies
- Installation: DIY or Hire a Pro?
- Maintaining and Caring for Your Wood Trim
- Final Thoughts: Is Wood Trim Right for Your Island?
Why Adding Wood Trim to Your Kitchen Island is a Timeless Move
Picture this: you walk into a kitchen that feels warm, inviting, and just a little bit luxurious. The cabinets are sleek, the countertops shine, but there’s something extra—something subtle—that ties it all together. Chances are, you’re noticing a wood trim on the kitchen island. It’s not just a design detail; it’s a statement. In 2026, as homeowners seek to blend modern functionality with natural warmth, wood trim is making a major comeback. And the kitchen island? It’s the perfect canvas.
I remember when I first added wood trim to my own island. I was tired of the cold, sterile look of my all-white kitchen. I wanted texture, depth, and a hint of organic charm. After some trial and error, I settled on a walnut inlay along the base and a matching wood edge on the overhang. The transformation was instant. It felt like the island had finally “grown up.” Now, I get compliments every time someone sits at the breakfast bar. And honestly? It’s one of the most satisfying DIY upgrades I’ve ever done.
Whether you’re building a new island or upgrading an existing one, adding wood trim is a stylish, budget-friendly way to elevate your kitchen’s aesthetic. It’s not just about looks—it’s about creating a space that feels lived-in, personal, and timeless. In this guide, I’ll walk you through everything you need to know to add wood trim to your kitchen island in 2026, from choosing the right wood to installation tips and design inspiration.
Understanding the Appeal of Wood Trim on Kitchen Islands
What Makes Wood Trim So Special?
Let’s be real: kitchens can easily feel cold and impersonal. Stainless steel, quartz, and painted cabinets are great, but they lack soul. That’s where wood trim on kitchen island comes in. Wood brings natural grain, warmth, and visual interest. It softens hard edges and adds a tactile quality that’s hard to replicate with synthetic materials.
Visual guide about adding wood trim to kitchen island
Image source: i.pinimg.com
Think of it like adding a cozy sweater to a minimalist outfit. The base is clean and modern, but the texture and color of the wood add depth and character. It’s a design trick that works in farmhouse, Scandinavian, industrial, and even contemporary kitchens. Plus, wood ages beautifully. Over time, it develops a rich patina that tells the story of your home.
Why 2026 is the Perfect Time for This Upgrade
Design trends are shifting toward biophilic design—bringing the outdoors in. In 2026, we’re seeing a strong preference for natural materials, earthy tones, and organic textures. Wood fits perfectly into this movement. According to a 2025 Houzz kitchen trends report, 68% of homeowners who renovated their kitchens included natural wood elements. Among them, wood trim on kitchen island ranked in the top 3 most popular upgrades.
Another reason? Sustainability. More people are choosing wood from responsibly managed forests or reclaimed sources. When you add wood trim, you’re not just making a design choice—you’re making an eco-conscious one. And with modern finishes and sealants, even softwoods like pine or poplar can stand up to daily kitchen wear.
Real-World Examples That Inspire
- Minimalist Modern: A white island with a thin, dark walnut base trim creates contrast without overwhelming the space. The wood acts as a grounding element.
- Rustic Farmhouse: A chunky oak trim with visible knots and grain adds charm to a reclaimed wood island. The imperfections become features, not flaws.
- Coastal Chic: Light maple or whitewashed pine trim gives a breezy, beachy vibe. Paired with a white quartz countertop, it feels fresh and airy.
- Industrial Edge: A blackened steel island with a walnut inlay on the overhang blends raw and refined. The wood adds warmth to the cold metal.
The key? Let the wood trim complement—not compete with—your existing design. It should feel intentional, not like an afterthought.
Choosing the Right Wood for Your Island Trim
Hardwood vs. Softwood: What’s the Difference?
Before you head to the lumberyard, it’s important to understand the wood options. Hardwoods like oak, maple, walnut, and cherry are denser, more durable, and better for high-traffic areas. They resist dents and scratches better than softwoods. Softwoods like pine, poplar, and cedar are lighter, more affordable, and easier to work with—but they require extra care in a kitchen setting.
For a kitchen island, I generally recommend hardwoods. They’ll last longer and handle spills, kids, and pets better. But if you’re on a tight budget or want a more rustic look, softwoods can work—especially if you seal them properly.
Top Wood Species for Kitchen Island Trim (With Pros & Cons)
| Wood Type | Pros | Cons | Best For |
|---|---|---|---|
| Walnut | Rich, dark color; excellent grain; durable; ages beautifully | Expensive; can look too dark in small kitchens | Modern, contemporary, or transitional styles |
| White Oak | Strong grain; water-resistant; light to medium tone; very durable | Prone to tannin reactions with some adhesives; can be pricey | Farmhouse, Scandinavian, or coastal kitchens |
| Maple | Hard, smooth surface; light color; resists wear; easy to stain | Can look “plastic” if over-stained; prone to yellowing over time | Minimalist or white kitchens |
| Cherry | Warm, reddish tone; ages to a deeper color; smooth finish | Expensive; soft for a hardwood (can dent easily) | Traditional or elegant kitchens |
| Poplar | Affordable; easy to cut; takes paint well | Soft; prone to dents; greenish tint when raw | Budget projects or painted trim |
| Pine | Very affordable; rustic charm; easy to work with | Soft; scratches easily; can warp if not sealed | Farmhouse or DIY rustic builds |
Finish Matters: Stain, Paint, or Natural?
Once you’ve picked your wood, decide how you want to finish it. This is where your personal style comes in.
- Stain: Enhances the natural grain. Use a light stain for subtlety or dark for contrast. Test on a scrap piece first—stain can look different on various woods.
- Paint: Great for a clean, modern look. Poplar or pine work well here. Use a high-quality, water-resistant paint (like Benjamin Moore Advance or Sherwin-Williams Emerald).
- Natural/Sealed: For a raw, organic feel. Use a food-safe, water-resistant sealant like tung oil or polyurethane. Ideal for walnut or white oak.
Pro tip: If you’re matching existing woodwork (like cabinets or floors), take a sample to the store. Many places offer color-matching services for stains.
Design Ideas and Placement Strategies
Where to Add Wood Trim (And Where to Avoid)
Not every inch of your island needs wood trim. Strategic placement is key. Here are the most effective spots:
- Base Trim: A 2-3 inch wood band around the bottom of the island. Hides seams, adds height, and protects from kicks and spills.
- Overhang Edge: A wood lip on the breakfast bar or overhang. Creates a cozy, built-in feel. Perfect for stools.
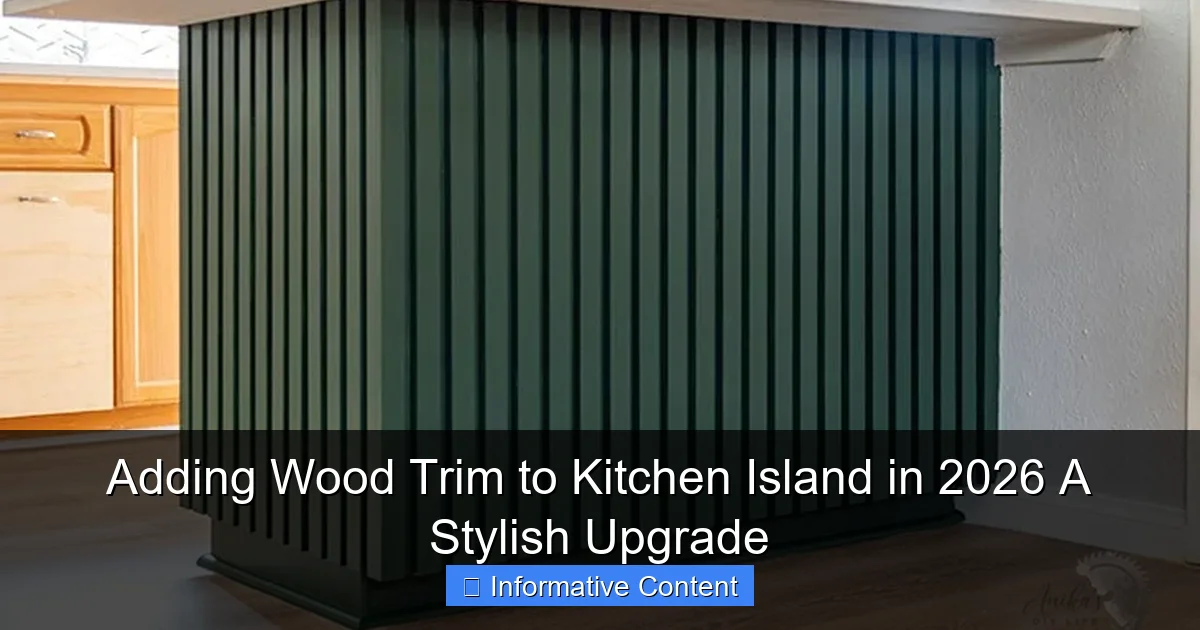
- Vertical Accents: Wood strips between cabinet panels or along the sides. Adds rhythm and breaks up large surfaces.
- Drawer/Door Fronts: Wood veneer or solid wood on island cabinet fronts. Works well in mixed-material designs.
- Back Panel: A wood back panel (if the island is open on one side). Adds warmth to the seating area.
What to avoid? Don’t cover the entire island in wood—unless that’s your full design theme. Too much wood can feel heavy or dated. Also, avoid placing trim where it will collect water (like under a sink or near a dishwasher). Even sealed wood can warp over time.
Mixing Materials: Wood + Stone, Wood + Metal, Wood + Paint
One of the biggest trends in 2026 is material mixing. Wood doesn’t have to stand alone. Pair it with other textures for a dynamic look.
- Wood + Quartz: A white quartz countertop with a walnut base trim feels fresh and grounded. The wood adds warmth to the cool stone.
- Wood + Metal: A black steel island with a light oak overhang edge. The contrast is bold but balanced.
- Wood + Paint: A navy-blue island with a natural wood base. The wood breaks up the color and adds texture.
- Wood + Concrete: A raw concrete countertop with a maple trim. The wood softens the industrial edge.
When mixing materials, keep the color palette cohesive. Use a neutral wood tone (like oak or maple) if you have bold cabinets or countertops. Or go bold with dark wood if the rest of the kitchen is light.
Size and Proportion: Getting the Scale Right
Too thin, and the trim looks like an afterthought. Too thick, and it overwhelms the island. Aim for:
- Base trim: 2–4 inches wide. Thicker for larger islands (over 6 ft).
- Overhang edge: 1–2 inches thick. Should extend slightly beyond the countertop for a “lip.”
- Vertical strips: 1–2 inches wide. Spaced evenly for rhythm.
For visual balance, the wood trim should cover about 10–20% of the island’s visible surface. Use painter’s tape to mock up sizes before cutting.
Installation: DIY or Hire a Pro?
DIY Installation: Step-by-Step Guide
If you’re handy with tools, adding wood trim to kitchen island is a rewarding DIY project. Here’s how I did it:
- Measure and Cut: Measure each side of the island. Use a miter saw for 45-degree corners (base trim) or a table saw for straight cuts (overhang edge). Sand edges smooth.
- Pre-Finish (Optional): Stain or seal the wood before installation. This is easier than trying to finish around the island.
- Attach Base Trim: Use wood glue and finish nails (or brad nails). For a seamless look, miter the corners. Fill nail holes with wood filler, sand smooth.
- Install Overhang Edge: If adding a wood lip, use L-brackets or pocket screws from underneath. Clamp in place while drying.
- Seal and Cure: Apply 2–3 coats of water-resistant sealant. Let cure for 24–48 hours before use.
Tools you’ll need: miter saw, nail gun (or hammer), clamps, wood glue, sandpaper, level, and a caulking gun (for gaps).
When to Call a Professional
DIY is great, but some situations call for a pro:
- Your island has curved edges or complex angles.
- You’re using expensive or exotic wood (like teak or mahogany).
- You’re adding trim to a stone countertop (requires special adhesives and precision).
- You’re not confident with power tools or finishing techniques.
A skilled carpenter or cabinetmaker can ensure a perfect fit and finish. Expect to pay $200–$800 depending on complexity. But the result? Flawless.
Common DIY Mistakes (And How to Avoid Them)
- Not sealing properly: Unsealed wood absorbs spills and stains. Always use a kitchen-grade sealant.
- Using the wrong adhesive: Wood glue + mechanical fasteners (nails/screws) is best. Avoid super glue or construction adhesive alone.
- Ignoring expansion gaps: Wood expands and contracts. Leave a 1/8-inch gap between trim and countertop or wall.
- Rushing the finish: Let each coat of sealant dry fully. Rushing leads to bubbles or peeling.
Maintaining and Caring for Your Wood Trim
Daily and Weekly Cleaning Tips
Wood trim needs gentle care. Avoid harsh chemicals or abrasive scrubbers. Here’s my routine:
- Daily: Wipe with a damp microfiber cloth. Dry immediately.
- Weekly: Use a wood-safe cleaner (like Method Wood for Good or Murphy’s Oil Soap). Spray on a cloth, not directly on wood.
- Spills: Blot immediately. Don’t let liquids sit.
Never use vinegar, bleach, or ammonia on sealed wood. They can damage the finish.
Long-Term Maintenance: Refinishing and Repairs
Over time, wood trim may show wear. Here’s how to refresh it:
- Light scratches: Rub with a walnut or use a touch-up pen.
- Water rings: Buff with a paste of baking soda and water. Rinse and reseal.
- Worn finish: Lightly sand and apply a new coat of sealant every 3–5 years.
- Deep gouges: Fill with wood filler, sand smooth, and refinish.
If the wood is severely damaged, you can replace just the trim—no need to redo the whole island.
Seasonal Care: Humidity and Temperature
Wood reacts to climate. In summer, it expands. In winter, it contracts. To prevent cracks or gaps:
- Use a humidifier in dry winters.
- Keep the kitchen well-ventilated to reduce moisture buildup.
- Check for tightness around seams seasonally. Tighten screws if needed.
A little maintenance goes a long way. With care, your wood trim can last 20+ years.
Final Thoughts: Is Wood Trim Right for Your Island?
Adding wood trim to kitchen island isn’t just a trend—it’s a timeless upgrade. It brings warmth, character, and a touch of nature to one of the busiest spaces in your home. Whether you choose rich walnut, light oak, or painted poplar, the result is a kitchen that feels more inviting, more personal, and more “you.”
It’s not without its challenges. You’ll need to plan carefully, choose the right wood and finish, and maintain it over time. But the effort is worth it. Every time you pull up a stool, set down a coffee mug, or gather with family, that wood trim will be there—quietly grounding the space, adding depth, and telling a story of craftsmanship and care.
In 2026, as we move toward more natural, sustainable, and human-centered design, wood trim is more than a style choice. It’s a return to authenticity. So if you’ve been thinking about upgrading your island, now is the time. Grab your tools, pick your wood, and make your kitchen feel like home—one beautiful trim at a time.
Frequently Asked Questions
What are the benefits of adding wood trim to a kitchen island in 2026?
Adding wood trim to a kitchen island in 2026 enhances warmth, texture, and natural appeal, making it a timeless design choice. It also allows for customization to match existing cabinetry or flooring, creating a cohesive look.
Which wood types work best for kitchen island trim?
Hardwoods like oak, walnut, and maple are ideal for kitchen island trim due to their durability and resistance to wear. For a budget-friendly option, consider engineered wood with a veneer finish.
How do I match wood trim to my existing kitchen style?
Choose a wood species and stain that complements your cabinetry or flooring—opt for light tones for modern kitchens or rich, dark finishes for traditional spaces. Adding wood trim to a kitchen island can bridge design gaps seamlessly.
Can I install wood trim on my kitchen island myself?
Yes, DIY installation is possible if you have basic woodworking skills and tools like a miter saw and adhesive. Pre-finished trim pieces simplify the process and reduce on-site sanding or staining.
Is wood trim a durable option for high-traffic kitchen islands?
When properly sealed with polyurethane or lacquer, wood trim is highly resistant to scratches and moisture, making it durable for busy kitchens. Regular maintenance ensures longevity.
What design trends pair well with wood trim on kitchen islands in 2026?
Pair wood trim with mixed materials like stone countertops, matte black hardware, or two-tone cabinetry for a contemporary look. Adding wood trim to a kitchen island in 2026 aligns with organic, nature-inspired design trends.