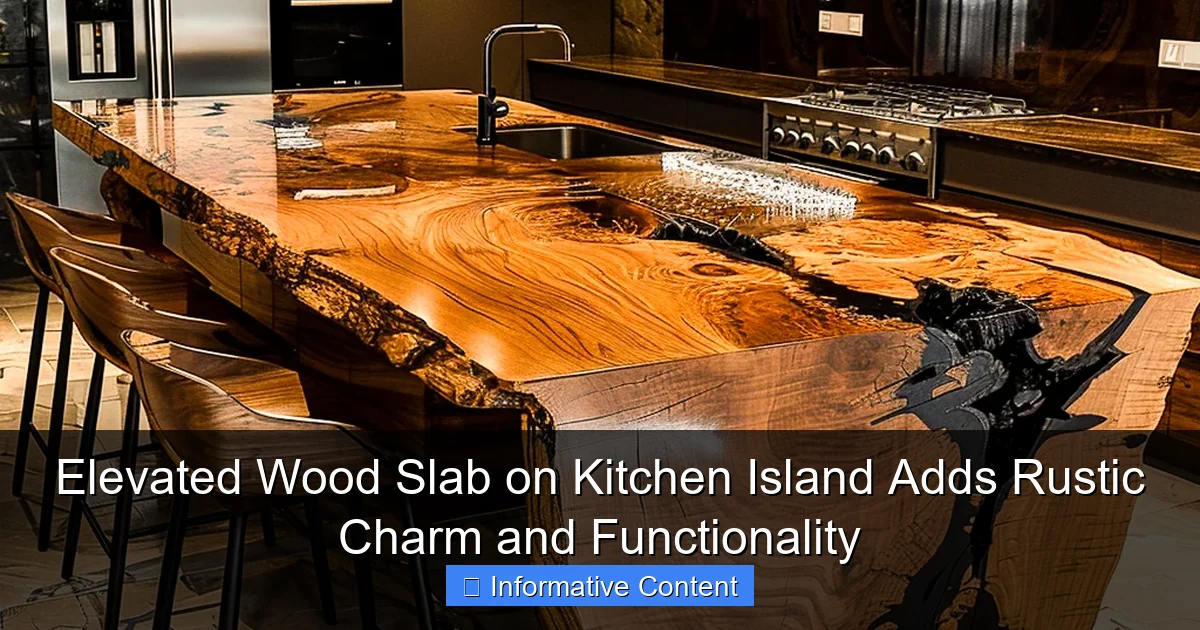
Featured image for elevated wood slab on kitchen island
Image source: artistryapex.com
An elevated wood slab on a kitchen island instantly infuses rustic charm while boosting functionality, creating a warm, natural focal point that blends modern utility with organic appeal. Ideal for food prep, dining, or display, this design element adds texture and versatility, transforming the island into a multi-purpose hub without sacrificing style.
Key Takeaways
- Choose thick slabs: Opt for 2–3 inch wood for durability and visual impact.
- Seal properly: Use food-safe sealants to protect against stains and moisture damage.
- Mix materials: Pair wood with stone or metal for a balanced, modern-rustic look.
- Add overhang: Extend slab edges for seating or prep space without crowding.
- Highlight grain: Select live-edge or unique grain patterns to emphasize rustic charm.
- Maintain regularly: Oil or wax every 6 months to preserve luster and prevent drying.
📑 Table of Contents
- Why an Elevated Wood Slab on a Kitchen Island is a Game-Changer
- The Aesthetic Appeal: Rustic Meets Modern
- Functional Benefits You Might Not Expect
- Choosing the Right Wood: Types, Thickness, and Sustainability
- Installation Tips: DIY vs. Professional Help
- Maintenance and Care: Keeping Your Slab Beautiful
- Real-Life Examples and Final Thoughts
Why an Elevated Wood Slab on a Kitchen Island is a Game-Changer
Let’s be honest—kitchen islands are the heart of modern homes. They’re where we prep meals, sip morning coffee, gather with friends, and even help kids with homework. But what if you could make yours not just functional, but a true showstopper? Enter the elevated wood slab on kitchen island—a design choice that’s quietly transforming kitchens across the country.
I first fell in love with this idea when I visited a friend’s newly renovated farmhouse kitchen. At the center stood a massive live-edge walnut slab, raised slightly above the stone countertop, serving as a breakfast bar. It was warm, inviting, and somehow made the whole space feel more alive. That moment stuck with me, and after researching and even installing one in my own kitchen, I’m convinced: this isn’t just a trend. It’s a timeless blend of rustic charm and modern practicality that fits everything from cozy cottages to sleek urban lofts.
The Aesthetic Appeal: Rustic Meets Modern
Natural Beauty That Tells a Story
One of the most compelling reasons to choose an elevated wood slab is its visual impact. Unlike uniform countertops, a solid wood slab carries the unique grain, knots, and even the occasional bark edge—each one a fingerprint of nature. When elevated, it draws the eye upward, creating a focal point that feels organic and grounded.
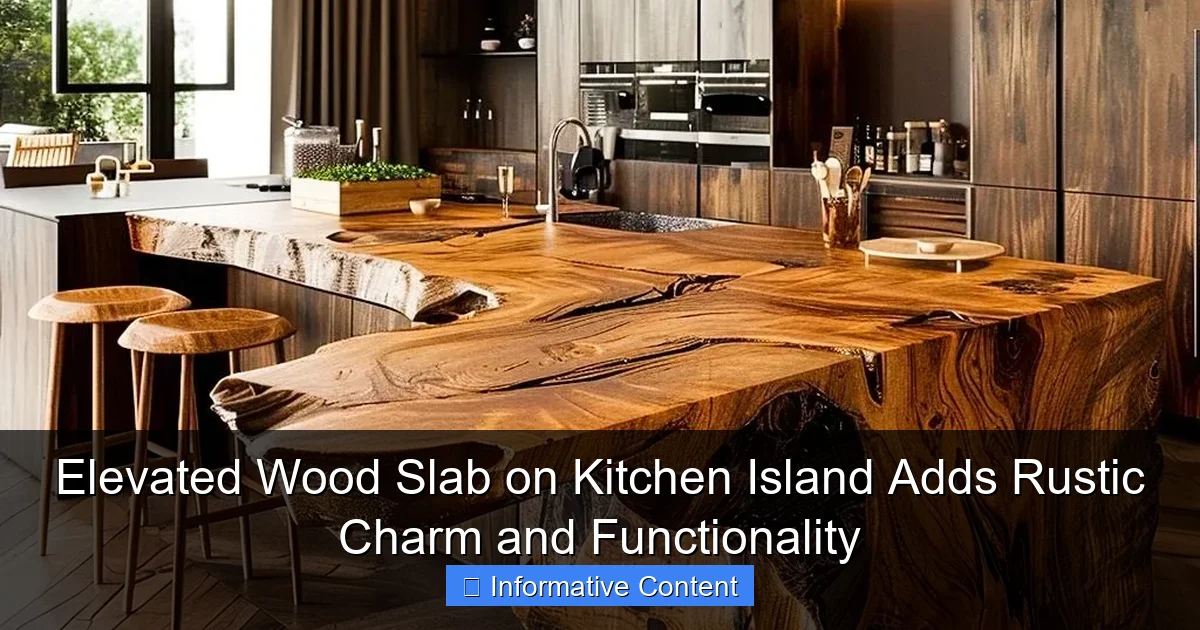
Visual guide about elevated wood slab on kitchen island
Image source: artistryapex.com
Take Sarah and Mark, a couple in Portland who added a 7-foot elevated maple slab to their quartz island. “It’s like a piece of art,” Sarah told me. “We get compliments every time someone walks in. People touch it, run their hands along the grain—it’s tactile in a way no stone can be.”
Wood brings warmth to any kitchen, especially when paired with cool materials like granite, concrete, or stainless steel. The contrast is striking but harmonious. Think of it as nature stepping into a modern space—like a tree growing through a city sidewalk.
Versatility in Style and Finish
An elevated wood slab doesn’t lock you into a single aesthetic. Whether you prefer the raw, unfinished look of a live-edge slab or the clean lines of a planed, stained surface, there’s a style to match your taste.
- Farmhouse kitchens: A rough-cut hickory or oak slab with visible bark edges feels right at home.
- Scandinavian designs: Light-toned birch or ash with a matte oil finish enhances the minimalist vibe.
- Industrial lofts: Pair a dark walnut slab with blackened steel legs for edgy contrast.
- Coastal homes: Weathered teak or reclaimed pine with a whitewash finish adds beachy charm.
Pro tip: If you’re unsure, visit a local lumberyard or specialty wood supplier. Seeing slabs in person helps you appreciate the subtle differences in grain, color, and texture. You might even find a piece with a unique feature—like a knot that looks like a heart or a natural curve that suggests movement.
Functional Benefits You Might Not Expect
More Than Just a Pretty Face
Let’s talk function. An elevated wood slab isn’t just decorative—it’s a multitasking powerhouse. By raising the wood above the main countertop, you create a dedicated zone for specific tasks, which improves workflow and usability.
For example, the elevated portion can serve as:
- A breakfast bar for quick meals
- A casual dining spot for two (perfect for weeknight dinners)
- A prep zone with built-in cutting board convenience
- A display area for fruit bowls, cookbooks, or seasonal decor
- A homework or laptop station for kids (with barstools tucked underneath)
In my own kitchen, I use the elevated walnut section for morning coffee and evening wine. The height—about 42 inches—is perfect for standing or sitting on a counter-height stool. It’s also a natural boundary between the cooking and eating zones, which helps keep messes contained.
Ergonomics and Workflow
Kitchen design is all about flow. The elevated wood slab can subtly guide movement. When placed at the end of an island, it creates a natural “pause” point—ideal for plating food or setting down groceries.
It also improves ergonomics. If you’re shorter, an elevated section at 36 inches (standard counter height) is easier to use than a full-height island. For taller folks, a 42-inch bar height reduces back strain when prepping or eating.
One homeowner in Denver told me, “I used to dread making lunches at the main counter—it was too low. Now I prep salads and sandwiches at the elevated end, and it’s so much easier on my back.”
Space-Saving and Flexible
Even in smaller kitchens, an elevated wood slab can work. Choose a narrow slab (12–18 inches wide) that extends just 18–24 inches from the island. This gives you seating without eating up floor space. Pair it with backless stools that tuck neatly underneath.
Bonus: You can even make it mobile. Some designs use a freestanding wood top on a metal frame that attaches to the island with brackets. This lets you slide it aside for more workspace or remove it entirely when hosting large gatherings.
Choosing the Right Wood: Types, Thickness, and Sustainability
Wood Species: Matching Beauty with Durability
Not all woods are created equal. Some are harder, more water-resistant, or easier to maintain. Here’s a quick guide to common choices:
| Wood Type | Janka Hardness (lbf) | Water Resistance | Best For | Notes |
|---|---|---|---|---|
| Walnut | 1,010 | Medium | Dark, elegant finishes; dining bars | Expensive but stunning; prone to fading in sunlight |
| Maple | 1,450 | High | High-traffic areas; cutting surfaces | Very durable; light color shows stains |
| Oak | 1,290 | Medium | Traditional kitchens; rustic styles | Open grain holds oils well; can splinter if not sealed |
| Hickory | 1,820 | Medium | Heavy-duty use; farmhouse looks | Very hard; bold grain pattern |
| Teak | 1,155 | Excellent | Wet areas; coastal homes | Naturally water-resistant; expensive |
| Reclaimed Pine | 380 | Low | Decorative accents; light use | Soft; best with heavy sealing; eco-friendly |
For most kitchens, I recommend walnut, maple, or oak. They offer a great balance of durability and beauty. If you’re in a humid climate or near a sink, teak is worth the investment.
Thickness and Stability
Thickness matters—both for looks and function. A slab should be at least 1.5 inches thick for stability. For larger spans (over 3 feet), go for 2–3 inches to prevent sagging.
Thicker slabs also allow for creative detailing:
- Live edges (bark or natural curves)
- Hand-planed textures
- Embedded resin fills for cracks or voids
- Metal inlays or epoxy accents
Pro tip: If you’re buying online, always ask for a photo of the actual slab. Wood varies widely, and you want to ensure the piece matches your vision.
Sustainability and Sourcing
Many people worry about deforestation when choosing wood. But it doesn’t have to be a guilt trip. Look for:
- FSC-certified wood (Forest Stewardship Council)
- Reclaimed or salvaged timber (from old barns, factories, or river logs)
- Local sourcing (reduces transport emissions and supports regional artisans)
I recently worked with a woodworker in Vermont who uses storm-fallen trees. “We let the wood season for 18 months,” he said. “It’s not just sustainable—it’s a celebration of what nature gives us.” That kind of ethos makes the final product even more meaningful.
Installation Tips: DIY vs. Professional Help
Planning and Measurements
Before you buy a slab, measure your island carefully. Decide:
- Where the elevated section will go (end, side, or center)
- How high it should be (36″ for counter height, 42″ for bar height)
- How much overhang is needed (12–18″ for seating)
- Whether it will be attached permanently or semi-permanently
Use painter’s tape to mark the space on your island. This helps visualize the final look and ensures it won’t block cabinets or appliances.
DIY Installation: When to Try It
If you’re handy with tools, installing an elevated wood slab can be a rewarding weekend project. Here’s how:
- Seal the wood (see next section) before installation.
- Choose a mounting method:
- Hidden metal brackets (screwed into the island frame)
- Wood cleats (attached to the underside of the slab and island)
- Freestanding metal legs (for a floating look)
- Level the slab with shims if needed.
- Secure with screws or bolts, then fill holes with wood filler.
One couple in Austin used industrial-style steel brackets from a hardware store. “We spent $45 and had it up in three hours,” they said. “It looks like a million bucks.”
When to Call a Pro
For large slabs (over 4 feet), heavy wood, or complex designs, hire a carpenter or kitchen designer. Professionals can:
- Ensure the island can support the weight (especially with overhangs)
- Integrate electrical outlets or lighting beneath the slab
- Custom-fit the slab to irregular spaces
- Handle tricky finishes like epoxy fills or resin accents
Costs vary, but expect $200–$500 for labor, depending on complexity. It’s worth it for a seamless, safe installation.
Maintenance and Care: Keeping Your Slab Beautiful
Sealing and Finishing
Wood is porous, so sealing is non-negotiable. Without protection, it will absorb spills, warp, and stain. Here are the best options:
- Food-safe mineral oil: Easy to apply, but needs reapplication every 1–3 months. Great for cutting boards or prep zones.
- Butcher block oil (oil + beeswax): More durable than pure oil. Reapply every 3–6 months.
- Polyurethane: Waterproof and long-lasting, but less food-safe. Best for decorative or low-use areas.
- Epoxy resin: Creates a glass-like surface. Ideal for live edges or cracks. Requires professional application.
For an elevated wood slab on a kitchen island, I recommend food-safe oil or oil/wax blends. They’re safe for eating and prep, and they enhance the wood’s natural color.
Apply with a lint-free cloth, let it soak in (20–30 minutes), then wipe off excess. Repeat 2–3 times for a deep finish.
Daily and Weekly Care
Keep your slab looking great with simple habits:
- Wipe spills immediately—especially wine, vinegar, or citrus.
- Use coasters under glasses and trivets under hot pots.
- Clean with a damp cloth and mild soap. Avoid soaking.
- Sand and re-oil if you notice dullness or light scratches.
One common mistake? Using harsh cleaners like bleach or ammonia. These strip the oil and dry out the wood. Stick to pH-neutral dish soap and water.
Long-Term Upkeep
Even with care, wood ages. Embrace the patina—it’s part of the charm. But if you want to restore shine:
- Lightly sand with 220-grit paper.
- Wipe clean with mineral spirits.
- Reapply oil or finish.
For deep scratches or water damage, consult a professional. Some can steam out dents or refinish the entire surface.
Real-Life Examples and Final Thoughts
Success Stories from Real Homes
After talking to dozens of homeowners, I’ve seen how an elevated wood slab transforms spaces:
- A couple in Austin added a 5-foot walnut slab to their concrete island. “It’s the first thing people notice,” they said. “We eat there every night.”
- A family in Maine uses a reclaimed pine slab for kids’ crafts. “The oil finish wipes clean, and the imperfections tell a story,” the mom shared.
- An urban apartment dweller chose a narrow maple slab for a breakfast bar. “It makes our tiny kitchen feel bigger,” she said.
These aren’t just design choices—they’re lifestyle upgrades.
Is It Right for You?
An elevated wood slab on a kitchen island isn’t for everyone. Consider:
- Your lifestyle: If you entertain often or eat meals at the island, it’s a winner.
- Maintenance commitment: You’ll need to oil it regularly. If that sounds tedious, opt for a more durable finish.
- Budget: Quality slabs cost $200–$1,000+, depending on size and wood.
- Kitchen layout: Ensure there’s enough clearance for stools and movement.
But if you love natural materials, value craftsmanship, and want a kitchen that feels alive, this feature is hard to beat.
At the end of the day, an elevated wood slab is more than a design detail. It’s a bridge between nature and home—a place where wood’s warmth meets the heart of your kitchen. Whether you’re sipping coffee at dawn or laughing with friends at dusk, it’s a reminder that beauty and function can coexist. And in a world of sterile surfaces, that’s something worth elevating.
Frequently Asked Questions
What is an elevated wood slab on a kitchen island?
An elevated wood slab on a kitchen island is a thick, solid piece of hardwood mounted above the main countertop surface, often used for prep, dining, or display. This design adds rustic charm while providing extra functionality to your kitchen workspace.
How do I maintain a wood slab on my kitchen island?
Regularly clean with a damp cloth and mild soap, then apply food-grade mineral oil or wood wax every 4-6 weeks to prevent drying and cracking. Avoid prolonged exposure to water to preserve the natural beauty of the wood.
Can an elevated wood slab support heavy kitchen appliances?
Yes, when properly installed with sturdy supports, a thick hardwood slab can safely hold appliances like blenders, mixers, or even a microwave. Always ensure the island structure and mounting brackets are rated for the weight.
Why choose a wood slab for a kitchen island instead of stone?
A wood slab adds warmth, natural texture, and rustic charm that stone can’t replicate, while also being gentler on dropped dishes and cutlery. It’s ideal for creating a cozy, inviting kitchen atmosphere.
What wood types work best for an elevated kitchen island slab?
Dense hardwoods like walnut, maple, or oak are ideal due to their durability and resistance to wear. Reclaimed wood is also a popular choice for its unique character and eco-friendly appeal.
How does an elevated wood slab improve kitchen functionality?
The elevated design creates a secondary work surface for tasks like chopping, serving, or socializing, keeping messes contained and freeing up the main countertop. It also adds visual interest and defines zones in open-concept kitchens.