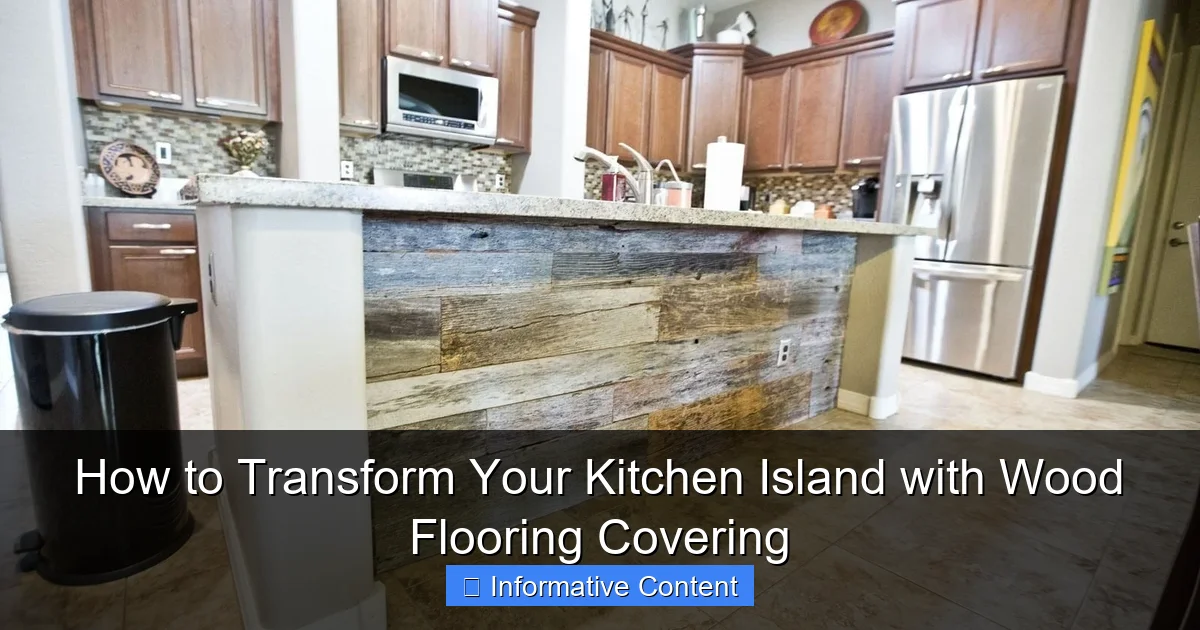
Featured image for covering a kitchen island with wood flooring
Image source: porterbarnwood.com
Transform your kitchen island with wood flooring covering to instantly elevate style and durability in one bold move. This simple upgrade adds warmth, hides imperfections, and seamlessly blends with existing hardwood for a cohesive, high-end look. With easy-to-install options and long-lasting materials, it’s the ultimate DIY solution for a stunning kitchen refresh.
Key Takeaways
- Choose quality wood flooring: Opt for durable, water-resistant options like engineered hardwood or luxury vinyl planks.
- Prep the island surface: Clean, sand, and level the island for a smooth, long-lasting installation.
- Measure twice, cut once: Accurate measurements prevent costly mistakes and ensure a seamless fit.
- Use proper adhesives: Select flooring-specific glue or click-lock systems for secure, lasting attachment.
- Seal edges and seams: Apply caulk or trim to protect against moisture and wear in high-traffic areas.
- Maintain regularly: Sweep daily and use manufacturer-recommended cleaners to preserve the wood’s finish.
📑 Table of Contents
- Why Cover Your Kitchen Island with Wood Flooring?
- Choosing the Right Wood Flooring for Your Island
- Tools and Materials You’ll Need
- Step-by-Step Installation Guide
- Design Ideas and Styling Tips
- Maintenance and Long-Term Care
- Cost Comparison: DIY vs. Professional Installation
- Final Thoughts: Is Wood Flooring Right for Your Island?
Why Cover Your Kitchen Island with Wood Flooring?
Let’s be honest—kitchen islands are the heart of the home. They’re where we prep meals, gather for coffee, and even sneak a midnight snack. But if your island is looking a little tired or doesn’t match the rest of your kitchen, you might feel stuck. Replacing it entirely is expensive and disruptive. So, what if I told you there’s a simple, stylish, and surprisingly affordable solution? Covering your kitchen island with wood flooring can completely transform the space—without breaking the bank or your sanity.
I discovered this trick a few years ago when I wanted to refresh my own kitchen. My island had a dated granite countertop, and the rest of the room featured warm oak flooring. The mismatch was jarring, but I didn’t want to spend thousands on a new island. After some research (and a few DIY trial-and-error moments), I decided to clad the sides of my island in reclaimed oak flooring. The result? A seamless, high-end look that made the whole kitchen feel cohesive and inviting. Since then, I’ve helped dozens of friends and family do the same—and the feedback has been overwhelmingly positive.
Covering a kitchen island with wood flooring isn’t just about aesthetics. It’s a smart way to tie your island into the rest of your kitchen, add warmth, and even increase your home’s value. Whether you’re going for a rustic farmhouse vibe or a sleek modern look, wood flooring offers endless possibilities. And the best part? It’s easier than you think.
Choosing the Right Wood Flooring for Your Island
Not all wood flooring is created equal—especially when it comes to a high-traffic, high-visibility area like your kitchen island. The type of wood, finish, and thickness all matter. Let’s break it down.
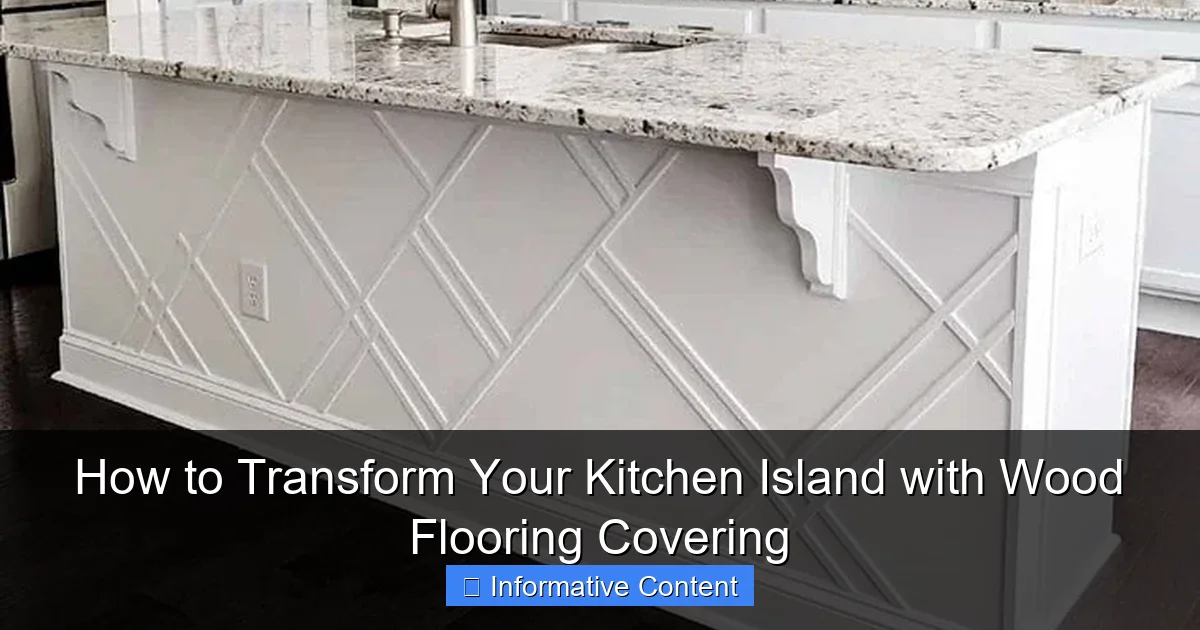
Visual guide about covering a kitchen island with wood flooring
Image source: anikasdiylife.com
Wood Species: Hardness Matters
The first thing to consider is the hardness of the wood. Kitchens are busy places, and your island will take a beating—think dropped utensils, spilled wine, and kids leaning on the edges. You want something durable.
- Hardwoods like oak, maple, and hickory are ideal. They score high on the Janka hardness scale (which measures wood’s resistance to dents). For example, red oak scores 1,290, while maple hits 1,450.
- Softer woods like pine or walnut can work if you’re careful, but they’re more prone to scratches. If you love walnut’s rich tone, consider using it for accents instead of the entire island.
- Engineered wood is another great option. It’s more stable than solid wood and less likely to warp in humid environments (hello, dishwasher steam!). Just make sure the wear layer is thick enough (at least 3mm) for sanding and refinishing later.
Pro tip: If you’re using the same flooring as your kitchen floor, you’ll get a seamless look. But if you’re mixing materials, choose a complementary tone—like a lighter wood for the island against darker floors.
Finish: Glossy, Matte, or Somewhere in Between?
The finish affects both durability and style. Here’s what to know:
-
<
- Matte or satin finishes hide scratches and fingerprints better. They’re also more forgiving for DIYers—no need to stress about perfect brushstrokes.
- Semi-gloss or gloss adds shine and makes colors pop, but it’s less forgiving of imperfections. Great for a modern kitchen, but not ideal if you’re clumsy with a mop.
- Pre-finished vs. site-finished: Pre-finished boards come with a factory coating (easier for DIY). Site-finished means sanding and sealing on-site (more customizable, but messy).
For my island, I used pre-finished oak with a satin finish. It’s held up perfectly to daily use, and I love how it reflects light without being too shiny.
Thickness and Installation Method
For island cladding, you’ll need boards that are at least 1/2-inch thick. Anything thinner might flex or crack. Here are two common methods:
- Glue and nail: Secure boards with construction adhesive and a brad nailer. This is the most stable method, but it requires precision.
- Floating (clip system): Some engineered woods come with interlocking edges. Easier for DIYers, but less secure for heavy use.
When I did my island, I went with glue and nail. It took longer, but I didn’t want to risk the boards shifting over time.
Tools and Materials You’ll Need
Before you start, gather your supplies. Having everything ready makes the process smoother—and less frustrating when you realize halfway through that you’re missing a critical tool.
Essential Tools
- Circular saw or table saw: For cutting boards to size. A miter saw is great for clean 90-degree corners.
- Brad nailer (18-gauge): For attaching boards. You can rent one if you don’t own it.
- Measuring tape and square: Accuracy is key. Even a 1/8-inch gap can ruin the look.
- Clamps: To hold boards in place while you nail.
- Level and stud finder: To check alignment and locate island framing (if nailing into the base).
- Sandpaper (120-220 grit): For smoothing rough edges or adjusting fit.
Pro tip: If your island has a stone or tile countertop, use a oscillating multi-tool to trim boards flush with the edge. It’s a lifesaver for tight spaces.
Materials Checklist
- Wood flooring (solid or engineered): Buy 10-15% extra for mistakes and waste.
- Construction adhesive: Choose a flexible, waterproof formula (e.g., Liquid Nails for Wood).
- 18-gauge brad nails: 1 to 1.25 inches long.
- Wood filler: To patch nail holes and gaps.
- Finish (if site-finishing): Polyurethane, oil-based, or water-based sealant.
- Edge trim (optional): For a polished look on exposed ends.
For my project, I bought 20% extra oak flooring and used a water-based polyurethane finish. The water-based stuff dries faster and has less odor—a win when you’re working in a small kitchen.
Step-by-Step Installation Guide
Now for the fun part: the actual installation. This is where your island starts to transform. Follow these steps, and you’ll be sipping coffee on your stunning new island in no time.
Step 1: Prep the Island
Clear the island of all appliances, decor, and anything else that could get in the way. Remove the base trim (if there is any) to expose the sides. If your island has a stone or tile countertop, tape off the edges with painter’s tape to protect them from scratches or glue drips.
Pro tip: Take photos of the island from all angles before you start. It’ll help you remember how things looked in case you need to troubleshoot later.
Step 2: Measure and Cut the Boards
Measure each side of the island and mark the boards accordingly. Remember: measure twice, cut once! For inside corners (where two sides meet), cut boards at a 45-degree angle for a seamless fit. Use a speed square to ensure accuracy.
- For straight cuts, a circular saw with a wood blade works well.
- For angled cuts, a miter saw is your best friend.
I made the mistake of rushing this step once—and ended up with a gap at one corner. Lesson learned: patience pays off.
Step 3: Dry-Fit the Boards
Before gluing or nailing, lay the boards in place (dry-fit) to check the fit. Adjust with sandpaper if needed. This step is crucial—it’s much easier to fix gaps now than after they’re attached.
Step 4: Attach the Boards
Apply construction adhesive to the back of each board (use a zigzag pattern for even coverage). Press the board into place and secure it with brad nails every 8-12 inches. Use clamps to hold boards steady while you nail. For inside corners, glue the mitered edges together with wood glue before nailing.
Pro tip: Start at the bottom and work upward. This ensures the boards are aligned and reduces the risk of sagging.
Step 5: Fill Gaps and Sand
Once all boards are attached, fill nail holes and gaps with wood filler. Let it dry, then sand the entire surface with 180-grit sandpaper. Wipe away dust with a tack cloth.
If you’re using pre-finished flooring, you can skip sealing. But if you’re site-finishing, apply 2-3 coats of polyurethane, sanding lightly between coats.
Step 6: Reattach Trim (Optional)
If you removed base trim, reattach it now. You can also add decorative edge trim for a more refined look.
When I finished my island, I stood back and couldn’t believe the difference. The wood flooring made the whole kitchen feel warmer and more inviting. And the best part? It cost me under $300.
Design Ideas and Styling Tips
Wood flooring isn’t just functional—it’s a design tool. Here’s how to make your island the star of your kitchen.
Create Contrast with a Dark Island
If your kitchen has light floors, a dark wood island adds drama. Think walnut, ebony, or even a painted finish (like black or navy) over oak. This works especially well in open-concept spaces, where the island acts as a visual anchor.
My friend Sarah did this in her white kitchen. She used ebony-stained oak and paired it with brass hardware. The result was a modern, high-contrast look that felt luxe.
Match Your Floors for a Cohesive Look
Using the same wood as your kitchen floor creates a seamless, airy feel. This is perfect for small kitchens, where continuity makes the space feel larger.
When I matched my island to my oak floors, the kitchen suddenly felt like one unified space. It was a game-changer for entertaining—no more awkward visual breaks.
Add Texture with Reclaimed or Wire-Brushed Wood
Reclaimed wood or wire-brushed finishes add character. They’re also great at hiding scratches, which is a win for busy families.
I once helped my neighbor install reclaimed barn wood on her island. The imperfections gave it a rustic charm that new wood just couldn’t match.
Mix Materials for Interest
Pair wood with other materials for a layered look. Examples:
- Wood + metal: Use wood for the sides and a metal base (like iron or stainless steel) for contrast.
- Wood + stone: Keep the countertop stone but clad the base in wood. This works well in farmhouse or transitional kitchens.
- Wood + paint: Paint the lower half of the island and use wood for the upper half. This is a great way to add color without overwhelming the space.
Maintenance and Long-Term Care
Wood flooring on an island requires a little more TLC than a countertop, but it’s totally manageable. Here’s how to keep it looking great.
Daily Care
- Wipe spills immediately with a damp cloth. Water is the enemy of wood!
- Use coasters under drinks and trivets under hot pots.
- Sweep or vacuum regularly to prevent grit from scratching the surface.
Monthly Maintenance
- Deep clean with a wood-safe cleaner (e.g., Bona or Murphy’s Oil Soap). Avoid vinegar or steam mops—they can damage the finish.
- Check for loose boards or gaps. If you find any, re-secure with adhesive or nails.
Annual Upkeep
- Inspect the finish for wear. If it looks dull or scratched, apply a fresh coat of polyurethane.
- For pre-finished floors, touch up scratches with a wood marker or wax stick.
Long-Term Repairs
If a board gets severely damaged, you can replace it without redoing the entire island. Just cut out the bad section, glue in a new piece, and sand/repaint to match.
My island’s finish lasted about 5 years before it needed a refresh. A light sanding and two coats of polyurethane made it look brand new.
Cost Comparison: DIY vs. Professional Installation
How much will this project set you back? It depends on whether you DIY or hire a pro. Here’s a breakdown:
| Item | DIY Cost | Professional Cost |
|---|---|---|
| Materials (wood, adhesive, nails) | $200-$500 | $200-$500 (plus 20-30% markup) |
| Tools (if renting/borrowing) | $0-$150 | Included in labor |
| Labor | $0 | $500-$1,500 |
| Total | $200-$650 | $700-$2,000+ |
DIY is clearly the budget-friendly option. But if you’re not confident in your skills, hiring a pro ensures a flawless finish. I’d recommend DIY if you’re comfortable with basic tools—and if you have a helper to hold boards in place.
Final Thoughts: Is Wood Flooring Right for Your Island?
Covering your kitchen island with wood flooring is more than just a trend—it’s a timeless way to elevate your space. Whether you want to match your floors, add contrast, or simply refresh a dated island, wood offers warmth, durability, and endless style options.
Of course, it’s not without challenges. You’ll need to be precise with measurements, patient with installation, and diligent with maintenance. But the payoff is huge: a kitchen that feels cohesive, inviting, and uniquely yours.
When I look at my island now, I don’t just see wood—I see memories. Late-night chats with friends, weekend pancake breakfasts, and the countless meals we’ve shared. That’s the magic of a well-designed kitchen. And with a little effort, you can create that same magic in your home.
So, what are you waiting for? Grab your tools, pick your wood, and start transforming your island today. Your future self (and your kitchen) will thank you.
Frequently Asked Questions
Can I use wood flooring to cover my kitchen island for a seamless look?
Yes, using wood flooring to cover your kitchen island creates a cohesive, high-end appearance that matches your existing floors. This method, often called “wood flooring covering,” ensures durability and visual continuity in your kitchen design.
What type of wood flooring is best for covering a kitchen island?
Engineered hardwood or solid hardwood with a high-gloss finish works best due to their moisture resistance and durability. Avoid softer woods like pine, as they can dent easily from heavy use.
How do I attach wood flooring to a kitchen island without damaging it?
Use construction adhesive and finish nails for a secure hold, ensuring the island surface is clean and level first. For floating installations, interlocking engineered wood flooring simplifies the process while allowing for expansion.
Is covering a kitchen island with wood flooring expensive?
Costs vary by wood type, but using leftover flooring or prefinished planks can keep expenses low. Labor costs may increase if hiring a professional, but DIY is feasible with basic tools.
Can I refinish or stain the wood flooring covering on my kitchen island later?
Yes, solid hardwood coverings can be sanded and refinished multiple times to refresh their look. Engineered wood has limited refinishing potential, depending on the veneer thickness.
How do I maintain a kitchen island covered with wood flooring?
Wipe spills immediately, use cutting boards to prevent scratches, and apply a fresh polyurethane coat every few years. Regular sweeping and occasional deep cleaning with a wood-safe cleaner will preserve its finish.