
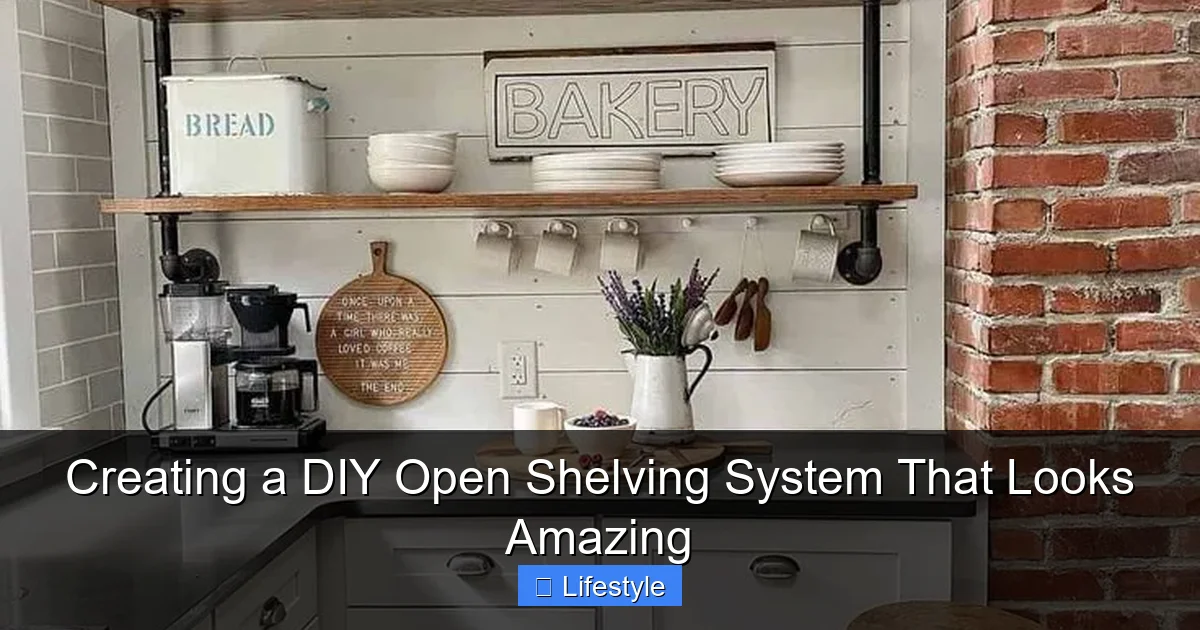
Featured image for this comprehensive guide about Creating a DIY open shelving system
Image source: images.inc.com
Are you tired of cluttered countertops and overflowing cabinets? Do you dream of a home where every item has its place, beautifully displayed and easily accessible? If so, then embarking on a project to create a DIY open shelving system might just be the perfect solution for you! Open shelving isn’t just a fleeting trend; it’s a design staple that offers a perfect blend of style, functionality, and personalization. Imagine transforming a drab wall into a captivating focal point, showcasing your personality while keeping essential items within reach. Whether it’s for your kitchen, living room, home office, or even a bathroom, a well-designed DIY open shelving system can revolutionize your space.
The beauty of building your own shelves lies in the complete creative control it offers. Forget standard sizes and limited finishes; with a DIY approach, you can tailor every aspect to your specific needs, taste, and budget. From rustic farmhouse vibes to sleek modern minimalist lines, the possibilities are endless. Plus, there’s an immense sense of satisfaction that comes with stepping back and admiring something you’ve built with your own hands. This comprehensive guide will walk you through everything you need to know to design, build, and style an amazing DIY open shelving system that not only looks incredible but also enhances your home’s functionality.
Get ready to unleash your inner designer and handyman (or woman!) as we dive into the world of custom shelving. We’ll cover everything from selecting the right materials and tools to mastering the art of installation and styling. By the end of this post, you’ll have all the knowledge and confidence required to create stunning, durable, and highly personalized open shelves that will be the envy of your friends and family.
Quick Answers to Common Questions
What essential tools do I need for a DIY open shelving system?
You’ll definitely want a drill, a level, a tape measure, and a saw (or have your wood cut at the store). These are your basic building blocks for a successful DIY open shelving system!
What kind of wood is best for my DIY open shelving system?
Pine is a popular, cost-effective choice for a DIY open shelving system, but plywood or MDF are also great if you plan to paint. Consider the weight your shelves will hold and the look you’re going for!
How do I ensure my DIY open shelving system is sturdy and safe?
Always anchor your DIY open shelving system into wall studs whenever possible, or use appropriate heavy-duty drywall anchors if studs aren’t available. A level is your best friend for stability!
Do I need a lot of DIY experience to create an open shelving system?
Not at all! Creating a DIY open shelving system is a surprisingly beginner-friendly project, especially with basic tools and clear instructions. You’ll gain confidence as you go!
What’s a quick tip to make my DIY open shelving system look professionally finished?
Pay attention to sanding and finishing! A smooth finish, whether painted or stained, and neatly mitered corners can make your DIY open shelving system look like it came from a high-end store.
📋 Table of Contents
- The Allure of DIY Open Shelving: Style, Savings, and Smart Storage
- Blueprinting Your Dream Shelves: Materials, Tools, and Design Principles
- Step-by-Step Construction: Bringing Your DIY Open Shelving System to Life
- Elevating Your Space: Styling and Decorating Open Shelves Like a Pro
- Navigating Challenges & Ensuring Longevity for Your DIY Shelves
- Beyond the Basics: Advanced DIY Shelving Ideas
- Conclusion
The Allure of DIY Open Shelving: Style, Savings, and Smart Storage
Why are so many homeowners flocking to open shelving? The answer lies in its unique ability to blend aesthetics with practicality, offering a flexible storage solution that closed cabinets simply can’t match. When you choose to build your own DIY open shelving system, you amplify these benefits, gaining even more control over the final outcome.
Learn more about Creating a DIY open shelving system – Creating a DIY Open Shelving System That Looks Amazing
Image source: i.pinimg.com
Aesthetic Evolution: From Clutter to Curated
Open shelving has cemented its place in interior design because it makes a statement. It invites you to be intentional about what you display, transforming everyday items into decorative elements. This design choice opens up a room, making it feel larger and airier, a particularly valuable asset in smaller spaces. According to recent Pinterest trends, searches for “kitchen open shelving ideas” have seen a significant increase, highlighting its popularity in creating light, inviting culinary spaces. Beyond the kitchen, a DIY open shelving system in a living room can showcase cherished books and art, while in a bedroom, it can provide a minimalist display for personal treasures. It forces you to declutter and curate, leading to a more intentional and visually pleasing home environment.
| Feature | DIY Open Shelving System | Store-Bought Open Shelving |
|---|---|---|
| Estimated Cost (Materials for 3-4 shelves) | $50 – $200 (wood, brackets, screws) | $150 – $400+ (pre-fabricated unit) |
| Time Investment | 4 – 8 hours (planning, cutting, finishing, installation) | 1 – 3 hours (assembly, installation) |
| Required Skill Level | Beginner to Intermediate (basic tools, measuring, drilling) | Beginner (screwdriver often sufficient) |
| Customization Potential | High (exact dimensions, material choice, finish, layout) | Low to Medium (limited to available sizes/styles) |
| Typical Aesthetics | Rustic, Industrial, Modern Minimalist (tailored) | Modern, Scandinavian, Traditional (brand-specific) |
Beyond the Budget: Customization is Key
One of the most compelling reasons to build your own open shelving system is the cost savings. Store-bought shelving units, especially custom ones, can quickly drain your renovation budget. By going DIY, you significantly cut down on labor costs and can often source materials more affordably. But the benefits extend beyond just money. A DIY open shelving system offers unparalleled customization. You’re not limited by standard sizes or finishes. You can design shelves that perfectly fit an awkward nook, utilize unique angles, or match an existing decor theme precisely. This level of personalization ensures your shelves are not just functional but also a true reflection of your personal style.
Where to Start: Visioning Your Space
Before you even think about drills and saws, start with a clear vision. Where will your DIY open shelving system go? What will it hold? Who will use it? For instance, kitchen open shelves might store plates, bowls, and frequently used spices, demanding sturdy construction and easy access. Living room shelves, on the other hand, might prioritize displaying decor, books, and family photos, allowing for more delicate designs. Consider the existing architecture and style of your home. Do you want your shelves to blend in or stand out as a focal point? Jot down your initial ideas, sketch a few layouts, and even browse online for inspiration to solidify your vision. This foundational step is crucial for a successful and satisfying DIY project.
Blueprinting Your Dream Shelves: Materials, Tools, and Design Principles
With your vision in mind, it’s time to get down to the practicalities. The success of your DIY open shelving system hinges on careful planning, from choosing the right materials to understanding the tools you’ll need and adhering to sound design principles.

Learn more about Creating a DIY open shelving system – Creating a DIY Open Shelving System That Looks Amazing
Image source: jeffdegraff.com
Selecting Your Shelving Materials
The materials you choose for your custom shelving solutions will dictate its look, durability, and cost. Here are some popular options:
- Wood: This is the most common choice, offering warmth and versatility.
- Pine: Affordable, easy to work with, but softer and prone to dents. Great for painted shelves.
- Oak/Maple: More durable and expensive, offering beautiful grain patterns. Ideal for stained or natural finishes.
- Plywood (Cabinet Grade): A strong, stable, and cost-effective option, especially when edge-banded or painted for a cleaner look.
- Reclaimed Wood: Perfect for a rustic or industrial aesthetic. It adds character but can be heavier and require more preparation.
- Brackets and Supports: The type of support will influence the look and strength of your wall-mounted shelves.
- Metal Brackets: Available in various styles (L-brackets, heavy-duty, decorative). Exposed brackets offer an industrial or farmhouse feel.
- Pipe Shelving: Uses industrial pipes and flanges for a distinctive, robust look. Requires more complex installation.
- Hidden Brackets (Floating Shelves): Creates a seamless, minimalist look where the shelves appear to float. Requires precise installation and often thicker wood.
- Cleats: Simple wooden supports screwed directly into studs, ideal for a minimalist or budget-friendly approach, especially if the shelves will be painted.
Essential Tools for a Seamless Build
Having the right tools makes all the difference in a home organization DIY project. Here’s a checklist:
- Measuring Tape: Accuracy is paramount!
- Pencil: For marking cuts and drilling spots.
- Level: A long level (2-4 ft) is crucial for ensuring perfectly straight shelves.
- Stud Finder: Non-negotiable for securely mounting your shelves into wall studs.
- Drill/Driver: For pre-drilling holes and driving screws.
- Saw: A miter saw or circular saw for straight, precise cuts. A jigsaw can be useful for any intricate cuts.
- Sandpaper/Sander: To smooth wood surfaces for a professional finish.
- Safety Glasses and Gloves: Always prioritize safety!
- Painters Tape: Useful for marking lines cleanly or protecting areas during finishing.
Design Fundamentals for Flawless Function
When planning your shelving design, keep these principles in mind:
- Spacing: Consider the height of items you’ll store. Standard spacing ranges from 12-18 inches, but adjust as needed. For visual appeal, vary the spacing slightly on different shelves.
- Depth: Kitchen shelves typically need to be 10-12 inches deep to accommodate plates. Decorative shelves can be shallower (6-8 inches). Don’t go too deep or items will get lost at the back.
- Load Capacity: This is critical for safety. Choose appropriate bracket types and ensure they are securely fastened into studs. For every foot of shelf length, a properly installed shelf can typically hold 15-20 pounds, but heavy-duty brackets and thicker wood can increase this significantly.
- Aesthetics: Match your shelving style to your room. Industrial pipe shelves fit a modern loft, while chunky wooden shelves with simple brackets complement a farmhouse kitchen.
Step-by-Step Construction: Bringing Your DIY Open Shelving System to Life
Now that you’ve planned your design and gathered your materials and tools, it’s time for the exciting part: building your DIY open shelving system!
Preparation is Paramount: Measure, Cut, Finish
- Measure Your Space (Again!): Double-check all your measurements. It’s always better to cut once and measure twice. Mark the exact locations where your shelves will go on the wall, using your level to ensure perfect horizontal lines.
- Cut Your Shelves: Using your chosen saw, carefully cut your wooden boards to the desired lengths. For multiple shelves, cut them all at once to ensure consistency.
- Sand and Finish: This step is crucial for a professional look.
- Sanding: Start with a coarser grit sandpaper (e.g., 80-100 grit) to remove imperfections, then move to finer grits (150-220) for a smooth finish. Pay attention to edges and ends.
- Staining/Painting: If staining, apply with a brush or rag, wiping off excess. For painting, apply primer first, then 1-2 coats of your chosen paint. Allow adequate drying time between coats.
- Sealing: For shelves in high-moisture areas (like kitchens or bathrooms) or those holding frequently used items, apply a clear sealant (polyurethane, lacquer, or wax) for protection.
Secure Foundations: Installing Brackets and Supports
The stability of your wall-mounted shelves depends entirely on how well you secure the supports.
- Locate Studs: Use your stud finder to mark the precise locations of wall studs along your marked shelf lines. Always aim to drill into studs for maximum support. If studs aren’t available where you need them, use heavy-duty drywall anchors specifically designed for the weight of your shelves and their contents.
- Mark Bracket Placement: Hold a bracket against the wall at your marked stud locations. Use your level to ensure it’s perfectly straight, then mark the screw holes with a pencil. Repeat for all brackets for that shelf.
- Pre-Drill Holes: Using a drill bit slightly smaller than your screws, pre-drill pilot holes at each marked spot. This prevents wood splitting and makes driving screws easier.
- Install Brackets: Attach the brackets to the wall using appropriate screws (long enough to penetrate well into the stud, typically 2.5-3 inches). Use a drill/driver to secure them firmly. For pipe shelving, assemble the pipe components and secure the flanges to the wall studs.
The Grand Mount: Attaching Your Shelves
With your supports securely in place, it’s time to add the shelves themselves.
- Position Shelves: Carefully place your finished wooden boards onto the installed brackets or supports.
- Secure Shelves:
- For L-Brackets: Most brackets have holes on the top flange. Pre-drill small pilot holes into the underside of your shelf and secure the shelf to the bracket with short wood screws.
- For Floating Shelves: Slide the shelf onto the hidden rods of the floating shelf brackets. Some systems may require set screws from the bottom to lock the shelf in place.
- For Pipe Shelving: The shelves typically rest on the horizontal pipe sections. You can simply let them rest or add small pipe clamps/straps from below for extra security if needed.
- Check Stability: Give each shelf a gentle wiggle test to ensure it’s stable and secure.
Here’s a quick comparison of common shelving materials to help you decide for your custom shelving solutions:
| Material | Cost (Avg. per linear foot) | Durability | Aesthetics |
|---|---|---|---|
| Pine | Low ($1-3) | Moderate (prone to dents) | Natural, easily painted/stained |
| Oak/Maple | High ($5-10+) | High (very durable) | Rich grain, classic, elegant |
| Plywood (Cabinet Grade) | Medium ($3-6) | High (stable, strong) | Modern, versatile (paintable) |
| Reclaimed Wood | Variable ($2-15+) | High (often very dense) | Rustic, unique, distressed |
Elevating Your Space: Styling and Decorating Open Shelves Like a Pro
Building your DIY open shelving system is only half the battle; the real magic happens when you style them! Thoughtful styling can transform your shelves from mere storage into captivating display areas that enhance your home’s aesthetic.
The Art of Arrangement: Principles of Visual Balance
Styling open shelves is an art form. It’s about creating visual interest and balance without looking cluttered. Here are some key principles:
- The “Rule of Three”: Arrange items in odd numbers (usually three) for a more appealing and natural look. This applies to groups of objects on a single shelf or to the overall number of decorative elements.
- Vary Heights and Textures: Combine tall and short items, smooth and textured pieces to add dynamic interest. For example, a tall vase next to a stack of books and a small, textured bowl.
- Create Triangles: Arrange items so that your eye naturally forms a triangle. This is a common design trick that creates flow and harmony.
- Layering: Place larger items at the back and smaller, more detailed pieces in front. This adds depth and allows you to showcase multiple items without hiding them.
- Negative Space: Don’t fill every inch! Empty space allows the eye to rest and highlights the items you do display. It’s just as important as the items themselves.
- Color Palette: Stick to a cohesive color palette. This doesn’t mean everything has to be the same color, but choose colors that complement each other and your room’s decor. Neutrals with pops of one or two accent colors usually work well.
Mixing Function and Form: Curating Your Collection
Your open shelving ideas should always blend beauty with practicality. Especially in a kitchen, where functionality is paramount, you’ll want to balance everyday essentials with decorative flair.
- Kitchen Open Shelves: Display your most beautiful dishes, neatly stacked bowls, unique mugs, and frequently used spice jars. Intersperse with small plants, a framed recipe, or a piece of art.
- Living Room Shelving: Mix books (stacked horizontally and vertically) with decorative objects, photos, small plants, and perhaps a small collection of curios.
- Bedroom Shelving: Keep it minimal and serene. Think essential oils, a beautiful candle, a few beloved books, and a delicate piece of art.
The goal is to curate your collection—choose items that are both meaningful to you and visually appealing. Don’t be afraid to rotate items seasonally or when you want a fresh look.
Adding Personality: Plants, Lighting, and Art
These elements are the finishing touches that truly make your DIY open shelving system shine:
- Greenery: Plants instantly add life and color. Trailing plants like Pothos or Philodendrons can drape beautifully, while small succulents or herbs add a fresh touch without taking up too much space.
- Lighting: Under-shelf LED strip lights can dramatically enhance the ambiance and highlight your displayed items. Small battery-operated puck lights are a simple, inexpensive option.
- Art and Photos: Lean small framed prints or photos against the back of the shelves. This adds a personal touch and a layer of visual interest.
- Baskets and Bins: For items you don’t want on full display (like extra napkins or small gadgets), stylish baskets or decorative bins offer attractive hidden storage.
Navigating Challenges & Ensuring Longevity for Your DIY Shelves
Even the most meticulously planned build open shelves project can encounter a few bumps along the way. Knowing how to troubleshoot common issues and prioritize safety will ensure your DIY open shelving system is not only beautiful but also durable and secure.
Common Hurdles: Leveling and Wall Types
- Ensuring Level Shelves: This is probably the most common challenge. Even a slight tilt can be noticeable and aesthetically jarring.
- Solution: Use a high-quality, long level (2-4 ft is ideal) throughout the installation process. Before marking any holes, draw a complete level line across the wall where the bottom of your bracket will sit. Always re-check level before tightening screws completely, as minor adjustments can still be made. For tricky walls, laser levels can offer pinpoint accuracy.
- Dealing with Different Wall Types: Not all walls are created equal.
- Drywall: Always aim for studs. If studs aren’t where you need them, invest in heavy-duty toggle bolts or self-drilling anchors rated for the expected weight. Never rely on standard plastic wall anchors for anything but very light decorative shelves.
- Plaster Walls: These can be brittle. Pre-drill slowly and carefully. Use expansion anchors or toggle bolts specifically designed for plaster, and again, always try to hit a stud.
- Brick/Concrete: Requires a hammer drill and masonry bits. Use specialized masonry anchors (e.g., lead anchors, sleeve anchors) for secure fastening. This is a more advanced installation and might be best for experienced DIYers.
Maxing Out Load Capacity Safely
Overloading shelves is a recipe for disaster. Understanding and respecting the load capacity of your custom shelving solutions is paramount for safety and longevity.
- Factor in Weight: Consider the weight of the items you plan to store. Books are surprisingly heavy (a foot of books can weigh 25-30 lbs!). Kitchenware, especially ceramic plates, also adds up quickly.
- Bracket Strength: Different brackets have different weight ratings. Heavy-duty L-brackets or pipe supports offer more strength than delicate decorative brackets or most floating shelf systems.
- Shelf Thickness: Thicker shelves (e.g., 1.5-2 inches solid wood) are less prone to bowing or sagging over time than thinner ones, especially over longer spans.
- Span Length: The longer the span between supports, the more likely a shelf is to sag, regardless of material or thickness. For spans over 30-36 inches, consider adding a central support or opting for a thicker, more rigid material.
- Secure Fastening: As emphasized, always anchor into studs. The quality and length of your screws also play a role; use screws appropriate for your material and weight needs.
Safety First: A Non-Negotiable Step
Throughout your entire DIY open shelving system project, safety should be your top priority.
- Personal Protective Equipment (PPE): Always wear safety glasses when cutting or drilling. Gloves can protect your hands during sanding and finishing.
- Tool Handling: Read and understand the operating instructions for all power tools. Keep fingers clear of blades and moving parts. Disconnect power when changing blades or bits.
- Ventilation: When staining, painting, or sealing, work in a well-ventilated area to avoid inhaling fumes.
- Clear Workspace: Keep your work area tidy to prevent tripping hazards.
- Don’t Rush: Rushing leads to mistakes and accidents. Take your time with each step.
- Seek Help: If a task feels beyond your skill level or requires lifting heavy items, don’t hesitate to ask for help from a friend or consider hiring a professional for specific aspects of the installation.
By taking these precautions, you’ll ensure your DIY open shelving system is not only a beautiful addition to your home but also a safe and lasting one.
Beyond the Basics: Advanced DIY Shelving Ideas
Once you’ve mastered the fundamental techniques for building a basic DIY open shelving system, you might find yourself itching to try more creative and complex designs. These advanced ideas can further customize your space and provide unique storage solutions.
Corner Shelves: Maximizing Underutilized Space
Corners are often overlooked, but they present fantastic opportunities for stylish and functional storage. A DIY open shelving system in a corner can be a true space-saver and a beautiful design element.
- Floating Corner Shelves: These can be triangular or L-shaped, creating a seamless look. They work wonderfully in bathrooms for toiletries or in living rooms for small decorative items. Installation requires precise measuring and robust corner brackets or cleats.
- Built-in Look: You can create shelves that appear to be built directly into the corner, especially if you add trim around the edges. This offers a polished, high-end finish.
- Stacked Units: For more extensive storage, consider stacking multiple corner shelves to create a continuous vertical display.
The key to successful corner shelves is accurate measurement of the angles and ensuring sturdy support, as the weight distribution can be different from flat wall installations.
Built-in Look with Minimal Effort
Want the sophisticated appearance of built-in shelves without the extensive carpentry? A DIY open shelving system can achieve this with a few clever tricks.
- Paint to Match: Painting your shelves and brackets the same color as your wall creates a cohesive, integrated look, making the shelves appear to recede into the wall.
- Add Trim: For an even more “built-in” feel, add decorative trim or molding around the top, bottom, or sides of your shelf units. This can bridge any small gaps between the shelves and the wall, providing a seamless finish.
- Recess into Alcoves: If you have an existing alcove or a recessed wall section, building shelves directly into this space naturally gives them a custom, built-in appearance. This is an ideal spot for living room shelving or a cozy reading nook.
These techniques help blur the lines between freestanding furniture and architectural features, elevating your shelving design significantly.
Incorporating Lighting for Enhanced Ambiance
Beyond displaying your items, intelligent lighting can transform your open shelves into a captivating focal point, adding warmth and sophistication to any room.
- Under-Shelf LED Strips: These are incredibly popular for a reason. Easily installed, discreet LED strips provide a soft, ambient glow that highlights items on the shelf below. They are perfect for illuminating collections, cookbooks, or decorative pieces. Many options are battery-operated or plug-in, requiring minimal electrical work.
- Spotlights or Puck Lights: Small, directional puck lights can be recessed into the underside of thicker shelves or mounted on top to shine down. These are great for accentuating specific items or creating dramatic effects. Again, battery-operated versions make installation a breeze.
- Backlighting: For a truly unique effect, consider adding LED strips behind the shelves, aimed at the wall. This creates a halo effect around the shelves, adding depth and a modern touch.
When planning your open shelving ideas, think about how lighting can enhance both the functionality and the aesthetic appeal of your display. Proper lighting can turn a simple storage solution into a gallery-worthy feature.
Conclusion
Congratulations! You’re now equipped with the knowledge and inspiration to create your very own stunning DIY open shelving system. From the initial spark of an idea to the final artful arrangement of your treasured possessions, this project is a rewarding journey that culminates in a truly personalized and functional addition to your home. We’ve explored the myriad benefits, from aesthetic enhancement and cost savings to the sheer satisfaction of custom design. You’ve learned about selecting the right materials, gathering essential tools, and meticulously planning your build for optimal strength and style.
Remember, the beauty of a DIY open shelving system lies in its versatility. Whether you’re aiming for sleek floating shelves DIY in your living room, robust kitchen open shelves to declutter and display, or a charming nook for your collectibles, the principles remain the same: careful planning, precise execution, and thoughtful styling. Don’t be afraid to experiment, infuse your personality, and most importantly, enjoy the process of bringing your vision to life. The functional elegance and customized charm of your new shelves will undoubtedly transform your space and become a testament to your creativity and ingenuity. So, grab your tools, unleash your inner designer, and get ready to enjoy the amazing results of your next great DIY adventure!
Frequently Asked Questions
Where should I begin when planning my DIY open shelving system?
Start by assessing the specific space where you intend to install your shelves. Consider the wall dimensions, the items you plan to store, and the overall aesthetic you want to achieve to determine the ideal size, depth, and number of shelves for your DIY open shelving system.
What are the best materials for a durable and attractive DIY open shelving system?
For sturdy and long-lasting open shelving, common material choices include solid wood (like pine, oak, or maple), high-quality plywood, or even MDF for painted finishes. Ensure your chosen brackets or supports are also appropriately rated for the weight you intend to place on the shelves.
How do I ensure my DIY open shelving system is securely mounted and can hold significant weight?
Always locate wall studs for primary support when installing your shelves, using a reliable stud finder. If studs aren’t available where you need them, use heavy-duty toggle anchors or similar fasteners designed for your specific wall type, rated for the maximum load you anticipate for your DIY open shelving system.
What essential tools will I need to create my own open shelving system?
You’ll typically need a measuring tape, level, stud finder, saw (circular or miter), drill, and appropriate screws or anchors. Depending on your material choice, sandpaper, wood glue, and finishing supplies might also be necessary to complete your open shelving system.
What are some tips to make my DIY open shelving system look professionally finished and amazing?
Pay close attention to details like smoothly sanded edges, a consistent paint or stain application, and perfectly aligned shelves. Thoughtful styling with a mix of practical items and decorative accents, along with good lighting, will significantly elevate the overall look of your DIY open shelving system.
Is building a DIY open shelving system truly more cost-effective than buying pre-made units?
Often, yes! While initial material costs can vary, building your own DIY open shelving system typically saves money compared to purchasing custom or high-end retail shelves. It also allows for greater customization to perfectly fit your specific space and style preferences, offering excellent value.