Featured image for diy wood crate kitchen island
Image source: images.farmfoodfamily.com
Transform your kitchen with a stylish, budget-friendly DIY wood crate island that combines rustic charm and modern functionality in just a few simple steps. Perfect for small spaces or renters, this easy build uses repurposed crates for a sustainable, customizable solution that adds storage, prep space, and instant character to any modern home.
Key Takeaways
- Plan dimensions carefully: Measure your space to ensure the crate island fits perfectly.
- Choose durable wood: Opt for hardwood crates to support heavy kitchenware and daily use.
- Add casters for mobility: Install lockable wheels for easy movement and stability.
- Sand and seal thoroughly: Prevent splinters and stains with proper finishing techniques.
- Customize storage: Adjust shelves and add hooks to maximize functionality.
- Match your decor: Stain or paint crates to blend with modern home aesthetics.
📑 Table of Contents
- Why a DIY Wood Crate Kitchen Island Might Be Your Next Weekend Project
- Choosing the Right Wood Crates for Your Island
- Designing Your Island: Layout, Height, and Functionality
- Building Your Island: Step-by-Step Assembly Guide
- Finishing Touches: Staining, Painting, and Styling
- Real-World Tips, Mistakes, and Long-Term Care
- Final Thoughts: A Project That Grows With You
Why a DIY Wood Crate Kitchen Island Might Be Your Next Weekend Project
Let’s be real—kitchen islands are the unsung heroes of modern homes. They’re where we prep meals, gather for coffee, and sometimes even sneak a midnight snack. But if you’re like me, you’ve probably looked at those sleek, custom-built islands and thought, “There’s no way I can afford that.” Well, here’s the good news: you don’t have to. A DIY wood crate kitchen island gives you all the functionality and style of a high-end island without the designer price tag.
I first stumbled upon this idea when my own kitchen felt cramped and cluttered. I needed more counter space, storage, and a place to sit—all without knocking down walls or spending thousands. That’s when I remembered an old wooden crate I’d seen at a farmers market. It was sturdy, simple, and full of charm. A quick Google search later, and I was knee-deep in DIY wood crate island tutorials. Fast-forward a weekend (and a few splinters), and I had a kitchen centerpiece that cost under $100 and looked like it belonged in a design magazine.
If you’re craving a kitchen upgrade that’s affordable, customizable, and surprisingly easy to build, a wood crate island might be your perfect match. In this guide, I’ll walk you through everything I learned—from choosing the right crates to adding wheels for mobility and even styling tips to make it look intentional, not improvised. Whether you’re a seasoned DIYer or a total beginner, this project is doable, rewarding, and a great way to add personality to your space.
Choosing the Right Wood Crates for Your Island
The foundation of any great DIY wood crate kitchen island starts with the crates themselves. Not all crates are created equal, and picking the wrong ones can lead to wobbly shelves, uneven surfaces, or even a safety hazard. Here’s how to choose wisely.
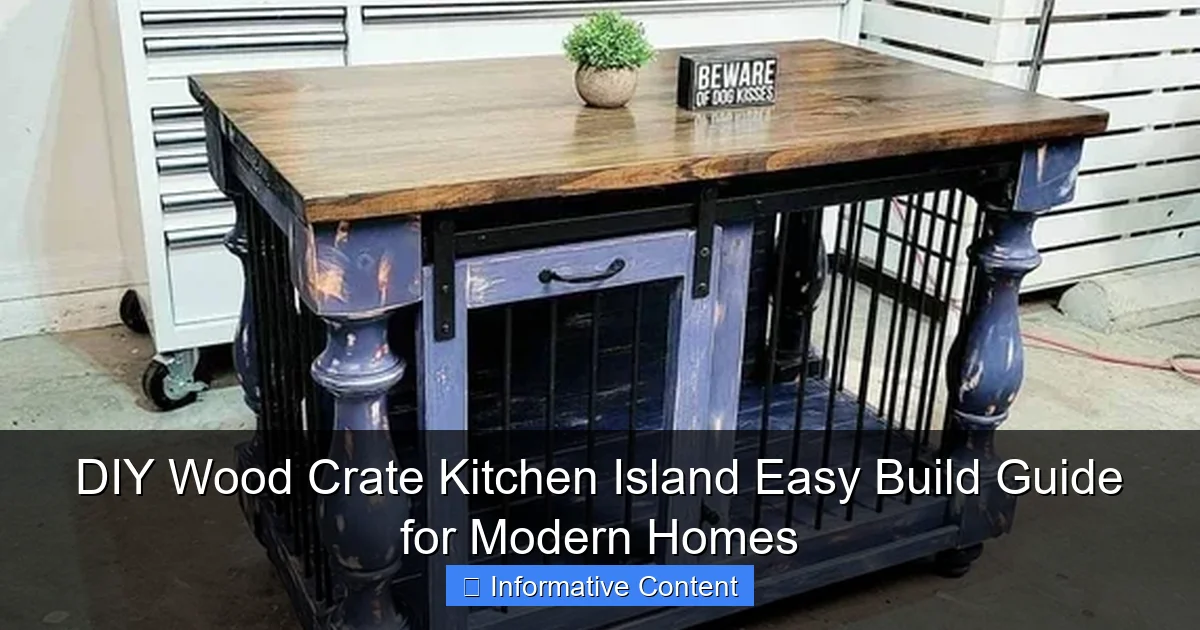
Visual guide about diy wood crate kitchen island
Image source: i.etsystatic.com
Types of Wood Crates: Pros and Cons
You’ve got a few options when sourcing crates:
- Reclaimed fruit/vegetable crates: These are often free or very cheap (check local markets or farms). They’re rustic and full of character, but may have stains, odors, or uneven wear. Great for a farmhouse or industrial look.
- New pine crates: Sold at hardware stores or craft shops, these are uniform, clean, and easy to paint or stain. A solid choice if you want a polished finish.
- Wine crates: These are sturdier and often have a more refined look. They’re slightly pricier but add a touch of elegance.
- Custom-cut crates: If you’re picky about size, you can buy pre-cut wood and assemble your own. More work, but total control.
<
My tip: I used reclaimed apple crates for my first island. They were free, but I spent a full day sanding and sealing them to remove the smell and splinters. If you’re short on time, go with new pine crates. They’re less labor-intensive.
Size and Quantity: How Many Crates Do You Need?
This depends on your kitchen layout and how you plan to use the island. Here’s a rough guide:
- Small kitchen (under 100 sq. ft.): 2–3 crates stacked vertically. Ideal for a compact prep station with open storage.
- Medium kitchen (100–150 sq. ft.): 4–6 crates in a rectangular layout. Great for a breakfast bar with seating.
- Large kitchen (150+ sq. ft.): 6+ crates with a countertop extension. Think of it as a full island with seating and storage.
Example: My kitchen is 120 sq. ft., so I used five crates arranged in a 2×2 grid with one on top for height. This gave me enough surface area for two stools and three storage compartments.
Stability and Weight Capacity
Wood crates are surprisingly strong, but they’re not indestructible. A standard crate can hold 20–30 lbs when stacked, but you’ll want to reinforce them if you plan to use the island for heavy appliances (like a stand mixer) or frequent seating.
Pro tip: Add a plywood backing or cross-bracing with 1x2s if you’re stacking more than three crates. I once skipped this and ended up with a sagging countertop after a week of heavy use. Learned that the hard way!
Designing Your Island: Layout, Height, and Functionality
Now that you’ve got your crates, it’s time to plan the design. This is where you turn a pile of wood into a functional, stylish island that fits your lifestyle.
Layout Options: From Simple to Sophisticated
Your layout depends on how you want to use the island. Here are three popular configurations:
- Single stack: One crate on the floor, another on top. Minimalist and great for small spaces. Add a countertop for extra prep space.
- Grid layout: Multiple crates arranged in a rectangle (e.g., 2×2 or 3×2). This creates more storage and a larger surface area. Ideal for seating.
- U-shape or L-shape: Crates arranged in a corner or along a wall. Perfect for open-concept kitchens or as a room divider.
My experience: I tried the single-stack first, but it felt too small. Switching to the 2×2 grid with a countertop made it feel like a real island. Plus, the open crates became perfect spots for storing my most-used pots and cutting boards.
Height and Countertop Considerations
Standard kitchen islands are 36 inches tall—about counter height. But if you plan to use it as a breakfast bar, you’ll want to go higher (42 inches) to accommodate stools.
Here’s how to calculate the right height:
- Measure the height of your crates (usually 12–18 inches each).
- Add the countertop thickness (¾ inch for plywood, 1–2 inches for butcher block).
- Stack crates to reach your desired height (36″ for prep, 42″ for seating).
Example: My crates were 15 inches tall. I used two stacked (30 inches) and added a 1-inch butcher block countertop for a total of 31 inches. A bit short for stools, but perfect for prepping.
Adding Functionality: Storage, Seating, and More
A great DIY wood crate kitchen island does more than just look good—it makes your life easier. Here’s how to add features:
- Open storage: Leave some crates open for easy access to spices, cookbooks, or produce.
- Closed storage: Line crates with fabric bins or add hinged doors for hiding clutter.
- Seating: Extend the countertop over one edge (like a breakfast bar) or add a built-in bench.
- Mobility: Attach casters for an island you can move around (see the next section).
Pro tip: I added a small towel bar to one side using a wooden dowel and L-brackets. It’s perfect for hanging oven mitts and keeps my towels from piling up on the counter.
Building Your Island: Step-by-Step Assembly Guide
Ready to build? This is the fun part. Grab your tools, put on some music, and let’s get started. I’ll walk you through the process, including my own trial-and-error lessons.
Tools and Materials You’ll Need
- Wood crates (4–6, depending on design)
- Plywood or butcher block countertop (cut to size)
- Wood screws (1.5–2 inches)
- Drill with drill bits
- Sandpaper (medium and fine grit)
- Wood glue
- Level
- Measuring tape
- Optional: Casters (locking wheels), L-brackets, paint/stain, sealant
Step 1: Sand and Prep the Crates
Even new crates can have rough edges. Sand all surfaces with medium-grit sandpaper, then switch to fine grit for a smooth finish. Wipe away dust with a damp cloth.
My mistake: I skipped sanding on my first attempt. The result? A splinter in my thumb and a countertop that snagged my clothes. Don’t skip this step!
Step 2: Assemble the Base
- Arrange crates in your desired layout on a flat surface. Use a level to ensure they’re even.
- Drill pilot holes through the sides of the crates to avoid splitting the wood.
- Secure crates together with wood screws and wood glue. For a 2×2 grid, attach each crate to its neighbors on all sides.
- Add L-brackets at the corners for extra stability (especially if stacking).
Tip: If your floor isn’t perfectly level, adjust the crates by adding felt pads under the low side.
Step 3: Add the Countertop
- Place the countertop on the assembled crates. Center it so it overhangs evenly (1–2 inches on each side).
- Secure it with screws from the inside of the crates. Pre-drill holes to avoid cracking.
- For a seamless look, use wood glue along the edges before screwing.
My hack: I used a reclaimed oak tabletop I found at a thrift store. It was free and added instant character. Just make sure it’s sanded and sealed.
Step 4: Add Casters (Optional)
Want a mobile island? Attach locking casters to the bottom of the crates before assembling:
- Flip crates upside down.
- Position casters at each corner (and center for larger islands).
- Secure with screws. Test mobility before final assembly.
Note: Locking casters are essential if you’re using the island for seating. I once used non-locking wheels and ended up with a runaway island during dinner prep. Not fun.
Finishing Touches: Staining, Painting, and Styling
Now that your island is built, it’s time to make it look intentional—not like a pile of crates. This is where your creativity shines.
Staining vs. Painting: Which Should You Choose?
- Stain: Enhances the wood’s natural grain. Great for a rustic or farmhouse look. Use a gel stain for even coverage on reclaimed wood.
- Paint: Offers endless color options. Ideal for modern, coastal, or boho styles. Use chalk paint for a matte finish or latex for durability.
My choice: I stained my island with a walnut gel stain. It brought out the grain in the apple crates and gave it a warm, lived-in feel. But if I were doing it again, I’d consider painting the base white for a more modern look.
Sealing for Durability
Kitchen islands take a beating—spills, heat, and constant use. Seal your wood with:
- Polyurethane: Durable and water-resistant. Use satin or semi-gloss for kitchens.
- Beeswax or mineral oil: Natural options, but require reapplication every 6–12 months.
Tip: Apply at least two coats, sanding lightly between them for a smooth finish.
Styling Your Island: Make It Look Intentional
A well-styled island blends function and aesthetics. Try these ideas:
- Open crates: Fill with woven baskets, cookbooks, or produce in vintage crates.
- Closed storage: Use fabric bins or add doors (I used old shutters for a shabby-chic look).
- Countertop decor: Add a tray with oils and spices, a cutting board, or a small plant.
- Lighting: Hang a pendant light above for a focal point.
Example: I added a small succulent in a terra-cotta pot to my countertop. It’s low-maintenance and adds a pop of green.
Real-World Tips, Mistakes, and Long-Term Care
Let’s talk about what happens after the project is done. Here’s what I learned after living with my DIY wood crate kitchen island for over a year.
Common Mistakes (and How to Avoid Them)
- Not sanding enough: Splinters are a real hazard. Sand until it’s baby-smooth.
- Skipping the sealant: Spills will stain unsealed wood. I had to sand and re-stain my countertop after a red wine incident.
- Overloading the crates: Stick to 20–30 lbs per crate. I once stored a full bag of flour in a bottom crate—it collapsed. Now I use those for lighter items.
- Ignoring mobility: If you add casters, make sure they lock. Trust me on this one.
Long-Term Care and Maintenance
- Clean weekly: Wipe with a damp cloth and mild soap. Avoid harsh chemicals.
- Re-seal annually: Check for scratches or dullness. Reapply sealant as needed.
- Rotate crates: If using for storage, switch contents occasionally to prevent warping.
- Tighten screws: Check every 6 months. Wood expands and contracts, which can loosen connections.
When to Replace or Upgrade
Even the best-built island won’t last forever. Consider upgrading if:
- The wood is warped or cracked beyond repair.
- You’ve outgrown the size or functionality.
- You’re ready for a new style (e.g., swapping rustic for modern).
My update: After a year, I added a second layer of crates to increase height and storage. It was a simple weekend project and made the island even more useful.
Final Thoughts: A Project That Grows With You
Building a DIY wood crate kitchen island isn’t just about saving money—it’s about creating a space that reflects your style and needs. Whether you’re a minimalist who wants extra prep space or a family that craves a breakfast bar, this project is flexible, forgiving, and surprisingly easy.
What I love most is how adaptable it is. Need more storage? Add another crate. Want to change the look? Paint it or swap out the countertop. And if you ever move, you can take it apart and rebuild it in your new kitchen. It’s not just a piece of furniture—it’s a conversation starter, a functional tool, and a testament to what you can create with a little patience and a few wooden crates.
So go ahead—gather your supplies, clear your weekend, and give it a try. You might surprise yourself with what you can build. And hey, if you end up with a few splinters or a wobbly leg, don’t sweat it. That’s part of the charm. After all, the best DIY projects aren’t about perfection—they’re about making something that feels like yours.
| Component | Recommended Material | Average Cost | Durability |
|---|---|---|---|
| Wood Crates (reclaimed) | Fruit/vegetable crates | $0–$20 | Medium (with proper sealing) |
| Countertop (butcher block) | Oak or maple | $50–$100 | High (with regular oiling) |
| Sealant | Polyurethane (satin) | $15–$25 | High (lasts 5+ years) |
| Casters (locking) | Rubber wheels | $20–$40 | High (with proper use) |
Frequently Asked Questions
How do I build a DIY wood crate kitchen island on a budget?
Start by sourcing affordable wooden crates (new or reclaimed) and assemble them into a base using screws or brackets. Add a countertop like butcher block or plywood for a cost-effective yet stylish finish.
What tools do I need for a DIY wood crate kitchen island?
Basic tools include a drill, screws, sandpaper, measuring tape, and a saw (if resizing crates). Optional upgrades include casters for mobility or a stain/paint kit for customization.
Can I make my wood crate kitchen island mobile?
Yes! Attach locking casters to the bottom of the crate base for easy movement. This is ideal for small kitchens or renters who need flexible workspace.
How do I ensure my DIY kitchen island is stable?
Reinforce the crate joints with corner braces or wood glue, and anchor the structure to the wall if needed. Use sturdy crates and avoid overloading the shelves.
What’s the best finish for a wood crate kitchen island?
Sand the crates thoroughly, then apply a food-safe oil (like mineral oil) for a natural look or paint/stain for color. Seal with polyurethane for durability.
How can I customize my DIY kitchen island for extra storage?
Add hooks, baskets, or fabric liners inside crates for utensils. Install a towel rack or spice racks on the sides to maximize functionality.