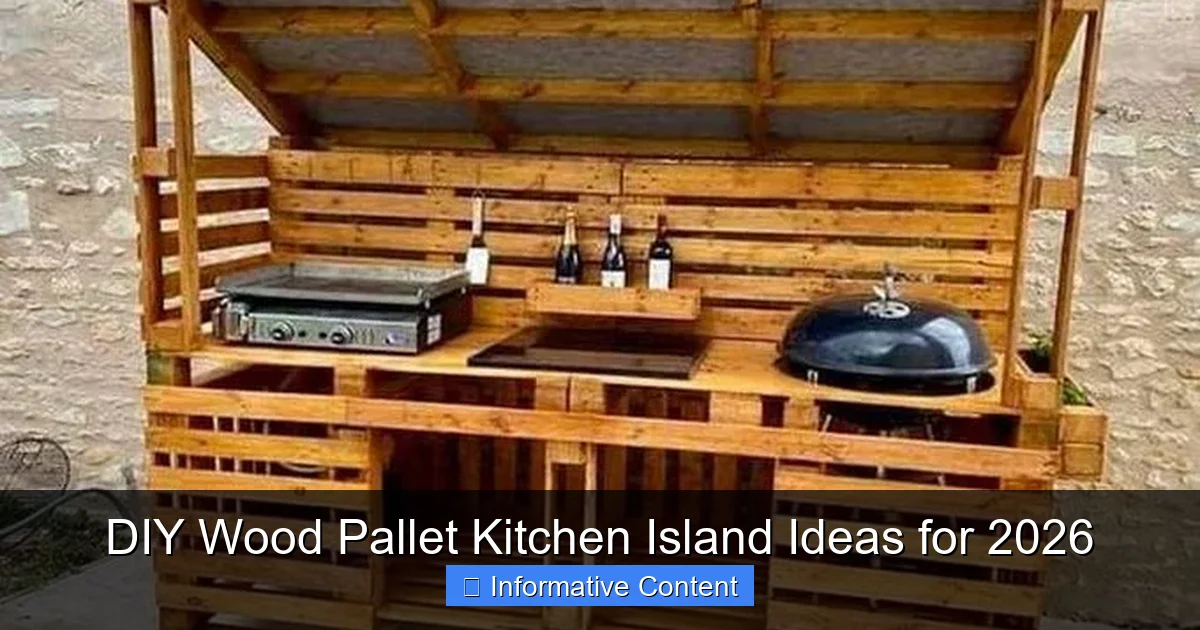
Featured image for diy wood pallet kitchen island
Image source: woodpalletcreations.com
Transform your kitchen with affordable, eco-friendly DIY wood pallet kitchen islands that combine rustic charm with modern functionality—perfect for 2026’s sustainable home trends. Easy to customize and assemble, these upcycled projects offer ample storage, counter space, and style, making them a smart weekend upgrade for any homeowner.
Key Takeaways
- Repurpose pallets: Use free or low-cost pallets to build a budget-friendly kitchen island.
- Prioritize safety: Sand and seal wood to prevent splinters and ensure food-safe surfaces.
- Add mobility: Install locking casters for easy movement and flexible kitchen layouts.
- Maximize storage: Include shelves, hooks, or drawers for efficient small-space organization.
- Customize style: Stain or paint to match your kitchen’s color scheme and decor.
- Reinforce structure: Use wood glue and screws for a stable, long-lasting island frame.
📑 Table of Contents
- Why a DIY Wood Pallet Kitchen Island Might Be Your Next Weekend Project
- 1. The Appeal of Wood Pallets: Why They’re Perfect for Kitchen Islands
- 2. Design Ideas and Functional Features for Your Island
- 3. Step-by-Step Guide to Building Your Island
- 4. Finishing Touches: Staining, Sealing, and Decor
- 5. Common Mistakes and How to Avoid Them
- 6. Real-Life Examples and Inspirational Projects
Why a DIY Wood Pallet Kitchen Island Might Be Your Next Weekend Project
Let’s be real—kitchen upgrades can cost a small fortune. Between countertops, cabinets, and appliances, even small changes can set you back thousands. But what if I told you there’s a way to add a functional, stylish kitchen island for under $200? That’s where the DIY wood pallet kitchen island comes in. I stumbled upon this idea when I needed more prep space in my small apartment kitchen. After a weekend of sanding, staining, and a little elbow grease, I had a custom island that doubled my counter space and became the centerpiece of my kitchen. It wasn’t perfect (more on that later), but it was mine—and that made all the difference.
Fast-forward to 2026, and this trend isn’t slowing down. More homeowners and renters are turning to upcycled materials like wood pallets to create affordable, eco-friendly furniture. A kitchen island built from pallets is more than just a budget hack—it’s a statement piece. Whether you’re a first-time DIYer or a seasoned woodworker, this project is surprisingly approachable. In this post, I’ll walk you through everything I’ve learned: design ideas, material sourcing, step-by-step builds, and even the mistakes to avoid. By the end, you’ll have a clear roadmap to transform a few old pallets into a kitchen island that’s both practical and Instagram-worthy.
1. The Appeal of Wood Pallets: Why They’re Perfect for Kitchen Islands
Affordability and Accessibility
Wood pallets are everywhere. Local warehouses, grocery stores, and even construction sites often give them away for free. I scored six pallets from a nearby furniture store—all they asked was that I haul them away. Compare that to the $800+ for a basic store-bought kitchen island, and the savings are obvious. Even if you buy new pallets (typically $10–$20 each), you’re still spending less than a quarter of the cost of a pre-made unit. Plus, you’re not limited to standard sizes. Need a 36”-tall island for bar seating? Or a 42”-wide island for a galley kitchen? With pallets, you can build to your exact specs.
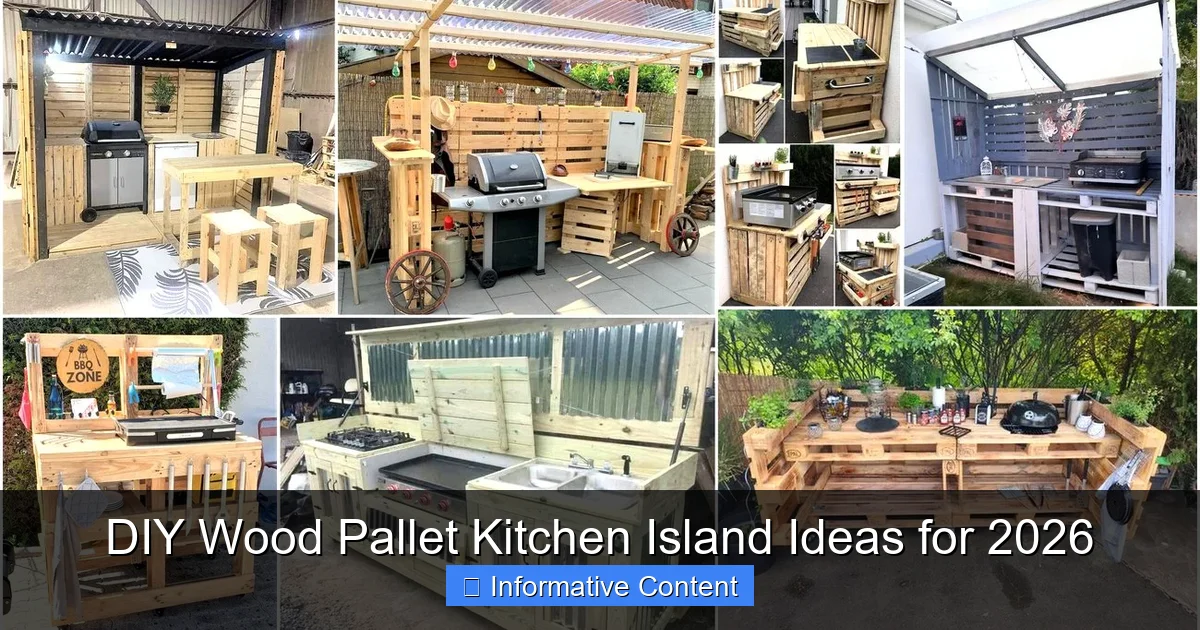
Visual guide about diy wood pallet kitchen island
Image source: woodpalletcreations.com
Eco-Friendly and Sustainable
Upcycling pallets reduces waste and lowers your carbon footprint. According to the EPA, over 2 billion pallets are used in the U.S. annually, with many ending up in landfills. By repurposing them, you’re diverting materials from the waste stream. Just make sure to use HT (Heat-Treated) pallets—they’re stamped with “HT” and safe for indoor use. Avoid “MB” (methyl bromide) pallets, which are chemically treated. Pro tip: Look for pallets stamped with “DB” (debarked), as they’re less likely to splinter.
Customization and Style Flexibility
Pallets come in different wood types (pine, oak, poplar), each with unique grain patterns. Pine is lightweight and easy to work with but stains unevenly. Oak is durable but heavier. I used pine for my first island, which worked fine, but for high-traffic areas, oak or poplar are better choices. You can also customize the finish: whitewash for a farmhouse vibe, dark stain for modern elegance, or paint to match your kitchen’s color scheme. I once saw a pallet island painted with chalkboard paint—perfect for grocery lists or kids’ doodles!
2. Design Ideas and Functional Features for Your Island
Size and Layout: Matching Your Kitchen’s Needs
Before cutting a single board, measure your kitchen. The island should leave at least 36” of clearance on all sides for walking and opening appliances. For a standard 10×12 ft kitchen, I recommend a 36”x24” island (or 48”x24” if you have space). If you’re tight on space, consider a narrow rolling island (24”x18”) with lockable casters. For open-concept kitchens, a larger island (60”x30”) with a breakfast bar can double as a dining area. My neighbor built a 72”-long island with a built-in wine rack—it’s now the heart of her home.
Storage Solutions: From Shelves to Drawers
One of the biggest perks of a DIY island is the ability to tailor storage. Here are my top ideas:
- Open shelves: Use pallet deck boards to create shelves for cookbooks or baskets. Easy to install and great for display.
- Closed cabinets: Attach a reclaimed door (or build one from extra pallet wood) to hide clutter. Add magnetic latches for a sleek look.
- Pull-out drawers: Use drawer slides ($15–$20 per set) for utensil trays or spice racks. I used a sliding tray for my cutting boards—game-changer!
- Vertical storage: Add a pegboard back or hooks for hanging pots, pans, or aprons.
For renters, I suggest a modular design with removable shelves. That way, you can disassemble it when you move.
Countertop Options: Balancing Cost and Durability
The countertop is the island’s workhorse. Here are the best options for pallet projects:
- Butcher block: $50–$100 for a pre-made slab. Durable and heat-resistant but needs oiling every 3–6 months.
- Reclaimed wood planks: Use extra pallet boards or scrap wood. Sand and seal with polyurethane. Budget-friendly but may warp over time.
- Concrete overlay: Apply a thin layer of concrete ($20 for a kit) over a plywood base. Modern look and easy to clean, but heavy.
- Tile or stone veneer: Adhere tiles to a cement board base. Waterproof and stylish but requires precise installation.
I used a butcher block on my island, and it’s held up well for two years. Just avoid placing hot pans directly on it!
3. Step-by-Step Guide to Building Your Island
Gathering Materials and Tools
Here’s what you’ll need for a basic 36”x24” island:
- Materials: 3–4 HT pallets (depending on design), 1×4 or 2×4 lumber (for frame reinforcement), countertop material, wood glue, screws (1.5” and 2.5”), sandpaper (80 and 220 grit), wood filler, finish (stain/paint/sealer), casters (optional).
- Tools: Circular saw, drill/driver, orbital sander, clamps, measuring tape, level, safety gear (gloves, goggles).
Total cost? Around $150 if buying new materials, or $0–$50 if sourcing free pallets and scrap wood. I borrowed a circular saw from a friend and used leftover stain from another project.
Disassembling and Prepping the Pallets
Start by removing the deck boards from one pallet. Use a pry bar to gently separate the nails—this gives you clean boards for shelves or trim. Sand all surfaces with 80-grit paper to remove splinters and rough edges. Fill cracks or holes with wood filler, then sand again with 220-grit for a smooth finish. Pro tip: Label boards as you disassemble to keep track of sizes.
Building the Frame and Adding Functionality
Here’s my tested method for a sturdy island:
- Frame: Use 2x4s to create a rectangular base (36”x24”). Attach two pallets vertically as side panels (screwed to the frame). This creates storage space inside.
- Reinforce: Add diagonal bracing (scrap wood) between the frame and side panels to prevent wobbling.
- Shelves: Cut deck boards to size and screw them into the frame at desired heights. Use a level to ensure they’re straight.
- Casters (if rolling): Attach heavy-duty casters (3”–4” wheels) to the base. Lockable ones ($10–$15 each) are a must for stability.
- Countertop: Secure your countertop material to the frame with screws from underneath. Seal edges with caulk to prevent water damage.
For a built-in look, I added a 1×4 trim around the base to hide the frame. It took an extra hour but made the island look custom-built.
4. Finishing Touches: Staining, Sealing, and Decor
Staining vs. Painting: Choosing the Right Finish
Stain enhances the wood’s natural grain and is easier to apply. I recommend water-based stain (like Minwax) for beginners—it dries quickly and cleans up with water. Apply two coats, sanding lightly between each. For a painted finish, use a primer (like Zinsser Bullseye 1-2-3) to prevent tannin bleed-through. Chalk paint is trendy but requires a topcoat for durability. I once tried whitewashing my island, but the finish chipped within weeks—lesson learned!
Sealing for Longevity
Kitchen islands face spills, heat, and heavy use. Seal your island with:
- Polyurethane: Clear, durable, and water-resistant. Use satin finish to hide fingerprints.
- Tung oil: Natural and food-safe (great for countertops). Reapply every 3–6 months.
- Epoxy resin: Creates a glass-like, waterproof surface. Overkill for most projects but stunning for high-end looks.
Apply 2–3 coats, sanding between each. Let the final coat cure for 48 hours before use.
Decor and Personalization
Make your island uniquely yours:
- Add hardware like cup pulls or knobs ($2–$5 each) to drawers/cabinets.
- Install under-cabinet lighting (battery-powered LED strips, $15) for ambiance.
- Attach a bottle opener or magnetic knife strip for functionality.
- Use contact paper (like marble or wood-look) to refresh the countertop without replacing it.
My favorite touch? A small chalkboard sign on the side for meal planning. It’s practical and cute!
5. Common Mistakes and How to Avoid Them
Structural Weakness
Pallets aren’t designed to support heavy weight. A common mistake is using only the original pallet frame without reinforcement. I once built an island with no bracing—it wobbled every time I chopped veggies. Fix it by adding internal supports (2x4s or plywood) and diagonal bracing. For heavy countertops (like concrete), use a double-layer frame.
Ignoring Moisture and Splinters
Wood expands and contracts with humidity. Seal all surfaces, especially edges, to prevent warping. Sand thoroughly—I’ve gotten splinters from poorly sanded pallets. Wear gloves and a dust mask when sanding or cutting.
Overcomplicating the Design
Start simple. A basic island with shelves and a countertop is achievable in a weekend. I tried building a complex island with drawers, a wine rack, and a built-in sink—it took three weeks and cost triple my budget. Save advanced features (like plumbing) for your second project.
Neglecting Safety
Always:
- Work in a well-ventilated area (especially when sealing).
- Use safety gear (goggles, ear protection).
- Secure pallets with clamps before cutting.
- Check for nails or staples before sanding.
6. Real-Life Examples and Inspirational Projects
To spark your creativity, here are three standout pallet kitchen islands from 2025–2026:
| Project | Size | Key Features | Cost |
|---|---|---|---|
| Farmhouse Rolling Island | 36”x24” | Butcher block top, open shelves, lockable casters, whitewash finish | $180 |
| Modern Concrete Island | 48”x30” | Concrete countertop, hidden drawers, matte black paint, LED lighting | $320 |
| Minimalist Open Shelving | 30”x18” | Reclaimed wood top, three-tier shelves, no back panel, natural finish | $90 |
The farmhouse island is perfect for small kitchens. The concrete version suits modern spaces, while the minimalist design works for renters or those who prefer open storage. All three use HT pallets and can be built in a weekend.
One of my favorite projects is from a couple in Austin who built an island with a built-in herb garden. They used a pallet for the base, added a glass-topped countertop, and planted mint and basil in the open shelves. Genius!
By now, you’ve seen how a DIY wood pallet kitchen island can transform your kitchen—without breaking the bank. From the affordability and sustainability of pallets to the endless design possibilities, this project is a win for DIYers, renters, and homeowners alike. Yes, it takes time and effort, but the payoff is huge: a custom island that fits your space, style, and needs.
Remember, perfection isn’t the goal. My first island had uneven shelves and a stain that dripped (oops!), but it was functional and full of character. The beauty of DIY is in the imperfections—they’re part of the story. So grab some pallets, dust off your tools, and start building. By 2026, your kitchen could be the envy of your neighborhood, all for less than the cost of a fancy dinner out. Happy building!
Frequently Asked Questions
What is a DIY wood pallet kitchen island, and why should I consider building one?
A DIY wood pallet kitchen island is a customizable, budget-friendly workspace made from repurposed wooden pallets, perfect for adding storage and style to your kitchen. These projects are ideal for 2026’s sustainability trends, as they upcycle materials while offering a rustic-chic aesthetic.
How do I choose the best wood pallets for a kitchen island project?
Look for heat-treated (HT) pallets stamped with “HT” or “DB” to avoid chemicals; avoid pallets marked “MB” (methyl bromide). Opt for sturdy, sanded pallets free of cracks or splinters to ensure safety and durability.
Can I build a DIY wood pallet kitchen island without advanced tools?
Yes! Basic tools like a saw, drill, sandpaper, and clamps are enough for simple designs. Many 2026 DIY wood pallet kitchen island tutorials feature beginner-friendly builds with step-by-step instructions.
How do I make a wood pallet kitchen island safe for food prep?
Seal the wood with food-grade mineral oil or a water-based polyurethane to prevent contamination. Add a removable cutting board or butcher block top for direct food contact.
What are the best ways to customize a DIY wood pallet kitchen island?
Add casters for mobility, open shelves for storage, or a towel rack for functionality. Paint or stain the wood to match your kitchen’s color scheme, or keep it natural for a rustic look.
How do I maintain a DIY wood pallet kitchen island to ensure longevity?
Clean with mild soap and water, then reapply wood sealant every 6–12 months. Check screws and joints periodically to tighten any loose connections, especially if the island is mobile.