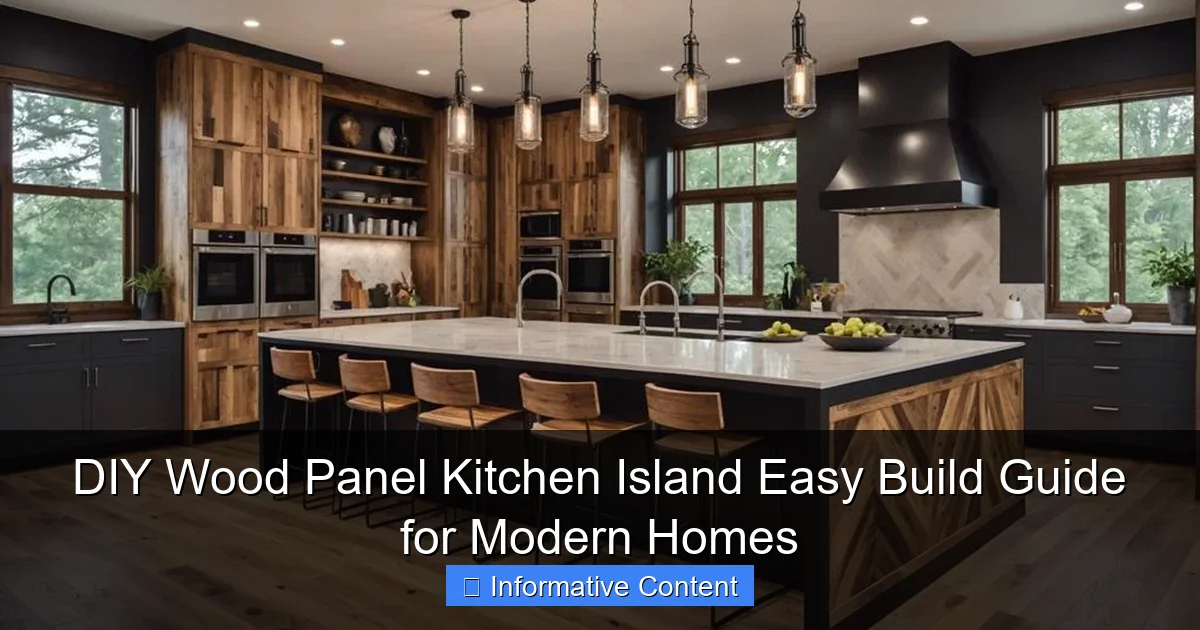
Featured image for diy wood panel kitchen island
Image source: dexdecor.com
Transform your kitchen with a sleek, modern DIY wood panel kitchen island that combines style, functionality, and affordability in one easy build. With simple tools and beginner-friendly instructions, this project lets you customize size, finish, and storage to perfectly fit your space—no professional skills required.
Key Takeaways
- Plan carefully: Measure your space and sketch a design before buying materials.
- Choose quality wood: Opt for durable, pre-finished panels to save time and effort.
- Use simple tools: A drill, saw, and level are all you need for this DIY project.
- Add functional storage: Incorporate shelves or cabinets for maximum kitchen utility.
- Secure properly: Anchor the island to the floor for safety and stability.
- Finish with style: Sand and stain or seal for a polished, modern look.
📑 Table of Contents
- Why a DIY Wood Panel Kitchen Island is the Perfect Addition to Your Modern Home
- Why Choose a Wood Panel Design for Your Kitchen Island?
- Materials and Tools You’ll Need (Plus Where to Buy Them)
- Step-by-Step Building Guide (From Frame to Finish)
- Design Ideas to Inspire Your DIY Project
- Common Mistakes to Avoid (And How to Fix Them)
- Maintenance and Long-Term Care for Your Wood Panel Island
Why a DIY Wood Panel Kitchen Island is the Perfect Addition to Your Modern Home
Let’s be real—kitchen islands are having a moment. They’re not just a trendy design choice; they’re a practical upgrade that can transform how you use your kitchen. Whether you’re prepping meals, hosting friends, or just sipping coffee while the kids do homework, a kitchen island brings functionality and style to the heart of your home. But here’s the thing: pre-built islands can cost a small fortune, and they often don’t quite fit your space or aesthetic. That’s where a DIY wood panel kitchen island comes in.
Building your own island isn’t just about saving money (though that’s a big perk). It’s about creating something that’s uniquely yours—customized to your kitchen’s layout, your storage needs, and your personal taste. And with today’s easy-to-find materials and beginner-friendly tools, you don’t need to be a master carpenter to pull it off. I’ve built a few kitchen islands over the years, and the most rewarding one was made from simple wood panels, a little paint, and a lot of elbow grease. It’s sturdy, stylish, and still the centerpiece of my kitchen after five years.
Why Choose a Wood Panel Design for Your Kitchen Island?
When I first started planning my DIY kitchen island, I was torn between materials: granite, stainless steel, even concrete. But after weighing the options, wood panels won me over. Here’s why they’re a fantastic choice for modern homes.
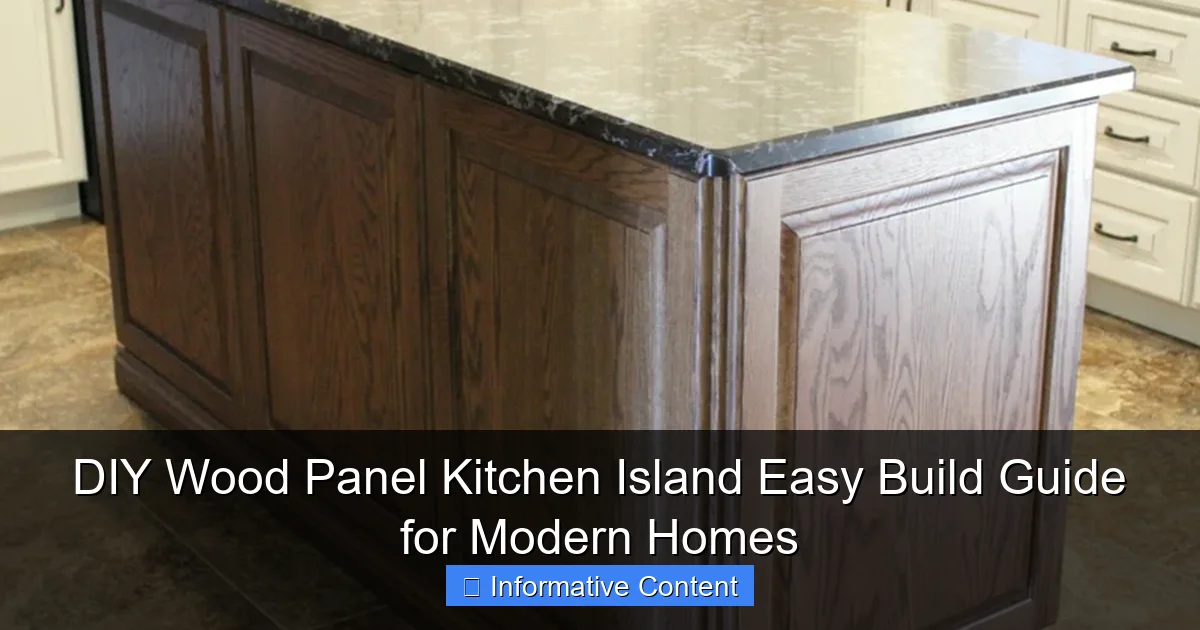
Visual guide about diy wood panel kitchen island
Image source: i.pinimg.com
Affordability Without Sacrificing Style
Wood panels—especially engineered wood or plywood—are significantly cheaper than solid hardwood or stone. But don’t let the price tag fool you. With the right finish, they look just as sleek and modern. I used birch plywood for my island, sanded it smooth, and sealed it with a matte polyurethane. The result? A high-end look for a fraction of the cost. Plus, if you’re on a tight budget, you can even repurpose old wood panels from furniture or pallets (just make sure they’re clean and structurally sound).
Customization Is a Breeze
One of the biggest advantages of a DIY wood panel kitchen island is the freedom to customize every detail. Want extra deep drawers for your pots and pans? Need a built-in wine rack? Or maybe you’d like to add a butcher block top for chopping? With wood, you can design and build exactly what you need. I added a small shelf under the counter for my cookbooks—something I never would’ve found in a pre-made island.
Easy to Work With (Even for Beginners)
Unlike metal or stone, wood is lightweight and easy to cut, drill, and shape. You don’t need fancy tools—a circular saw, drill, and clamps are enough to get started. And if you make a mistake? Wood is forgiving. A little wood filler and sandpaper can fix most errors. I once cut a shelf too short and had to add a small extension, but you’d never know unless I told you.
Warmth and Texture That Elevates Your Kitchen
Modern kitchens often lean into sleek, minimalist designs, but that doesn’t mean they have to feel cold. Wood brings natural warmth and texture to the space, balancing out stainless steel appliances or concrete floors. I paired my island with black metal bar stools, and the contrast between the wood and metal is one of my favorite parts of the design.
Materials and Tools You’ll Need (Plus Where to Buy Them)
Before you start building, let’s talk about what you’ll need. The good news? Most of these items are easy to find at your local hardware store or online. Here’s my go-to list for a basic DIY wood panel kitchen island.
Essential Materials
- Wood panels: ¾-inch birch or maple plywood for the frame and shelves, ½-inch for the back panel (if you’re adding one).
- Butcher block or solid wood countertop: 1.5-inch thick for durability. You can buy pre-finished or sand and seal it yourself.
- Drawer slides and hinges: Soft-close slides are worth the extra cost—they make opening and closing drawers feel luxurious.
- Wood glue and screws: Use wood glue for joints and 1.25-inch pocket hole screws for assembly.
- Sandpaper (80, 120, and 220 grit): For smoothing edges and prepping the surface.
- Sealant or finish: Polyurethane, tung oil, or a food-safe butcher block oil for the countertop.
Tools You’ll Need
- Circular saw or table saw (for straight cuts)
- Drill with screwdriver bits
- Kreg Jig (for pocket holes—this tool is a game-changer for beginners)
- Clamps (at least two)
- Tape measure and square
- Sander (orbital or hand sander)
- Safety gear: goggles, gloves, and a dust mask
Pro Tips for Sourcing Materials
- Check local lumberyards: They often have better-quality wood than big-box stores, and the staff can help you choose the right type.
- Look for offcuts: Some stores sell leftover wood at a discount. You might find a perfect-sized piece for a shelf or drawer front.
- Buy extra: Wood can warp or splinter during cutting. Having a spare panel or two saves you from running back to the store mid-project.
I once bought a pre-cut butcher block online because I was short on time. It was convenient, but I ended up spending more than if I’d just made it myself. Lesson learned: if you’re building a DIY wood panel kitchen island, invest the time in sourcing materials yourself. It’s worth it for the quality and customization.
Step-by-Step Building Guide (From Frame to Finish)
Ready to build? Let’s break it down into manageable steps. This guide assumes a 36-inch high, 30-inch deep, and 60-inch long island—adjust the dimensions to fit your space.
Step 1: Design and Measure
Start by sketching your island on graph paper or using free design tools like SketchUp or Canva. Measure your kitchen to ensure the island fits comfortably (leave at least 36 inches of clearance around it for walking space). Decide on features: drawers, shelves, open storage, or a combination.
Example: My island has two deep drawers on one side, a cabinet with shelves on the other, and an open shelf in the middle. I also added a small overhang (12 inches) on one end for bar stools.
Step 2: Cut the Panels
Using your design, cut the wood panels to size. For a 60-inch long island, you’ll need:
- Two 36″ x 30″ side panels
- Two 30″ x 30″ front and back panels (or one full back panel if you’re not adding doors)
- One 60″ x 30″ bottom panel
- One 60″ x 30″ top panel (this will hold the countertop)
- Drawer and shelf pieces (measure based on your design)
Pro tip: Label each piece with painter’s tape (e.g., “Side Left,” “Drawer Front”) to avoid confusion during assembly.
Step 3: Build the Frame
Assemble the frame using pocket holes and screws:
- Attach the side panels to the front and back panels using wood glue and 1.25-inch pocket hole screws.
- Add the bottom panel, securing it with screws from the inside of the frame.
- Reinforce joints with corner braces if needed.
I used a Kreg Jig to create pocket holes—it’s a beginner-friendly tool that hides the screws and makes the frame super sturdy.
Step 4: Add Shelves and Drawers
Install shelves by drilling pocket holes into the side panels and screwing them in. For drawers:
- Build drawer boxes from ½-inch plywood using butt joints or dovetails.
- Attach drawer slides to the frame and drawers (follow the manufacturer’s instructions).
- Test the drawers to ensure they open smoothly.
My drawers were slightly off-center at first, but I adjusted the slides with a few turns of a screwdriver. Don’t rush this step—precision here pays off.
Step 5: Attach the Countertop
Place the butcher block or solid wood countertop on the frame. Secure it with 2-inch screws from underneath, pre-drilling to avoid splitting the wood. If you’re using a separate top panel, glue and screw it first, then attach the countertop.
Step 6: Sand and Finish
Sand the entire island, starting with 80-grit and moving to 220-grit for a smooth finish. Wipe off dust with a tack cloth. Apply your chosen sealant or finish (I used three coats of polyurethane, sanding lightly between each coat).
Step 7: Add Final Touches
- Install drawer pulls and cabinet handles.
- Add a back panel (if desired) using ½-inch plywood and brad nails.
- Consider adding casters for mobility (great if you want to move the island later).
My island took about 12 hours to build over a weekend. The most time-consuming part was sanding—but it’s also the step that makes the biggest difference in the final look.
Design Ideas to Inspire Your DIY Project
Now that you know how to build a DIY wood panel kitchen island, let’s talk design. Your island can be more than just a functional piece—it can be a statement. Here are some ideas to spark your creativity.
Minimalist and Modern
Keep it simple with clean lines and a monochromatic palette. Use birch or maple plywood with a matte finish, and pair it with black metal hardware. I love this look with white or gray cabinets—it feels fresh and uncluttered.
Farmhouse Charm
Distressed wood, shaker-style doors, and open shelves give your island a cozy, rustic vibe. I once built an island with reclaimed barn wood for a friend, and it became the heart of her farmhouse kitchen. Tip: Use a wire brush to lightly distress the wood before sealing it.
Two-Tone Contrast
Paint the frame a bold color (like navy or forest green) and leave the countertop natural wood. This creates visual interest without overwhelming the space. I did this in a client’s kitchen, and the navy island became the room’s focal point.
Multi-Functional Island
Maximize utility with features like:
- A built-in wine rack
- A pull-out trash can
- A charging station (add a power strip inside a drawer)
- A drop-leaf extension for extra counter space
One of my favorite projects was an island with a hidden cutting board that slid out from under the countertop. It’s perfect for small kitchens where space is tight.
Open and Airy
Skip the doors and drawers and go for open shelving. Display your favorite dishes, cookbooks, or plants. Just be sure to keep it tidy—open storage shows everything!
Common Mistakes to Avoid (And How to Fix Them)
Even with the best intentions, DIY projects can go sideways. Here are the mistakes I’ve made (and seen others make) when building a DIY wood panel kitchen island—and how to avoid them.
Not Measuring Twice (And Cutting Once)
I’ve been guilty of this. Measure your kitchen space, then measure the wood again before cutting. A 1/8-inch miscalculation can throw off the entire build. Use a square to ensure your cuts are perfectly straight.
Skipping the Sanding
Sanding isn’t the most exciting step, but it’s crucial. Uneven surfaces will show through your finish and feel rough to the touch. Sand with the grain, and don’t rush through the grits.
Ignoring Weight Distribution
Wood islands are sturdy, but they can sag over time if the frame isn’t reinforced. Use cross-supports under the countertop (especially for overhangs) and add a center brace if your island is longer than 4 feet.
Choosing the Wrong Finish
Kitchen islands take a lot of abuse—spills, heat, scratches. A cheap sealant won’t hold up. Invest in a durable finish like polyurethane or tung oil. For the countertop, use a food-safe option if you’ll be prepping food on it.
Forgetting About Mobility
If you ever need to move your island (for cleaning or rearranging), casters are a lifesaver. I didn’t add them to my first island, and moving it was a two-person job. Now, I always install locking casters—they’re affordable and make life easier.
Maintenance and Long-Term Care for Your Wood Panel Island
A DIY wood panel kitchen island is built to last, but it needs a little TLC to stay looking great. Here’s how to care for it.
Cleaning Tips
- Wipe spills immediately with a damp cloth.
- Use a mild soap and water solution for regular cleaning—avoid harsh chemicals.
- For the countertop, reapply food-safe oil every 6 months to prevent drying and cracking.
Repairing Scratches and Dents
- Light scratches: Rub with a walnut (yes, really—it’s a natural wood filler) or use a wood touch-up pen.
- Deep scratches: Sand the area lightly, then reapply sealant.
- Dents: Place a damp cloth over the dent and iron it on low heat. The steam will raise the wood fibers.
Refinishing Every Few Years
Over time, the finish will wear down. Every 3-5 years, sand the island lightly and apply a fresh coat of sealant. It’s a simple process that can make your island look brand new.
Protecting from Heat and Moisture
- Always use trivets for hot pots and pans.
- Keep a small rug or mat under the island if it’s near a sink or dishwasher to catch drips.
I’ve had my island for five years, and it’s still going strong. The key is treating it with care—and enjoying the fact that I made it myself.
| Material | Cost (Average) | Durability | Best For |
|---|---|---|---|
| Birch Plywood | $50-$100 | High | Modern, minimalist designs |
| Maple Plywood | $60-$120 | High | Light-colored kitchens |
| Reclaimed Wood | $30-$150 (varies) | Medium | Rustic, farmhouse styles |
| Butcher Block | $100-$300 | Medium (needs sealing) | Countertops, food prep |
Building a DIY wood panel kitchen island isn’t just a project—it’s an investment in your home. It’s a chance to create something functional, beautiful, and uniquely yours. Whether you’re a seasoned DIYer or a first-timer, the process is rewarding from start to finish. And the best part? Every time you use your island, you’ll be reminded of the time, care, and creativity you put into it. So grab your tools, pick your favorite design, and get building. Your dream kitchen is closer than you think.
Frequently Asked Questions
How do I build a DIY wood panel kitchen island on a budget?
To build a budget-friendly DIY wood panel kitchen island, use affordable materials like plywood or reclaimed wood, and repurpose hardware from old furniture. Follow free or low-cost plans online to minimize design expenses while ensuring sturdy construction.
What tools do I need for a DIY wood panel kitchen island?
Essential tools include a circular saw, drill, measuring tape, clamps, level, and sandpaper. A Kreg Jig for pocket holes and a pocket-hole screwdriver will help assemble the wood panels securely for a polished finish.
Can I customize the size of my DIY wood panel kitchen island?
Yes, one of the biggest advantages of a DIY wood panel kitchen island is customization. Adjust the dimensions, height, and layout to fit your kitchen space, whether you need extra storage, seating, or a compact design.
How do I finish and seal a DIY wood panel kitchen island?
Sand the wood panels thoroughly, then apply a wood stain or paint for color, followed by a food-safe polyurethane or wax sealant to protect against moisture and daily wear. Reapply the sealant every 1-2 years for longevity.
What are the best wood types for a DIY kitchen island?
Hardwoods like oak, maple, or birch are durable and ideal for a DIY wood panel kitchen island. For a cheaper option, use birch or poplar plywood, which still offer a modern, clean aesthetic when properly sealed.
Can I add wheels to my DIY wood panel kitchen island?
Absolutely! Install locking casters or swivel wheels to the base for mobility, making your DIY wood panel kitchen island easy to move for cleaning or rearranging. Just ensure the wheels are rated for the island’s weight.