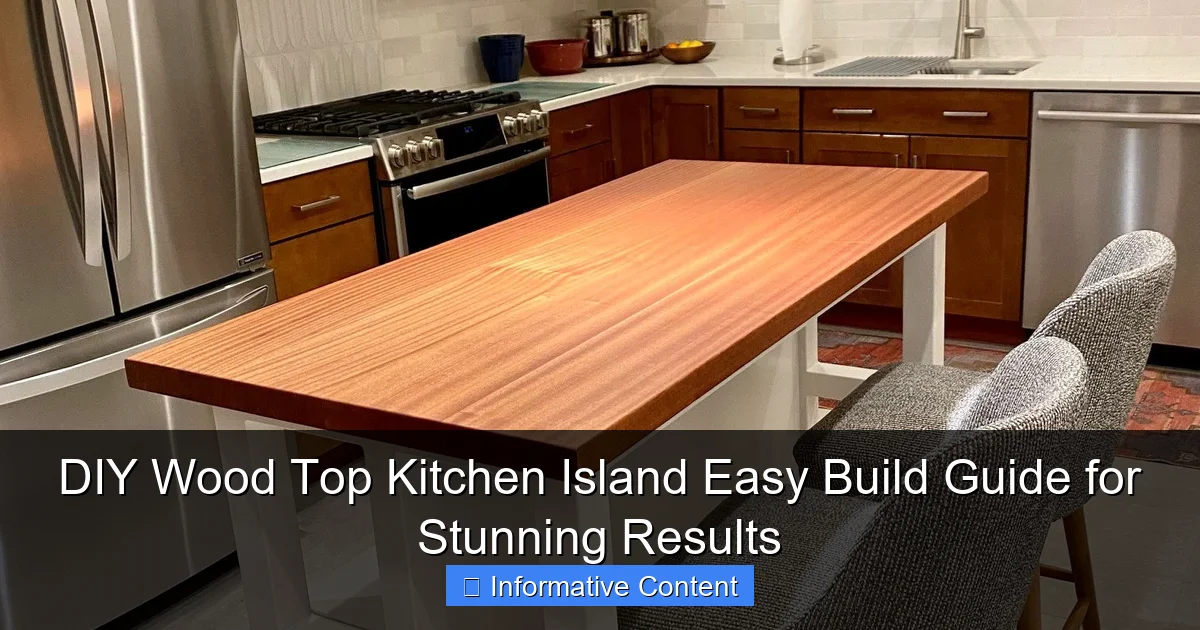
Featured image for diy wood top kitchen island
Image source: i.etsystatic.com
Transform your kitchen with a stunning DIY wood top kitchen island that combines functionality and style using simple tools and beginner-friendly techniques. This easy build guide walks you through every step—from selecting durable hardwoods to achieving a flawless finish—ensuring professional-quality results without the high cost.
Key Takeaways
- Choose durable wood: Opt for hardwoods like maple or oak for long-lasting beauty.
- Prep is key: Sand and seal the top properly to resist stains and moisture.
- Measure twice, cut once: Precision ensures a perfect fit and seamless installation.
- Add functional storage: Include shelves or drawers for practical kitchen organization.
- Customize your finish: Stain or paint to match your kitchen’s style effortlessly.
- Reinforce the base: Use sturdy legs or supports for a wobble-free island.
📑 Table of Contents
- Why a DIY Wood Top Kitchen Island Is the Perfect Weekend Project
- Planning Your DIY Wood Top Kitchen Island: Start Smart
- Tools and Materials You’ll Need (No Fancy Gear Required)
- Step-by-Step Build: From Frame to Finished Island
- Finishing Your Island: Stain, Seal, and Protect
- Customization Ideas: Make It Uniquely Yours
- Common Mistakes to Avoid (Learned the Hard Way)
Why a DIY Wood Top Kitchen Island Is the Perfect Weekend Project
Let’s be honest—kitchen islands are the unsung heroes of the modern home. They’re where we sip our morning coffee, prep dinner, help kids with homework, and sometimes even host impromptu wine nights. But buying a ready-made one? That can cost anywhere from $500 to $2,000—often more if you want real wood and a custom look. A few years ago, I found myself in that exact spot: I wanted a kitchen island with a solid wood top, but I didn’t want to break the bank. So, I did what any budget-savvy DIYer would do: I built one myself.
And guess what? It wasn’t as hard as I thought. In fact, with the right tools, a clear plan, and a little patience, you can build a DIY wood top kitchen island in a weekend (or less, if you’re quick). The result? A beautiful, functional centerpiece that adds warmth, storage, and style to your kitchen—without the premium price tag. Whether you’re a seasoned woodworker or just starting out, this guide will walk you through every step, from choosing materials to sealing your finished island. No fluff, no filler—just real, practical advice from someone who’s been there, sanded that.
Planning Your DIY Wood Top Kitchen Island: Start Smart
Before you pick up a saw or order lumber, take a breath and plan. A well-thought-out design saves time, money, and frustration. I learned this the hard way when I once built a cabinet that didn’t fit through my kitchen door. (Spoiler: I had to cut it in half and reassemble it inside. Not fun.) So, let’s avoid that.
Measure Your Space Accurately
Start by measuring your kitchen. You’ll want at least 36 inches of clearance around the island for comfortable movement. For example, if your kitchen is 12 feet wide, a 4-foot-wide island leaves 4 feet on each side—perfect. Use painter’s tape to mark the island’s footprint on the floor. Walk around it. Open imaginary drawers. Sit on a stool. Does it feel right? If not, adjust the size.
- Ideal island width: 36–48 inches
- Depth: 24–30 inches (standard cabinet depth)
- Height: 36 inches (standard counter height) or 42 inches (bar height)
Decide on Style and Function
Ask yourself: What do I need this island for? Cooking prep? Extra seating? Storage? A mix of all three? Your answer shapes your design.
- Prep-focused: Add a sink or cooktop (requires plumbing/electrical work—more complex).
- Storage-focused: Include drawers, cabinets, or open shelving.
- Social-focused: Add overhang for bar stools (12–16 inches overhang, 30–36 inches from floor to seat).
For beginners, I recommend starting with a storage-focused island with a wood top and simple base. It’s easier, safer, and still adds major value.
Choose Your Wood Top Material
The wood top is the star of your DIY wood top kitchen island. Here are your best options:
- Hardwood boards (e.g., oak, maple, walnut): Durable, beautiful grain, but more expensive. Ideal for a long-lasting island.
- Plywood with hardwood veneer: Budget-friendly, stable, and looks real when stained. Use 3/4-inch birch or oak plywood.
- Reclaimed wood: Eco-friendly and full of character, but may need extra sanding and sealing.
Pro tip: Buy 10–15% extra wood for mistakes and sanding waste.
Tools and Materials You’ll Need (No Fancy Gear Required)
Good news: You don’t need a full workshop to build a kitchen island. Most tools are common household items or available at your local hardware store. Here’s what I used for my island, and what I recommend for yours.
Essential Tools
- Circular saw or miter saw: For cutting wood to size. A circular saw works fine for beginners.
- Drill/driver: For screws and pocket holes.
- Pocket hole jig (e.g., Kreg Jig): Makes strong, hidden joints. A game-changer for DIY furniture.
- Clamps: At least two bar clamps for holding pieces together during glue-up.
- Orbital sander or sanding block: For smoothing wood.
- Measuring tape, square, and pencil: For accuracy.
- Level: To ensure your island doesn’t wobble.
No pocket hole jig? No problem. You can use corner brackets or butt joints with wood glue and screws. But the jig makes it easier and cleaner.
Materials List (Example: 48″ x 30″ Island)
| Item | Quantity | Notes |
|---|---|---|
| 3/4″ plywood (4×8 sheet) | 1 | For base cabinet and top (if using veneer) |
| 1×12 or 2×12 hardwood boards | 3–4 | For solid wood top (e.g., 48″ long) |
| 2×2 or 2×3 lumber (8 ft) | 6 | For frame and legs |
| 2×4 lumber (8 ft) | 2 | For cross supports (optional) |
| Wood glue | 1 bottle | Waterproof PVA glue recommended |
| Pocket hole screws (1-1/4″ and 2-1/2″) | 1 box each | For joints and frame |
| Wood filler | 1 tube | For gaps and screw holes |
| Sandpaper (80, 120, 220 grit) | Assorted | For smoothing |
| Stain or paint + sealer | 1–2 cans | Polyurethane, tung oil, or water-based sealer |
| Drawer slides (optional) | 2 pairs | For soft-close function |
Total cost estimate: $150–$300 (depending on wood choice and extras). Compare that to $800+ for a store-bought equivalent. See why DIY wins?
Step-by-Step Build: From Frame to Finished Island
Now comes the fun part: building. I’ll walk you through a simple, sturdy design with a solid wood top and enclosed base. This is the same plan I used for my island, and it’s stood up to years of daily use.
Step 1: Build the Base Frame
Start with the frame. It’s the skeleton of your island and must be strong.
- Cut four 2×2 legs to your desired height (e.g., 34.5″ for a 36″ island with 1.5″ top).
- Cut two 2×2 rails: 45″ long (for width) and two at 27″ (for depth).
- Use the pocket hole jig to drill holes at the ends of the rails.
- Attach rails to legs with wood glue and 2-1/2″ screws. Make a rectangle. Use a square to ensure 90-degree corners.
- Add a middle support: Cut a 2×2 to 45″ and attach it vertically in the center of the long sides. This prevents sagging.
Tip: Clamp pieces together before screwing. It keeps everything aligned.
Step 2: Add the Cabinet Box (Optional but Recommended)
For storage, add a simple cabinet. Use 3/4″ plywood.
- Cut two sides (30″ H x 27″ W), two top/bottom panels (45″ L x 27″ W), and a back panel (45″ L x 30″ H).
- Drill pocket holes along the edges of the side panels.
- Attach sides to top and bottom panels. Then attach the back panel. Use glue and screws.
- Set the cabinet on the frame. Secure with screws from inside the cabinet into the 2×2 frame.
No cabinet? Skip this step. Just add a plywood top directly to the frame.
Step 3: Build and Attach the Wood Top
This is where your DIY wood top kitchen island gets its personality.
- Cut your hardwood boards to 48″ long (or your island width). Use a straight edge to guide your saw.
- Arrange boards side by side. Check for gaps. Trim if needed.
- Apply wood glue to the edges. Clamp boards together tightly. Let dry 24 hours.
- Once glued, sand the top with 80-grit, then 120-grit, then 220-grit. Wipe clean.
- Flip the top over. Attach it to the cabinet or frame using 1-1/4″ pocket hole screws from underneath. Space screws every 12–16 inches.
- Leave a 1/8″ overhang on all sides for a clean look.
Pro tip: Don’t glue the top to the frame. Wood expands and contracts with humidity. Let it “float” to prevent warping.
Step 4: Add Doors, Drawers, or Open Shelves
Customize based on your needs.
- Doors: Cut plywood to fit. Attach with hinges. Add a magnetic latch.
- Drawers: Build drawer boxes from 1/2″ plywood. Install slides. Add a simple wood front.
- Open shelves: Cut a 1×12 board to 45″ long. Attach to sides with L-brackets.
I added one drawer and two open shelves. It’s perfect for storing cutting boards, mixing bowls, and cookbooks.
Finishing Your Island: Stain, Seal, and Protect
Finishing is what transforms raw wood into a kitchen-ready surface. It’s also the step most people rush—and regret later. Don’t be that person.
Stain or Paint? Choose Wisely
Stain enhances the wood’s grain. Paint hides it but offers more color options.
- Stain: Use oil-based or water-based stain. Apply with a rag or brush. Wipe off excess after 5–10 minutes. Let dry 24 hours.
- Paint: Use a durable enamel or chalk paint. Prime first if using bare wood.
I used a walnut stain on my oak top. It brought out the grain beautifully and hid minor imperfections.
Seal It Right: The Key to Durability
A good sealer protects your wood from spills, heat, and wear. Here are your best options:
- Water-based polyurethane: Dries fast, low odor, clear finish. Apply 3–4 thin coats. Sand lightly between coats with 220-grit.
- Tung oil: Natural, food-safe, but needs reapplication every 6–12 months. Great for a matte look.
- Epoxy resin: Super durable and glossy. Overkill for most kitchens, but perfect if you want a “bar top” look.
For a DIY wood top kitchen island, I recommend water-based polyurethane. It’s easy, affordable, and lasts years.
Pro Finishing Tips
- Work in a clean, dust-free area. Dust ruins smooth finishes.
- Use a foam brush or lint-free rag for even application.
- Sand between coats with 220-grit paper. Wipe with a tack cloth.
- Let the final coat cure for 72 hours before using heavily.
After sealing, your island will resist water, wine, and even red sauce. (Trust me—I’ve tested it.)
Customization Ideas: Make It Uniquely Yours
Your island doesn’t have to be plain. A few smart upgrades make it stand out.
Add Casters for Mobility
Attach locking casters to the legs. Now you can move your island for cleaning, parties, or reconfiguring. Use heavy-duty casters (rated 100+ lbs each) for stability.
Install a Butcher Block Edge
For a rustic touch, add a 2×4 edge to the front of the top. Cut it to match the island length. Attach with glue and screws from underneath. Sand smooth. It adds character and protects the edge from chipping.
Include Power and Lighting
Drill a hole in the back panel for an outlet strip. Or install under-cabinet LED lights for ambiance. Use a cord cover to keep wires tidy.
Use Contrasting Wood or Paint
Paint the base a bold color (navy, sage, or charcoal) and keep the top natural. Or use light wood for the base and dark for the top. Contrast creates visual interest.
Add a Towel Bar or Hooks
Mount a wooden dowel or metal hooks on the side. Perfect for hanging dish towels or aprons.
I added a towel bar and a small chalkboard for grocery lists. It’s now the most functional (and stylish) piece in my kitchen.
Common Mistakes to Avoid (Learned the Hard Way)
Even with a great plan, things can go wrong. Here’s what to watch for.
Skipping the Sanding
Sanding takes time, but it’s essential. A rough surface feels cheap and stains unevenly. Always sand with the grain. Start coarse (80-grit), then go finer (120, then 220).
Overlooking Weight Distribution
A heavy wood top needs a strong base. Don’t use flimsy 1x2s for legs. Use 2x2s or 2x3s. Add cross braces if the island is over 4 feet long.
Ignoring Humidity and Expansion
Wood moves. Don’t glue the top to the frame. Leave 1/8″ gaps between boards. This prevents buckling in humid months.
Using the Wrong Screws
Long screws can split wood. Use 2-1/2″ screws for frame joints, 1-1/4″ for attaching the top. Pre-drill holes in hardwoods to avoid splitting.
Rushing the Sealant
One thin coat of sealer won’t protect your island. Apply multiple thin coats. Let each cure fully. It’s worth the wait.
I once rushed sealing and ended up with a cloudy, sticky finish. I had to sand it all off and start over. Lesson learned.
Building a DIY wood top kitchen island is one of the most rewarding home projects you can tackle. It’s affordable, customizable, and adds real value to your space. Whether you’re a first-time builder or a DIY pro, this project gives you full control—over design, materials, and budget.
Remember: Start simple. Measure twice, cut once. Sand well. Seal thoroughly. And don’t stress about perfection. A little character (like a knot in the wood or a slightly uneven edge) adds charm, not flaws. My island isn’t flawless, but it’s mine. And every time I use it, I remember the weekend I built it with my own hands.
So grab your tools, clear your weekend, and get building. Your dream kitchen island is just a few cuts, screws, and coats away. And when it’s done? Invite a friend over, pour a glass of wine, and toast to your hard work. You’ve earned it.
Frequently Asked Questions
What tools do I need to build a DIY wood top kitchen island?
You’ll need basic tools like a circular saw, drill, clamps, level, tape measure, and sandpaper. For a polished finish, consider a pocket-hole jig and wood stain or sealant to protect your DIY wood top kitchen island.
How thick should the wood top be for a kitchen island?
Aim for a wood top that’s at least 1.5 to 2 inches thick for durability and stability. Thicker tops (like butcher block) resist warping and provide a sturdy surface for food prep and dining.
Can I use reclaimed wood for my DIY wood top kitchen island?
Yes, reclaimed wood adds character and sustainability to your project. Just ensure it’s sanded smooth and sealed properly to prevent splinters and moisture damage in your kitchen environment.
How do I prevent my wood top from warping over time?
Seal all sides of the wood (including edges) with a food-safe oil or polyurethane to minimize moisture absorption. Maintain consistent humidity in your kitchen and avoid placing hot items directly on the surface.
What’s the easiest way to add storage to a DIY kitchen island?
Install open shelves or cabinets underneath the countertop for accessible storage. Use prefabricated cabinet boxes or build simple cubbies with plywood for a custom DIY wood top kitchen island.
Can I build a mobile kitchen island with a wood top?
Absolutely! Attach locking casters to the base for mobility and stability. Just ensure the island is balanced and the wheels are rated for the weight of your wood top and storage contents.