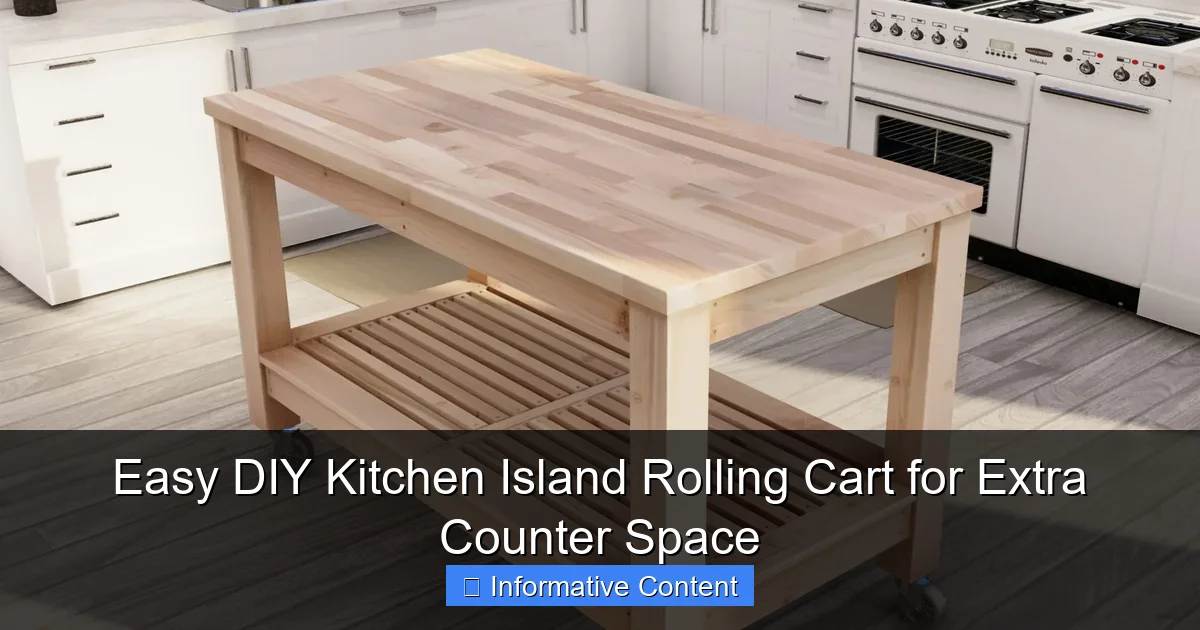
Featured image for easy diy kitchen island rolling
Image source: gooddiyplans.com
Transform your kitchen in a weekend with an easy DIY rolling island cart that adds valuable counter space and mobility without breaking the bank. Perfect for small kitchens or renters, this customizable project uses basic tools and materials to create a stylish, functional centerpiece on wheels.
Key Takeaways
- Maximize space: Add a rolling cart for instant extra counter space.
- Easy assembly: Use basic tools and pre-cut materials for quick setup.
- Mobility matters: Lockable casters ensure stability when stationary.
- Customize style: Paint or stain to match your kitchen decor.
- Smart storage: Include shelves or hooks for added functionality.
- Cost-effective: Build it yourself to save money vs. buying.
📑 Table of Contents
- Why a DIY Rolling Kitchen Island is a Game-Changer
- Planning Your DIY Rolling Kitchen Island
- Step-by-Step Guide to Building Your Rolling Kitchen Island
- Customization Ideas to Make Your Cart Unique
- Maintenance and Safety Tips for Your Rolling Kitchen Island
- Real-Life Examples and Inspiration
- Final Thoughts: Why You Should Build a Rolling Kitchen Island Today
Why a DIY Rolling Kitchen Island is a Game-Changer
Let’s be real: the kitchen is the heart of the home, but it’s also where clutter and chaos tend to gather. Between meal prep, family gatherings, and last-minute homework sessions, counter space can feel like a luxury. I remember the days when I’d juggle cutting boards, mixing bowls, and half-chopped veggies on every available inch of countertop. Sound familiar? That’s when I discovered the magic of a DIY kitchen island rolling cart—a simple, budget-friendly solution that instantly added workspace, storage, and mobility to my kitchen.
Unlike permanent islands, a rolling cart is flexible. Need extra space near the stove? Slide it over. Hosting a party? Move it to the living room for a snack station. The best part? You don’t need to be a woodworking pro to build one. With basic tools and a weekend (or two), you can create a custom island that fits your space, style, and storage needs. Whether you’re a renter, a DIY newbie, or just looking to upgrade your kitchen, this project is a practical and rewarding way to reclaim your counter space.
Planning Your DIY Rolling Kitchen Island
Assessing Your Kitchen Needs
Before you start measuring wood, take a moment to think about how you’ll use your rolling island. Are you mostly prepping meals? Need extra storage for pots and pans? Or maybe you want a spot to serve breakfast? Your answers will shape the design. For example, if you’re a frequent baker, you might prioritize a large, sturdy countertop. If storage is your main goal, consider open shelves, drawers, or even a wine rack. I once built a cart with a built-in spice rack—total game-changer for keeping my most-used seasonings within reach.

Visual guide about easy diy kitchen island rolling
Image source: gooddiyplans.com
Also, think about mobility. A rolling cart should be easy to move, so consider the weight of your materials and the type of casters (wheels) you’ll use. For a lighter cart, plywood or MDF works well. For something more durable, solid wood is a better choice, but it’s heavier. And don’t forget about clearance—measure the height of your existing counters to ensure your island matches (standard height is 36 inches).
Choosing the Right Materials and Tools
You don’t need fancy tools or expensive materials to build a rolling kitchen island. Here’s a list of essentials to get you started:
- Wood or MDF: For the base, shelves, and countertop. Plywood is affordable and lightweight, while solid wood (like pine or poplar) is sturdier but pricier.
- Casters (wheels): Look for locking casters (at least two) to keep the cart steady when in use. Swivel wheels make it easier to maneuver.
- Screws, nails, and wood glue: For assembly. I prefer pocket-hole screws for a clean, strong finish.
- Sandpaper and stain/paint: To finish the wood. A food-safe sealant is a must if you’re using the cart for food prep.
- Basic tools: Circular saw, drill, screwdriver, measuring tape, and a level.
Pro tip: If you’re on a tight budget, check out your local hardware store for scrap wood or discounted materials. I once snagged a beautiful butcher block countertop for half price because it had a small scratch—easily fixed with a little sanding!
Designing for Function and Style
Your rolling kitchen island should be both functional and stylish. Think about how it will blend with your existing kitchen decor. A rustic farmhouse cart with reclaimed wood looks great in a country kitchen, while a sleek, minimalist design suits modern spaces. I once built a cart with a white-painted base and a butcher block top—it matched my shaker-style cabinets perfectly.
Here are a few design ideas to inspire you:
- Open shelving: Great for displaying dishes or storing frequently used items.
- Closed cabinets: Hide clutter like appliances or pantry items.
- Drop-leaf countertop: Saves space when not in use (perfect for small kitchens).
- Butcher block top: Adds warmth and is perfect for food prep.
Sketch out your design or use free online tools like SketchUp to visualize the final product. Don’t be afraid to get creative—I added a chalkboard panel to my cart so my kids could draw while I cooked!
Step-by-Step Guide to Building Your Rolling Kitchen Island
Cutting and Assembling the Frame
Start by cutting your wood to size. For a basic rectangular cart, you’ll need:
- 4 legs (18–24 inches tall, depending on your counter height)
- 4 horizontal supports (for the top and bottom frames)
- 2–3 shelves (cut to fit the depth and width of your cart)
- Countertop (cut to your desired size, with overhang if desired)
Assemble the frame using pocket-hole screws or butt joints. I recommend starting with the legs and horizontal supports, then adding the shelves. Use a level to ensure everything is square—this will prevent wobbly shelves later. Pro tip: Pre-drill holes to avoid splitting the wood.
Attaching the Casters and Shelves
Once the frame is sturdy, attach the casters to the bottom of the legs. Make sure to use locking casters (at least two) to keep the cart stable when in use. If your casters have a plate, attach it to the leg with screws. For stem-style casters, drill a hole in the leg and secure it with a nut.
Next, attach the shelves. I like to use shelf pins for adjustable shelves, but you can also screw them directly into the frame. For a clean look, sand any rough edges and wipe down the wood with a damp cloth.
Adding the Countertop and Finishing Touches
For the countertop, you can use a pre-made butcher block or cut a piece of plywood to size. Attach it to the frame with screws from underneath, or use brackets for a removable top. If you’re using a butcher block, sand it smooth and apply a food-safe sealant (like mineral oil or beeswax).
Now it’s time for the fun part: finishing! Sand the entire cart with 120-grit sandpaper, then 220-grit for a smooth surface. Wipe away dust, then apply stain or paint. I like using a gel stain for a rich, even finish. Let it dry completely, then add a second coat if needed. For extra protection, finish with a clear polyurethane sealant.
Customization Ideas to Make Your Cart Unique
Adding Storage Solutions
The beauty of a DIY rolling kitchen island is that you can tailor it to your storage needs. Here are some ideas:
- Drawers: Install small drawers for utensils or spice jars. I used a simple drawer slide kit for mine.
- Wine rack: Perfect for entertaining or storing your favorite bottles.
- Pegboard back panel: Hang pots, pans, or kitchen tools for easy access.
- Hanging baskets: Great for storing onions, garlic, or fruit.
I once added a magnetic knife strip to my cart—now my knives are always within reach!
Upgrading with Functional Features
Want to take your cart to the next level? Consider these upgrades:
- Drop-leaf top: Folds down to save space when not in use.
- Built-in trash bin: A small pull-out bin keeps trash out of sight.
- Paper towel holder: Mount a rod under the countertop for easy access.
- Charging station: Drill a hole in the side for a power strip—perfect for keeping phones and tablets charged.
My favorite upgrade? A pull-out cutting board. I cut a slot in the countertop and added a sliding tray—now I have a dedicated prep area that doesn’t take up extra space.
Maintenance and Safety Tips for Your Rolling Kitchen Island
Keeping Your Cart in Top Shape
A well-maintained rolling kitchen island can last for years. Here’s how to keep it looking and functioning its best:
- Clean regularly: Wipe down the countertop with a mild soap and water solution. For butcher block, use a food-safe cleaner.
- Tighten screws and bolts: Check them every few months to prevent wobbling.
- Inspect the casters: Make sure they’re rolling smoothly and lock securely.
- Reapply sealant: For butcher block or painted finishes, touch up the sealant every 6–12 months.
I learned the hard way that neglecting the casters can lead to a wobbly cart—now I check them every time I clean the kitchen.
Safety Considerations
Safety is key when using a rolling cart in the kitchen. Here are a few tips:
- Lock the casters when the cart is in use, especially if you’re cutting or using hot appliances.
- Distribute weight evenly to prevent tipping. Store heavy items on lower shelves.
- Keep the cart away from stoves and sinks to avoid heat damage or water exposure.
- Use a cutting board on the countertop to protect the surface.
My rule of thumb? If the cart feels unsteady, stop and adjust the load or tighten the hardware.
Real-Life Examples and Inspiration
To inspire your own DIY project, here’s a quick look at some popular rolling kitchen island designs:
| Design Style | Key Features | Best For |
|---|---|---|
| Farmhouse | Reclaimed wood, open shelves, butcher block top | Country kitchens, rustic decor |
| Modern | White paint, stainless steel accents, minimalist shelves | Contemporary kitchens, small spaces |
| Industrial | Black metal frame, wire shelves, wood top | Lofts, urban kitchens |
| Multifunctional | Drop-leaf top, pull-out cutting board, charging station | Families, frequent entertainers |
I’ve built carts in all these styles, and each one has its own charm. The key is to choose a design that fits your lifestyle and kitchen layout.
Final Thoughts: Why You Should Build a Rolling Kitchen Island Today
A DIY kitchen island rolling cart isn’t just a practical solution for extra counter space—it’s a chance to add personality and functionality to your kitchen. Whether you’re a seasoned DIYer or a first-timer, this project is manageable, affordable, and incredibly rewarding. I’ve seen how a simple cart can transform a cluttered kitchen into an organized, efficient workspace.
Remember, the best part about DIY is that you can make it your own. Add features that solve your specific problems, choose materials that match your style, and don’t be afraid to experiment. And if you run into a snag? Take a break, reassess, and keep going. The end result will be worth it. So grab your tools, clear your schedule, and get ready to build the kitchen island of your dreams. Your counters (and your sanity) will thank you!
Frequently Asked Questions
What is an easy DIY kitchen island rolling cart?
An easy DIY kitchen island rolling cart is a movable, customizable countertop unit with wheels, designed to add extra prep space and storage to your kitchen. It’s a budget-friendly project using simple materials like wood, casters, and basic tools.
How do I build a rolling kitchen island with storage?
Start by assembling a wooden frame with shelves or cabinets, then attach locking casters to the bottom for mobility. Use pre-cut boards or repurpose furniture to simplify the process while incorporating hooks or baskets for added storage.
Can a DIY rolling island support heavy countertops like granite?
Yes, but reinforce the frame with sturdy plywood and heavy-duty casters rated for 200+ lbs. Ensure the base is wide enough to prevent tipping when loaded.
What tools do I need for an easy DIY kitchen island rolling project?
Basic tools like a drill, saw, measuring tape, and screwdriver are sufficient. For beginners, a pocket-hole jig helps join wood securely without advanced skills.
How do I ensure my rolling cart is stable while cooking?
Use locking casters on all wheels and add a center support beam if the cart is over 3 feet wide. Test stability by applying downward pressure before finalizing the build.
Where can I find plans for a compact rolling kitchen island?
Check free tutorials on home improvement blogs or YouTube, filtering for “easy DIY kitchen island rolling” designs. Many include printable cut lists and step-by-step videos.