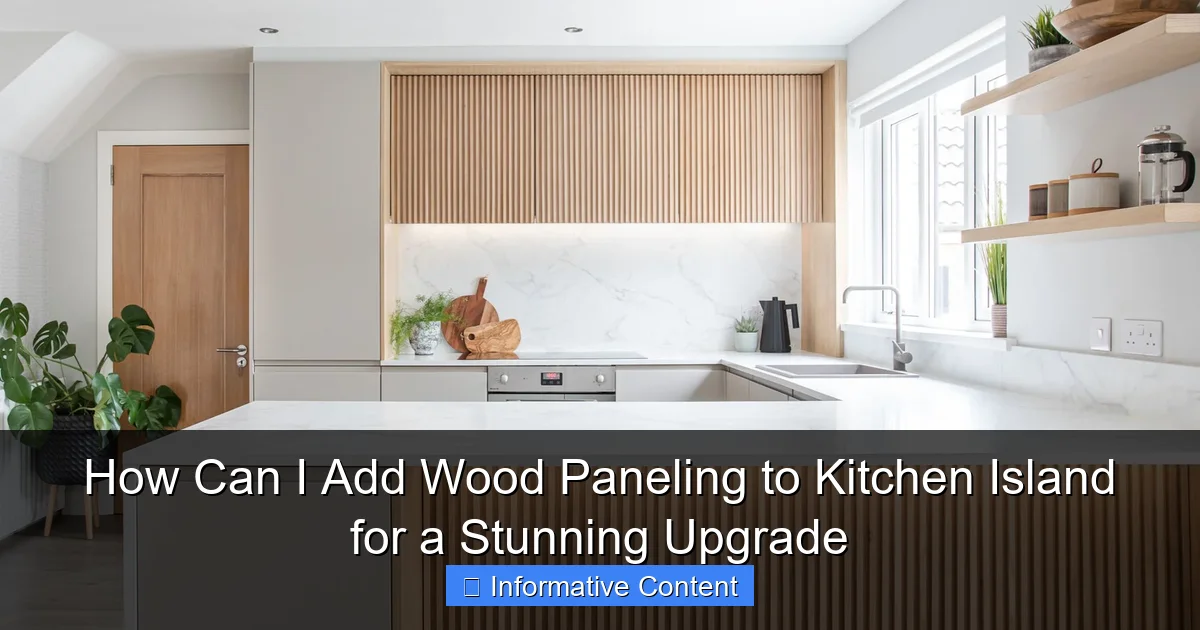
Featured image for how can i add wood paneling to kitchen island
Image source: static.wixstatic.com
Transform your kitchen island with wood paneling by choosing high-quality, moisture-resistant wood like oak or walnut and securely attaching it with construction adhesive and finish nails for a seamless look. Ensure a professional finish by sanding, staining, or sealing the panels to match your kitchen’s aesthetic while protecting against spills and wear. This simple yet impactful upgrade adds warmth, texture, and timeless charm in just a few steps.
Key Takeaways
- Choose quality wood: Opt for durable, moisture-resistant wood like oak or walnut for longevity.
- Measure precisely: Accurate measurements ensure seamless paneling and a professional finish.
- Prep the surface: Clean and sand the island to guarantee strong adhesion and smooth results.
- Use proper adhesive: Select construction-grade glue or nails for secure, lasting installation.
- Stain or seal: Protect wood with a food-safe finish for a polished, functional upgrade.
- Plan the layout: Align panels vertically or horizontally to enhance your kitchen’s aesthetic.
- Add trim: Finish edges with trim for a refined, custom-built appearance.
📑 Table of Contents
- Why Wood Paneling Is the Perfect Upgrade for Your Kitchen Island
- Choosing the Right Wood Paneling for Your Kitchen Island
- Tools and Materials You’ll Need (No Pro Skills Required)
- Step-by-Step Installation: From Prep to Perfection
- Design Ideas and Inspiration: Make It Your Own
- Common Mistakes (And How to Avoid Them)
- Cost Breakdown and Time Commitment
- Final Thoughts: Is Wood Paneling Worth It?
Why Wood Paneling Is the Perfect Upgrade for Your Kitchen Island
Let’s be honest—your kitchen island is more than just a countertop. It’s the heart of your home. It’s where you sip your morning coffee, help your kids with homework, and host friends for wine nights. But if yours feels a little… plain? Maybe it’s time for a wood paneling upgrade.
Wood paneling isn’t just a design trend—it’s a timeless way to add warmth, texture, and character to your kitchen. Think about it: a sleek, modern island with clean lines suddenly gets a cozy, inviting feel when you wrap it in natural wood. It’s like giving your kitchen a hug. And the best part? You don’t need to be a pro to do it.
I remember when I first added wood paneling to my own kitchen island. I was tired of the cold, sterile look of my laminate island. I wanted something that felt lived-in, something that made the space feel like *home*. After a weekend of DIY work, I had a stunning transformation—and I didn’t break the bank. If I can do it, so can you.
Choosing the Right Wood Paneling for Your Kitchen Island
Before you start cutting or nailing anything, take a breath. The type of wood paneling you choose will make or break your project. Here’s what to consider:
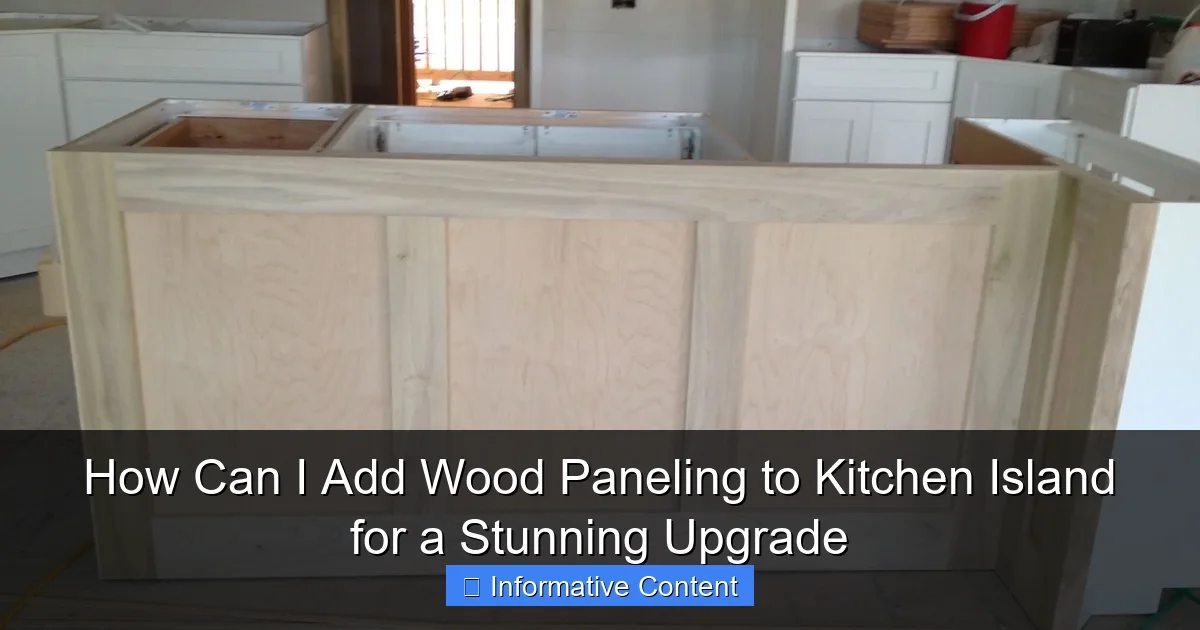
Visual guide about how can i add wood paneling to kitchen island
Image source: s-media-cache-ak0.pinimg.com
Types of Wood Paneling: Pros and Cons
- Solid wood (e.g., oak, walnut, maple): Durable, beautiful, and can be sanded/refinished. But it’s expensive and can warp in high-moisture areas. Best for islands that aren’t near sinks or dishwashers.
- Plywood with wood veneer: Affordable, stable, and comes in many finishes. Great for beginners. Just make sure the veneer is thick enough (at least 1/16″) to avoid chipping.
- Reclaimed wood: Adds rustic charm and sustainability. But it can be pricey, uneven, and may need extra prep work (cleaning, planing).
- MDF with wood-look laminate: Super affordable and easy to install. But it’s not real wood, and water damage can be a dealbreaker.
Thickness and Style Matters
For kitchen islands, aim for paneling that’s at least 3/8″ thick. Thinner panels can feel flimsy. As for style, you’ve got options:
- Flat panels: Simple, clean lines. Great for modern or minimalist kitchens.
- Shiplap or tongue-and-groove: Creates a classic, textured look. Adds visual interest without overwhelming the space.
- Reeded or fluted panels: Trendy and elegant. Adds depth and a touch of luxury.
Color and Finish: Match Your Kitchen’s Vibe
Wood paneling can blend seamlessly or make a bold statement. Ask yourself:
- Do you want it to match your existing cabinets? (Stain it to blend in.)
- Do you want a contrasting accent? (Try a dark walnut on a white island, or vice versa.)
- Do you want a natural, matte finish or a glossy, polished look? (Glossy finishes show more fingerprints—great if you love cleaning!)
Tools and Materials You’ll Need (No Pro Skills Required)
Good news: you don’t need a workshop full of fancy tools. Most of this can be done with basic gear. Here’s your shopping list:
Essential Tools
- Measuring tape and level: Precision is key—measure twice, cut once!
- Circular saw or miter saw: For straight cuts. A handsaw works in a pinch, but it’s slower.
- Nail gun or hammer and finish nails: A nail gun saves time, but a hammer and 1.5″ finish nails get the job done.
- Wood glue and clamps: For extra adhesion (especially on edges).
- Sandpaper (120-220 grit): Smooth those rough edges.
- Paintbrush or foam roller: If you’re staining or sealing.
Materials Checklist
- Wood panels (pre-cut or custom-sized)
- Wood filler (for gaps or nail holes)
- Stain, paint, or sealant (choose a moisture-resistant finish for kitchens!)
- Construction adhesive (optional, for extra hold)
- Trim molding (to cover edges or seams, if needed)
Pro Tips for Beginners
- Buy 10-15% extra wood for mistakes or miscalculations. (I once cut a panel too short—lesson learned!)
- Rent tools if you don’t own them (e.g., a miter saw from your local hardware store).
- Work in a clean, dry space. Sawdust is the enemy of a smooth finish.
Step-by-Step Installation: From Prep to Perfection
Alright, let’s get into the nitty-gritty. Here’s how to transform your island in a weekend (or less).
Step 1: Prep the Island
- Clean the surface: Wipe down the island with a damp cloth to remove grease, dust, or debris.
- Remove obstacles: Take off cabinet doors, knobs, or hardware that might get in the way.
- Sand if needed: If the island has a glossy finish, lightly sand it with 120-grit paper to help the wood glue adhere.
Step 2: Measure and Cut the Panels
- Measure each side of the island (sides, front, back) and note the dimensions.
- Cut the wood panels to size. Pro tip: Cut one panel at a time and test-fit it before cutting the next. Walls and cabinets aren’t always perfectly square!
- Sand the edges until smooth.
Step 3: Attach the Panels
- Start with the back panel: It’s usually the least visible, so it’s a good warm-up.
- Apply wood glue to the back of the panel (or use construction adhesive for extra hold).
- Press the panel onto the island, starting from the bottom. Use a level to ensure it’s straight.
- Nail it into place every 6-8 inches. Tip: Sink the nails slightly below the surface (called “countersinking”) for a cleaner look.
- Repeat for all sides, working your way around.
Step 4: Fill and Sand
- Fill nail holes and gaps with wood filler. Let it dry, then sand smooth.
- Wipe away dust with a tack cloth.
Step 5: Finish the Wood
- Stain: Apply with a brush or cloth in the direction of the grain. Let it sit for 5-15 minutes, then wipe off excess.
- Seal: Use a clear polyurethane or water-based sealant (at least 2 coats). This protects against moisture and spills.
- Paint (optional): If you want a painted look, use a high-quality primer first, then apply your paint.
Step 6: Add Trim (Optional)
- For a polished look, add trim molding to cover seams or edges.
- Cut trim to size, glue it in place, and nail it lightly.
- Fill nail holes, sand, and touch up with stain or paint.
Design Ideas and Inspiration: Make It Your Own
Wood paneling isn’t one-size-fits-all. Here are some creative ways to make your island stand out.
Match Your Cabinets (For a Cohesive Look)
- Stain the paneling to match your existing cabinets. This creates a seamless, built-in feel.
- Example: A white kitchen with white-painted wood paneling on the island. Clean, bright, and timeless.
Create a Statement (Contrasting Colors or Textures)
- Pair a light island with dark walnut paneling (or vice versa).
- Try reeded or fluted panels for a high-end look. Bonus: It hides fingerprints!
- Example: A gray kitchen island with black shiplap paneling. Modern, bold, and dramatic.
Mix Materials (Wood + Metal or Stone)
- Add a metal trim or brackets for an industrial touch.
- Pair wood paneling with a stone countertop for a rustic-chic vibe.
- Example: A reclaimed wood island with black iron legs. Perfect for farmhouse kitchens.
Go Two-Tone (Top vs. Bottom)
- Paint or stain the top half of the island one color and the bottom half another.
- Example: A navy blue island base with white paneling on the sides. Fun and playful.
Keep It Simple (Natural Wood)
- Let the wood’s natural grain shine. Use a clear sealant and minimal styling.
- Example: A walnut island with no trim or paint. Warm, organic, and inviting.
Common Mistakes (And How to Avoid Them)
Even the best DIYers hit snags. Here are the pitfalls I’ve learned from—so you don’t have to.
Mistake 1: Not Prepping the Surface
Wood glue won’t stick to a greasy or dusty island. Always clean and (if needed) sand the surface first.
Mistake 2: Ignoring Moisture
Kitchens are humid. Use a moisture-resistant sealant and avoid solid wood near sinks or dishwashers.
Mistake 3: Rushing the Finish
Skipping sanding or rushing the stain will show. Take your time—it’s worth the effort.
Mistake 4: Poor Measurements
Measure each side individually. Walls aren’t always square, and a 1/8″ gap can ruin the look.
Mistake 5: Overlooking the Details
- Don’t forget to sand between stain coats.
- Use wood filler for nail holes—don’t just leave them!
- Trim molding can hide imperfections. Use it!
Quick Fixes for Minor Issues
- Gap between panels? Fill with wood filler or add a small trim piece.
- Uneven staining? Lightly sand and reapply.
- Panel warping? Use construction adhesive for extra hold.
Cost Breakdown and Time Commitment
Here’s what to expect in terms of time, money, and effort.
| Category | Low-Cost Option | Mid-Range Option | High-End Option |
|---|---|---|---|
| Wood Type | MDF with laminate ($2-$5/sq ft) | Plywood with veneer ($5-$10/sq ft) | Solid wood or reclaimed ($10-$30/sq ft) |
| Tools | Basic hammer, saw, sandpaper ($50-$100 if buying) | Nail gun, miter saw (rent for $50/day) | Pro-grade tools ($200+ if buying) |
| Finishing | Paint or basic stain ($20-$50) | Premium stain + sealant ($50-$100) | Custom finishes, oil-based ($100+) |
| Time | 1-2 days (pre-cut panels) | 2-3 days (custom cuts, staining) | 3-5 days (reclaimed wood, intricate designs) |
Note: A typical 4’x6′ island will cost $100-$500 in materials (depending on wood type) and take 1-5 days to complete.
Final Thoughts: Is Wood Paneling Worth It?
Absolutely. Adding wood paneling to your kitchen island is one of the easiest ways to upgrade your space without a full remodel. It’s affordable, customizable, and—let’s be real—it just feels *right*. Whether you go for a cozy farmhouse look, a sleek modern vibe, or something totally unique, the warmth of wood can’t be beat.
And here’s the secret: it’s not about perfection. It’s about progress. My island isn’t flawless—there are tiny gaps, a little uneven staining, and a nail hole I missed. But you know what? It’s *mine*. Every time I walk into my kitchen, I see the effort I put in, and it makes the space feel even more like home.
So grab your tools, pick your wood, and get started. Your dream kitchen island is just a weekend away. And hey—when you’re done, send me a pic. I’d love to see your masterpiece.
Frequently Asked Questions
How can I add wood paneling to a kitchen island without professional help?
You can DIY wood paneling on a kitchen island using peel-and-stick wood veneer, shiplap planks, or tongue-and-groove panels. Ensure the surface is clean, level, and primed (if needed) before installation for a secure, long-lasting finish.
What type of wood is best for kitchen island paneling?
Hardwoods like oak, maple, or walnut are durable and moisture-resistant, making them ideal for kitchen island wood paneling. For budget-friendly options, engineered wood or MDF with a wood veneer offer a similar aesthetic with less maintenance.
Can I install wood paneling on an existing kitchen island?
Yes, you can add wood paneling to an existing kitchen island by attaching panels directly to the surface with construction adhesive or nails. Sand and prep the island first to ensure proper adhesion and a smooth finish.
How do I match wood paneling to my kitchen’s existing style?
Choose a wood stain or paint that complements your cabinetry, countertops, or flooring. For a cohesive look, sample swatches in your kitchen’s lighting to test undertones before committing to a full paneling installation.
Is wood paneling on a kitchen island hard to maintain?
Wood paneling is easy to maintain with regular dusting and occasional wiping using a damp cloth. Seal the wood with a protective finish (e.g., polyurethane) to resist stains and moisture, especially in high-traffic areas.
How can I add wood paneling to a kitchen island for a modern look?
Opt for sleek, horizontal shiplap or geometric wood tile patterns in light or neutral tones. Pair with minimalist hardware and clean lines to create a contemporary upgrade that enhances your kitchen’s aesthetic.