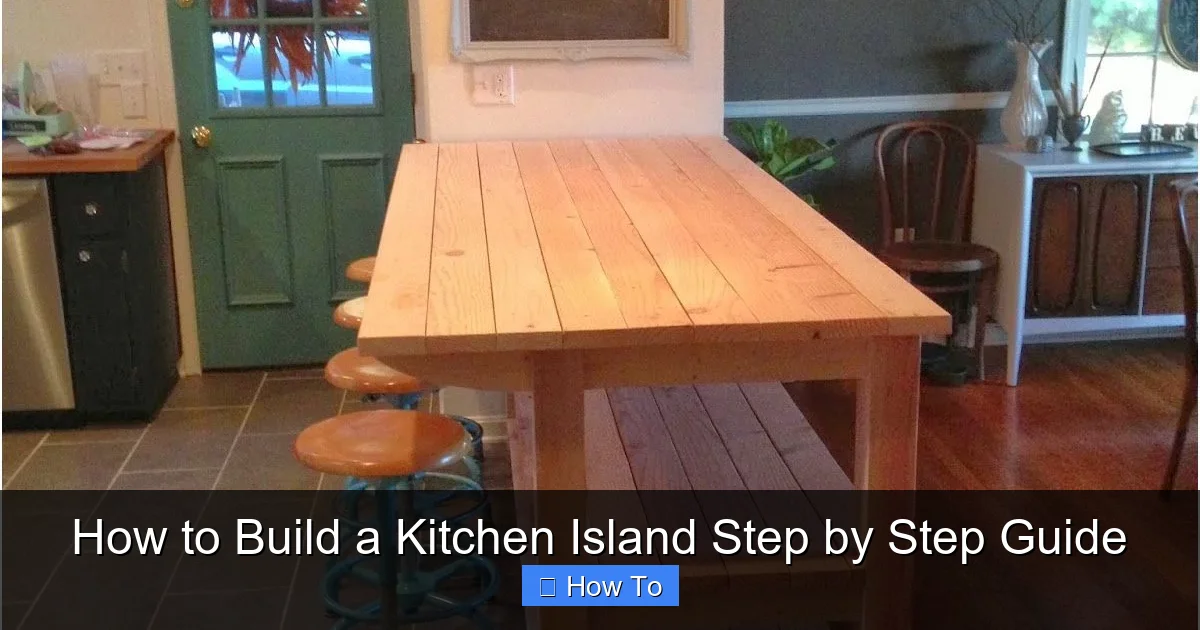
Featured image for this comprehensive guide about how to build a kitchen island
Image source: i.pinimg.com
The kitchen isn’t just a place to cook; it’s the bustling heart of your home, a hub for family gatherings, homework sessions, and impromptu conversations. If you’ve ever dreamt of having more counter space, a dedicated area for meal prep, or a stylish spot for guests to gather, then a kitchen island is probably at the top of your wishlist. It’s more than just an extra surface; it’s a transformative element that can redefine the functionality and aesthetic of your entire kitchen.
While the idea of adding a custom kitchen island might seem daunting or costly, embarking on a DIY project can be incredibly rewarding. Imagine building something with your own hands that perfectly fits your space, matches your style, and meets your unique needs – all while saving a significant amount compared to a professionally installed unit. This comprehensive guide will walk you through every step of how to build a kitchen island, turning that dream into a tangible reality.
From initial design concepts and planning to the final finishing touches, we’ll demystify the process, providing actionable tips and expert insights. Whether you’re a seasoned DIYer or just starting your home improvement journey, prepare to unlock the potential of your kitchen and create a functional, beautiful centerpiece that you’ll love for years to come. Let’s roll up our sleeves and get ready to build your perfect DIY kitchen island!
Quick Answers to Common Questions
Is building a kitchen island a super difficult DIY project?
Not at all! With a good plan and a little patience, building a kitchen island is a very achievable and rewarding project for most DIY enthusiasts. We’ll show you exactly how!
What essential tools do I need to build a kitchen island?
You’ll primarily need a circular saw, drill, measuring tape, level, and some clamps. A pocket hole jig can also make your joints much cleaner and stronger.
How much should I budget when I build a kitchen island?
The cost to build a kitchen island varies, but expect to spend anywhere from $200 to $1000+, depending on your chosen materials, countertop, and any custom features. It’s often much cheaper than buying pre-made!
What kind of materials are best for building a kitchen island?
Plywood or MDF are excellent choices for the base cabinetry, offering stability and a smooth surface for finishing. For the countertop, options range from butcher block to laminate or even custom stone.
How long does it typically take to build a kitchen island?
From start to finish, building a kitchen island can take a dedicated weekend or spread out over a few weeks, depending on your experience and the complexity of your design. Don’t rush it, and enjoy the process!
📋 Table of Contents
- Why a DIY Kitchen Island is a Game Changer for Your Home
- Planning Your Perfect Kitchen Island: Design and Dimensions
- Gathering Your Tools and Materials: The Pre-Build Checklist
- Step-by-Step Construction: Building Your Kitchen Island Base
- Finishing Touches: Countertops, Trim, and Final Aesthetics
- Conclusion: Your Dream Kitchen Island, Built with Your Own Hands
Why a DIY Kitchen Island is a Game Changer for Your Home
A kitchen island is far more than just a trend; it’s a highly functional and versatile addition that can dramatically enhance your living space. Opting for a DIY approach elevates these benefits, giving you unparalleled control and immense satisfaction. Let’s explore why building your own island is such a smart move for any homeowner.
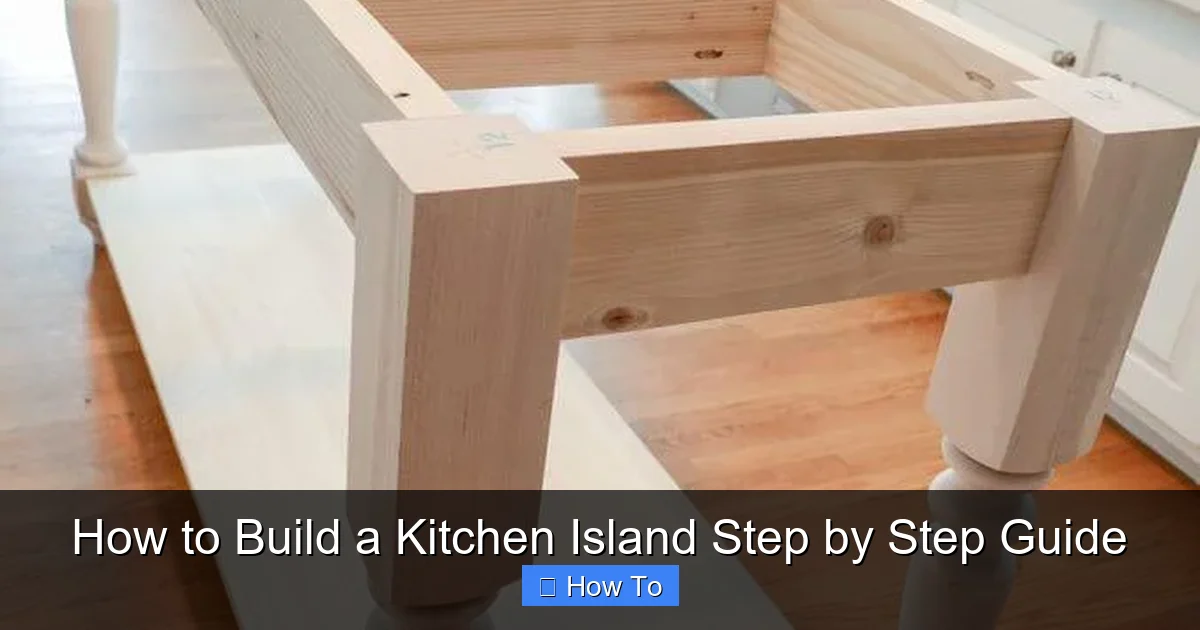
Learn more about how to build a kitchen island – How to Build a Kitchen Island Step by Step Guide
Image source: homebnc.com
Unlocking Functionality and Flow
One of the primary reasons homeowners crave a kitchen island is for its ability to expand functionality. In today’s open-plan living environments, the kitchen often serves multiple roles, and an island acts as a central command station. A survey by the National Association of Home Builders (NAHB) consistently shows that a kitchen island with storage and seating is among the most desired features in new homes and renovations. When you build a kitchen island, you gain:
| DIY Build Phase | Key Tasks & Considerations | Estimated Material Cost (DIY) | Estimated DIY Time |
|---|---|---|---|
| Planning & Design | Measure kitchen space, define island function (storage, seating, cooktop), sketch layout, check local building codes for electrical/plumbing. | $0 – $50 | 4 – 12 hours |
| Framing & Base Structure | Build sturdy frame (e.g., 2x4s, plywood, or pre-made cabinet bases), ensure level and plumb, secure to floor if permanent. | $100 – $400 | 8 – 16 hours |
| Cabinetry & Storage Integration | Install base cabinets, open shelving, or custom drawers. Ensure proper alignment, smooth operation, and maximize storage. | $300 – $1500+ | 12 – 24 hours |
| Countertop Installation | Select countertop material (e.g., laminate, butcher block, quartz), accurately measure and cut, secure firmly to the base, seal/finish as required. | $150 – $2000+ | 8 – 20 hours |
| Finishing & Utilities (Optional) | Apply paint/stain, add decorative trim/molding, install electrical outlets, plumb for a sink (if adding), backer boards. | $100 – $800+ | 10 – 25 hours |
- Expanded Counter Space: Crucial for meal prep, baking projects, or simply setting out a buffet for guests. This extra surface area makes cooking and entertaining much more manageable.
- Ample Storage Solutions: Integrate drawers, cabinets, open shelving, or even wine racks. A kitchen island with storage helps declutter your main kitchen, keeping essentials close at hand but out of sight.
- Dedicated Seating Area: Transform your island into a casual dining spot, perfect for quick breakfasts, informal meals, or a place for kids to do homework while you cook. A kitchen island with seating fosters connectivity within the home.
- Entertainment Hub: Islands naturally draw people in. They become a central point for socializing during parties, allowing hosts to engage with guests while still attending to kitchen duties.
Customization at Its Best
Professional kitchen installations often come with standard options, limiting your ability to truly personalize your space. When you take on a DIY kitchen island project, the design possibilities are virtually endless. You can:
- Match Existing Decor Perfectly: Choose materials, finishes, and colors that seamlessly integrate with your current kitchen cabinets and overall home aesthetic. Whether your style is modern, farmhouse, industrial, or traditional, your island can be a perfect fit.
- Tailor to Specific Needs: Do you need a dedicated spice rack, a built-in microwave nook, a pull-out cutting board, or even an integrated pet feeding station? When you’re building a kitchen island, you can design every detail to suit your lifestyle. This level of personalization is difficult and expensive to achieve with off-the-shelf solutions.
- Incorporate Unique Features: Consider a built-in trash receptacle, a bookshelf for cookbooks, or specialized power outlets for small appliances. Your custom kitchen island can be as unique as you are.
Cost Savings and Satisfaction
One of the most compelling reasons to learn how to build a kitchen island yourself is the significant cost savings. Professional installation, labor, and markup on materials can add thousands to the price of a new island. By handling the construction yourself, you primarily pay for materials, which can reduce the overall cost by 50% or more. Beyond the financial benefits, there’s an immense sense of satisfaction that comes with completing a substantial home improvement project like this.
- Budget-Friendly: You control material choices, allowing you to opt for more affordable yet durable options like plywood and laminate, or invest in premium materials like solid wood and granite, all within your budget.
- Personal Achievement: There’s a unique pride in stepping back and admiring a piece of furniture you’ve built with your own hands. Your DIY kitchen island will be a constant reminder of your skill and effort.
- Empowerment: Successfully tackling such a project builds confidence and equips you with valuable skills for future home renovations.
In essence, a DIY kitchen island isn’t just about adding a piece of furniture; it’s about investing in your home’s value, functionality, and your personal sense of accomplishment.
Planning Your Perfect Kitchen Island: Design and Dimensions
Before you pick up a single tool, meticulous planning is paramount. The success of your kitchen island project hinges on thoughtful design and accurate measurements. This crucial stage ensures your island is not only beautiful but also perfectly functional and safe within your kitchen space.
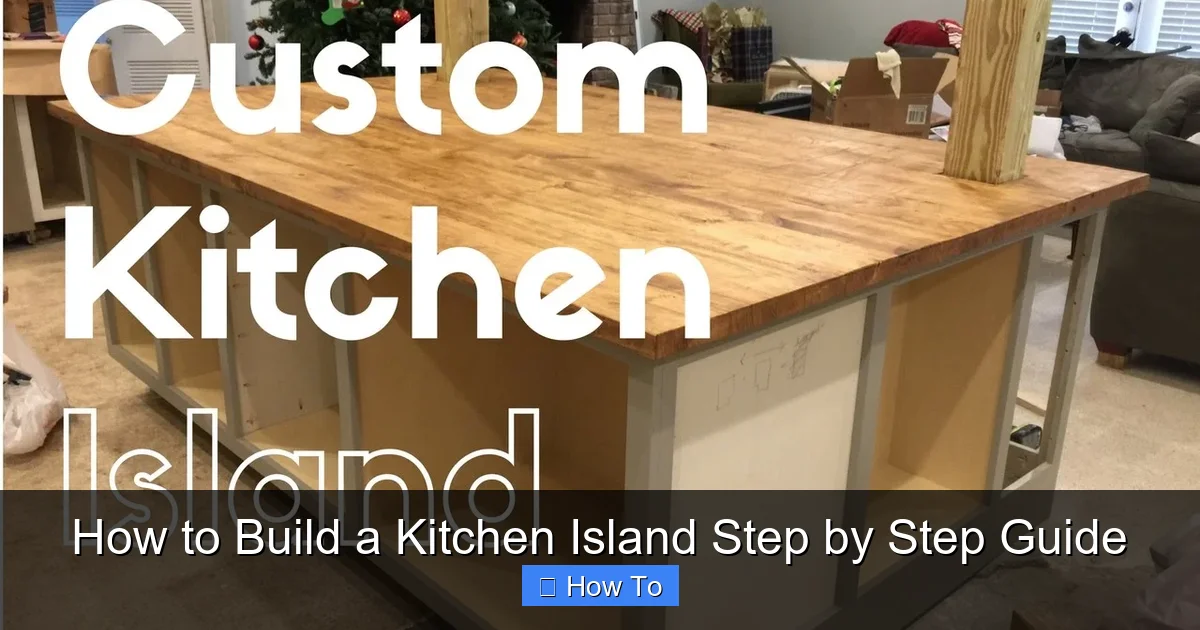
Learn more about how to build a kitchen island – How to Build a Kitchen Island Step by Step Guide
Image source: i.ytimg.com
Assessing Your Space and Needs
Start by truly understanding your kitchen. What are its dimensions? What kind of flow do you want to maintain? And most importantly, what purpose will your custom kitchen island serve?
- Kitchen Size and Clearance: This is non-negotiable. The National Kitchen and Bath Association (NKBA) recommends a minimum of 36 inches of clearance around all sides of your island, ideally 42 inches in high-traffic areas or between the island and major appliances (refrigerator, oven). For a small kitchen, a smaller, perhaps even a portable kitchen island or a narrow design might be more appropriate.
- Primary Purpose:
- Is it primarily for food preparation? Then prioritize counter space and perhaps an integrated sink or cooktop (requiring plumbing/electrical planning).
- Do you need maximum storage? Focus on cabinets, drawers, and shelving.
- Will it be a social hub with seating? Ensure adequate overhang and comfortable knee room.
- Will it house appliances like a microwave or a wine fridge? Account for their dimensions and ventilation.
- Aesthetic Style: Consider your existing kitchen’s style. Do you want your island to blend in seamlessly or act as a striking focal point?
- Farmhouse kitchen island: Often features natural wood, shiplap, or beadboard paneling, and a rustic countertop.
- Modern kitchen island: Characterized by clean lines, minimalist design, and sleek materials like quartz or concrete.
- Traditional kitchen island: May incorporate decorative moldings, raised panel doors, and classic finishes.
Essential Measurements and Layout
Once you have a clear vision, it’s time to get down to the numbers. Precise measurements are critical for both functionality and aesthetic appeal. Use painter’s tape on your floor to outline the proposed island dimensions – this visual aid is invaluable for gauging clearance and flow.
- Island Height:
- Standard Counter Height: Most kitchen islands are 36 inches high, matching standard kitchen counters. This is ideal for prep work.
- Bar Height: If you’re planning a dedicated eating area with bar stools, a 42-inch high counter section (often on a raised tier) is typical.
- Table Height: A 30-inch high island can offer a more casual, dining-table feel, though it’s less common for primary prep.
- Island Width and Depth: These dimensions will be dictated by your kitchen’s size and the functions you plan to incorporate. A common minimum width is around 24 inches for a purely functional island, but 36-48 inches wide is more common for islands with seating or appliances. Length varies greatly based on space, but ensure you maintain those critical clearance zones.
- Seating Overhang: For comfortable seating, plan for a minimum of 12 inches of overhang for counter-height seating, and 15-18 inches for bar-height seating. Also, allow 24-30 inches of width per person at the counter.
- Electrical and Plumbing: If you plan to incorporate outlets, a sink, or a cooktop, you MUST consult with a licensed electrician and/or plumber early in the planning process. Running new lines is a significant undertaking that requires professional expertise and permits.
Choosing Your Materials
The materials you select for your kitchen island construction will influence its durability, appearance, and overall cost. Consider both the base and the countertop.
- For the Island Base (the kitchen island cabinet or framework):
- Plywood: A strong, stable, and affordable choice, especially for the main structure. ¾-inch hardwood plywood is recommended.
- MDF (Medium-Density Fiberboard): Good for painted finishes as it’s very smooth, but less durable and water-resistant than plywood.
- Solid Wood: Offers superior strength and a beautiful natural grain if you plan to stain, but is more expensive.
- Repurposed Cabinets: A popular and budget-friendly option for a cabinet kitchen island base. You can use existing base cabinets, modify them, and join them together.
- For the Countertop:
- Butcher Block: A classic, warm, and highly functional choice. It’s DIY-friendly to install and can be refinished. Requires sealing.
- Laminate: The most budget-friendly option, available in a vast array of colors and patterns. Easy to clean but can scratch/burn.
- Granite/Quartz: Durable, beautiful, and heat-resistant. More expensive and typically requires professional fabrication and installation due to weight and cutting needs.
- Concrete: A modern, industrial look. Can be DIY but requires specialized skills and materials.
- Tile: Versatile and durable, but grout lines can be challenging to keep clean.
- Finishes: Paint (enamel or cabinet paint for durability), stain, or a combination. Don’t forget primer for paint, and a good sealer for stain or butcher block.
Table: Standard Kitchen Island Dimensions and Clearances
| Feature | Recommended Measurement | Notes |
|---|---|---|
| Island Height (Standard) | 36 inches | Matches standard kitchen counters for prep work. |
| Island Height (Bar) | 42 inches | For dedicated bar seating with taller stools. |
| Clearance Around Island | 36 – 42 inches | Minimum 36″, ideally 42″ in high-traffic areas or near appliances. |
| Counter Overhang for Seating | 12 – 18 inches | 12″ for counter height, 15-18″ for bar height for legroom. |
| Width Per Person (Seating) | 24 – 30 inches | Ensures comfortable elbow room. |
| Minimum Island Depth | 24 inches | For pure functionality (e.g., small prep surface, single cabinet). |
| Recommended Island Depth (with seating) | 36 – 48 inches | Allows for cabinet depth + seating overhang. |
By investing ample time in this planning phase, you’ll lay a solid foundation for a successful and satisfying kitchen island build.
Gathering Your Tools and Materials: The Pre-Build Checklist
Once your design is finalized and your measurements are precise, it’s time to gather everything you’ll need. A well-stocked toolkit and a comprehensive materials list will streamline your build, prevent frustrating delays, and ensure your building a kitchen island project goes smoothly. Don’t underestimate the importance of this step – having the right equipment makes all the difference.
Essential Tools for Your DIY Kitchen Island
You don’t necessarily need a professional workshop, but certain tools will make the job much easier and ensure a higher quality finish. Here’s a list of must-haves and nice-to-haves:
- Measuring and Marking:
- Tape Measure: Absolutely essential for all measurements.
- Pencil/Marker: For marking cuts and drilling spots.
- Speed Square/Combination Square: For accurate 90-degree and other angle marks.
- Long Straight Edge: For guiding cuts on larger sheets of plywood.
- Level (4-foot and/or torpedo): Critical for ensuring your island is perfectly level and plumb.
- Cutting Tools:
- Circular Saw: Excellent for cutting large sheets of plywood. A guide rail or clamped straight edge will ensure straight cuts.
- Miter Saw (Chop Saw): Ideal for precise cross-cuts on dimensional lumber and trim pieces.
- Jigsaw: Handy for curved cuts or cutting out sections for sinks/cooktops.
- Utility Knife: For scoring and cutting smaller materials or opening packages.
- Assembly and Fastening:
- Cordless Drill/Driver: Indispensable for pre-drilling holes and driving screws.
- Kreg Jig (Pocket Hole Jig): Highly recommended for strong, hidden joinery on cabinet frames. This is a game-changer for cabinet kitchen island construction.
- Clamps (Bar Clamps, Corner Clamps): Essential for holding pieces securely while gluing and screwing.
- Hammer: For tapping pieces into place or driving nails (though screws are generally preferred for strength).
- Staple Gun: For attaching back panels or decorative elements.
- Finishing Tools:
- Orbital Sander: For smooth surfaces before painting or staining. Various grits of sandpaper.
- Paint Brushes/Rollers: For applying primer, paint, or stain.
- Caulking Gun: For filling gaps and sealing joints.
- Wood Filler/Putty Knife: For filling screw holes and imperfections.
- Safety Gear:
- Safety Glasses/Goggles: ALWAYS wear eye protection when cutting or drilling.
- Hearing Protection: For loud tools like saws.
- Dust Mask: Especially when cutting MDF or sanding.
- Work Gloves: To protect your hands.
Key Materials List for Building a Kitchen Island
This list assumes a basic rectangular island construction. Adjust quantities and types based on your specific design for a custom kitchen island.
- For the Base Structure (e.g., kitchen island cabinet framework):
- Plywood Sheets: ¾-inch hardwood plywood (e.g., birch or maple) for cabinet sides, tops, bottoms, and shelves. Consider ¼-inch plywood for back panels. Quantity depends on island size and complexity (e.g., 2-4 sheets for a medium island).
- Dimensional Lumber: 2x4s or 2x2s for structural framing, toe-kick base, or internal supports.
- Wood Glue: High-quality wood glue for strong, long-lasting joints.
- Wood Screws: Various lengths (1¼-inch, 1½-inch, 2½-inch) suitable for your material thickness.
- Pocket Hole Screws: Specific to your Kreg jig and wood thickness.
- For the Countertop:
- Your Chosen Countertop Material: Butcher block slab, laminate sheet, stone slab (ordered from fabricator), etc.
- Countertop Mounting Screws/Brackets: Appropriate hardware to secure the countertop to the base.
- Sealant (for butcher block): Food-grade mineral oil, tung oil, or specific butcher block conditioner.
- For Finishing and Aesthetics:
- Wood Filler/Putty: To fill screw holes, nail holes, and minor imperfections.
- Caulk: Paintable caulk for sealing gaps between trim pieces and walls.
- Sandpaper: Various grits (80, 120, 180, 220) for smooth finishing.
- Primer: Essential for consistent paint adhesion, especially on plywood or MDF.
- Paint or Stain: Your chosen color/finish. Use durable kitchen-grade paint.
- Polyurethane/Topcoat: For added protection and durability if staining or using a non-enamel paint.
- Trim/Molding: Baseboards, crown molding, or decorative trim to finish edges and add style.
- Hardware: Cabinet hinges, drawer slides, cabinet pulls/knobs (if adding doors/drawers).
- Leveling Feet (Optional): If your floor isn’t perfectly level or you want adjustability.
- Casters (Optional): For a portable kitchen island. Ensure they are heavy-duty and locking.
- Miscellaneous:
- Drop cloths or old sheets to protect your work area.
- Shop rags for cleanup.
- Denatured alcohol or mineral spirits for cleaning before finishing.
Having everything laid out and ready before you begin will make the construction process much more enjoyable and efficient. Double-check your list against your design plans to ensure nothing is missed.
Step-by-Step Construction: Building Your Kitchen Island Base
With your plans, tools, and materials ready, it’s time for the exciting part: bringing your kitchen island design to life! This section focuses on constructing the base – the sturdy foundation of your new island. We’ll outline a common method using plywood for a cabinet-style base, which offers excellent storage and a clean finish. Remember, precision and patience are your best allies here.
Step 1: Design and Cut Your Components
Before making any cuts, transfer your detailed measurements from your plans onto your plywood sheets and dimensional lumber. Double-check every measurement before you cut. “Measure twice, cut once” is the golden rule in woodworking.
- Create a Cutting List: Break down your entire island into individual components (e.g., two side panels, one top panel, one bottom panel, shelves, back panel). List the exact dimensions for each.
- Lay Out Your Cuts: Optimize your cuts on the plywood sheets to minimize waste. Use a pencil and a long straight edge.
- Make Precise Cuts: Using your circular saw (with a guide) or miter saw, carefully cut all your plywood and lumber pieces. Ensure all cuts are straight and square (90 degrees). Any inaccuracies here will compound and lead to a wobbly or crooked island. Label each piece as you cut it to avoid confusion later.
Step 2: Assemble the Cabinet Frames
For a strong and clean assembly, pocket hole joinery is highly recommended for building the main cabinet boxes. It provides robust connections without visible fasteners on the exterior.
- Drill Pocket Holes: Using your Kreg Jig, drill pocket holes into the ends of your horizontal pieces (bottoms, tops, and any fixed shelves). Drill holes on the interior faces where they will be hidden.
- Assemble Side Panels: Attach the bottom panel to the two side panels first. Apply a bead of wood glue along the edges, then clamp the pieces together. Drive pocket hole screws to secure. Ensure everything is square. Repeat for the top panel, or for internal stretchers if you’re leaving the top open for a countertop.
- Add Vertical Dividers/Supports (If Applicable): If your island has multiple cabinet sections or internal partitions, install these now using pocket holes or dados (grooves cut into the wood) for extra strength.
- Attach the Back Panel: Once the main box is assembled and square, attach the ¼-inch plywood back panel. You can glue and use small brad nails or staples, ensuring the cabinet remains square.
At this stage, you are essentially creating the main “box” or boxes that will form the body of your kitchen island base. If you’re using existing base cabinets, this step would involve joining them together securely.
Step 3: Add Shelving, Drawers, or Cabinet Doors (Optional)
This is where your island’s storage really takes shape. Install any interior components before attaching the island to the floor, as it’s easier to work on at this stage.
- Install Fixed Shelves: If you have fixed shelves, they were likely part of your initial cabinet assembly (Step 2).
- Install Adjustable Shelf Pins: Drill shelf pin holes for adjustable shelving. Use a jig for consistent placement.
- Assemble and Install Drawers: Build your drawer boxes using pocket holes or dados. Attach drawer slides to the island interior and the drawer boxes, then test fit them for smooth operation.
- Install Cabinet Doors: Attach hinges to your cabinet doors and then mount the doors to the island frame. Adjust hinges for proper alignment and gaps.
Step 4: Construct the Base and Prepare for Installation
The base provides stability and a finished look to your island.
- Build the Toe-Kick: Construct a sturdy toe-kick base (typically 4-6 inches high and recessed 3-4 inches) using 2x4s or plywood. This elevates the cabinet off the floor and protects it from kicks and scuffs. Attach it securely to the bottom of your assembled cabinet box.
- Add Leveling Feet (Optional): If your floor is uneven, or you want the ability to precisely level the island, install adjustable leveling feet into the toe-kick frame.
- Reinforce (If Needed): Add any internal blocking or bracing for countertop support, especially if you have a significant overhang or are using a very heavy countertop material like stone.
- Pre-Finish (Optional but Recommended): It’s often easier to prime and paint or stain the cabinet base now, before it’s installed and the countertop is on. This avoids awkward angles and potential messes.
Step 5: Secure the Island Base to the Floor
For safety and stability, your kitchen island must be securely anchored to the floor. This prevents it from tipping over, especially if it has a heavy countertop or is used for seating.
- Position the Island: Carefully move your island base into its final desired position. Use your level to ensure it is perfectly level in all directions. Adjust leveling feet if necessary.
- Mark Anchor Points: Identify the studs in your floor (if applicable) where your island will sit. If not, you’ll need to use appropriate anchors. Mark the spots on your island’s toe-kick or base frame where you’ll attach it.
- Secure with L-Brackets: Use sturdy L-brackets or cleats. Attach them to the inside of the island base, flush with the bottom. Then, screw the brackets securely into the floor (into studs or using heavy-duty toggle bolts/anchors for concrete). Use screws long enough to penetrate well into the subfloor without hitting pipes or electrical wires. Countersink the screws for a flush finish.
- Test Stability: Once secured, give the island a firm push from all sides to ensure there’s no wobble. It should feel incredibly solid.
Your kitchen island base is now built and anchored! You’ve completed the heavy lifting. Next, it’s all about the details that transform it from a functional box into a beautiful centerpiece.
Finishing Touches: Countertops, Trim, and Final Aesthetics
With the sturdy base of your DIY kitchen island firmly in place, it’s time to focus on the elements that truly define its look and feel. The countertop, trim, and chosen finish will elevate your island from a functional structure to a stunning centerpiece that complements your kitchen’s overall design. This stage is where your custom kitchen island truly comes to life.
Installing Your Countertop
The countertop is arguably the most impactful visual element of your island. The installation method will depend on your chosen material.
- Butcher Block or Laminate:
- Preparation: If you purchased a raw butcher block, sand it smooth and apply several coats of your chosen sealant (food-grade mineral oil, tung oil, or a polyurethane specifically for countertops) according to product instructions. For laminate, ensure edges are properly finished.
- Placement: Carefully position the countertop on top of your island base, ensuring it has the correct overhang on all sides (or just the seating side). Use shims if needed to ensure it’s perfectly level.
- Securing: From underneath the island base, use pre-drilled pilot holes and appropriate screws to secure the countertop. For butcher block or solid wood, use "Z" clips or elongated holes to allow for wood expansion and contraction. For laminate, screws directly through the frame into the underside are often sufficient. Avoid screwing directly through the top surface.
- Sealing Edges (if applicable): For butcher block, ensure all cut edges are sealed, especially around sinks if integrated.
- Stone (Granite, Quartz) or Concrete:
- These heavier materials typically require professional installation. The fabricators will measure, cut, and install the slabs for you, often using silicone adhesive and clips to secure it to your base. Ensure your island base is perfectly level and strong enough to support the weight beforehand.
Applying Trim and Molding
Trim and molding are the details that give your kitchen island a finished, professional look, hiding raw edges and adding character. This is especially important for a cabinet kitchen island.
- Base Molding (Toe-Kick Trim): If your toe-kick is recessed, add a piece of base molding around the bottom perimeter. This provides a clean transition from the island to the floor and protects the toe-kick. Miter the corners for a seamless look.
- Side Panels and Decorative Elements:
- If your island sides are plain plywood, consider adding decorative paneling like beadboard, shiplap, or raised paneling to match your kitchen cabinets. Cut these pieces to size and attach them with wood glue and small brad nails.
- For a seating area, you might add decorative corbels or brackets under the countertop overhang for both support and aesthetic appeal.
- Edge Banding/Trim: For exposed plywood edges (if not covered by decorative panels), apply iron-on edge banding or small pieces of solid wood trim for a clean, finished appearance.
- Fill and Sand: Fill all nail holes, screw holes (that aren’t hidden), and any small gaps with wood filler. Once dry, sand smooth. Caulk any seams or gaps between trim pieces and the main cabinet body for a flawless paint finish.
Painting, Staining, and Sealing
The finish you choose for your kitchen island is critical for its durability and how well it integrates into your kitchen design.
- Preparation is Key: Thoroughly clean all surfaces to remove dust, grease, or debris. Lightly sand all surfaces with fine-grit sandpaper (220 grit) to ensure good adhesion, even if you pre-finished. Wipe down with a tack cloth.
- Prime: Apply a high-quality primer, especially if you’re painting plywood or MDF. Primer ensures even color, better adhesion, and helps seal the wood, preventing tannin bleed-through. Allow to dry completely.
- Paint or Stain:
- Painting: Apply thin, even coats of your chosen paint (a durable cabinet or enamel paint is best). Use a good quality brush for edges and a small roller for flat surfaces to minimize brush marks. Lightly sand between coats for an ultra-smooth finish.
- Staining: Apply stain evenly with a cloth or brush, wiping off excess according to product instructions. Allow to dry completely.
- Seal/Topcoat:
- For stained surfaces, apply several coats of a clear protective topcoat (polyurethane, polycrylic) for durability.
- If using certain paints (especially non-enamels), a clear topcoat can add an extra layer of protection against wear and tear.
Integrating Electrical and Plumbing (If Applicable)
If your kitchen island includes a sink, cooktop, or electrical outlets, these need to be properly installed and connected. This is where professional help is often crucial for safety and compliance.
- Electrical Outlets: If you planned for outlets, now is the time for a licensed electrician to run the wiring and install the receptacles. This typically involves running a new circuit from your main electrical panel.
- Plumbing for Sink: If you have a sink, a licensed plumber will connect the water supply lines and drain. Ensure you have the necessary cutouts in your countertop and within the cabinet base for the sink bowl and pipes.
- Appliance Hook-ups: Any built-in appliances like a wine fridge or microwave will need their specific electrical connections. Ensure proper ventilation is also accounted for.
Always prioritize safety and local building codes when dealing with utilities. Don’t hesitate to call professionals for these specialized tasks.
Step back and admire your handiwork! Your beautifully finished kitchen island is now ready to become the focal point and functional workhorse of your kitchen.
Conclusion: Your Dream Kitchen Island, Built with Your Own Hands
You’ve done it! From the initial spark of an idea to the final brushstroke, you’ve navigated the rewarding journey of how to build a kitchen island. This comprehensive guide has equipped you with the knowledge, steps, and confidence to transform a simple concept into a tangible, functional, and beautiful centerpiece for your home. You’ve mastered the art of planning, precise cutting, robust assembly, and meticulous finishing, creating a custom kitchen island that truly reflects your style and meets your family’s unique needs.
Your new DIY kitchen island isn’t just a piece of furniture; it’s a testament to your hard work, creativity, and dedication. It’s a space that will host countless meals, conversations, and cherished memories. Enjoy the expanded counter space, the smart storage solutions, the comfortable seating, and the sheer pride of knowing you built it yourself. This project not only enhances the value and functionality of your kitchen but also empowers you with new skills and confidence for future home improvement endeavors.
So, gather your family, brew a pot of coffee, and enjoy the heart of your home even more. Your beautifully crafted kitchen island awaits its inaugural use. Ready to start your next DIY adventure? The possibilities are endless!
🎥 Related Video: Here’s how to build your own kitchen island! #kitchenremodel #homeimprovement #diyhome #kitchenreno
📺 Charleston Crafted
Frequently Asked Questions
Where should I begin when planning to build a kitchen island?
Start by assessing your kitchen’s layout and your specific needs. Consider the ideal size, desired functionality (e.g., storage, seating, prep space), and the overall style to ensure your new kitchen island integrates seamlessly and enhances your home.
What essential tools and materials will I need to build a kitchen island?
You’ll typically need basic woodworking tools such as a miter saw, drill, level, and measuring tape. Common materials include lumber for the frame, plywood or MDF for the base, and your chosen countertop material like butcher block, laminate, or stone.
How difficult is it to build a kitchen island, and how long does it typically take?
Building a kitchen island is a moderately challenging DIY project, best suited for those with basic to intermediate carpentry skills. The time commitment varies widely, ranging from a few days to a couple of weekends, depending on the complexity of your design and your prior experience.
What’s the estimated cost to build a custom kitchen island?
The cost to build a kitchen island can range significantly, from a few hundred dollars for a basic design with budget-friendly materials to several thousand for high-end finishes and features. The largest cost drivers will be your choice of countertop material, cabinetry, and any integrated appliances or plumbing.
How do I ensure my custom kitchen island is securely anchored?
Anchoring your kitchen island is crucial for safety and stability, especially if it will support a heavy countertop or include seating. It’s typically secured to the subfloor or concrete slab using screws or lag bolts, often with a sturdy wood cleat for added reinforcement.
Can I incorporate storage or power outlets into my DIY kitchen island?
Absolutely! Integrating features like drawers, cabinets, open shelving, or even a small appliance garage can greatly enhance the functionality of your kitchen island. Adding electrical outlets is a popular and practical upgrade, though it may require consulting a professional electrician to ensure safety and adherence to local building codes.