
Featured image for this comprehensive guide about how to build a kitchen island with seating
Image source: handymantips.org
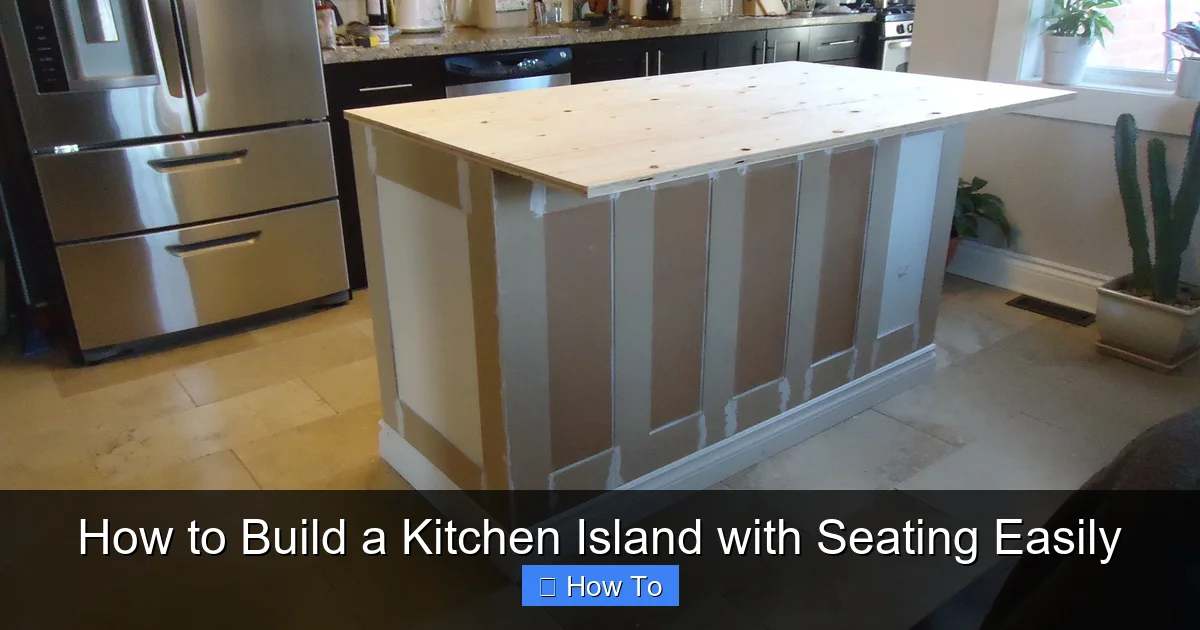
How to Build a Kitchen Island with Seating Easily
Imagine your kitchen, the heart of your home, transformed into an even more inviting and functional space. A place where family gathers for breakfast, kids do homework while you cook, or friends share a glass of wine during a party. This vision often includes a magnificent kitchen island with seating. More than just an extra countertop, a well-designed kitchen island with seating offers unparalleled versatility, adding storage, workspace, and a central hub for social interaction.
Many homeowners dream of this essential kitchen feature but assume it's an expensive renovation or a project only for professional contractors. We're here to tell you that building your own kitchen island with seating is an achievable and incredibly rewarding DIY endeavor. With careful planning, the right tools, and a step-by-step guide, you can create a custom island that perfectly fits your space, style, and budget. Plus, the satisfaction of saying "I built that!" is truly priceless.
Ready to roll up your sleeves and transform your kitchen? This comprehensive guide will walk you through everything you need to know, from initial design concepts to the final finishing touches. Let's dive into how to build a kitchen island with seating that will become the envy of your neighborhood and the beloved centerpiece of your home.
Quick Answers to Common Questions
Where do I even begin when thinking about how to build a kitchen island with seating?
Start with a clear plan! Sketch out your ideal island, considering its dimensions, the number of seats you need, and how it will integrate seamlessly into your existing kitchen space.
What basic tools will I need to tackle how to build a kitchen island with seating?
You'll primarily need a tape measure, level, drill, saw (circular or miter), and common hand tools like a hammer and screwdriver. Don't forget safety glasses and hearing protection!
What are good material choices for how to build a kitchen island with seating that's both durable and looks great?
For the base, use sturdy plywood or lumber, which you can then finish with decorative panels or cabinet doors. For the countertop, options range from cost-effective laminate and butcher block to more premium quartz or granite.
How much overhang is needed for comfortable seating on my new kitchen island?
Aim for at least a 12-inch overhang for sufficient legroom, though 15-18 inches offers even greater comfort, especially for adults. This ensures your stools can tuck away nicely when not in use.
How do I ensure my DIY kitchen island with seating is stable and safe once it's built?
Properly anchor the base of your island to the floor using L-brackets or screws, especially if it's a permanent fixture. Sturdy construction techniques, like dado joints or strong fasteners, are also crucial for long-term stability.
📋 Table of Contents
- 1. Planning Your Perfect Kitchen Island with Seating
- 2. Gathering Your Tools & Materials for Your DIY Kitchen Island
- 3. Building the Base Cabinet Structure of Your Kitchen Island
- 4. Installing the Countertop and Seating Overhang
- 5. Finishing Touches & Customization for Your Kitchen Island
- Estimated Cost and Time for Your DIY Kitchen Island Project
- 6. Safety Tips and Common Pitfalls to Avoid
- Conclusion: Enjoy Your New Custom Kitchen Island with Seating!
1. Planning Your Perfect Kitchen Island with Seating
The success of your DIY kitchen island with seating project hinges on meticulous planning. This isn't just about picking a pretty countertop; it's about understanding your needs, your space, and your style. Spend ample time in this phase to avoid costly mistakes down the line.
Learn more about how to build a kitchen island with seating - How to Build a Kitchen Island with Seating Easily
Image source: i.pinimg.com
Defining Your Island's Purpose and Design
Before you even think about lumber, consider what you truly want your kitchen island to do. Is it primarily for dining? Extra prep space? Storage? Or a combination? The answer will heavily influence your design choices.
| Design Aspect | Recommendation for Comfort/Functionality | Typical Measurement |
|---|---|---|
| Countertop Overhang for Seating | Allows comfortable legroom for seated individuals | 10-12 inches (25-30 cm) |
| Standard Counter Height (Eating Surface) | Matches standard kitchen counter height for versatile use | 36 inches (91 cm) |
| Standard Bar Height (Eating Surface) | Taller option, often used for separate eating zones | 42 inches (107 cm) |
| Island Width Per Seated Person | Ensures adequate personal space at the counter | 24 inches (61 cm) per person |
| Clearance Around Island | Allows for easy traffic flow and access to cabinets/appliances | 36-42 inches (91-107 cm) minimum |
- Seating Requirements: How many people do you want to accommodate? This directly impacts the length of your overhang and the overall island size. Standard counter height (36 inches) usually requires stools 24-26 inches high, while bar height (42 inches) needs 28-30 inch stools. Aim for at least 24-30 inches of width per person for comfortable seating.
- Storage Needs: Do you need drawers, open shelving, closed cabinets, or a mix? Think about what you'll store there – pots, pans, cookbooks, small appliances?
- Workspace: Will you integrate a sink, stovetop, or simply need a large, flat surface for meal prep?
- Aesthetics: Consider your existing kitchen's style. Do you want the island to match your current cabinetry, or be a contrasting focal point?
Measuring Your Space and Ensuring Clearance
This is critical for a functional and safe kitchen. The general rule of thumb is to maintain at least 36-42 inches of clearance around all sides of your island, especially between the island and other fixed elements like counters, walls, or appliances.
- Walkways: Ensure there's enough room for people to move freely, even when stools are pulled out.
- Appliance Access: Can refrigerator doors open fully? Can dishwasher drawers be loaded easily?
- Island Dimensions: Start by laying out the proposed footprint of your kitchen island with seating on the floor with painter's tape. Live with it for a day or two. Walk around it, open cabinet doors – this visual aid is incredibly helpful.
- Overhang Depth: For comfortable seating at counter height, aim for an overhang of at least 12-15 inches. For bar height, 10-12 inches might suffice.
Material Selection and Budgeting
The materials you choose will significantly impact the look, durability, and cost of your DIY kitchen island with seating. Common choices include:
- Base Structure: Plywood (ACX grade for stability), MDF, or repurposing old kitchen cabinets.
- Countertop: Butcher block (popular for DIY), laminate, granite, quartz, or concrete. Butcher block is often the most DIY-friendly and cost-effective.
- Finishes: Paint, stain, wood veneer, decorative panels.
Create a detailed budget, including not just major materials but also fasteners, adhesives, primer, paint/stain, and any potential electrical or plumbing components. Don't forget the cost of tools you might need to purchase or rent.
2. Gathering Your Tools & Materials for Your DIY Kitchen Island
Having all your tools and materials ready before you start will make the building process much smoother and more efficient. Nothing is more frustrating than stopping mid-project to run to the hardware store!

Learn more about how to build a kitchen island with seating - How to Build a Kitchen Island with Seating Easily
Image source: impressiveinteriordesign.com
Essential Tools You'll Need
- Measuring Tape and Pencil: For accurate marking and cutting.
- Circular Saw or Table Saw: For precise cuts of plywood and lumber. A miter saw is great for trim.
- Drill/Driver: For pre-drilling holes and driving screws.
- Level: Crucial for ensuring your island is perfectly level.
- Stud Finder: If you're anchoring to a wall or floor joist.
- Sander (orbital or block): For smooth finishes.
- Safety Glasses and Ear Protection: Always prioritize safety!
- Clamps: Essential for holding pieces together while fastening.
- Router (optional but recommended): For rounding edges on countertops or decorative profiles.
- Caulk Gun: For sealing gaps.
Materials Checklist
This list assumes a basic, rectangular kitchen island with seating. Adjust quantities based on your specific design.
- Plywood (3/4" thick): For the cabinet boxes, shelves, and possibly the base frame. ACX grade is suitable.
- 2x4 Lumber: For the base frame and internal supports.
- Screws: Various sizes (1-1/4" to 2-1/2" wood screws).
- Wood Glue: For strong, lasting joints.
- Pocket Hole Screws (optional): If using a Kreg Jig for joinery.
- Cabinet Hardware: Hinges, drawer slides, pulls/knobs (if adding cabinets/drawers).
- Countertop Material: E.g., butcher block, laminate, or granite slab.
- Trim/Molding: For decorative finishes and concealing edges.
- Primer and Paint/Stain/Sealer: For your desired finish.
- Shims: For leveling the base.
- Silicone Caulk: For sealing around the countertop.
- Sandpaper: Various grits.
3. Building the Base Cabinet Structure of Your Kitchen Island
This is where your DIY kitchen island really starts to take shape. The base provides the stability, storage, and foundation for your countertop and seating area.
Constructing the Base Frame (Kick Plate)
Start with a sturdy base frame, often called a kick plate, which elevates the cabinets slightly off the floor. This prevents moisture damage and provides a toe-kick space for comfort.
- Cut 2x4s: Cut your 2x4s to create a rectangular frame that matches the footprint of your island's base cabinets, minus the countertop overhang. Ensure the dimensions are precise.
- Assemble the Frame: Join the 2x4s using wood screws and wood glue. You can use butt joints reinforced with screws, or more robust joinery like pocket holes.
- Add Support: Add cross supports within the frame for extra rigidity, especially if your island is long.
- Level the Base: Place the assembled frame in its final position. Use your level and shims to ensure it is perfectly level and stable on all sides. Secure the shims in place.
Building the Cabinet Boxes
Most kitchen islands with seating are built around a series of simple cabinet boxes. These can be open shelves, closed cabinets, or drawer units.
- Cut Plywood Panels: Measure and cut your 3/4" plywood panels for the sides, tops, bottoms, and any internal shelves of your cabinet boxes. Remember to account for the thickness of the plywood itself.
- Assemble Cabinet Boxes: Use wood glue and screws (or pocket holes) to assemble the panels into sturdy boxes. Ensure all corners are square. For added strength, you can add small corner blocks internally.
- Attach Back Panels (Optional): If your island will have an exposed back, consider using 1/4" or 1/2" plywood for finished back panels. If it's against a wall, it might not be necessary.
- Secure to Base Frame: Once your cabinet boxes are built, attach them securely to the 2x4 base frame using screws driven from inside the cabinet into the frame.
- Join Multiple Boxes: If your island comprises multiple cabinet boxes, fasten them together side-by-side using cabinet screws for a seamless and strong structure.
Adding the Seating Overhang Support
This is crucial for a safe and comfortable seating area. The countertop overhang needs robust support.
- Extended Back Frame: You can build the cabinet boxes slightly shallower than the desired island depth, then extend the 2x4 frame outward on the seating side to create the base for your overhang.
- Brackets or Corbels: Heavy-duty steel brackets or decorative wood corbels can be installed on the back side of the cabinet structure to support the countertop. These should extend far enough to support the majority of your overhang.
- Hidden Supports: For a cleaner look, steel flat bars can be routed into the top edges of your cabinet structure before the countertop is installed.
- Support Spacing: Space your supports no more than 24-30 inches apart to prevent sagging of the countertop.
4. Installing the Countertop and Seating Overhang
The countertop is the crown jewel of your kitchen island with seating. Installing it correctly ensures durability and a beautiful finish.
Preparing and Securing the Countertop
- Pre-Finish (if applicable): If you're using butcher block or another wood countertop, sand it thoroughly and apply several coats of a food-safe sealant (like mineral oil for butcher block) before installation. This protects against moisture and stains.
- Position the Countertop: Carefully place the countertop onto your island base and supports. Ensure it is centered and that your overhangs (including the seating overhang) are even.
- Check for Level: Use a level to ensure the countertop is perfectly flat. If not, use shims under the countertop (between the cabinet and the countertop) in strategic locations to correct.
- Secure the Countertop:
- Wood Countertops: You can attach these from underneath by driving screws up through the cabinet frame into the countertop. Use "figure-8" fasteners or slotted clips to allow for seasonal wood movement.
- Stone/Laminate Countertops: These are typically secured with silicone adhesive around the perimeter of the cabinet and supports. For stone, professional installation is often recommended due to weight and fragility.
Integrating the Seating Area
With the countertop secured, your seating area is almost complete. Ensure the space beneath the overhang is clear for comfortable legroom.
- Stool Selection: Choose stools that complement your island's height and style. Remember the 10-12 inch rule between the seat of the stool and the underside of the countertop for optimal comfort.
- Floor Protection: If your stools will frequently be moved, consider adding felt pads to their feet to protect your flooring.
5. Finishing Touches & Customization for Your Kitchen Island
This is where your DIY kitchen island with seating truly comes to life and reflects your personal style.
Applying Finishes
Whether you choose to paint or stain, proper preparation is key for a professional-looking finish.
- Sand Thoroughly: Sand all exposed wood surfaces with progressively finer grit sandpaper (e.g., 120-grit, then 180-grit, then 220-grit) until smooth. Wipe away all dust.
- Prime (for paint): Apply a high-quality primer if you're painting. This ensures better adhesion and a more durable finish.
- Paint or Stain: Apply several thin coats of your chosen paint or stain, lightly sanding between coats if recommended by the product. Allow ample drying time between coats.
- Seal (for stain/raw wood): If staining, follow up with a protective topcoat like polyurethane or lacquer.
Adding Trim, Panels, and Hardware
These details elevate the look of your custom kitchen island.
- Decorative Panels: If the back or sides of your island are exposed plywood, consider adding decorative beadboard, shiplap, or flat panels to match your kitchen's aesthetic.
- Base Molding/Trim: Add shoe molding or baseboard trim around the bottom of the island where it meets the floor for a polished, built-in look.
- Cabinet Hardware: Install handles, pulls, and hinges on any doors or drawers.
- Electrical Outlets: For added functionality and to meet code in many areas, consider installing an electrical outlet on your island. This is usually best done by a licensed electrician. Plan for this during the framing stage.
Estimated Cost and Time for Your DIY Kitchen Island Project
While costs and timelines can vary wildly based on materials, size, and complexity, here's a general estimation to help you budget and plan for your build a kitchen island with seating project.
Typical Cost Breakdown (Estimates)
These figures are illustrative and can fluctuate based on local material prices, sales, and your choice of finishes.
| Category | Estimated Cost Range | Notes |
|---|---|---|
| Plywood & Lumber | $150 - $400 | For base frame, cabinet boxes, and supports. |
| Countertop (e.g., Butcher Block) | $200 - $800+ | Depends on material, size, and thickness. |
| Hardware (Screws, Glue, Shims) | $50 - $150 | Fasteners, adhesives, leveling shims. |
| Finishing Supplies | $75 - $200 | Primer, paint/stain, sealer, sandpaper, brushes. |
| Decorative Trim & Panels | $50 - $200 | Beadboard, molding, finished panels. |
| Cabinetry & Drawer Hardware | $50 - $300 | Hinges, drawer slides, pulls (if adding). |
| Tools (if purchasing) | $0 - $500+ | Depends on what you already own. Can rent for specific needs. |
| TOTAL ESTIMATED DIY COST | $575 - $2550+ | Significantly less than a professional installation ($3,000 - $10,000+). |
Time Estimation
Building a kitchen island with seating is not a weekend project for most DIYers, especially when striving for a high-quality finish.
- Planning & Design: 1-3 days (spread out, including material sourcing).
- Cutting & Assembly (Base/Cabinets): 1-3 days.
- Countertop Installation: 0.5-1 day.
- Finishing (Sanding, Painting/Staining): 2-4 days (allowing for drying times between coats).
- Trim & Hardware Installation: 0.5-1 day.
Total Estimated Time: Expect to dedicate anywhere from 5 to 12 full days of work, often spread out over 2-3 weekends and some evenings. This doesn't include the time spent purchasing materials.
6. Safety Tips and Common Pitfalls to Avoid
Safety should always be your top priority when embarking on any home improvement project, especially one involving power tools and heavy materials. Avoiding common mistakes will save you time, money, and frustration.
Essential Safety Measures
- Always Wear PPE: Safety glasses, hearing protection, and gloves are non-negotiable when using power tools.
- Read Tool Manuals: Understand how to safely operate all your tools before use.
- Maintain a Clean Workspace: Clutter can lead to trips and falls. Keep your area organized.
- Secure Materials: Always clamp wood securely before cutting or drilling.
- Lift with Your Legs: Countertops and large pieces of plywood can be heavy. Get help when moving them to prevent injury.
- Electrical/Plumbing Safety: If you're adding electrical outlets or a sink, always consult or hire a licensed professional. Working with electricity or plumbing incorrectly can be dangerous and costly.
Common Mistakes to Steer Clear Of
- Inadequate Planning: Rushing the planning phase is the number one cause of project failures. Double-check all measurements and clearances.
- Poor Support for Overhang: An unsupported or weakly supported countertop overhang is a safety hazard. Ensure robust brackets or a strong extension for seating.
- Not Leveling the Base: A wobbly or uneven island will be constantly annoying and can compromise the integrity of the structure and countertop over time.
- Ignoring Wood Movement: Especially with butcher block, wood expands and contracts with humidity. Account for this in your fastening methods (e.g., slotted fasteners) to prevent cracking.
- Skipping Sanding or Priming: These steps might seem tedious, but they are crucial for a durable and professional-looking finish.
- Underestimating Time & Cost: Be realistic with your schedule and budget. It's always better to over-estimate than run out of time or money mid-project.
- Forgetting About Codes: Check local building codes, especially if dealing with electrical or plumbing, or if your island will be permanently affixed.
By keeping these tips in mind, you'll be well-equipped to tackle your DIY kitchen island with seating project safely and successfully.
Conclusion: Enjoy Your New Custom Kitchen Island with Seating!
Congratulations! You've successfully navigated the journey of how to build a kitchen island with seating. From the initial spark of an idea to the final coat of paint, this comprehensive guide has equipped you with the knowledge and confidence to create a truly transformative addition to your kitchen. Building your own kitchen island is more than just a home improvement project; it's an investment in your home's functionality, aesthetics, and overall value.
The satisfaction of crafting a central gathering place with your own hands is immense. You'll not only have a beautiful, custom-designed piece that perfectly fits your needs, but you'll also have gained invaluable DIY skills. Now, it's time to enjoy the fruits of your labor! Imagine all the wonderful memories that will be made around your new DIY kitchen island with seating – from lively family meals to quiet morning coffees. So, pull up a stool, gather your loved ones, and savor your incredible accomplishment!
Frequently Asked Questions
What’s the ideal size for a kitchen island with seating, and how much space do I need around it?
The ideal size for your kitchen island with seating depends on your kitchen’s dimensions and the number of seats you want to include. Generally, aim for at least 36-42 inches of clearance around all active sides of the island for comfortable movement and appliance access. For seating, allow about 24 inches of counter width per person.
How difficult is it to build a kitchen island with seating, and how long does the project typically take?
Building a kitchen island with seating can range from moderately easy for a basic design to more challenging for custom features like integrated appliances or complex storage. If you have basic DIY skills and some woodworking experience, it’s a manageable project. Expect it to take anywhere from a few days to a week, depending on the complexity, your skill level, and drying times for finishes.
What are the best materials to use for building a durable kitchen island with seating?
For the base of your kitchen island with seating, plywood or MDF are common and robust choices, often finished with cabinet-grade veneers, paint, or decorative panels. For the countertop, consider durable options like butcher block, laminate, quartz, or granite, which can withstand daily use and spills effectively. Ensure all materials are suitable for a kitchen environment.
What kind of seating options are available when designing a kitchen island with seating?
When designing a kitchen island with seating, common options include creating an overhang for counter-height or bar-height stools, depending on the island’s height. You could also integrate a lower, table-height section, or even build in a small bench for a cozier feel. Always ensure there’s adequate legroom and comfortable spacing for each seat.
How much should I budget for building a kitchen island with seating?
The cost to build a kitchen island with seating varies widely based on materials, size, and complexity. A basic DIY project using affordable materials might range from $300-$800, while more elaborate designs with premium countertops and custom cabinetry could easily exceed $1500-$2000. Prioritize your material choices to best fit your budget.
Can I incorporate storage and other functionalities into my DIY kitchen island with seating?
Absolutely! A kitchen island with seating is an excellent opportunity to add valuable storage and enhance functionality. You can include cabinets, drawers, open shelving for cookbooks or display items, or even a built-in microwave shelf. Consider adding electrical outlets for small appliances or charging devices to make your island even more versatile.