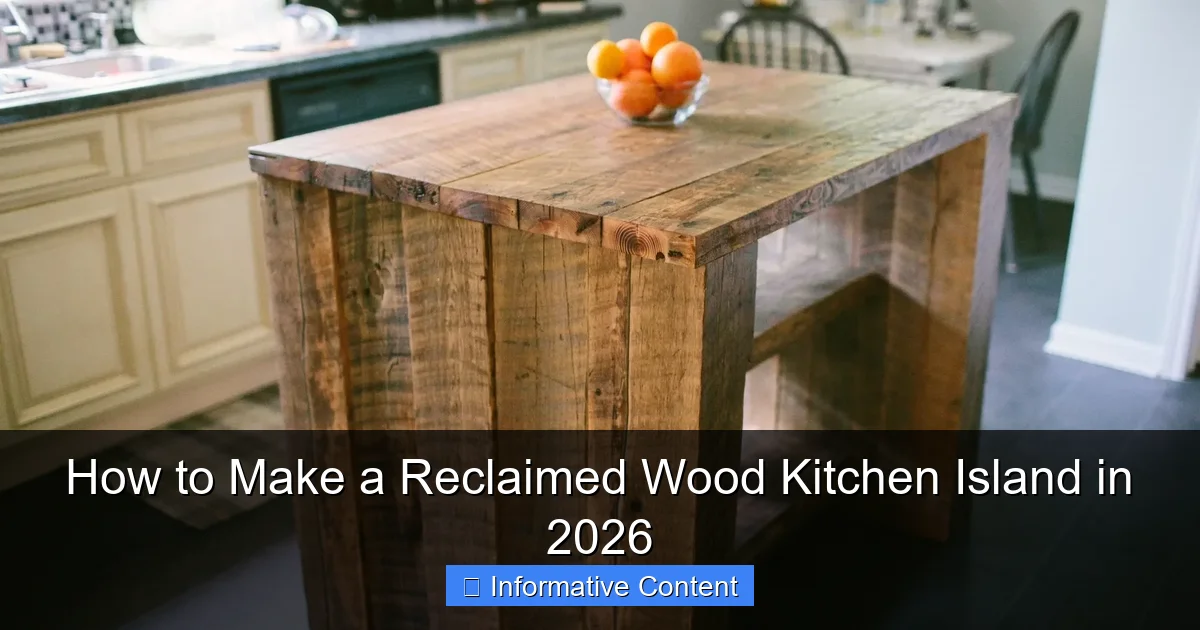
Featured image for how to make a reclaimed wood kitchen island
Image source: images.custommade.com
Transform your kitchen sustainably by building a reclaimed wood island using salvaged materials, eco-friendly finishes, and timeless joinery techniques. This 2026 guide walks you through sourcing quality reclaimed wood, designing for durability, and assembling a custom island that blends rustic charm with modern functionality. Perfect for DIYers seeking a unique, planet-friendly centerpiece.
Key Takeaways
- Source responsibly: Choose salvaged wood from barns, factories, or demolition sites for authenticity and sustainability.
- Inspect thoroughly: Check for nails, rot, and insect damage before repurposing reclaimed planks.
- Prep properly: Clean, sand, and seal wood to ensure durability and food-safe surfaces.
- Plan dimensions: Design island size to fit your kitchen layout and workflow needs.
- Use strong joinery: Opt for mortise-and-tenon or pocket screws for lasting structural integrity.
- Add functional features: Include storage, overhangs, or casters for practicality and mobility.
📑 Table of Contents
- Why a Reclaimed Wood Kitchen Island Is the Ultimate DIY Project for 2026
- Planning Your Reclaimed Wood Kitchen Island: Start Smart
- Sourcing Reclaimed Wood: Where to Find Hidden Gems
- Prepping the Wood: Turning History into Function
- Building the Frame: Stability Is Everything
- Assembling the Countertop: The Star of the Show
- Finishing Touches: Sealing, Styling, and Love
- Conclusion: Your Kitchen, Your Story
Why a Reclaimed Wood Kitchen Island Is the Ultimate DIY Project for 2026
Let’s be honest—your kitchen is the heart of your home. It’s where meals are made, memories are shared, and sometimes, where you just stand with a glass of wine, staring at the mess you’ll clean up later. But what if your kitchen could also be a conversation starter? A reclaimed wood kitchen island isn’t just functional—it’s a statement piece. It brings warmth, history, and a touch of rustic charm to any space. And in 2026, with sustainability and authenticity topping design trends, building one yourself is more rewarding than ever.
I remember my first attempt at building a reclaimed wood island. I was nervous—what if the wood was too fragile? What if the legs wobbled? What if I accidentally glued my fingers together (okay, that happened). But once I finished, and my family gathered around it for dinner, I realized it wasn’t just about the wood. It was about the story. The knots, the nail holes, the weathered grain—they all whispered tales of barns, old factories, and forgotten workshops. And now, they were part of our home. If I can do it, so can you. In this guide, I’ll walk you through every step, from sourcing reclaimed wood to sealing the final surface, so you can create a kitchen island that’s as unique as your family.
Planning Your Reclaimed Wood Kitchen Island: Start Smart
Before you even touch a hammer, planning is everything. A well-thought-out design saves time, money, and frustration. Think of this phase as laying the foundation—literally and figuratively.
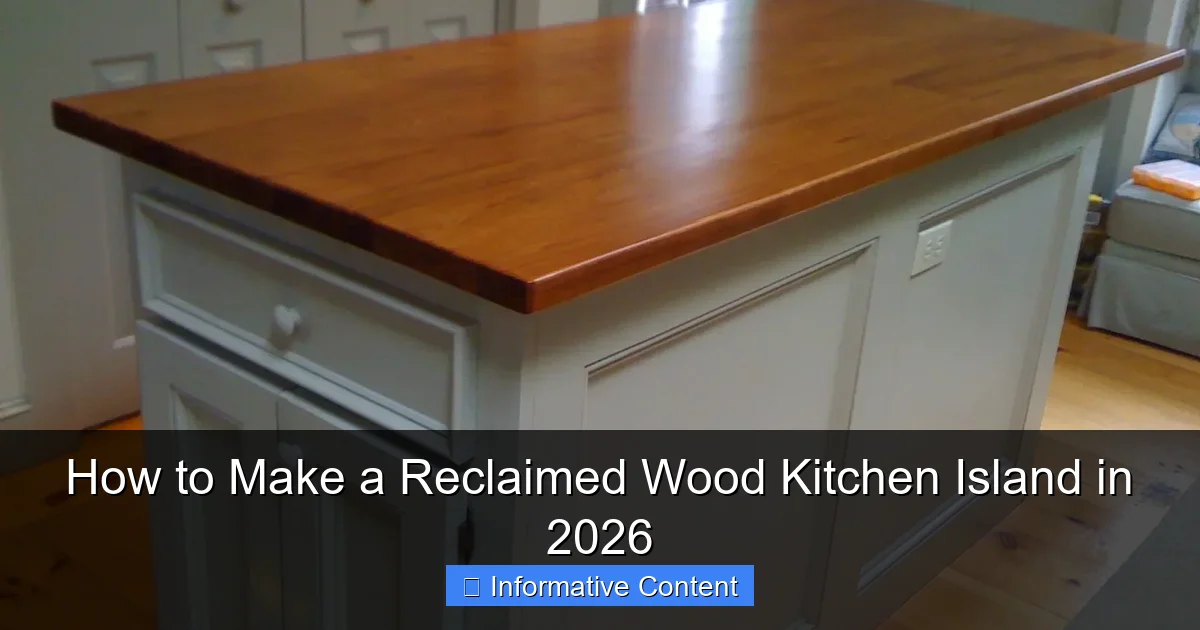
Visual guide about how to make a reclaimed wood kitchen island
Image source: images.custommade.com
Define Your Needs and Space
Ask yourself: What’s the island’s purpose? Is it for prep space, dining, or storage? Measure your kitchen. Leave at least 36 inches of clearance around the island for movement. For example, if your kitchen is 10×12 feet, a 36×24-inch island gives you breathing room. If you’re adding seating, plan for 24–30 inches per person. A 60-inch countertop can seat two comfortably.
- Tip: Use painter’s tape to mark the island’s footprint on the floor. Walk around it. Does it feel cramped? Adjust the size before cutting wood.
- Pro insight: If you have kids, consider rounded corners for safety. I learned this the hard way when my nephew bonked his head on a sharp edge.
Choose Your Design Style
Reclaimed wood works with almost any aesthetic, but your design will influence material choices. Here are three popular styles:
- Farmhouse: Thick planks, visible joinery, and a distressed finish. Think apron sinks and shiplap.
- Modern rustic: Sleek lines with a live-edge slab top. Add a waterfall edge for drama.
Sketch your island or use free tools like SketchUp Free or Canva. I once sketched mine on a napkin (true story), but digital tools help visualize proportions.
Budget and Timeline
Set a realistic budget. Reclaimed wood can cost $5–$15 per linear foot, depending on quality. Metal legs run $50–$200. Tools? Borrow or rent if you don’t own them. For a mid-sized island, plan 2–3 weekends. Rushing leads to mistakes—like when I glued the legs upside down (don’t ask).
Sourcing Reclaimed Wood: Where to Find Hidden Gems
Not all reclaimed wood is equal. Some is sturdy and beautiful; some is… well, a ticking time bomb of rot and nails. Here’s how to find the good stuff.
Local Reclaimed Wood Suppliers
Start with local salvage yards, architectural salvage shops, or Habitat for Humanity ReStores. I once scored 50 linear feet of oak from a 1920s barn for $200—half the retail price. Ask for “structural-grade” wood. Look for:
- Minimal rot or insect damage.
- Straight, flat boards (warped wood is harder to work with).
- Original nail holes—they add character, but too many can weaken the board.
Online Marketplaces and Salvage Auctions
Websites like Etsy, Facebook Marketplace, or eBay have reclaimed wood. Filter for “local pickup” to avoid shipping fees. I found a stunning 8-foot walnut slab on Facebook for $150 (retail: $800). But always:
- Ask for photos of the backside (hidden rot is common).
- Verify dimensions and moisture content (ideally below 20%).
- Check for chemical treatments (e.g., creosote—avoid it).
DIY Salvage: Tear Down an Old Structure
If you’re adventurous, salvage wood from a demolition site. I helped a friend dismantle a 19th-century chicken coop (with permission!). We got 200+ linear feet of cedar. But wear PPE: gloves, goggles, and a mask. Remove nails with a pry bar or nail punch. Pro tip: Soak old wood in water overnight to make it easier to work with—dry wood is brittle.
Data Table: Reclaimed Wood Sourcing Options (2026)
| Source | Cost per Linear Foot | Quality | Pros | Cons |
|---|---|---|---|---|
| Local Salvage Yard | $5–$12 | High (vetted) | Eco-friendly, supports local | Limited selection |
| Online Marketplace | $8–$15 | Variable | Wide variety, delivery options | Shipping costs, no inspection |
| DIY Salvage | Free–$50 (tools) | High (if done right) | Most affordable, unique | Time-consuming, labor-intensive |
| Reclaimed Wood Specialist | $10–$20 | Very High | Guaranteed quality, prepped | Most expensive |
Prepping the Wood: Turning History into Function
Reclaimed wood is like an old book—full of stories, but needs a little TLC before you can use it. This step is crucial for durability and safety.
Cleaning and De-Nailing
Start by removing nails and staples. Use a magnetic nail finder (I use the StudBuddy—game-changer) to avoid missing hidden fasteners. For surface nails, a pry bar works. For deep ones, a nail punch. Then, scrub the wood with a stiff brush and soapy water. For stubborn grime, a 1:1 vinegar-water mix helps. Rinse and dry for 48 hours.
- Tip: Wear gloves. Old wood is rough, and splinters hurt!
- Caution: If you find lead paint (common in pre-1978 structures), don’t sand it. Hire a pro or use a chemical stripper.
Planing and Sanding
Even if the wood looks flat, it’s probably not. Run it through a planer or use a hand planer to remove the top 1/8 inch. This exposes fresh grain and ensures even thickness. Then, sand with 80-grit (coarse), 120-grit (medium), and 220-grit (fine) paper. Sand with the grain—against it, and you’ll get scratches. I once sanded a board for 2 hours only to realize I was going cross-grain. Rookie mistake.
Moisture Check
Use a moisture meter. If the wood reads above 20%, let it acclimate indoors for 1–2 weeks. High moisture causes warping later. I ignored this once—my island top cupped after a month. Not fun.
Sealing the Wood (Before Assembly)
Seal the back and sides with a wood conditioner or shellac. This prevents uneven drying and warping. I use Zinsser Bulls Eye 1-2-3—it’s affordable and dries fast.
Building the Frame: Stability Is Everything
The frame is the skeleton of your island. A weak frame means a wobbly island—and a wobbly island means spilt coffee. Not good.
Choose Your Frame Material
Options:
- Reclaimed wood: For a cohesive look. Use 2x4s or 2x6s for legs and crossbeams.
- Metal: For industrial style. Welded steel or black iron pipe legs (e.g., Pipe Decor kits).
- Hybrid: Wood top with metal legs. My favorite—best of both worlds.
Constructing a Wooden Frame
For a 36×24-inch island:
- Cut legs: Four 34.5-inch 2x4s (subtract countertop thickness).
- Cut stretchers: Two 32-inch and two 20-inch 2x4s (for the frame).
- Assemble the base: Attach stretchers to legs with 3-inch wood screws and corner brackets. Use a square to ensure 90-degree angles.
- Add diagonal braces: Cut 2x4s to fit diagonally inside the frame. This prevents racking (twisting).
Tip: Pre-drill holes to avoid splitting old wood. I learned this after splitting three legs in a row.
Attaching Metal Legs
For pipe legs, follow the manufacturer’s instructions. Most kits include brackets that screw into the wood. Use a level to ensure legs are even. If one leg is shorter, sand the base or add a shim. I once had a 1/4-inch difference—my dog used the island as a teeter-totter. Not ideal.
Adding Storage (Optional)
For shelves or cabinets:
- Shelves: Cut reclaimed wood to size. Attach with L-brackets or cleats.
- Cabinets: Use reclaimed wood for doors. Add hinges and knobs. I used vintage drawer pulls from a flea market—$2 each!
Assembling the Countertop: The Star of the Show
The countertop is where your reclaimed wood shines. This is the part that will get compliments—and maybe a few “How did you make this?” questions.
Joining the Boards
For a seamless look, join boards with biscuit joints or dowels. I prefer biscuits—they’re forgiving. Here’s how:
- Arrange boards on a flat surface. Leave 1/8-inch gaps for expansion.
- Mark biscuit locations (every 8 inches).
- Cut biscuit slots with a biscuit joiner.
- Apply wood glue, insert biscuits, and clamp for 24 hours.
Pro tip: Use pipe clamps for even pressure. I use Bessey clamps—worth every penny.
Creating a Live Edge (Optional)
For a dramatic look, keep one edge natural (unplaned). Sand it smooth, but preserve the bark and curves. Seal with epoxy if the edge is porous. I made a live-edge island for a friend—her kids love tracing the tree’s rings.
Attaching the Countertop to the Frame
Don’t glue the top! Wood expands and contracts. Instead:
- Use figure-8 fasteners or Z-clips to secure the top to the frame. These allow movement.
- Place fasteners every 12 inches along the perimeter.
- Add a center support if the top is over 30 inches wide.
Caution: If you glue the top, it will crack. I did this once. Lesson learned.
Finishing Touches: Sealing, Styling, and Love
You’re almost done! The final step is sealing the wood and adding personal touches.
Choosing a Finish
Options:
- Oil: Minwax Tung Oil or Howard Feed-N-Wax. Enhances grain, easy to apply. Reapply every 6 months.
- Polyurethane: Varathane Diamond Wood Finish. Durable, water-resistant. Use satin or matte to avoid plastic look.
- Wax: Minwax Paste Finishing Wax. Soft sheen, easy to repair. Best for low-traffic areas.
My go-to: 2 coats of tung oil, then 1 coat of satin polyurethane. It’s tough enough for daily use but keeps the wood’s warmth.
Applying the Finish
1. Sand lightly with 220-grit between coats.
2. Wipe with a tack cloth.
3. Apply finish with a lint-free cloth or foam brush.
4. Let dry 24 hours between coats.
Tip: Work in a dust-free area. I once got a fly in my finish. Not my finest moment.
Adding Hardware and Accessories
- Legs: Add casters for mobility (lockable wheels).
- Edges: Round over sharp corners with a router or sandpaper.
- Decor: Hang pendant lights above, add a butcher block cutting board, or display a potted herb garden.
I added a vintage brass towel bar to mine—it’s now my favorite detail.
Conclusion: Your Kitchen, Your Story
Building a reclaimed wood kitchen island isn’t just about DIY skills—it’s about creating a piece of history that fits your life. Every scratch, every nail hole, every grain pattern tells a story. And now, that story is yours. In 2026, as we chase sustainability and authenticity, this project isn’t just trendy—it’s meaningful. You’re not just saving wood from a landfill; you’re giving it a second life. And your kitchen? It’s not just a room. It’s a gathering place, a workshop, a sanctuary. With your reclaimed wood island at its center, it’s a home.
So, grab your tools, find that perfect piece of wood, and get building. The coffee spills and family dinners will happen anyway—might as well do it around something you made with your own hands. And hey, if you make a mistake? That’s part of the story too. Just like my upside-down legs. Now they’re a family joke. And honestly? I wouldn’t change a thing.
Frequently Asked Questions
How do I choose the best reclaimed wood for a kitchen island?
Look for solid hardwood pieces like oak, maple, or barn wood with minimal warping and insect damage. Ensure the wood has been properly cleaned, sanded, and treated for indoor use to prevent splinters and odors. Prioritize locally sourced reclaimed wood to reduce costs and environmental impact.
What tools do I need to build a reclaimed wood kitchen island?
Essential tools include a miter saw, drill, sander, clamps, level, and measuring tape. You’ll also need safety gear like goggles and gloves. For a polished finish, consider a planer to smooth uneven reclaimed wood surfaces before assembly.
Can I build a reclaimed wood kitchen island without professional experience?
Yes, with pre-cut materials and beginner-friendly plans, DIYers can build a reclaimed wood kitchen island in a weekend. Follow step-by-step tutorials and use simple joinery techniques like pocket screws or mortise-and-tenon for stability.
How do I finish reclaimed wood to make it food-safe and durable?
Sand the wood to 120-220 grit, then apply food-grade mineral oil or beeswax for a natural look. For extra protection, use water-based polyurethane or epoxy resin—ideal for high-moisture areas like kitchen islands.
How much does it cost to make a reclaimed wood kitchen island in 2026?
Expect to spend $200-$800 depending on size, wood type, and hardware. Reclaimed wood itself ranges from $3-$10 per board foot, while countertops and metal legs add $100-$400. DIY labor cuts costs significantly.
How do I attach reclaimed wood planks for a seamless island countertop?
Stagger plank joints and secure them to a plywood base using wood glue and pocket screws. Fill gaps with epoxy or wood filler, then sand smooth. For expansion, leave 1/8″ spacing between planks and avoid over-tightening.