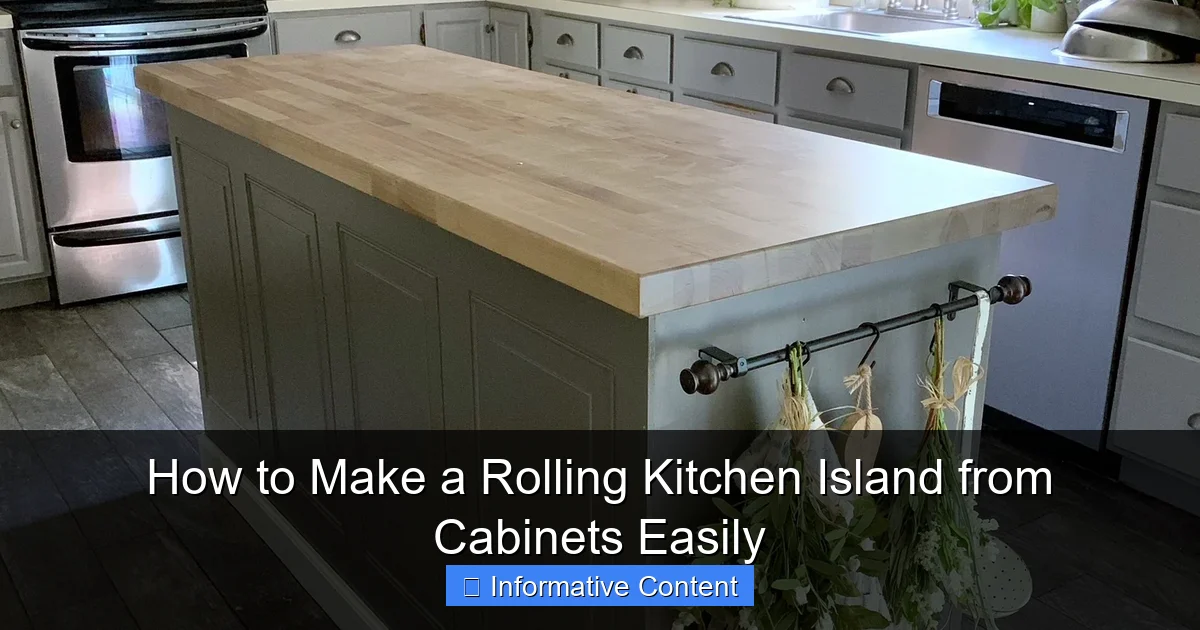
Featured image for how to make a rolling kitchen island from cabinets
Image source: celebratednest.com
Transform old cabinets into a functional rolling kitchen island with just a few tools and basic DIY skills. By reinforcing the cabinet base, adding heavy-duty casters, and customizing with a countertop, you can create a mobile, space-saving kitchen centerpiece in a weekend—perfect for extra storage, prep space, or entertaining.
Key Takeaways
- Choose sturdy cabinets: Ensure they support weight and movement.
- Install locking casters: Add mobility and stability when in use.
- Reinforce the base: Use plywood for added durability and strength.
- Measure carefully: Match cabinet height to your countertops perfectly.
- Add a countertop: Secure a solid surface for functionality and style.
- Customize storage: Adjust shelves and drawers for your kitchen needs.
📑 Table of Contents
- Why a Rolling Kitchen Island Is a Game-Changer
- Planning Your Rolling Kitchen Island: Start Right
- Gathering Tools and Materials: What You’ll Need
- Step-by-Step Assembly: Building Your Island
- Finishing Touches: Make It Your Own
- Real-World Examples and Data: What Works (and What Doesn’t)
- Conclusion: Roll Into a Better Kitchen
Why a Rolling Kitchen Island Is a Game-Changer
Let’s be honest—kitchen space is sacred. Whether you’re working in a cozy apartment or a spacious home, every inch counts. That’s why I was thrilled when I discovered how to make a rolling kitchen island from cabinets—a simple, budget-friendly upgrade that transformed my cooking and entertaining experience. No more tripping over stools or struggling to prep food in cramped corners. Instead, I now have a mobile workhorse that moves when I need it and tucks away when I don’t.
What I love most about this DIY project is that it’s not just about function—it’s about flexibility. A rolling kitchen island gives you extra counter space, storage, and even a place to eat or chat with guests. And the best part? You don’t need to spend hundreds on a custom-built island. With a few cabinets, some casters, and a weekend of work, you can build one yourself. I’ve done it twice now (once for my own kitchen and once for a friend’s), and I’m here to walk you through every step—no fancy tools or carpentry degree required.
Planning Your Rolling Kitchen Island: Start Right
Assess Your Space and Needs
Before you grab a single tool, take a good look at your kitchen. Ask yourself: Where do you need more space? Is it near the stove for prep work, or near the sink for cleanup? How much countertop area do you really need? I made the mistake of building my first island too wide, and it blocked my walkway. Lesson learned: measure twice, build once.
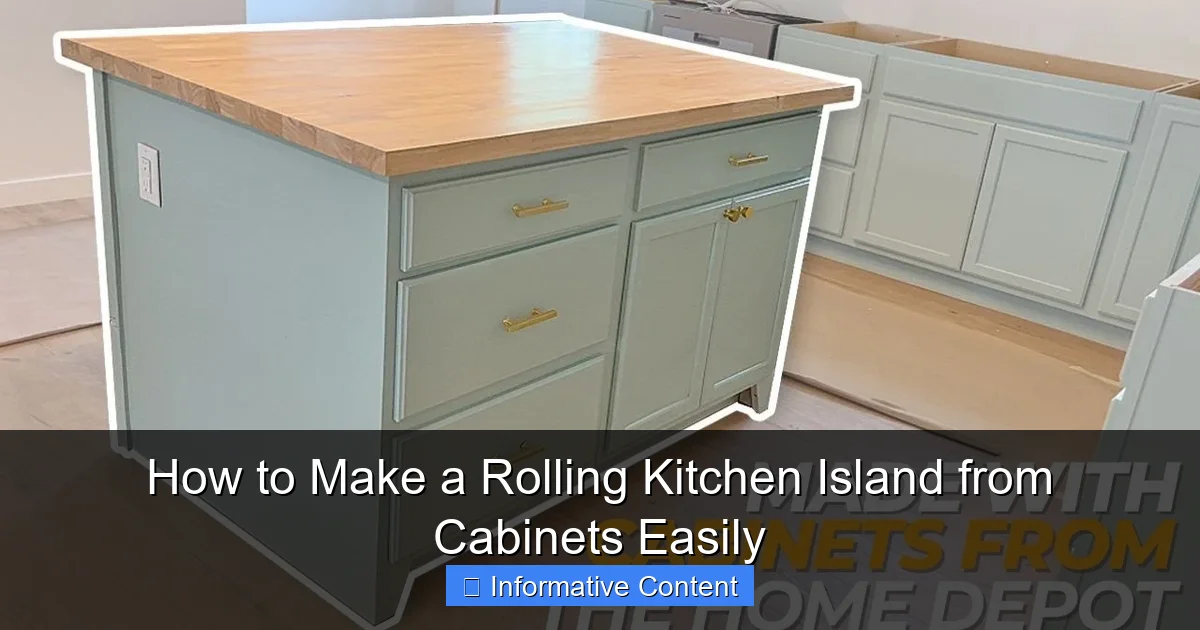
Visual guide about how to make a rolling kitchen island from cabinets
Image source: i.ytimg.com
Here’s what to consider:
- Size: Your island should be at least 18–24 inches deep and 24–36 inches wide for comfortable use. If you’re tight on space, go smaller. For larger kitchens, you can go up to 48 inches wide.
- Height: Standard counter height is 36 inches. If you plan to use it as a breakfast bar, go for 42 inches (bar height).
- Mobility: Think about where you’ll move it. Will it roll over tile, wood, or carpet? You’ll need casters that suit your flooring.
Pro tip: Use painter’s tape to mark the island’s footprint on your floor. Walk around it, open doors, and simulate cooking. This “test drive” saved me from a major layout blunder!
Choose the Right Cabinets
Not all cabinets are created equal. You want ones that are sturdy, easy to modify, and match your kitchen’s style. Here’s what I recommend:
- Base cabinets: These are perfect. They’re already 36 inches tall and come in standard widths (12″, 18″, 24″, 30″, 36″). I used two 24-inch cabinets side by side for a balanced look.
- Stock cabinets: Buy from home improvement stores like Home Depot or Lowe’s. They’re affordable and come pre-assembled (or in easy-to-build kits).
- Refurbished or used cabinets: Check Facebook Marketplace, Habitat for Humanity ReStore, or Craigslist. I scored a set of solid wood cabinets for $100—half the price of new!
Avoid flimsy particleboard if possible. Solid wood or plywood cabinets last longer and handle weight better. Also, pick cabinets with full backs—they add stability when you add casters.
Set Your Budget and Timeline
You can build a rolling kitchen island for as little as $150 or up to $500, depending on materials. Here’s a rough breakdown:
- Low end ($150–$250): Used cabinets, basic casters, and a pre-cut countertop.
- Mid-range ($250–$400): New stock cabinets, locking casters, and a butcher block countertop.
- High end ($400+): Custom cabinets, heavy-duty casters, and a granite or quartz countertop.
Time-wise, set aside 1–2 weekends. The first day is for prep and assembly. The second day is for finishing touches (sanding, painting, installing hardware).
Gathering Tools and Materials: What You’ll Need
Essential Tools (Most You Probably Own)
You don’t need a workshop full of tools. Here’s what I used:
- Cordless drill (with Phillips and flathead bits)
- Circular saw or jigsaw (for cutting countertops or trim)
- Tape measure
- Level (critical for even casters)
- Clamps (to hold pieces in place)
- Sandpaper or sander (80-grit for rough sanding, 120-grit for finish)
- Safety gear (goggles, gloves, mask)
No drill? Borrow one or rent from a tool library. A hand screwdriver works in a pinch, but it’ll take longer.
Materials Checklist
Here’s your shopping list:
- Cabinets (2–3 base cabinets) – I used two 24″ wide ones.
- Casters (4–6 wheels) – Get locking casters (at least 2) for stability. 2″–3″ diameter works for most kitchens.
- Countertop material – Butcher block, laminate, quartz, or even a solid wood board.
- Wood glue (for extra strength)
- Wood screws (1.5″ and 2.5″)
- Wood filler (to patch screw holes)
- Sandpaper (80-grit and 120-grit)
- Paint or stain (if refinishing)
- Polyurethane sealant (for water resistance)
- Drawer slides or cabinet hardware (if not pre-installed)
Pro tip: Buy extra screws and wood glue. You’ll inevitably drop one behind the fridge or need to reinforce a joint.
Choosing Casters: The Key to Smooth Rolling
Not all casters are equal. Here’s what to look for:
- Locking wheels: At least two casters should lock. This keeps your island from rolling while you’re chopping.
- Weight capacity: Check the load rating. A typical kitchen island with food, dishes, and appliances weighs 150–300 lbs. Choose casters rated for at least 200 lbs each.
- Floor type:
- Tile/wood: Use rubber or polyurethane wheels.
- Carpet: Go for larger (3″) wheels with deep treads.
- Swivel vs. fixed: Swivel casters are easier to maneuver but less stable. I use 2 swivel + 2 fixed for balance.
I recommend the Shepherd Hardware 2″ Locking Casters—they’re affordable, quiet, and hold up to 250 lbs each. For heavy-duty use, try Rev-A-Shelf 3″ Heavy-Duty Casters.
Step-by-Step Assembly: Building Your Island
Prep the Cabinets
Start by assembling your cabinets (if they’re not pre-built). Follow the manufacturer’s instructions, but here’s my shortcut:
- Attach the sides to the back panel using wood screws and glue. Clamp them together for a tight fit.
- Install the bottom and top panels. Use 2.5″ screws every 6–8 inches along the edges.
- Add shelves or drawer slides if needed. I added a middle shelf for extra storage.
Once assembled, sand the cabinets with 80-grit paper to smooth rough edges. Then wipe with a damp cloth to remove dust.
Attach the Casters
This is where many DIYers go wrong. Here’s the right way:
- Flip the cabinet upside down on a soft surface (like a blanket or cardboard).
- Mark caster positions 2–3 inches from each corner. Use a level to ensure they’re aligned.
- Drill pilot holes slightly smaller than the screw diameter. This prevents splitting.
- Screw in the casters using the provided hardware. Tighten firmly, but don’t over-torque.
Test the island by rolling it. If it wobbles, add a fifth caster in the center (under the bottom panel). I did this on my first try—it made a huge difference!
Join Multiple Cabinets (If Using 2+)
If you’re using two or more cabinets side by side:
- Place them face-to-face and clamp them together.
- Drill pilot holes through the side panels where they meet.
- Join with 2.5″ wood screws every 8–12 inches. Add wood glue for extra strength.
For a seamless look, fill gaps between cabinets with wood filler. Sand smooth when dry.
Install the Countertop
Your countertop should overhang the cabinets by 1–2 inches on all sides. Here’s how to secure it:
- Place the countertop upside down on a soft surface.
- Center the cabinet assembly on top. Use a level to ensure it’s even.
- Drill pilot holes through the cabinet top into the countertop’s underside.
- Secure with 1.5″ screws every 12 inches. Add wood glue for a permanent bond.
For butcher block, seal it with food-safe mineral oil or polyurethane. For laminate, wipe with a damp cloth.
Finishing Touches: Make It Your Own
Paint or Stain for Style
Want your island to match your kitchen? Here’s how I refinished mine:
- Sand with 120-grit paper to smooth the surface.
- Wipe with a tack cloth to remove dust.
- Apply paint or stain in thin, even coats. I used Benjamin Moore Advance for a durable finish.
- Let dry 24 hours between coats.
- Seal with polyurethane (2–3 coats) for water resistance.
Pro tip: Use a paint sprayer for a smooth finish. A brush works too—just sand between coats.
Add Functional Upgrades
Take your island from basic to brilliant with these upgrades:
- Drawer organizers: I added bamboo dividers for utensils.
- Pull-out trash bin: A 13-gallon bin fits perfectly in a 12″ cabinet.
- Paper towel holder: Mount it on the side with screws.
- Hooks or pegboard: Hang pots, pans, or aprons.
- Power strip: Install a slim strip inside a cabinet for small appliances.
I added a wine rack to one side—perfect for parties!
Test and Adjust
Before declaring victory, test your island:
- Roll it around to check for wobbles or uneven movement.
- Lock the casters and press down on the countertop. It shouldn’t rock.
- Open drawers/doors while the island is locked. They should glide smoothly.
If it wobbles, tighten the casters or add shims under the wheels. If drawers stick, adjust the slides.
Real-World Examples and Data: What Works (and What Doesn’t)
Case Studies: Islands That Succeeded (and One That Didn’t)
Here’s what I’ve learned from my builds and others:
| Project | Cabinet Type | Countertop | Casters | Cost | Result |
|---|---|---|---|---|---|
| My First Island | Two 24″ stock cabinets | Butcher block (pre-cut) | 2″ locking (Shepherd) | $220 | Stable, easy to roll. Added a fifth caster later. |
| Friend’s Apartment Island | One 30″ base cabinet | Laminate (cut to size) | 3″ swivel (Rev-A-Shelf) | $180 | Perfect for small space. Locking wheels essential. |
| Failed Attempt (Neighbor) | Three 18″ particleboard cabinets | Quartz (heavy) | 1.5″ non-locking (cheap brand) | $350 | Wobbled, casters broke after 3 months. Lesson: Invest in quality. |
Common Mistakes to Avoid
Don’t repeat these errors:
- Skipping pilot holes: This cracks wood and weakens joints.
- Using non-locking casters: Your island will roll when you least expect it.
- Ignoring weight limits: Overloading casters causes breakage.
- Rushing the finish: Sanding and sealing take time but make a huge difference.
- Forgetting the overhang: A 1–2″ overhang prevents spills from dripping down the cabinets.
One friend skipped sanding and ended up with splinters in her hand—ouch!
Conclusion: Roll Into a Better Kitchen
Building a rolling kitchen island from cabinets isn’t just a DIY project—it’s a kitchen revolution. I’ve used mine for everything from meal prep to holiday baking to impromptu wine nights. It’s saved my back, my sanity, and my floor space. And the best part? It didn’t cost a fortune.
You don’t need to be a master carpenter to do this. With careful planning, the right tools, and a little patience, anyone can create a functional, stylish island that rolls exactly where you need it. Just remember: measure, test, and don’t skip the locking casters.
So go ahead—grab those cabinets, dust off your drill, and start building. Your kitchen (and your guests) will thank you. And when you’re done? Roll it into the corner, pour yourself a glass of wine, and admire your handiwork. You’ve earned it.
Frequently Asked Questions
What materials do I need to make a rolling kitchen island from cabinets?
You’ll need base cabinets, heavy-duty locking casters, plywood or butcher block for the countertop, screws, wood glue, and tools like a drill and saw. Don’t forget sandpaper and paint/stain for finishing touches. These materials ensure a sturdy, mobile island.
How do I attach casters to cabinets for a rolling kitchen island?
Flip the cabinet upside down and pre-drill holes in the corners for the caster screws. Use 3–4-inch heavy-duty locking casters rated for at least 100 lbs each to ensure stability and smooth movement.
Can I customize the size of my rolling kitchen island from cabinets?
Absolutely! Measure your space and select cabinets of the desired width, depth, or height. Stack or combine cabinets for added storage, and trim the countertop to fit your unique layout.
How do I ensure my rolling kitchen island is stable and safe?
Reinforce joints with wood glue and screws, and use corner braces if needed. Always lock the casters when the island is in use, and distribute weight evenly inside the cabinets to prevent tipping.
What’s the easiest way to finish a rolling kitchen island from cabinets?
Sand all surfaces, then apply primer and paint or stain for a polished look. Seal the countertop with food-safe mineral oil (for wood) or epoxy for durability and easy cleanup.
Can I add features like hooks or a towel bar to my rolling kitchen island?
Yes! Install hooks on the sides for utensils or a towel bar underneath for easy access. Use pre-drilled holes or brackets to avoid damaging the cabinet structure while adding functionality.