
Featured image for this comprehensive guide about how to measure for a kitchen island placemet
Image source: i.pinimg.com
Imagine your dream kitchen: a vibrant hub of activity, a place where delicious meals are crafted, laughter echoes, and memories are made. At the heart of many such kitchens stands a magnificent, functional, and perfectly positioned kitchen island. It’s more than just a countertop; it’s a breakfast bar, a prep station, a homework zone, and often, the social epicenter of your home. But achieving this idyllic vision isn’t just about picking out the right materials or design aesthetic. It all boils down to one critical, often overlooked step: accurate measurement for a kitchen island placement.
Many homeowners jump straight to the exciting part – browsing finishes and features – only to encounter costly headaches down the line if the island doesn’t fit, obstructs traffic, or simply feels “off.” A poorly placed island can turn a dream kitchen into a frustrating maze, hindering flow, reducing counter space, and even violating safety codes. That’s why mastering the art of how to measure for a kitchen island placement is paramount. It’s the blueprint for success, ensuring your island enhances, rather than detracts from, your kitchen’s functionality and beauty.
This comprehensive guide will walk you through every essential step, from initial considerations to final layout checks. We’ll delve into the crucial clearances, practical dimensions, and often-forgotten elements that contribute to a truly seamless kitchen island placement. By the end, you’ll be equipped with the knowledge and confidence to precisely plan for an island that not only looks spectacular but also makes your kitchen an absolute joy to use. Let’s grab our tape measures and dive in!
Quick Answers to Common Questions
What’s the golden rule for clearance around a kitchen island placement?
Aim for at least 36-42 inches (90-105 cm) of clear walkway space on all working sides for comfortable movement and appliance access. This ensures your kitchen island placement doesn’t become an obstacle.
How do I know what size kitchen island placement my kitchen can handle?
Start by measuring your available open floor space, then subtract your desired walkway clearances. This will give you the maximum dimensions for your ideal kitchen island placement without overcrowding the room.
Should I consider traffic flow when deciding on my kitchen island placement?
Absolutely! Ensure your kitchen island placement doesn’t block major pathways, like the route between your fridge, sink, and stove (the “work triangle”), or access to doorways.
What about opening appliance doors when planning for kitchen island placement?
Always check that your refrigerator, oven, and dishwasher doors can fully open without hitting your kitchen island placement. Factor in their open depth when measuring your clearances.
How can I visualize the best kitchen island placement before committing?
Use painter’s tape or cardboard boxes to mock up your desired kitchen island placement on the floor. This practical step helps you physically test the fit and flow in your actual space.
📋 Table of Contents
- Why Accurate Measurement is the Foundation of Your Dream Kitchen Island
- Essential Pre-Measurement Considerations: Beyond Just Dimensions
- The Golden Rules of Kitchen Island Clearance: Your Guide to Functional Flow
- Measuring for Kitchen Island Size and Shape: Finding Your Perfect Fit
- Accounting for Utilities and Appliances: The Hidden Hurdles
- Bringing it All Together: Visualizing and Finalizing Your Kitchen Island Plan
- Conclusion
Why Accurate Measurement is the Foundation of Your Dream Kitchen Island
The saying “measure twice, cut once” has never been more relevant than when planning a kitchen island placement. This central fixture has a profound impact on your kitchen’s overall functionality, aesthetics, and even your home’s resale value. A well-designed and perfectly proportioned island can transform a good kitchen into a great one, but errors in measurement can lead to a cascade of problems.
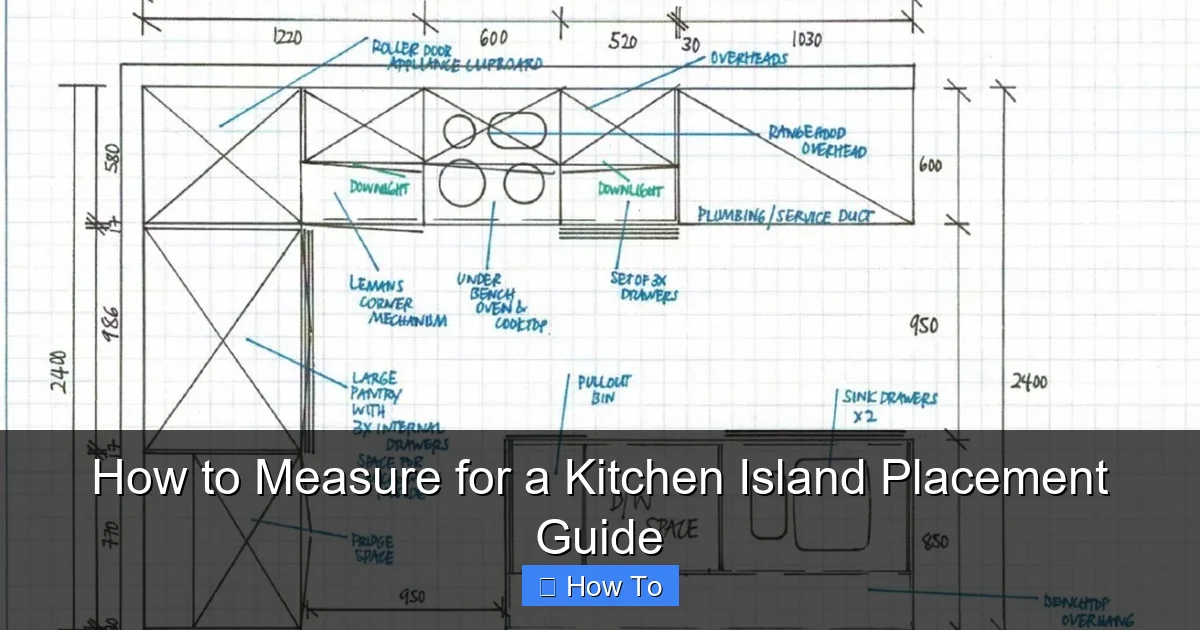
Learn more about how to measure for a kitchen island placemet – How to Measure for a Kitchen Island Placement Guide
Image source: aussiecut.com.au
- Optimized Workflow: The kitchen is a highly active space. Your island should enhance the “kitchen work triangle” (sink, stove, refrigerator) by providing a convenient prep surface or a secondary wash station, not impede movement between these crucial points. Accurate kitchen island dimensions ensure smooth transitions.
- Safety First: Insufficient clearance around an island can create pinch points, making it difficult to open appliance doors (like dishwashers or ovens), pull out chairs, or navigate with hot pots and pans. This isn’t just an inconvenience; it’s a safety hazard. Proper clearance around a kitchen island is non-negotiable.
- Visual Harmony: An island that’s too big can overwhelm a small kitchen, making it feel cramped and unbalanced. Conversely, a tiny island in a spacious kitchen can look lost and disproportionate. Getting the kitchen island size right ensures visual balance and aesthetic appeal.
- Cost Efficiency: Mistakes in initial planning often lead to costly rework, custom fabrication changes, or even having to scrap an island design entirely. Investing time in precise kitchen island planning upfront saves money and stress in the long run.
- Increased Home Value: A thoughtfully designed and expertly integrated kitchen island is a highly desirable feature for prospective homebuyers. It signals a well-planned, functional, and modern kitchen, significantly boosting your home’s market appeal.
Understanding these benefits underscores why the initial measuring phase is not just a formality but a critical investment in the success of your entire kitchen renovation or design project. It’s about laying a solid foundation for a beautiful and highly functional space.
| Measurement Aspect | Recommended Guideline | Importance / Impact |
|---|---|---|
| Main Traffic Walkway Clearance | 36-42 inches (90-107 cm) minimum | Ensures comfortable movement and prevents bottlenecks in high-traffic zones. |
| Appliance Door Clearance | 42-48 inches (107-122 cm) from island edge | Allows appliance doors (e.g., dishwasher, oven) to open fully without obstruction, and provides space to stand in front. |
| Island Depth (Standard) | 24-42 inches (60-107 cm) | Balances usable workspace with kitchen flow; accommodates various functions from prep to serving. |
| Island Length (Standard) | 48-96 inches (120-240 cm) | Provides ample surface area for tasks and potentially seating, depending on kitchen size. |
| Seating Overhang | 12-15 inches (30-38 cm) for counter height | Crucial for comfortable legroom when sitting at the island, prevents knees from hitting cabinets. |
Essential Pre-Measurement Considerations: Beyond Just Dimensions
Before you even pick up your tape measure, there are several crucial factors to contemplate that will heavily influence your kitchen island placement and ultimate design. These aren’t just about inches and feet; they’re about lifestyle, usage, and the very fabric of your home.
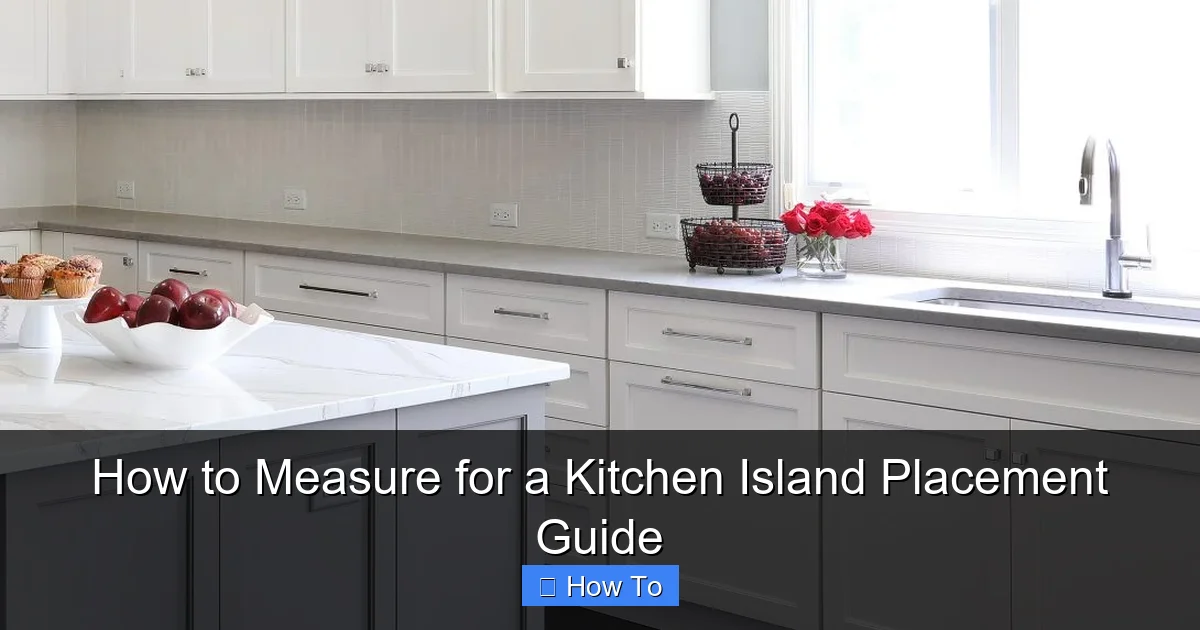
Learn more about how to measure for a kitchen island placemet – How to Measure for a Kitchen Island Placement Guide
Image source: normandyremodeling.com
Defining Your Kitchen Island’s Primary Purpose
What will your island primarily be used for? This question dictates its necessary features, size, and even its optimal placement within the kitchen layout. Common purposes include:
- Prep Station: If heavy-duty cooking is your game, you’ll need ample counter space, perhaps a secondary sink, and easy access to your main cooking zone.
- Dining/Breakfast Bar: For casual meals, homework, or entertaining, seating is key. This impacts overhang requirements and the overall footprint.
- Storage Hub: If you’re craving extra pantry space, drawers, or shelving, your island will need to accommodate these storage solutions.
- Appliance Zone: Incorporating a cooktop, a secondary oven, a wine fridge, or a microwave into the island requires specific utility connections and surrounding clearances.
- Social Hub: For open-concept living, the island might serve as a visual divider and a gathering point, requiring space for guests to stand or sit comfortably without impeding the work zone.
Understanding the core function helps you prioritize space and features, guiding your subsequent measurements.
Mapping Your Kitchen’s Existing Layout and Traffic Flow
Observe how people currently move through your kitchen. Where are the main pathways? Where do bottlenecks occur? This “traffic flow analysis” is vital for preventing your island from becoming an obstacle. Consider:
- Entry/Exit Points: Ensure easy access to and from the kitchen.
- Appliance Paths: Can you easily access the refrigerator, oven, dishwasher, and pantry without having to “walk around” the island excessively?
- Work Triangle: As mentioned, the path between your sink, refrigerator, and range should remain clear and efficient. The ideal work triangle perimeter is often cited between 12-26 feet (3.6-7.9 meters).
- Adjacent Rooms: How does the kitchen connect to dining rooms, living areas, or outdoor spaces? Your island shouldn’t block these important transitions.
Use blue painter’s tape or cardboard boxes to mock up potential kitchen island placement scenarios and physically walk around them to get a feel for the flow.
Identifying Fixed Obstacles and Architectural Features
Don’t forget the unmovable elements in your kitchen. These will set boundaries for your island’s shape and size:
- Walls: Obvious, but remember to measure from the finished wall surface.
- Doors and Windows: Ensure the island doesn’t block opening doors or obscure views from windows.
- Radiators/Vents: Keep these clear for proper air circulation and heating.
- Support Columns: These might need to be incorporated into the island design.
- Existing Cabinetry/Appliances: Remember their depth, especially when doors are open.
- Floor Outlets/Vents: Note their current positions.
Thoroughly documenting these elements will prevent unexpected conflicts during installation and ensure a harmonious kitchen design.
The Golden Rules of Kitchen Island Clearance: Your Guide to Functional Flow
Arguably the most critical aspect of kitchen island placement is ensuring adequate clearance. This isn’t just about convenience; it’s about safety, accessibility, and creating a kitchen that feels spacious and works efficiently. These guidelines are based on industry standards and ergonomic principles.
Minimum Clearance Requirements
The general rule of thumb for walking paths around a kitchen island is 36-48 inches (91-122 cm). However, specific areas may require more or less:
- Primary Work Aisles (Between Island and Appliances/Counters):
- Minimum: 42 inches (107 cm) is the generally accepted minimum for a single cook.
- Recommended: 48 inches (122 cm) is ideal for multi-cook kitchens or where appliances (like dishwashers, ovens, refrigerators) have doors that swing open into the aisle. This allows someone to be at the counter while another person accesses an appliance.
- Secondary Aisles (Non-Work Areas or Light Traffic):
- Minimum: 36 inches (91 cm) can be acceptable for aisles where there’s no major appliance or heavy work happening, like between the island and a wall or a pantry.
- Aisle with Seating:
- Without Through Traffic: If the back of your island has seating and backs up to a wall or window with no major traffic, 36 inches (91 cm) from the counter edge to the wall is the minimum to allow someone to sit and get up.
- With Through Traffic: If people need to walk behind seated individuals, aim for 44-48 inches (112-122 cm) from the counter edge to the wall/obstruction. This allows someone to easily walk behind a seated person.
Special Considerations for Appliance Doors and Drawers
When measuring clearance, always factor in the full extension of appliance doors and drawers. This is a common oversight that leads to frustrating everyday interactions.
- Dishwasher: Ensure enough space for the door to fully drop down and for you to comfortably load/unload without bumping into the island.
- Oven/Range: If an oven door opens down, make sure there’s room to stand in front of it and access contents.
- Refrigerator: The doors must open fully, preferably to 90 degrees or more, to allow full access to drawers and shelves. Measure the swing radius.
- Microwave/Wine Fridge: Account for their doors as well.
Data Table: Standard Kitchen Island Clearance Guidelines
Below is a quick reference for common clearance recommendations when planning your kitchen island placement:
| Area / Purpose | Minimum Clearance (Inches) | Recommended Clearance (Inches) | Notes |
|---|---|---|---|
| Primary Work Aisle (Single Cook) | 42″ (107 cm) | 48″ (122 cm) | Between island and main counter/appliances. |
| Primary Work Aisle (Multiple Cooks) | 48″ (122 cm) | 54″ (137 cm) | Allows two people to work comfortably back-to-back. |
| Secondary Aisle (Light Traffic) | 36″ (91 cm) | 42″ (107 cm) | Between island and a wall or non-working counter. |
| Aisle with Seating (No Through Traffic) | 36″ (91 cm) | 42″ (107 cm) | From counter edge to wall/obstruction. |
| Aisle with Seating (With Through Traffic) | 44″ (112 cm) | 48″ (122 cm) | Allows walking behind seated individuals. |
| Island Width (Minimum for Prep) | 24″ (61 cm) | 36″ (91 cm) | Ideal for useful prep space. |
| Island Length (Minimum for Utility) | 48″ (122 cm) | 72″+ (183+ cm) | Depends heavily on function (sink, cooktop, seating). |
These guidelines are crucial for achieving an optimal kitchen layout and ensuring your island feels like a natural, integral part of your kitchen.
Measuring for Kitchen Island Size and Shape: Finding Your Perfect Fit
Once you’ve established your clearances, you can work backward to determine the ideal kitchen island size and shape. This is where your vision truly starts to take form, balancing aesthetics with practicality.
Determining Optimal Island Length and Width
Start by identifying the available floor space after accounting for all necessary clearances. This is your maximum envelope. Then, consider:
- Functional Needs:
- Prep Space: Aim for at least 24 inches (61 cm) of uninterrupted counter space for comfortable chopping and mixing. If you plan to incorporate a sink or cooktop, factor in additional landing space on either side (typically 18-24 inches / 46-61 cm).
- Seating: Allow 24-30 inches (61-76 cm) of width per person for comfortable seating at the island. The depth of the seating overhang should be at least 15 inches (38 cm) for counter-height seating (36 inches / 91 cm high) and 12 inches (30 cm) for bar-height seating (42 inches / 107 cm high).
- Storage: If your island will house cabinets or drawers, standard cabinet depths are 24 inches (61 cm), but shallower options exist. Double-sided islands often have a total depth of 42-48 inches (107-122 cm).
- Kitchen Proportions:
- A good rule of thumb is that your island should occupy no more than 10% of your kitchen’s total square footage. This helps maintain balance and prevents the island from dominating the room.
- Visually, the island should feel proportionate to the surrounding cabinetry and the room itself. Use graph paper or a digital design tool to draw out different sizes.
A typical functional island is at least 4 feet (122 cm) long and 2 feet (61 cm) deep. However, many homes opt for larger islands, with common dimensions ranging from 6-8 feet (183-244 cm) long and 3-4 feet (91-122 cm) deep.
Choosing the Right Island Shape for Your Kitchen
The shape of your island plays a significant role in flow and function. Common shapes include:
- Rectangular/Square: The most common and versatile, offering clear lines and easy integration into most layouts. Great for maximizing prep and seating space.
- L-Shaped: Excellent for larger kitchens, creating distinct work zones or allowing for more expansive seating.
- U-Shaped: Even more expansive, essentially creating a ‘room within a room.’ Suitable for very large kitchens with multiple cooks.
- Circular/Curved: Can add a unique aesthetic touch and softer lines, but might be less efficient for prep space. Often used for seating areas.
- Galley/Narrow: For smaller kitchens, a long, narrow island can provide extra counter space without impeding flow.
Consider how the shape interacts with your existing cabinetry and the overall architectural style of your home. A curved island might look out of place in a very modern, minimalist kitchen, for instance.
Island Height Considerations
The standard height for a kitchen counter and island is 36 inches (91 cm) – known as “counter height.” This is ergonomic for most adults when prepping food. However, other heights exist:
- Bar Height: 42 inches (107 cm). This height often provides a visual separation between the kitchen and an adjacent living area and is great for casual drinks. Requires taller stools.
- Table Height: 30 inches (76 cm). Less common for main islands, but can be a good option if you want to integrate a dining table feel directly into the island, using standard dining chairs.
- Multi-Level Island: Some islands feature different heights for different functions – a 36-inch (91 cm) prep area and a raised 42-inch (107 cm) bar for seating. This offers versatility but can sometimes break up the visual flow.
Ensure the chosen height accommodates your family’s needs and integrates seamlessly with your existing kitchen elements.
Accounting for Utilities and Appliances: The Hidden Hurdles
A beautiful island is nothing without its underlying infrastructure. Planning for plumbing, electrical, and ventilation systems is a critical, yet often overlooked, part of kitchen island placement. These elements can significantly impact where your island can or should go.
Plumbing: Sinks, Dishwashers, and Water Lines
If your island is destined to house a prep sink, a main sink, or a dishwasher, you’ll need to run water supply lines and a drain line to its location. This involves:
- Cost: Running new plumbing through concrete slabs or across floor joists can be a significant expense. Be prepared for potential floor disruption.
- Drainage: Ensure adequate pitch for drainage if connecting to existing waste lines. Sometimes, a lift pump is required if gravity drainage isn’t feasible.
- Ventilation: Sinks require venting to prevent vacuum locks. An air admittance valve (AAV) can sometimes be used in place of traditional stack venting, which is often easier to install in an island.
Consult with a licensed plumber early in your planning phase to understand the feasibility and cost implications of island plumbing.
Electrical: Outlets, Lighting, and Appliance Hookups
Modern building codes often require electrical outlets on islands, especially if they have a countertop. Beyond code, electrical planning is vital for convenience and functionality.
- Outlets: Plan for at least two strategically placed outlets for small appliances (blenders, toasters, laptops). Pop-up outlets are a sleek solution.
- Appliance Hookups: If you’re installing a cooktop, oven, or microwave in the island, you’ll need dedicated circuits and appropriate voltage (120V or 240V).
- Lighting: Consider pendant lighting above the island. This requires electrical wiring in the ceiling directly above the intended island location. Ensure the island location allows for balanced lighting.
- Smart Home Tech: Future-proof your island with USB charging ports or even integrated smart home controls.
An electrician can advise on the best and safest way to bring power to your island, especially if trenching for new wiring is required.
Ventilation: Hoods for Cooktops and Ranges
If your island includes a cooktop or range, robust ventilation is absolutely essential to remove smoke, grease, and odors. This usually involves:
- Island Hoods: These are mounted to the ceiling above the island and duct out through the ceiling and roof. They require significant overhead space and careful planning for ductwork.
- Downdraft Ventilation: These systems are built into the cooktop or rise from the countertop, pulling air down and usually ducting through the floor or toe kick. They offer a cleaner aesthetic but can be less effective than overhead hoods and more complex to install.
Proper ventilation is not just about comfort; it’s about maintaining indoor air quality and preventing grease buildup in your home. Factor in the visual impact of an island hood on your open-concept space.
Bringing it All Together: Visualizing and Finalizing Your Kitchen Island Plan
You’ve gathered all the measurements, considered the clearances, and accounted for utilities. Now it’s time to synthesize this information and truly visualize your future kitchen island placement. This final stage is crucial for avoiding costly surprises and ensuring your design is perfect.
Creating a Detailed Floor Plan
Don’t rely solely on mental images. A detailed floor plan is your most powerful tool:
- Scale Drawing: Use graph paper or kitchen design software (many free online tools are available) to draw your kitchen to scale. Include all walls, doors, windows, and existing appliances.
- Outline Your Island: Draw your proposed island, incorporating its exact length, width, and shape.
- Mark Clearances: Draw lines representing the minimum and recommended clearances around all sides of the island and to surrounding counters/appliances.
- Plot Utilities: Indicate the precise locations of existing and proposed plumbing lines, electrical outlets, and ventilation ducts.
- Appliance Swings: Draw the full arc of appliance doors (refrigerator, oven, dishwasher) to ensure they clear the island.
- Seating Areas: If applicable, draw chairs or stools to visualize how they fit and if there’s enough room for movement behind them.
A detailed plan helps catch potential conflicts before construction even begins, making it an indispensable part of your kitchen design process.
Mock-Ups: The Power of Physical Visualization
While a drawing is helpful, a physical mock-up takes visualization to the next level. This allows you to experience the space in three dimensions.
- Blue Painter’s Tape: Outline the exact footprint of your proposed island on the floor with painter’s tape. This is a quick and easy way to see the size and how it affects walking paths.
- Cardboard Boxes/Furniture: Stack cardboard boxes, move existing furniture, or even rent temporary barriers to simulate the island’s height and bulk. This is particularly effective for understanding the visual impact and how it feels to walk around it.
- Sit Test: If your island will have seating, place chairs or stools at the mock-up and have people sit and try to move around. Does it feel comfortable? Is there enough elbow room? Can someone walk behind them?
Spending an hour or two with a physical mock-up can reveal issues that a drawing might miss, giving you ultimate confidence in your chosen kitchen island placement.
Final Review and Professional Consultation
Before committing to your design, take one last, critical look:
- Walk Through Your Day: Mentally (or physically) walk through your typical kitchen routines: making coffee, cooking dinner, unloading groceries, doing dishes, entertaining. Does the island enhance or hinder these activities?
- Traffic Flow: Are the pathways clear and unobstructed?
- Ergonomics: Is the height comfortable for prep? Is seating functional?
- Aesthetics: Does the island look balanced within the room? Does it complement your overall kitchen design?
- Professional Eye: Consider consulting with a kitchen designer, architect, or general contractor. Their experience can spot potential problems or offer innovative solutions you might have overlooked. They can also ensure your plan adheres to local building codes, especially concerning utilities and clearances.
A professional can provide valuable insights, ensuring your kitchen island planning is not just functional but also future-proof and compliant.
Conclusion
Embarking on the journey of designing and placing a kitchen island is an exciting endeavor, one that promises to elevate the heart of your home. However, as this comprehensive guide has underscored, the success of this project hinges critically on meticulous planning and accurate measurement. From understanding your island’s core purpose to navigating the intricacies of utility hookups and ensuring optimal clearances, every step contributes to a final result that is both beautiful and profoundly functional.
By diligently following the actionable tips and insights provided, you’re not just measuring for a piece of furniture; you’re crafting the very essence of your kitchen’s workflow, comfort, and aesthetic appeal. Remember the golden rules of clearance, visualize with detailed plans and physical mock-ups, and never underestimate the power of a professional consultation. Your investment in precise kitchen island placement will pay dividends daily, transforming your kitchen into an efficient, safe, and welcoming space where countless cherished moments will unfold.
So, take a deep breath, grab your trusty tape measure, and embark on this rewarding process with confidence. Your perfectly placed kitchen island is within reach, ready to become the vibrant centerpiece you’ve always dreamed of!
Frequently Asked Questions
What is the minimum recommended clearance around a kitchen island?
You should aim for at least 36 to 42 inches of clear space on all sides of your kitchen island. This ensures comfortable movement, allows appliance doors to open fully, and provides sufficient passage in your kitchen layout.
How do I determine the appropriate size for my kitchen island placement?
To determine the right size, first measure your available kitchen space, accounting for the minimum clearances needed on all sides. Then, consider the primary functions you want the island to serve, such as prep, seating, or storage, to choose dimensions that fit both your space and needs.
How can I tell if my kitchen is large enough to accommodate an island?
Generally, kitchens that are at least 10×12 feet (approx. 3×3.6 meters) or larger are good candidates for an island. The key is ensuring you can maintain the essential 36-42 inches of clearance around the island while still having a functional work triangle and clear pathways.
How does the “work triangle” concept apply when measuring for a kitchen island placement?
When measuring for a kitchen island placement, ensure the island doesn’t obstruct the “work triangle” between your refrigerator, sink, and stove. The total perimeter of the triangle should ideally be between 12 and 26 feet, with no single leg being shorter than 4 feet or longer than 9 feet, allowing for efficient workflow.
How much space should I allow for seating at my kitchen island?
For comfortable seating at your kitchen island, allocate at least 24 inches of width per person and a minimum of 15 inches of clear knee space depth beneath the countertop. Adjust these measurements based on the type of stool and the individuals who will be using the seating.
What should I consider regarding existing appliances and doorways when measuring for a kitchen island placement?
It’s crucial to account for the full swing of appliance doors (refrigerator, oven, dishwasher) and cabinet doors, as well as any existing doorways. Ensure your kitchen island placement doesn’t block access or prevent doors from opening completely, maintaining both safety and functionality.