Featured image for this comprehensive guide about How to sharpen your kitchen knives at home
Image source: gottagodoityourself.com
The satisfying glide of a razor-sharp knife through a ripe tomato. The effortless slice through crusty bread. The precision in dicing an onion without a single tear. These aren’t just scenes from a professional cooking show; they’re experiences every home cook deserves. Yet, for many, the reality is a frustrating battle with a dull blade that slips, tears, and makes even simple tasks feel like a chore.
A dull knife isn’t just inefficient; it’s a hazard. Counterintuitively, a blunt edge requires more force, increasing the chance of it slipping and causing a serious injury. If you’ve ever wrestled with a steak or crushed a delicate herb rather than cutting it cleanly, you know the struggle. But what if we told you that achieving and maintaining a professional-level edge on your kitchen knives doesn’t require expensive equipment or a trip to a specialist? You can absolutely, effectively, and safely sharpen your kitchen knives at home.
This comprehensive guide will demystify the art of knife sharpening, transforming it from an intimidating chore into an empowering skill. We’ll walk you through the why, what, and how of bringing your blades back to life, covering everything from understanding your knife’s edge to mastering various sharpening tools. Get ready to reclaim the joy and efficiency of cooking with truly sharp knives.
Quick Answers to Common Questions
Why should I bother sharpening my kitchen knives at home?
A sharp knife is a safe knife! Learning to sharpen your kitchen knives at home makes cooking easier, safer, and brings new life to dull blades you might otherwise replace.
What’s the easiest way to sharpen my kitchen knives at home if I’m a beginner?
For beginners, a pull-through sharpener or an electric sharpener can be very user-friendly. These tools take much of the guesswork out of how to sharpen your kitchen knives at home quickly and effectively.
How often should I sharpen my kitchen knives at home?
It really depends on how often you use them, but a good rule of thumb is to hone your knives regularly (every few uses) and aim to sharpen your kitchen knives at home more thoroughly every few months or when they start to feel dull.
Do I need fancy equipment to sharpen my kitchen knives at home?
Not at all! While there are many advanced tools, you can successfully sharpen your kitchen knives at home with just a simple sharpening stone (whetstone), a honing rod, or an inexpensive pull-through sharpener.
Is it safe to sharpen my kitchen knives at home, or will I cut myself?
Sharpening can seem daunting, but with proper technique and care, it’s very safe to sharpen your kitchen knives at home. Always pay attention and follow instructions to keep your fingers out of the blade’s path.
📋 Table of Contents
- Why Sharp Knives Matter: Safety, Efficiency, and Culinary Joy
- Understanding Your Knife’s Edge: The Foundation of Good Sharpening
- Choosing the Right Tool to Sharpen Your Kitchen Knives at Home
- Step-by-Step Guides to Sharpen Your Kitchen Knives at Home
- Maintaining Your Knife’s Edge and Longevity
- Common Mistakes to Avoid When Sharpening Your Kitchen Knives at Home
- Comparison of At-Home Knife Sharpening Methods
- Conclusion: Embrace the Edge
Why Sharp Knives Matter: Safety, Efficiency, and Culinary Joy
Before we dive into the “how,” let’s understand the profound impact a sharp knife has on your kitchen experience. It’s more than just a convenience; it’s a fundamental aspect of safe, enjoyable, and efficient cooking.
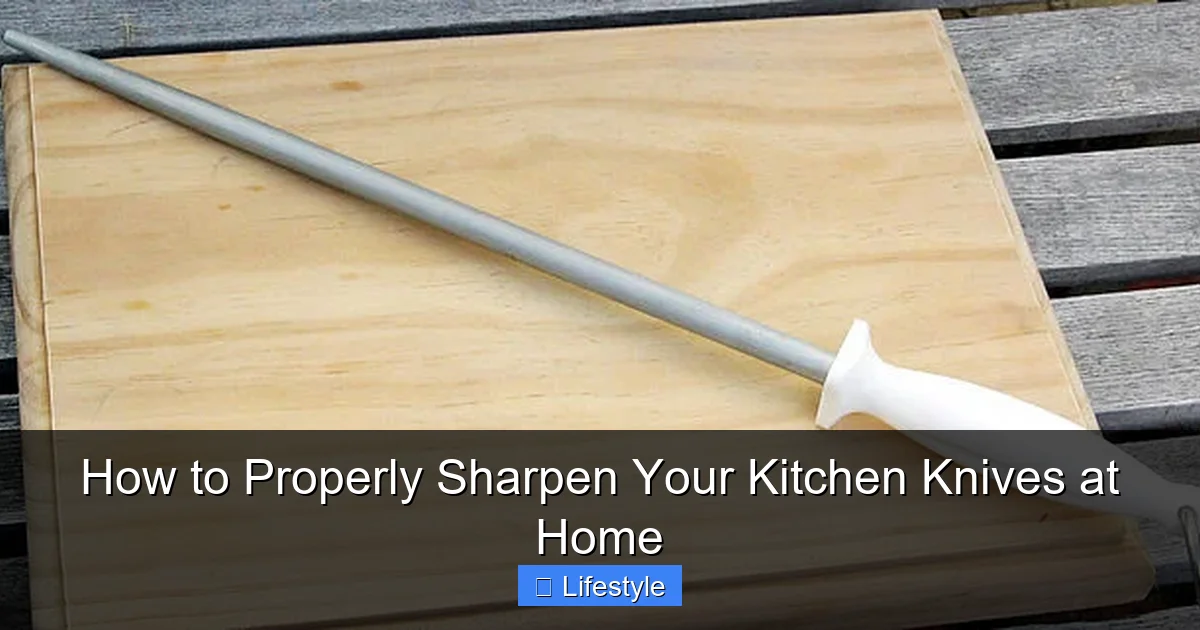
Learn more about How to sharpen your kitchen knives at home – How to Properly Sharpen Your Kitchen Knives at Home
Image source: i.stack.imgur.com
The Counterintuitive Truth: Dull Knives are Dangerous
It might seem logical to think a dull knife is safer because it can’t cut as easily. However, the opposite is true. A blunt edge requires significantly more pressure to make a cut. This increased force makes the knife prone to slipping off the food, especially on rounded or tough surfaces like onions, squash, or even a slippery piece of meat. When a knife slips, it’s often with considerable momentum, leading to uncontrolled cuts and potential injuries to your hands or fingers.
| Sharpening Method | Ease of Use | Typical Use Case | Initial Cost (Approx.) |
|---|---|---|---|
| Honing Steel | Very Easy | Edge Realignment & Maintenance | $10 – $30 |
| Pull-Through Sharpener | Easy | Quick Sharpening & Minor Repair | $15 – $50 |
| Whetstone (Manual Stone) | Intermediate-Advanced | Superior Edge Restoration & Customization | $30 – $100+ |
| Electric Knife Sharpener | Easy | Fast, Consistent Sharpening for Dull Knives | $50 – $250+ |
According to kitchen safety experts, a significant percentage of knife-related injuries in the home occur due to dull blades. When a knife is sharp, it bites into the food surface with minimal effort, giving you far greater control over the blade’s path. This precision dramatically reduces the risk of accidental slips and cuts, making your cooking environment safer for everyone.
Enhanced Efficiency and Precision in Your Prep
Imagine effortlessly gliding through vegetables, creating perfect juliennes or paper-thin slices without struggle. A sharp knife doesn’t tear or bruise delicate ingredients; it cuts cleanly. This precision is not just about aesthetics; it affects the texture, flavor, and even cooking time of your food. For instance, a clean slice through an herb preserves its cellular structure, retaining more flavor and preventing rapid discoloration. When you can slice, dice, and chop with ease, your food preparation becomes faster, more consistent, and ultimately, more enjoyable.
Beyond the direct benefits to your food, sharp knives save you energy and reduce fatigue. The struggle with a dull blade often leads to strained wrists, shoulders, and a general sense of frustration. By contrast, a sharp knife works with you, not against you, allowing you to focus on the creative aspects of cooking rather than battling your tools. Learning to sharpen your kitchen knives at home is the first step towards this culinary liberation.
Elevating Your Culinary Experience
Cooking is often called an art, and like any artist, a chef (professional or home-based) needs the right tools in peak condition. A sharp knife instills confidence. It allows you to tackle more complex recipes, experiment with different cuts, and present your dishes beautifully. The act of cooking becomes less of a chore and more of a mindful, enjoyable process when your tools perform as they should. There’s a profound satisfaction that comes from feeling the precision and control offered by a perfectly honed blade.
In essence, investing time in learning to sharpen your kitchen knives at home is an investment in your safety, your culinary skills, and your overall enjoyment of cooking. It transforms a basic utility into a reliable extension of your hand, ready to meet any kitchen challenge.
Understanding Your Knife’s Edge: The Foundation of Good Sharpening
To effectively sharpen your kitchen knives at home, it’s crucial to understand what makes a knife cut and what happens when it becomes dull. This knowledge forms the bedrock of successful sharpening.

Learn more about How to sharpen your kitchen knives at home – How to Properly Sharpen Your Kitchen Knives at Home
Image source: archive.org
Anatomy of a Knife Edge
Every knife blade has several key components, but the most important for sharpening is the edge geometry. A knife’s edge isn’t a single point; it’s formed by two beveled surfaces meeting at a very fine point. These beveled surfaces are ground at an angle, creating a ‘V’ shape. The sharper the ‘V’ angle, the thinner and often sharper the initial edge, but also potentially more delicate.
Over time and with use, this fine edge degrades. It can bend or “roll” over (especially on softer steels or with aggressive cutting), micro-chip, or simply become abraded and rounded. When the very tip of that ‘V’ is no longer a fine point but a rounded or damaged surface, the knife feels dull. The goal of sharpening is to remove just enough material to reform this perfect ‘V’ apex, bringing the two beveled surfaces back to a precise, sharp meeting point.
Deciphering Sharpening Angles
The angle at which the blade’s sides meet to form the cutting edge is critical. Different knives are designed with different edge angles to suit their purpose and the properties of their steel. Understanding these angles is paramount when you sharpen your kitchen knives at home.
- Western/European Knives: Typically sharpened to an angle of 20-22.5 degrees per side, for a total inclusive angle of 40-45 degrees. This provides a robust edge suitable for chopping and general-purpose tasks.
- Japanese Knives: Often have a much finer edge, around 15 degrees per side, for a total inclusive angle of 30 degrees. Some specialized Japanese knives (like single-bevel sashimi knives) are even sharper on one side, with a much wider angle on the other. This acute angle makes them incredibly sharp and precise, but also more prone to chipping if used improperly or on hard surfaces.
- Pocket/Outdoor Knives: Can vary widely, often between 20-30 degrees per side for durability.
Consistency in maintaining the correct angle throughout the sharpening process is the most challenging yet most important aspect of achieving a truly sharp edge. Even slight variations can lead to a rounded or uneven edge, diminishing the knife’s cutting ability. While specialized jigs can help, with practice, you can develop the muscle memory to hold a consistent angle freehand.
Choosing the Right Tool to Sharpen Your Kitchen Knives at Home
The market offers a bewildering array of knife sharpening tools. Selecting the right one depends on your skill level, desired results, and the type of knives you own. Let’s explore the most common options for when you want to sharpen your kitchen knives at home.
Whetstones (Sharpening Stones)
Whetstones, also known as sharpening stones, are considered the gold standard for achieving the sharpest, most precise edge. They require the most skill and practice but offer unparalleled control over the sharpening process.
- Pros:
- Provides the absolute best edge quality and sharpness.
- Allows for complete control over sharpening angle, making them suitable for all knife types.
- Removes minimal metal when used correctly, prolonging knife life.
- Versatile for repairing damaged edges or simply maintaining sharpness.
- Cons:
- Steep learning curve; requires significant practice to master.
- Can be messy, as they often require water or oil as a lubricant.
- Can be time-consuming, especially for very dull knives.
- Types and Grit Levels: Whetstones come in various materials (natural, ceramic, diamond) and grit levels, which refer to the size of the abrasive particles.
- Coarse Grit (120-600): For repairing damaged edges, chips, or completely reshaping a very dull blade.
- Medium Grit (800-2000): The workhorse for most sharpening tasks, refining the edge after coarse grit.
- Fine Grit (3000-8000+): For honing and polishing the edge, making it incredibly smooth and sharp.
- Polishing Grit (10,000+): Creates a mirror-like finish for ultimate sharpness, often used for razors or very fine Japanese knives.
Pull-Through Sharpeners
Pull-through sharpeners are popular for their ease of use and speed, making them a good entry point for those new to learning to sharpen your kitchen knives at home.
- Pros:
- Extremely easy and quick to use, often requiring just a few passes.
- Beginner-friendly; no special skill or angle control needed as angles are pre-set.
- Relatively inexpensive and portable.
- Cons:
- Fixed angles may not be suitable for all knives (e.g., very thin Japanese blades).
- Can remove a significant amount of metal, potentially shortening a knife’s lifespan over time.
- The resulting edge is generally not as fine or lasting as one achieved with a whetstone.
- Can scratch or damage the blade’s finish.
- Types:
- Manual: Handheld devices with ceramic or carbide wheels/rods set at specific angles. You pull the knife through the slots.
- Electric: Use powered abrasive wheels that guide the knife through different sharpening stages (coarse to fine). Faster but can be more aggressive.
Honing Steels (Crucial Distinction: Honing vs. Sharpening!)
This is where many home cooks get confused. A honing steel, despite its name, does not truly sharpen a knife in the traditional sense. It’s a maintenance tool, not a sharpening tool, when you want to sharpen your kitchen knives at home.
- Purpose: A honing steel is used to realign a knife’s edge that has become bent or “rolled” through normal use. It pushes the microscopic edge back into alignment, restoring its sharpness. It does not remove significant metal or create a new edge.
- Pros:
- Quick and easy way to maintain an already sharp edge between full sharpenings.
- Extends the time between needing a full sharpening.
- Relatively inexpensive.
- Cons:
- Will not sharpen a truly dull knife that has lost its edge geometry.
- Requires practice to maintain a consistent angle.
- Using too much pressure can damage the edge.
- Types: Ceramic, steel, or diamond-coated. Diamond steels can remove a tiny amount of metal and are a bit more aggressive, making them closer to a very fine sharpener than a traditional honing steel.
Step-by-Step Guides to Sharpen Your Kitchen Knives at Home
Now that you understand the tools, let’s get down to the practical steps of how to sharpen your kitchen knives at home using different methods.
Mastering the Whetstone
Sharpening with a whetstone requires patience and practice, but the results are unmatched.
- Preparation:
- Soak (Water Stones): If using water stones, immerse them in water for 5-10 minutes until no more bubbles appear. Keep the stone wet throughout the process. Oil stones require a light coating of honing oil.
- Stabilize: Place the stone on a damp cloth or a non-slip holder on a stable surface.
- Starting with Coarse Grit (if needed):
- Establish Angle: Hold the knife blade at your desired angle (e.g., 15-20 degrees) against the coarse side of the stone. Imagine trying to slice a thin layer off the stone. You can use an angle guide initially.
- Pushing Stroke: With light to moderate pressure, push the knife away from you, leading with the edge, moving from the heel to the tip of the blade across the stone.
- Pulling Stroke: Turn the blade over. With the same angle, pull the knife towards you, leading with the spine, again moving from heel to tip.
- Burr Formation: The goal of this stage is to create a “burr”—a tiny wire-like edge that forms on the opposite side of the blade you’re sharpening. This indicates you’ve reached the very apex of the edge. Feel for it with your thumbnail (carefully!) or fingertip. Once you feel a burr along the entire length of one side, switch to the other side until you feel the burr on the opposite side.
- Moving to Medium Grit:
- Repeat the pushing and pulling strokes with lighter pressure on the medium-grit side of the stone. Focus on refining the burr and ensuring it runs consistently along the edge. Reduce the pressure as you go.
- Finishing with Fine Grit:
- Switch to the fine-grit side. Use very light pressure, alternating sides with fewer and fewer strokes. The goal here is to remove the burr and polish the edge to razor sharpness.
- Deburring: One effective method for deburring is to do a few very light, alternating edge-trailing strokes (pulling the knife towards you with the spine leading) at a slightly higher angle.
- Testing Sharpness:
- Paper Test: Hold a piece of newspaper or thin paper upright. A truly sharp knife should slice through it cleanly without snagging.
- Tomato Test: A sharp knife will slice through a ripe tomato’s skin with almost no pressure.
- Clean Up: Wipe your knife clean and wash your whetstone, allowing it to air dry.
Using a Pull-Through Sharpener Safely
This method is quick and requires minimal skill to sharpen your kitchen knives at home, but it’s important to use it correctly to avoid damaging your blade.
- Read Instructions: Always follow the manufacturer’s instructions for your specific sharpener.
- Stabilize: Place the sharpener on a stable, flat surface.
- Coarse Slot First (if available and needed): If your knife is very dull, start with the coarse (carbide) slot. Place the knife heel into the slot and pull it towards you with light to moderate pressure, drawing it through the slot from heel to tip. Do 3-5 passes. Do not push the knife away from you in a pull-through sharpener.
- Fine Slot Second: Move to the fine (ceramic) slot. Repeat the pulling motion for 5-10 passes, again from heel to tip, using lighter pressure. This step refines the edge and removes any burr.
- Clean Up: Wipe the blade clean to remove any metal filings.
- Test: Perform the paper or tomato test.
Important Note: Use pull-through sharpeners sparingly, as they remove more material than whetstones. They are best for quick touch-ups on moderately dull knives, not for severely damaged or high-quality blades.
Effective Honing Steel Usage
Remember, a honing steel is for realignment, not true sharpening. Use it regularly, even daily, to maintain your knife’s edge between full sharpenings.
- Secure Position: Hold the honing steel vertically, tip down, on a cutting board or towel to prevent slipping.
- Angle: Hold your knife at the correct sharpening angle (e.g., 20 degrees) against the steel near the handle.
- Downward Stroke: With very light pressure, draw the knife downwards and towards you, moving the blade from heel to tip across the steel. Imagine you’re shaving a thin layer off the steel.
- Alternate Sides: Repeat on the other side of the steel, ensuring you use the same angle.
- Repeat: Perform 5-10 alternating strokes per side. The key is light, consistent pressure and maintaining the angle.
- Clean: Wipe your knife clean.
Pro Tip: Many chefs prefer to hold the steel horizontally in the air, away from their body, for more fluid motion. Practice this method carefully until you’re confident in your angle control.
Maintaining Your Knife’s Edge and Longevity
Learning to sharpen your kitchen knives at home is only half the battle. Proper care and maintenance will significantly extend the life of your edge and reduce the frequency of needing a full sharpening.
Regular Honing is Key
As discussed, honing realigns the edge, preventing it from becoming truly dull. Make it a habit to hone your most used knives before or after each use. A few quick passes on a steel can make a surprising difference in how long your knife stays sharp. Think of it as preventative maintenance that keeps your blade performing optimally.
Proper Storage
How you store your knives is critical. Allowing them to rattle around in a drawer with other utensils is a surefire way to chip, nick, and dull their edges prematurely. Every time the edge bumps against another piece of metal, it takes damage.
- Knife Block: A traditional and effective way to store knives, protecting the blades within slots.
- Magnetic Strip: Great for visibility and accessibility, but ensure you place and remove knives carefully, spine first, to avoid scraping the edge.
- In-Drawer Organizers: Keep knives separated and protected within a drawer.
- Blade Guards/Sheaths: Ideal for individual knives, especially if you transport them.
Cleaning and Care
Always hand wash your good kitchen knives immediately after use with warm, soapy water and dry them thoroughly with a soft towel. Never put your quality knives in the dishwasher. The harsh detergents, high heat, and violent jostling against other items can severely damage the edge, corrode the blade, and degrade the handle material. Prompt cleaning also prevents acidic food residues from etching the blade.
Using the Right Cutting Surface
Your cutting board choice dramatically impacts your knife’s edge. Hard surfaces like glass, ceramic, stone, or even hard plastic can rapidly dull or even chip your knife. Always opt for surfaces that are gentler on the blade:
- Wood: End-grain wood boards are excellent, as the wood fibers absorb the blade, allowing it to cut between them without damaging the edge.
- Soft Plastic/Polyethylene: Good, hygienic options that are kinder to your knives than harder plastics.
By incorporating these simple maintenance habits, you’ll find that your knives stay sharp longer, and the periods between needing to fully sharpen your kitchen knives at home become much further apart.
Common Mistakes to Avoid When Sharpening Your Kitchen Knives at Home
While the process of sharpening can be highly rewarding, certain pitfalls can lead to frustration or even damage to your knives. Being aware of these common mistakes will help you achieve better results when you sharpen your kitchen knives at home.
- Inconsistent Angle: This is arguably the most common mistake, especially with whetstones or honing steels. A constantly changing angle will round off the edge instead of creating a sharp apex. Practice with angle guides or spend time developing muscle memory.
- Applying Too Much Pressure: Especially on fine-grit stones or with pull-through sharpeners, excessive pressure can create a larger burr that’s harder to remove, damage the stone, or even chip the edge. Lighten your pressure as you move to finer grits.
- Not Using Enough Lubricant (Water/Oil): Whetstones need a lubricant to float away metal particles and prevent the stone from glazing over. Dry sharpening can clog the stone and lead to ineffective sharpening and excessive heat build-up.
- Neglecting to Deburr: A burr is a good sign that you’ve reached the edge, but it must be removed for a truly sharp and lasting edge. Leaving a burr will result in a knife that feels sharp initially but quickly dulls. Gentle, alternating passes on fine grit or a strop are crucial for deburring.
- Confusing Honing with Sharpening: As emphasized earlier, a honing steel realigns the edge; it doesn’t create a new one. Using a honing steel on a truly dull knife is like trying to comb extremely tangled hair with a fine-toothed comb – it won’t work. Know when your knife needs a full sharpening versus just a quick hone.
- Waiting Too Long to Sharpen: Trying to sharpen a severely dull or chipped knife takes significantly more effort and time than maintaining a moderately sharp one. Regular maintenance and timely sharpening prevent extensive damage.
- Sharpening Only One Side: Unless you have a specific single-bevel Japanese knife, most kitchen knives require sharpening on both sides of the blade to form a proper ‘V’ edge.
By being mindful of these common errors, you can improve your sharpening technique and ensure your efforts result in beautifully sharp, long-lasting knives.
Comparison of At-Home Knife Sharpening Methods
To help you decide which method is best for you when you need to sharpen your kitchen knives at home, here’s a quick comparison:
| Method | Initial Cost (Approx.) | Skill Level Required | Effectiveness | Maintenance Frequency | Best For |
|---|---|---|---|---|---|
| Whetstone | $30 – $150+ | High (requires practice) | Excellent (razor-sharp edge, precision) | Occasional (when knife is truly dull) | All knife types, serious cooks, enthusiasts, repairing damaged edges |
| Pull-Through Sharpener (Manual) | $10 – $50 | Low (beginner-friendly) | Good (serviceable edge, quick) | Moderate (for quick touch-ups) | Everyday kitchen knives, quick fixes, beginners |
| Pull-Through Sharpener (Electric) | $50 – $200+ | Low (very easy) | Very Good (consistent edge, fast) | Moderate (for quick touch-ups) | Busy kitchens, those seeking speed and consistency without skill development |
| Honing Steel | $15 – $70 | Medium (needs angle consistency) | Maintenance (realigns edge, not sharpens) | Frequent (daily or weekly use) | Maintaining already sharp knives, extending time between sharpenings |
Conclusion: Embrace the Edge
The journey to mastering the art of keeping your knives sharp at home is a rewarding one. You’ve now learned that a sharp knife is not just a luxury but a crucial tool for safety, efficiency, and enjoyment in the kitchen. From understanding the geometry of an edge to selecting the right sharpening tool and executing the correct techniques, you possess the knowledge to confidently sharpen your kitchen knives at home.
Remember, practice makes perfect. Don’t be discouraged if your first attempts aren’t flawless. With each knife you sharpen, your confidence will grow, and your technique will improve. Incorporate regular honing and proper knife care into your routine, and you’ll find that your blades stay sharper for longer, making your time in the kitchen more joyful and less frustrating.
So, take the plunge. Invest in a good sharpening tool, dedicate a little time to practice, and transform your cooking experience. A sharp knife is a happy knife, and a happy knife leads to a happy cook. Reclaim the control, precision, and pleasure that comes with cooking with truly sharp blades – you and your ingredients deserve it.
Frequently Asked Questions
Why should I bother sharpening my kitchen knives at home?
Sharpening your kitchen knives regularly makes cooking safer and more enjoyable. Dull knives require more force to cut, increasing the risk of slippage and accidents, while a sharp knife glides through food with precision.
How often do I need to sharpen my kitchen knives?
The frequency for sharpening depends on usage, but for an average home cook, every 1-3 months is a good guideline. You should also hone your knives with a honing steel frequently (ideally before each use) to maintain the edge between full sharpenings.
What tools do I need to properly sharpen my kitchen knives at home?
To effectively sharpen your kitchen knives, common tools include whetstones (water stones) with different grits, electric sharpeners, or pull-through sharpeners. A honing steel is also essential for daily maintenance, but it realigns the edge, it doesn’t remove material to truly sharpen.
What’s the correct angle to sharpen my kitchen knives?
Most Western-style kitchen knives are typically sharpened at an angle between 15 and 20 degrees per side, totaling 30-40 degrees inclusive. Japanese knives often have a steeper angle, around 10-15 degrees per side, for a finer edge.
Is it difficult or dangerous to sharpen knives at home?
While there’s a slight learning curve, especially with whetstones, sharpening knives at home is not inherently difficult. With proper technique, patience, and careful attention to blade direction, it’s a safe and rewarding skill to master. Always prioritize safety by keeping fingers away from the sharp edge.
How can I tell if my kitchen knife is properly sharpened?
A simple test for a properly sharpened knife is to try slicing through a sheet of paper held vertically; a truly sharp blade will cut it cleanly without tearing. Another good indicator is if it can smoothly slice a ripe tomato without crushing it.