Featured image for how to turn a kitchen cabinet rolling center island
Image source: i.pinimg.com
Transform your kitchen cabinet into a rolling center island with just a few simple modifications—start by reinforcing the base and adding heavy-duty casters for smooth mobility. Remove the cabinet doors, install locking wheels, and ensure the structure is level and secure to create a functional, mobile workspace. This easy DIY upgrade maximizes storage and versatility without a full kitchen remodel.
Key Takeaways
- Measure carefully: Ensure cabinet and caster dimensions match for a secure fit.
- Choose heavy-duty casters: Use lockable wheels rated for your cabinet’s weight.
- Reinforce the base: Add plywood or brackets to prevent sagging during movement.
- Drill pilot holes: Avoid splitting wood by pre-drilling caster screw holes.
- Test stability: Roll and lock the island to confirm smooth, wobble-free operation.
- Optimize placement: Leave clearance for appliances and traffic flow when positioning.
📑 Table of Contents
- Why a Rolling Kitchen Island is a Game-Changer
- What You Need to Know Before You Begin
- Step-by-Step: Building Your Rolling Island
- Customizing Your Rolling Island for Maximum Utility
- Common Mistakes and How to Avoid Them
- Maintenance and Long-Term Care
- Comparing Rolling Island Options: DIY vs. Store-Bought
- Final Thoughts: Why Your Kitchen Deserves a Rolling Island
Why a Rolling Kitchen Island is a Game-Changer
Let’s be honest—kitchen space is precious. Whether you’re cooking a family dinner, hosting a weekend brunch, or just trying to find room for your coffee maker, every inch counts. That’s where a kitchen cabinet rolling center island comes in. It’s not just a stylish addition; it’s a functional powerhouse that can transform your kitchen’s flow and usability.
Imagine this: You’re chopping veggies, and suddenly realize you need more countertop space. Instead of running to the dining table or piling ingredients on the stove, you simply roll your island into place. It’s like having a portable kitchen hub. And the best part? You don’t need a contractor or a full kitchen remodel to make it happen. With a few simple tools and a bit of DIY spirit, you can turn an ordinary kitchen cabinet into a fully functional, rolling center island.
What You Need to Know Before You Begin
Assessing Your Kitchen Cabinet
Before you dive in, take a good look at your kitchen cabinet. Is it sturdy enough to handle daily movement? A solid wood or high-quality plywood cabinet is ideal. Particleboard or flimsy MDF might not hold up over time. Measure the cabinet’s dimensions—especially height, width, and depth—to ensure it fits your kitchen’s layout and provides the workspace you need.
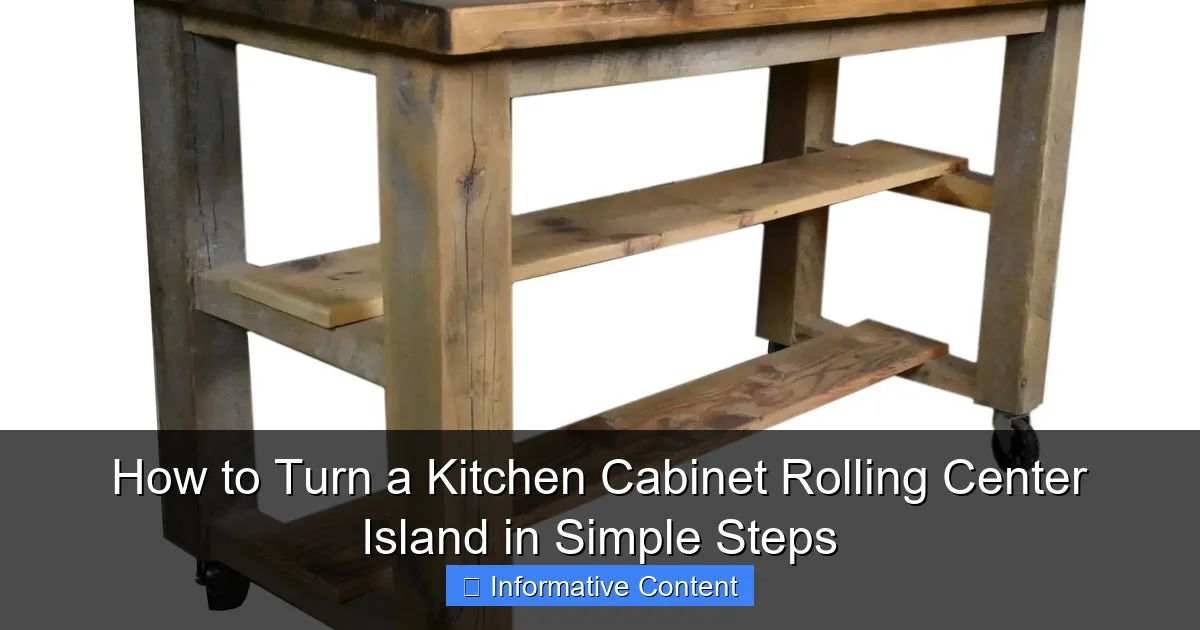
Visual guide about how to turn a kitchen cabinet rolling center island
Image source: i1.wp.com
Pro tip: If you’re using a base cabinet (the kind under your countertops), you’re in luck. These are designed to handle weight and are often already the perfect height for a rolling island. If you’re repurposing a taller cabinet, you might need to adjust the legs or add supports.
Choosing the Right Wheels (Casters)
The wheels—or casters—are the heart of your rolling island. Not all casters are created equal. Here’s what to consider:
- Locking casters: Essential for safety. Look for casters with a brake mechanism to keep your island steady when in use.
- Weight capacity: Check the load rating. A standard kitchen cabinet can weigh 50–100 lbs, but with countertops and supplies, it can easily double. Choose casters rated for at least 150–200 lbs each.
- Swivel vs. fixed: Swivel casters make maneuvering easier, especially in tight spaces. Fixed casters provide stability but are harder to turn.
- Material: Rubber or polyurethane wheels are quiet and floor-friendly. Avoid hard plastic—it can scratch hardwood.
Real-life example: I once used cheap casters from a big-box store. They squeaked every time I rolled the island, and one wheel broke after three months. Invest in quality—it’s worth it.
Gathering Tools and Materials
You’ll need:
- Kitchen cabinet (preferably with doors and drawers)
- 4 locking casters (with matching screws)
- Drill and drill bits
- Measuring tape
- Level
- Sandpaper (if refinishing)
- Wood screws (if adding supports)
- Optional: Countertop material (e.g., butcher block, granite remnant, or even a thick cutting board)
Most of these are likely already in your garage or toolbox. If not, they’re easy to find at hardware stores or online.
Step-by-Step: Building Your Rolling Island
Step 1: Prep and Clean the Cabinet
Start by emptying the cabinet. Remove shelves, drawers, or hardware if needed. Clean it thoroughly—wipe down surfaces, vacuum out dust, and let it dry. If the cabinet is old or worn, consider sanding and repainting or staining it. A fresh finish not only looks better but also protects the wood from moisture and wear.
Tip: If you’re painting, use a semi-gloss or satin finish. These are easier to wipe down and resist kitchen grease better than flat paint.
Step 2: Add a Countertop (Optional but Recommended)
While the cabinet itself can act as a counter, adding a dedicated top improves functionality. Butcher block is a popular choice—it’s affordable, easy to cut, and adds warmth. Granite or quartz remnants (often available at stone yards for cheap) work too. Measure your cabinet’s top dimensions, then cut the material to fit. Secure it with wood glue and screws from underneath.
Example: I used a 1.5-inch-thick walnut butcher block. I cut it slightly larger than the cabinet (about 1 inch overhang on all sides) to create a built-in lip for holding bowls or utensils.
Step 3: Install the Casters
This is the most critical step. Follow these sub-steps:
- Mark the caster positions: Measure 2–3 inches in from each corner. Use a level to ensure they’re aligned.
- Pre-drill holes: Use a drill bit slightly smaller than the caster screws. This prevents wood from splitting.
- Attach the casters: Screw them in firmly. Double-check that all four are at the same height. An uneven caster will make your island wobble.
- Test the lock: Roll the cabinet and engage the brakes. It should stay put without sliding.
Pro tip: If your cabinet has a recessed bottom (common in base cabinets), you might need longer screws or a spacer block to reach the caster mounting plate.
Step 4: Reinforce if Needed
For heavy loads (e.g., a microwave, mixer, or stone countertop), add extra support. Attach 2x4s or plywood strips to the cabinet’s interior bottom to distribute weight. You can also install a center caster (5th wheel) for added stability—especially if the island will be over 4 feet long.
Customizing Your Rolling Island for Maximum Utility
Adding Storage and Organization
A rolling island isn’t just about mobility—it’s about smart storage. Here are some ideas:
- Pull-out shelves: Install drawer slides inside the cabinet for easy access to pots or spices.
- Magnetic knife strip: Mount it on the side for quick access to knives.
- Hanging hooks: Add S-hooks to the sides for towels, oven mitts, or utensils.
- Wine rack: Cut a slot in the top or install a freestanding rack inside.
Real-life example: I added a pegboard to one side of my island. I hung measuring cups, spatulas, and a colander—it freed up drawer space and made cooking way faster.
Lighting and Electrical Upgrades
If your island will be used for prep work, consider adding lighting. Under-cabinet LED strips or a small pendant light (wired or battery-powered) can make a big difference. For appliances, install a power strip inside the cabinet. Run the cord through a hole in the back, and use a surge protector for safety.
Caution: Avoid overloading the outlet. Stick to one high-wattage appliance (like a mixer) and a few small ones (e.g., phone charger, coffee grinder).
Style and Aesthetics
Your island should match your kitchen’s vibe. Paint it a bold color for a pop of contrast, or stain it to match your cabinets. Add trim, molding, or even a chalkboard panel for a personalized touch. Don’t forget the hardware—swap out basic knobs for vintage pulls or sleek modern handles.
Tip: If you rent, use removable contact paper or peel-and-stick tiles for a no-commitment upgrade.
Common Mistakes and How to Avoid Them
Overloading the Cabinet
It’s tempting to fill your island with every kitchen gadget you own. But overloading can strain the casters and make the island unstable. Stick to essentials—think: mixing bowls, cutting boards, a few cookbooks, and daily-use appliances.
Example: I once loaded my island with a stand mixer, a blender, and a stack of cookbooks. The casters groaned, and one wheel bent. Now I keep only what I use daily and store the rest in a pantry.
Ignoring Floor Protection
Even with rubber casters, frequent movement can scratch hardwood or laminate. Place felt pads under the casters or use a rug/mat in high-traffic areas. For tile, check that the casters don’t have metal edges that could chip the surface.
Skipping the Test Phase
Before you start using your island, roll it around the kitchen. Test:
- How easily it turns
- If the brakes hold on sloped floors
- If the height is comfortable for prep work
Make adjustments early—it’s easier to fix issues now than after you’ve loaded it up.
Maintenance and Long-Term Care
Cleaning and Upkeep
Wipe down the island weekly with a damp cloth and mild cleaner. For wooden countertops, use food-safe mineral oil every few months to prevent drying. Check the casters monthly—tighten loose screws and wipe away dust or grease buildup.
When to Replace Casters
Even the best casters wear out. Look for signs like:
- Squeaking or grinding noises
- Wheels that don’t spin smoothly
- Visible cracks or warping
Replace them as a set to ensure even movement. Most casters last 3–5 years with regular use.
Adapting to New Needs
Your kitchen needs might change. If you add a new appliance or rearrange your space, don’t be afraid to modify the island. Swap out the countertop, add more storage, or even change the caster type (e.g., from swivel to fixed for a more permanent feel).
Comparing Rolling Island Options: DIY vs. Store-Bought
| Feature | DIY Rolling Island | Store-Bought Rolling Island |
|---|---|---|
| Cost | $50–$200 (repurposed cabinet + casters) | $200–$600+ (pre-made) |
| Customization | Fully customizable (size, style, features) | Limited to available designs |
| Durability | Depends on materials (can be very durable) | Often lower quality (particleboard, thin metal) |
| Assembly Time | 2–4 hours (plus drying/curing time) | 30–60 minutes |
| Skill Level | Beginner-friendly (basic tools) | None required |
| Eco-Friendliness | High (repurposes old cabinets) | Low (new materials, often non-recyclable) |
As you can see, DIY wins on cost, customization, and sustainability. But if you’re short on time or tools, a store-bought island can still be a great solution.
Final Thoughts: Why Your Kitchen Deserves a Rolling Island
Creating a kitchen cabinet rolling center island isn’t just about adding storage or counter space. It’s about giving yourself the freedom to adapt, experiment, and truly enjoy your kitchen. Whether you’re a home cook, a busy parent, or someone who loves to entertain, a rolling island can make daily tasks easier and more enjoyable.
I’ll never forget the first time I used my DIY island to roll my coffee setup to the patio for a sunny morning brew. It felt like a small victory—proof that a little creativity and elbow grease can solve real-life problems. So grab that old cabinet, dust off your drill, and give it a try. You’ll be amazed at how much more functional (and fun!) your kitchen becomes.
Remember: There’s no “perfect” rolling island—only the one that works for you. Start simple, tweak as you go, and don’t stress about perfection. After all, the best kitchens aren’t showrooms—they’re lived-in, loved, and always ready for the next meal.
Frequently Asked Questions
How do I turn a kitchen cabinet into a rolling center island?
To turn a kitchen cabinet into a rolling center island, start by emptying the cabinet and reinforcing its structure if needed. Attach locking casters to the base for mobility and stability, ensuring they’re level and secure.
What tools do I need to build a rolling center island from a cabinet?
You’ll need a drill, screwdriver, level, measuring tape, locking casters, and optionally wood glue or brackets for reinforcement. A saw may also help adjust the cabinet’s height or shape.
Can I use any kitchen cabinet for a rolling center island?
Most sturdy, freestanding cabinets work well, but avoid overly lightweight or damaged ones. Ensure the cabinet is structurally sound to support added weight and movement.
How do I choose the right casters for my rolling center island?
Opt for heavy-duty, locking casters rated for your cabinet’s weight. Swivel casters offer flexibility, while larger wheels (2–3 inches) handle uneven floors better.
How can I add countertop space to my rolling center island?
Attach a butcher block, granite remnant, or solid wood top to the cabinet using brackets or adhesive. Seal the surface for durability and easy cleaning.
How do I keep my rolling center island stable when in use?
Engage the caster locks to prevent movement, and consider adding anti-slip pads or adjustable feet for extra stability on uneven floors. Distribute weight evenly inside the cabinet.