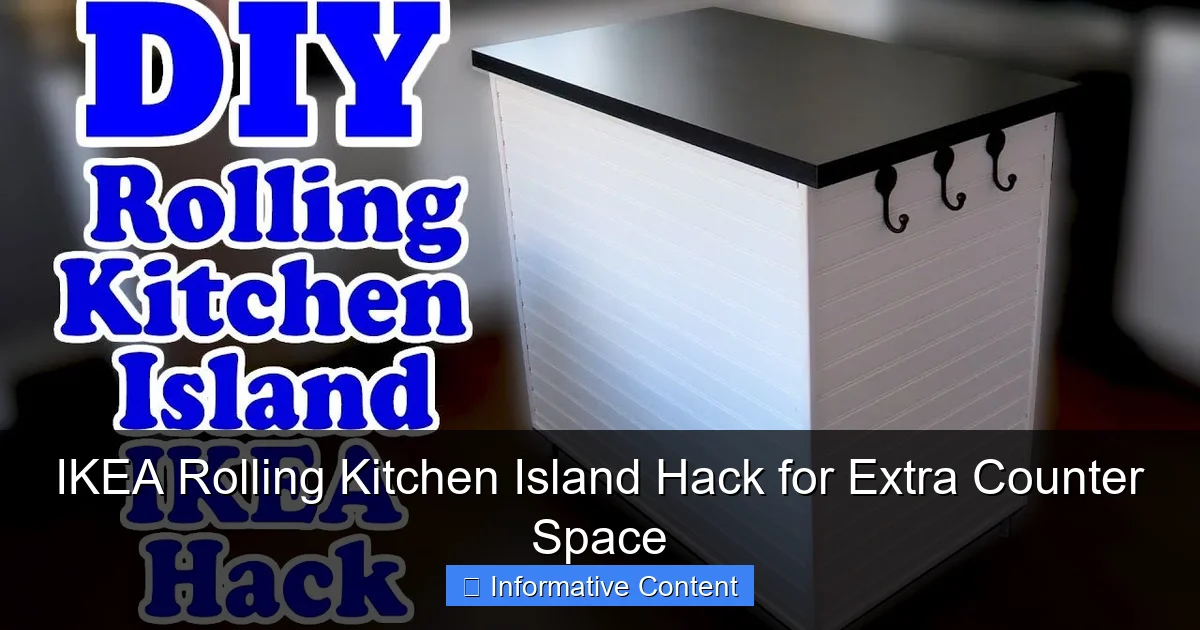
Featured image for ikea rolling kitchen island hack
Image source: i.pinimg.com
Transform your small kitchen with the ultimate IKEA rolling kitchen island hack—using affordable, modular pieces like the KALLAX or TROFAST to create a mobile, space-saving prep station. With added countertop space, storage, and lockable casters, this DIY solution delivers big functionality without a full renovation, perfect for renters and homeowners alike.
Key Takeaways
- Maximize space: Use IKEA’s rolling islands for flexible, extra counter space.
- Customize affordably: Upgrade with paint or wood for a high-end look.
- Add storage: Incorporate baskets or hooks to organize kitchen essentials.
- Ensure mobility: Lock wheels for stability or roll for easy repositioning.
- Mix materials: Combine IKEA parts for a personalized, functional design.
- DIY lighting: Install under-cabinet lights for better task visibility.
📑 Table of Contents
- The Secret to Extra Counter Space: My IKEA Rolling Kitchen Island Hack
- Why a Rolling Kitchen Island is a Game-Changer
- Top 3 IKEA Rolling Island Hacks (With Real-Life Examples)
- Step-by-Step Guide: Building Your Own IKEA Rolling Island
- Pro Tips for a Functional and Beautiful Island
- Cost Breakdown and Value Comparison
- Is This Hack Right for You? (And When to Avoid It)
- Final Thoughts: Your Kitchen, Upgraded
The Secret to Extra Counter Space: My IKEA Rolling Kitchen Island Hack
Ever feel like your kitchen is working against you? You’re not alone. I used to dread cooking dinner because I’d end up juggling ingredients, utensils, and cutting boards on a tiny sliver of counter space. Sound familiar? Then one day, I stumbled upon a game-changing solution: the IKEA rolling kitchen island hack.
This isn’t just another DIY project that looks great on Pinterest but fails in real life. I’ve lived with this setup for over a year, and it’s transformed my cooking experience. Whether you’re in a tiny apartment, a rental kitchen, or just need more workspace, this hack delivers. And the best part? It costs a fraction of what a custom kitchen island would. In this post, I’ll walk you through everything I’ve learned – the good, the not-so-perfect, and the surprisingly simple steps to create your own rolling kitchen island.
Why a Rolling Kitchen Island is a Game-Changer
Let’s be honest: counter space is the MVP of any kitchen. But not all of us have the luxury of a sprawling island or a remodel budget. That’s where the IKEA rolling kitchen island hack comes in. It’s like giving your kitchen a mobile upgrade.
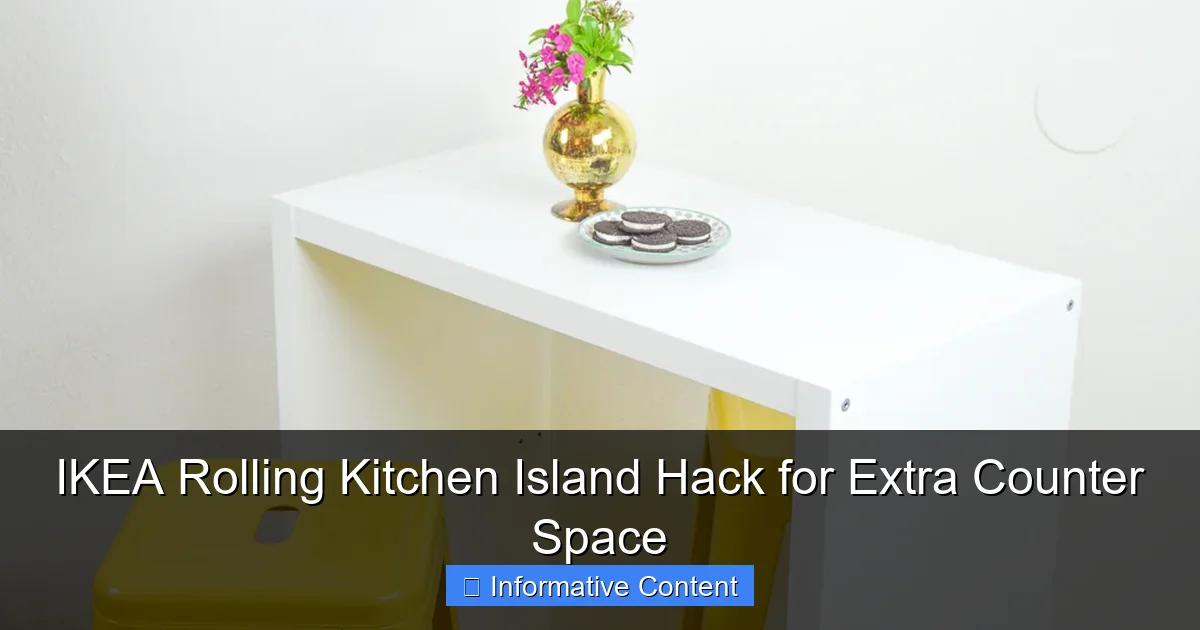
Visual guide about ikea rolling kitchen island hack
Image source: clubcrafted.com
The Counter Space Crisis (And Why It Matters)
Think about your last cooking session. Where did you prep? Where did you put hot pans? Did you run out of space for your recipe book? A 2022 National Kitchen and Bath Association (NKBA) report found that 68% of homeowners say inadequate counter space is their top kitchen frustration. And it’s not just about convenience – lack of space leads to clutter, which increases stress and makes cooking less enjoyable.
Here’s the magic of a rolling island: it’s on-demand counter space. Need it for meal prep? Roll it in. Done? Push it aside. It’s that simple. No permanent changes, no contractor fees, and no sacrificing floor space when you don’t need it.
Why IKEA? The Perfect Foundation
IKEA is the go-to for this hack for good reasons:
- Affordability: Base units start at around $50, making it accessible for most budgets.
- Modularity: Their products are designed to work together. You can mix and match to fit your needs.
- Availability: Most IKEA products are in stock online and in stores, so you won’t wait weeks for parts.
- Style options: From modern to rustic, there’s an IKEA piece that fits your kitchen aesthetic.
I started with the KALLAX unit (a cube shelf) and added casters. It’s a blank canvas you can customize to look like a high-end island. The key is choosing a base that’s sturdy and the right height (typically 34-36 inches for comfortable use).
Top 3 IKEA Rolling Island Hacks (With Real-Life Examples)
There’s no one-size-fits-all approach. Here are the three most popular (and practical) IKEA rolling island hacks, based on what works for real people:
1. The KALLAX Cube Island: Simple, Stylish, and Super Functional
This is my personal favorite and the most popular choice. The KALLAX unit (23 5/8″ x 47 1/4″) is the perfect size for a rolling island.
What you’ll need:
- KALLAX unit (choose a 2×2 or 2×4 cube size)
- Locking casters (4 heavy-duty, 2″ or 2.5″) – I recommend Hafele or GlideRite
- Wooden board (for the countertop, cut to size)
- Wood stain or paint (optional)
- Sandpaper, screws, screwdriver, drill
How I did it:
- Assembled the KALLAX unit (took me 20 minutes).
- Attached the casters to the bottom corners. Pro tip: Use locking casters so it stays put when you’re working.
- Cut a 1/2″ thick plywood board to fit the top. I used birch for its smooth finish.
- Sanded the board, stained it with walnut, and sealed it with polyurethane (for water resistance).
- Secured the board to the KALLAX with screws from underneath.
Why it works:
- The cubes are perfect for storing cookbooks, mixing bowls, or even a small spice rack.
- The wooden top feels like real counter space – I use it for chopping, rolling dough, and plating food.
- It’s easy to move and fits in a corner when not in use.
2. The RÅSHULT Cart: The Minimalist’s Dream
If you want a sleek, no-frills island, the RÅSHULT cart is a fantastic choice. It’s a metal trolley with a stainless steel top.
What you’ll need:
- RÅSHULT cart (comes with casters)
- Optional: Wooden board to fit over the metal top (for a warmer feel)
How to customize it:
- The cart comes with casters – no assembly needed!
- For extra counter space, cut a wooden board to fit the top. I used a 1″ thick maple board for mine.
- Secure the board with small brackets or adhesive (so you can remove it if needed).
Why it works:
- The metal top is super easy to clean – perfect for messy cooking.
- The shelves are great for storing frequently used items (like olive oil, salt, or a knife block).
- It’s incredibly lightweight and rolls smoothly on any floor type.
3. The FREDRIKSJÖN Island: A High-End Look for Less
This is for those who want a more traditional island feel. The FREDRIKSJÖN is a freestanding kitchen island with a solid wood top and storage drawers.
What you’ll need:
- FREDRIKSJÖN island (comes with casters)
- Optional: Additional drawer organizers or a cutting board insert
How to make it roll:
- The FREDRIKSJÖN already has casters – you’re halfway there!
- For extra mobility, I swapped the standard casters for locking, 360-degree swivel casters. This lets me turn the island easily in tight spaces.
- I added a wooden cutting board that fits perfectly over the top for prep work.
Why it works:
- The wood top feels like a real kitchen island – no DIY countertop needed.
- The drawers are perfect for storing kitchen tools, linens, or even a small appliance.
- It’s a statement piece that looks expensive (but costs a fraction of a custom island).
Step-by-Step Guide: Building Your Own IKEA Rolling Island
Ready to build your own? Here’s a detailed, step-by-step guide using the KALLAX hack as an example (but the principles apply to most IKEA units).
Step 1: Choose Your Base and Casters
Base selection: Consider:
- Size: Measure your kitchen. Leave at least 36″ of clearance around the island when it’s in use.
- Height: Standard counter height is 36″, but 34″ is also comfortable. Most IKEA units are 30″ high – you’ll need to add a countertop to reach the right height.
- Weight capacity: Check the unit’s specs. A KALLAX can hold 100 lbs, which is plenty for most kitchen items.
Casters: Don’t skimp here! Look for:
- Weight rating: At least 100 lbs per caster.
- Locking mechanism: Essential for stability.
- Swivel capability: 360-degree swivel makes maneuvering easier.
- Wheel type: Soft rubber wheels are best for hardwood floors. Hard plastic works for tile or linoleum.
My caster pick: GlideRite 2″ Heavy Duty Locking Casters ($25 for a set of 4 on Amazon). They’re quiet, smooth, and lock securely.
Step 2: Assemble the Base and Attach Casters
1. Follow the IKEA instructions to assemble your unit. This usually takes 20-45 minutes.
2. Flip the unit upside down on a soft surface (like a blanket or cardboard) to protect it.
3. Attach the casters to the bottom corners using the screws provided (or heavy-duty wood screws if needed). Tip: Pre-drill holes to avoid splitting the particle board.
4. Test the casters. They should roll smoothly and lock securely.
Step 3: Create and Attach Your Countertop
This is where you personalize your island.
Countertop options:
- Plywood: Affordable (~$20 for a 4×8 sheet). Sand and seal it for a smooth finish.
- Butcher block: Pre-finished and ready to use (~$50 for a 24″x36″ piece). Looks like a real kitchen counter.
- Laminate: Easy to clean and comes in many colors. Cut to size and attach with adhesive.
Attaching the countertop:
- Cut your countertop material to fit the top of the IKEA unit. Use a straight edge and a circular saw or jigsaw.
- Sand the edges smooth.
- If using wood, stain or paint it to your liking. Apply 2-3 coats of polyurethane for water resistance.
- Place the countertop on the unit. Secure it with screws from underneath (through the particle board into the wood). Don’t overtighten – this can crack the particle board.
Step 4: Add Storage and Personal Touches
Now make it functional!
- Baskets or bins: Fit perfectly in the KALLAX cubes. I use fabric bins for produce and plastic bins for cleaning supplies.
- Hooks: Add S-hooks to the sides for hanging towels, oven mitts, or utensils.
- Cutting board: A wooden or bamboo board that fits on top is great for prep work.
- Small appliance storage: Use a cube for your stand mixer, air fryer, or blender.
My personal touch: I added a small magnetic strip to one side for knives and a spice rack to the other. It keeps everything within reach but out of the way.
Pro Tips for a Functional and Beautiful Island
After a year of using my rolling island, I’ve learned a few tricks to make it even better.
Choosing the Right Casters for Your Floor
Casters can make or break your island’s usability.
- Hardwood or laminate: Use soft rubber or polyurethane wheels. Hard plastic wheels can scratch or dent the floor.
- Tile or linoleum: Hard plastic or nylon wheels work well. They’re durable and easy to clean.
- Carpet: You need larger wheels (2.5″ or 3″) to roll over the pile. Look for casters specifically for carpet.
Tip: If you have mixed flooring (like tile in the kitchen and hardwood in the dining room), get casters with universal wheels that work on both.
Maximizing Storage Without Clutter
The goal is more space, not more stuff. Use these storage hacks:
- Use vertical space: Add a pegboard or magnetic strip to the sides for tools.
- Go for multi-use items: A cutting board that doubles as a serving tray saves space.
- Rotate storage: Keep only frequently used items on the island. Store seasonal or rarely used items elsewhere.
- Use baskets with labels: It makes finding things easier and keeps the island looking tidy.
Keeping Your Island Clean and Maintained
A clean island is a usable island.
- Wipe down the countertop daily: Use a damp cloth with mild soap. For wood tops, avoid excessive water.
- Clean the casters monthly: Remove dust and debris from the wheels to keep them rolling smoothly.
- Inspect the screws: Tighten any loose screws to maintain stability.
- Protect the wood: Re-apply polyurethane or wax every 6-12 months to prevent water damage.
Customizing for Your Cooking Style
Your island should work for you.
- Baker? Add a marble slab for rolling dough and hooks for hanging rolling pins.
- Cooking with kids? Use lower shelves for kid-friendly items and add a step stool to the side.
- Entertainer? Add a wine rack or a small beverage fridge to one cube.
Cost Breakdown and Value Comparison
Let’s talk numbers. Here’s a realistic cost breakdown for the KALLAX rolling island hack, and how it compares to alternatives.
KALLAX Rolling Island Hack (2×4 cube):
| Item | Cost | Notes |
|---|---|---|
| KALLAX unit (2×4) | $79.99 | From IKEA |
| 4 Heavy-duty locking casters | $25.00 | GlideRite or Hafele on Amazon |
| Plywood countertop (1/2″ thick, 24″x48″) | $30.00 | Home Depot or lumber yard |
| Wood stain and polyurethane | $20.00 | Varied by brand |
| Storage baskets (2) | $15.00 | Fabric or plastic |
| Total | $170.00 |
Comparison to Alternatives:
- Pre-made rolling cart: $150-$300 (limited customization, often smaller).
- Custom kitchen island: $1,000-$5,000+ (expensive, permanent).
- RÅSHULT cart: $129 (great for minimalists, but less storage).
- FREDRIKSJÖN island: $299 (higher end, but still a good value).
The IKEA rolling kitchen island hack delivers 80% of the functionality of a custom island for 20% of the cost. And you can take it with you if you move!
Is This Hack Right for You? (And When to Avoid It)
The IKEA rolling kitchen island hack is a fantastic solution for many people, but it’s not perfect for everyone.
Who Will Love This Hack:
- Renters: No permanent changes, easy to take with you.
- Tiny kitchens: Adds counter space without sacrificing floor space.
- Homeowners on a budget: A fraction of the cost of a remodel.
- People who entertain: Roll it out for parties, then tuck it away.
- Those who need flexibility: Move it for cleaning or to create space for other activities.
Potential Drawbacks (And How to Mitigate Them):
- Stability on uneven floors: Use adjustable casters or add shims under the legs.
- Weight capacity: Don’t overload it. Most IKEA units can handle 100-200 lbs, but check the specs.
- Particle board durability: It’s not as durable as solid wood. Avoid placing extremely heavy items (like a full refrigerator) on it.
- Assembly required: If you hate DIY, a pre-made cart might be better.
- Not a permanent solution: If you’re remodeling, consider a built-in island instead.
My experience: The only “issue” I’ve had is that the particle board can chip if you’re not careful when moving it. But a little wood filler fixes it, and it’s a small price to pay for the convenience.
Final Thoughts: Your Kitchen, Upgraded
The IKEA rolling kitchen island hack isn’t just about adding counter space – it’s about reclaiming your kitchen. It’s about having room to cook without feeling cramped, to entertain without tripping over guests, and to enjoy your kitchen the way it was meant to be enjoyed.
I remember the first time I used my rolling island for a big dinner party. I rolled it into the center of the kitchen, set out my ingredients, and suddenly had space to prep, plate, and serve without running back and forth. My guests were amazed, and I felt like a professional chef. All for under $200.
This hack has transformed my relationship with cooking. I’m more organized, less stressed, and actually look forward to meal prep. And the best part? It’s completely customizable. You can make it as simple or as elaborate as you want. Use the KALLAX for a budget-friendly option, the RÅSHULT for a minimalist look, or the FREDRIKSJÖN for a high-end feel.
So if you’re tired of fighting for counter space, give this hack a try. You don’t need to be a DIY expert. You just need a few hours, some basic tools, and the willingness to give your kitchen the upgrade it deserves. Trust me – once you have that extra counter space, you’ll wonder how you ever lived without it.
Happy building!
Frequently Asked Questions
What is an IKEA rolling kitchen island hack?
An IKEA rolling kitchen island hack involves customizing a basic IKEA cart (like the RÅSKOG or TROLIGTVIS) to function as a mobile kitchen island. These affordable, DIY-friendly upgrades add extra counter space, storage, and mobility to small kitchens.
Which IKEA products work best for a rolling kitchen island hack?
The RÅSKOG utility cart and TROLIGTVIS kitchen trolley are top choices due to their sturdy frames and compact size. Both can be easily modified with countertop upgrades, hooks, or custom paint for a personalized look.
How do I add more counter space with an IKEA rolling kitchen island hack?
Replace the cart’s original top with a solid surface like wood, marble, or quartz for a seamless countertop. Attach a foldable drop-leaf or side extension to maximize workspace when needed.
Can I use an IKEA rolling kitchen island in a small kitchen?
Absolutely! The compact size and wheels make it ideal for tight spaces. It can be tucked into a corner or moved aside when not in use, offering flexible storage and prep space.
What modifications are popular for IKEA kitchen island hacks?
Common upgrades include adding casters with locks, installing towel bars or spice racks, and using peel-and-stick backsplashes. Some DIYers even add lighting or power strips for extra functionality.
Is an IKEA rolling kitchen island hack budget-friendly?
Yes! Starting at under $50, these hacks cost a fraction of traditional islands. With simple DIY skills, you can achieve a high-end look without the premium price tag.