
Featured image for kitchen island rolling plans
Image source: gooddiyplans.com
Kitchen island rolling plans combine effortless mobility with sleek, modern style, making them ideal for dynamic cooking spaces that need flexibility and function. Featuring lockable casters, durable materials, and smart storage, these customizable designs let you reconfigure your kitchen layout in minutes—without sacrificing aesthetics or stability.
Key Takeaways
- Choose durable casters: Opt for locking wheels to ensure stability and easy movement.
- Measure your space: Plan dimensions to fit your kitchen layout and workflow needs.
- Prioritize materials: Use sturdy wood or metal for long-lasting, stylish island construction.
- Add storage wisely: Include shelves or drawers for functional, clutter-free kitchen organization.
- Match your decor: Select finishes and colors that complement your kitchen’s existing style.
- Plan for countertop weight: Reinforce structure to support heavy countertops like granite or quartz.
📑 Table of Contents
- Why Your Kitchen Deserves a Rolling Island
- What Is a Kitchen Island Rolling Plan?
- Benefits of Rolling Kitchen Islands
- Choosing the Right Rolling Island for Your Space
- DIY Rolling Island Plans (Yes, You Can Build One!)
- Top Rolling Island Brands and Models (With Real Examples)
- How to Maximize Your Rolling Island’s Potential
Why Your Kitchen Deserves a Rolling Island
Picture this: You’re hosting a dinner party, and your kitchen feels cramped. You need more prep space, but the dining table is full of dishes, and the countertops are cluttered. Suddenly, you remember your kitchen island rolling plan—a mobile island on wheels that glides effortlessly to where you need it. It’s not just a piece of furniture; it’s a game-changer. Rolling kitchen islands offer the best of both worlds: extra storage, workspace, and style, all with the freedom to move them around. Whether you’re a passionate home cook or someone who loves a flexible layout, a rolling island can transform how you use your kitchen.
But it’s not just about convenience. A well-designed rolling island can elevate your kitchen’s aesthetics. Think of it as a statement piece that adds personality—whether you love rustic wood, sleek stainless steel, or bold colors. The key is choosing a design that fits your space, needs, and budget. In this guide, we’ll explore everything you need to know about kitchen island rolling plans, from choosing the right size to clever DIY hacks. Let’s dive in and discover how a rolling island can make your kitchen more functional and stylish.
What Is a Kitchen Island Rolling Plan?
Defining the Concept
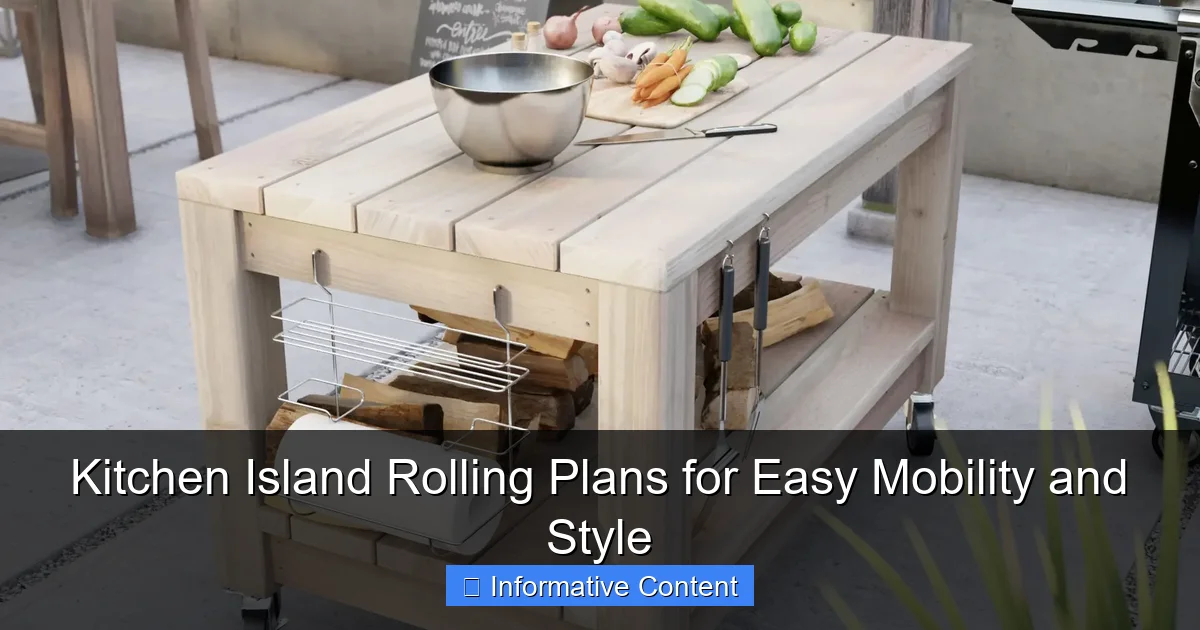
A kitchen island rolling plan refers to a freestanding kitchen island equipped with casters (wheels) that allow it to be easily moved. Unlike fixed islands, these are designed for flexibility. They’re perfect for small kitchens, open-concept spaces, or anyone who loves to rearrange their layout. The term “plan” here means the design, features, and functionality you choose to include—like storage, seating, or built-in appliances.
Visual guide about kitchen island rolling plans
Image source: gooddiyplans.com
Think of it like a Swiss Army knife for your kitchen. It can be a prep station, a breakfast bar, a serving area, or even a temporary workspace. For example, my friend Sarah uses her rolling island for weekend pancake breakfasts with her kids. She wheels it into the dining area, sets up stools, and voilà—a cozy breakfast nook. When the meal is over, she rolls it back into the kitchen for cleanup.
Key Features to Look For
Not all rolling islands are created equal. Here are the must-have features to consider:
- Sturdy Casters: Look for locking wheels (usually two or four) to prevent the island from shifting during use. Heavy-duty casters can handle 100+ pounds.
- Weight Capacity: Check the max load. A good island should support countertops, appliances, and your heaviest pots without wobbling.
- Storage Options: Shelves, drawers, or cabinets? Deep drawers are great for utensils; open shelves work for cookbooks or decor.
- Material: Wood offers warmth and durability; metal is sleek and easy to clean; stone tops add luxury but are heavy.
- Height: Standard is 36 inches (bar height) or 30 inches (counter height). Choose based on your needs—bar height for seating, counter height for prep work.
Pro tip: Measure your kitchen’s clearance. Leave at least 36 inches around the island for easy movement. If space is tight, opt for a narrow island (under 24 inches deep).
Benefits of Rolling Kitchen Islands
Flexibility for Any Kitchen
The biggest perk? Mobility. Rolling islands let you adapt your kitchen to different tasks. Need more space for a big dinner? Move the island to the center. Hosting a party? Wheel it to the dining room for a buffet. Even in a small apartment, a rolling island can double as a room divider or a makeshift desk.
For example, my neighbor Tom uses his rolling island as a “kitchen command center.” He keeps his coffee maker, toaster, and fruit bowl on it. In the morning, he wheels it near the window for a sunny breakfast spot. At night, he tucks it into a corner to free up floor space. It’s like having a kitchen that changes with your day.
Cost-Effective Alternative to Built-Ins
Fixed kitchen islands require plumbing, electrical work, and a hefty budget (think $5,000+). A rolling island? You can find quality options for $200–$800. Even a DIY rolling plan (more on that later) can cost under $300. It’s a budget-friendly way to add storage, seating, or countertop space without a full renovation.
Plus, if you move homes, you can take your rolling island with you. No more leaving your dream island behind!
Style and Function in One
Rolling islands aren’t just practical—they’re stylish. You can find designs that match any kitchen aesthetic:
- Rustic: Reclaimed wood with iron wheels (think farmhouse chic).
- Modern: Stainless steel or matte black metal with glass shelves.
- Coastal: Whitewashed wood with rope accents.
- Industrial: Exposed pipes and concrete tops.
Bonus: Many rolling islands come with built-in features like towel bars, spice racks, or cutting board slots. These small details save space and keep things organized.
Choosing the Right Rolling Island for Your Space
Size and Dimensions
Size matters. A rolling island that’s too big will block traffic; one that’s too small might not hold your stuff. Here’s how to pick the right dimensions:
- Small Kitchens (under 100 sq ft): Opt for a 24″ x 24″ island or a narrow 18″ x 36″ cart.
- Medium Kitchens (100–200 sq ft): A 30″ x 36″ island works well.
- Large Kitchens (200+ sq ft): Go bold with a 36″ x 48″ island or a double-tiered design.
Example: A 30″ x 36″ island gives you 10 sq ft of workspace—enough for chopping veggies, kneading dough, or setting up a mini bar.
Material and Finish
Your island’s material affects both looks and durability:
- Wood: Warm and classic, but needs sealing (especially if you use it as a cutting board). Oak and maple are durable; pine is cheaper but softer.
- Metal: Stainless steel resists stains and heat; powder-coated steel comes in colors. Avoid cheap aluminum—it dents easily.
- Stone: Granite or quartz countertops add luxury but are heavy (may require stronger casters).
- Laminate: Affordable and low-maintenance, but can peel over time.
Pro tip: If you cook a lot, choose a material that’s easy to clean (like stainless steel or sealed wood). For a cozy feel, pick a wood finish that matches your cabinets.
Storage and Functionality
Storage is where rolling islands shine. Look for:
- Drawers: Great for utensils, spices, or linens.
- Open Shelves: Perfect for displaying dishes or cookbooks.
- Cabinets: Hide clutter (think trash bags or cleaning supplies).
- Wine Racks or Bottle Holders: Ideal for entertainers.
For example, a rolling island with a built-in trash bin can save steps during cleanup. One with a drop-leaf extension adds extra workspace when needed (and folds up when not in use).
DIY Rolling Island Plans (Yes, You Can Build One!)
Materials and Tools You’ll Need
Building your own rolling island is easier than you think. Here’s a basic list for a simple 30″ x 36″ island:
- 4 casters (locking wheels)
- 2×4 lumber (for the frame)
- Plywood (for shelves and top)
- Wood glue, screws, sandpaper
- Stain or paint (optional)
- Drawer slides or hinges (if adding drawers/cabinets)
Tools: Saw, drill, measuring tape, level, clamps.
Step-by-Step Guide
Step 1: Frame
Cut 2x4s to create a rectangular frame (30″ x 36″). Attach the corners with wood glue and screws. Add cross braces for stability.
Step 2: Shelves
Measure and cut plywood for shelves (e.g., a middle shelf at 18″ height). Secure with screws or brackets.
Step 3: Top
Cut a 30″ x 36″ plywood top. Sand the edges smooth, then stain or seal it.
Step 4: Casters
Attach locking casters to each corner. Make sure they’re level so the island doesn’t wobble.
Step 5: Finish
Add trim, paint, or decorative hardware. For extra style, install a backsplash (like a chalkboard or pegboard).
Pro tip: Use a Kreg Jig for hidden screws (no visible hardware). Or, repurpose an old dresser—just add casters and a countertop!
Customization Ideas
- Butcher Block Top: Glue together maple or birch boards for a professional look.
- Chalkboard Panel: Paint one side of the island with chalkboard paint for grocery lists or doodles.
- Hidden Trash Compartment: Install a slide-out bin under the top.
- Lighting: Add battery-powered LED strips under the top for ambiance.
For inspiration, check out Pinterest or YouTube tutorials. A DIY rolling island lets you tailor every detail—perfect for picky designers!
Top Rolling Island Brands and Models (With Real Examples)
Budget-Friendly Picks
| Brand | Model | Price Range | Key Features |
|---|---|---|---|
| IKEA | GRUNDTAL | $150–$200 | Stainless steel, 2 shelves, 4 locking casters |
| Wayfair | Homedale Kitchen Cart | $200–$250 | Wood top, drawer, towel bar, 36″ height |
| Amazon | Linon Home Decor | $100–$150 | Butcher block, 2 shelves, 30″ height |
Example: The IKEA GRUNDTAL is a favorite for small kitchens. Its sleek design and affordable price make it a no-brainer for renters or first-time homeowners.
Mid-Range Options
| Brand | Model | Price Range | Key Features |
|---|---|---|---|
| Pottery Barn | Harrison Kitchen Island | $600–$800 | Solid wood, 2 drawers, 4 shelves, 36″ height |
| Overstock | Home Styles Liberty | $400–$500 | Granite top, wine rack, 2 cabinets, 30″ height |
| Home Depot | Hampton Bay | $300–$400 | Butcher block, 2 drawers, 4 casters, 36″ height |
Example: The Pottery Barn Harrison is a classic choice. Its timeless design and solid construction make it a long-term investment.
High-End Designs
| Brand | Model | Price Range | Key Features |
|---|---|---|---|
| Williams Sonoma | Copper & Wood Island | $1,200–$1,500 | Copper top, 4 drawers, 2 wine racks, 36″ height |
| Restoration Hardware | Industrial Cart | $2,000+ | Reclaimed wood, iron frame, 60″ length |
Example: The Restoration Hardware Industrial Cart is a showstopper. Its vintage vibe and massive size make it perfect for large, open kitchens.
How to Maximize Your Rolling Island’s Potential
Creative Uses Beyond the Kitchen
Your rolling island isn’t just for cooking! Try these clever ideas:
- Home Office: Use it as a portable desk (add a laptop stand and organizer).
- Bar Cart: Stock it with glasses, mixers, and a shaker for parties.
- Laundry Helper: Roll it into the laundry room for folding clothes or storing detergents.
- Kids’ Craft Station: Fill it with crayons, paper, and glue for messy projects.
For example, my sister uses her rolling island as a “craft cart” during the holidays. She wheels it into the living room, sets up her wrapping paper and scissors, and turns it into a gift-wrapping station.
Maintenance Tips
Keep your island in top shape with these simple steps:
- Clean Weekly: Wipe down surfaces with a damp cloth. For wood, use a wood-safe cleaner.
- Lubricate Casters: Every 6 months, apply a silicone spray to wheels to keep them rolling smoothly.
- Check Screws: Tighten loose hardware annually.
- Protect Surfaces: Use cutting boards or trivets to prevent scratches and heat damage.
Pro tip: If you spill something sticky, clean it immediately. Dried-on gunk is harder to remove.
Styling Ideas
Make your island Instagram-worthy with these tricks:
- Layer Textures: Add a woven basket, a marble tray, and a ceramic vase.
- Use Greenery: A small potted herb plant adds life.
- Hang Towels: Drape a colorful dish towel over the side.
- Light It Up: String lights or a small lamp create cozy vibes.
For a cohesive look, match your island’s style to your kitchen. A farmhouse island pairs well with mason jars and vintage signs; a modern island loves minimalist decor and monochrome accents.
A kitchen island rolling plan is more than just a piece of furniture—it’s a lifestyle upgrade. Whether you buy one or build your own, the flexibility, style, and functionality it brings are unmatched. From small kitchens to large entertaining spaces, a rolling island adapts to your needs and grows with you. So, take the leap. Measure your space, pick a design that speaks to you, and start rolling. Your future self will thank you every time you effortlessly glide that island into place for another perfect meal or cozy gathering.
Frequently Asked Questions
What are kitchen island rolling plans and why are they popular?
Kitchen island rolling plans are mobile kitchen units equipped with wheels, allowing for easy repositioning. They combine functionality and style, making them ideal for flexible layouts, small spaces, or those who love to entertain.
How do I choose the right kitchen island rolling plan for my space?
Measure your kitchen area and consider the island’s dimensions, storage needs, and wheel type (locking casters are a must). Match the design—material, color, and countertop—to your existing kitchen decor for a cohesive look.
Are rolling kitchen islands sturdy enough for daily use?
Yes, most well-built kitchen island rolling plans use durable materials like stainless steel, hardwood, or engineered wood with reinforced frames. Look for models with locking wheels to ensure stability during food prep or dining.
Can I use a rolling kitchen island for extra seating or dining?
Absolutely! Many rolling islands feature overhanging countertops or built-in stools, making them perfect for casual meals or additional seating. Ensure the height matches standard bar stools (usually 36–42 inches tall).
Do kitchen island rolling plans require assembly?
Most do, but many brands offer easy-to-follow instructions and pre-drilled parts for quick setup. Some models arrive fully assembled—check the product description to save time.
How do I maintain and clean a rolling kitchen island?
Wipe surfaces with mild soap and water; avoid abrasive cleaners on wood or stainless steel. Regularly check and tighten screws or casters to keep the unit stable and mobile.