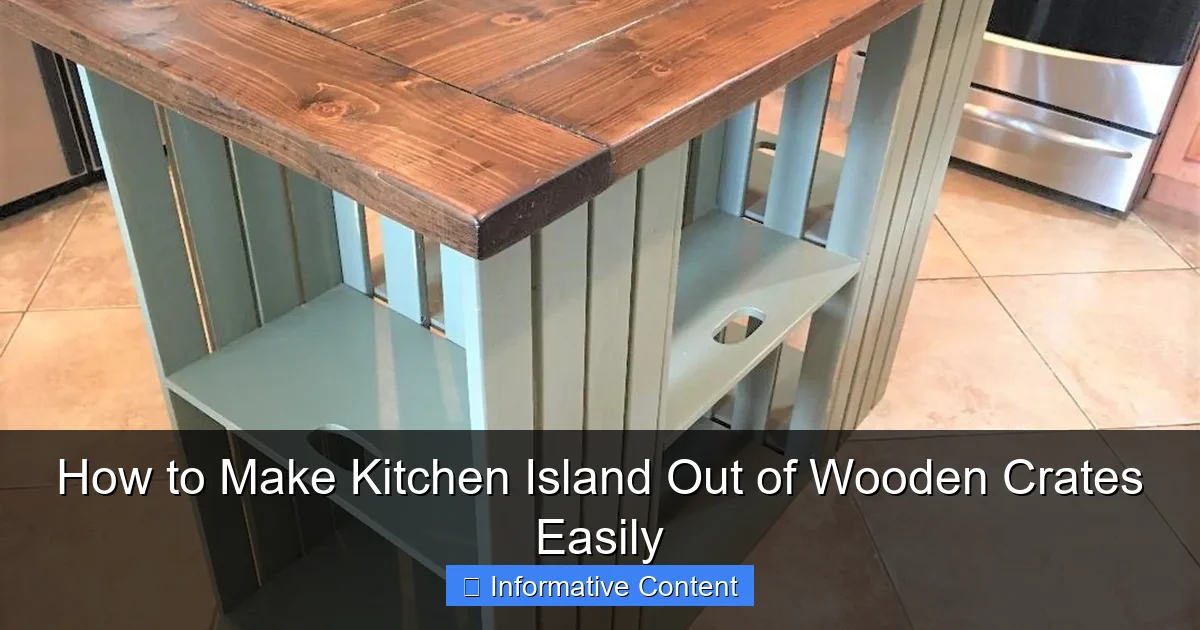
Featured image for make kitchen island out of wooden crates
Image source: goodshomedesign.com
Transform ordinary wooden crates into a stylish, functional kitchen island with just a few tools and basic DIY skills—perfect for adding storage and charm to your space. This easy, budget-friendly project lets you customize size, layout, and finish while repurposing materials for a sustainable upgrade.
Key Takeaways
- Choose sturdy crates: Use solid wood crates for durability and stability.
- Plan layout first: Sketch your design to ensure proper dimensions and functionality.
- Secure crates tightly: Bolt or screw crates together for a safe, stable island.
- Add a smooth countertop: Attach plywood or butcher block for a polished surface.
- Include storage features: Add hooks, shelves, or drawers for extra kitchen utility.
- Sand and finish: Smooth edges and apply sealant to protect wood and enhance look.
📑 Table of Contents
- Why a Wooden Crate Kitchen Island Could Be Your Next DIY Win
- Why Wooden Crates? The Perks and Pitfalls
- Planning Your Crate Island: Design & Measurements
- Building Your Island: Tools, Materials & Assembly
- Finishing Touches: Paint, Stain & Style
- Upgrades & Customizations (Optional but Awesome)
- Final Thoughts: Love Your Crate Island—Flaws and All
Why a Wooden Crate Kitchen Island Could Be Your Next DIY Win
Let’s be honest—kitchen islands are the dream. They add counter space, storage, and a cozy gathering spot. But if you’ve priced out a custom island lately, you might’ve felt your wallet whimper. That’s where making a kitchen island out of wooden crates swoops in like a budget-friendly superhero.
I first tried this project when I was stuck with a tiny kitchen and zero room for a proper island. I had a stack of leftover wooden crates from a farmers’ market haul, a few tools, and a stubborn hope. Fast-forward a weekend, and I had a charming, functional island that doubled as storage and prep space. It wasn’t perfect, but it was mine—and it cost less than $100. If I can do it, so can you.
Why Wooden Crates? The Perks and Pitfalls
Before we dive into the build, let’s talk about why wooden crates are such a smart base for a DIY kitchen island. They’re affordable, eco-friendly, and already have that rustic charm. But they’re not magic. Here’s the real talk about their pros and cons.
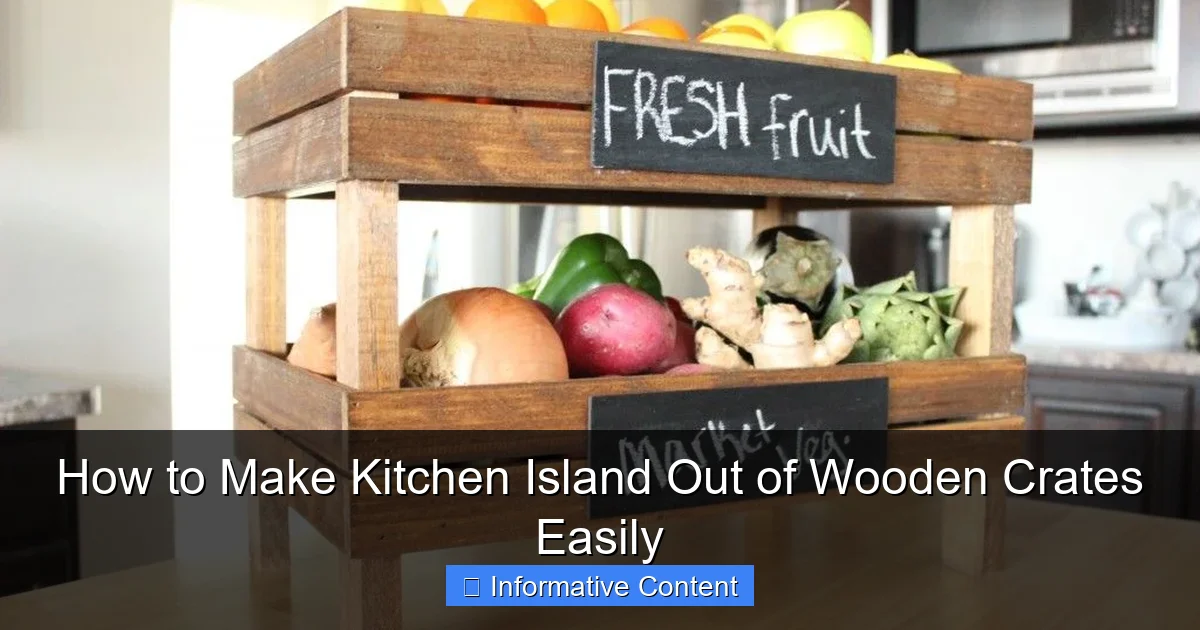
Visual guide about make kitchen island out of wooden crates
Image source: cdn.homedit.com
The Good: Why Crates Shine
- Cost-effective: New crates cost $5–$20 each. You can often score free or cheap ones from local farms, breweries, or Craigslist.
- Pre-built structure: No need to cut or join lumber—crates come ready to stack or arrange.
- Eco-friendly: Reusing crates keeps them out of landfills and gives your kitchen a sustainable edge.
- Style versatility: Paint, stain, or leave them raw. They adapt to farmhouse, industrial, or modern looks.
- Modular design: Add or remove crates later if you need more storage or space.
For example, my first island used six crates (two rows of three, stacked). I painted the sides white and left the tops raw for a two-tone effect. It looked intentional, not “I ran out of paint.”
The Not-So-Good: Crates Aren’t Perfect
- Size inconsistency: Crates vary in height/width. Measure each one before building.
- Sturdiness issues: Thin or old crates may wobble. Reinforce them (more on this later).
- Surface prep required: Raw wood can splinter or stain. Sanding and sealing are non-negotiable.
- Weight limitations: Don’t expect to store a 50-lb sack of flour on a flimsy crate.
Pro tip: Test your crates’ durability by stacking them with books or water jugs. If they creak, add cross-bracing (see “Reinforcement” section).
Crates vs. Alternatives: A Quick Comparison
You might wonder: “Why not use pallets or IKEA cabinets?” Here’s a snapshot:
| Material | Cost | Time | Skill Level | Best For |
|---|---|---|---|---|
| Wooden Crates | $–$$ | 2–4 hours | Beginner | Small kitchens, rustic style |
| Pallets | $–$ | 4–6 hours | Intermediate | Large islands, outdoor use |
| IKEA Cabinets | $$–$$$ | 3–5 hours | Beginner | Modern kitchens, easy assembly |
Crates win for speed, simplicity, and charm. Pallets need more prep (removing nails, sanding rough edges). IKEA cabinets cost more but offer seamless finishes. For a make kitchen island out of wooden crates project, crates are the sweet spot.
Planning Your Crate Island: Design & Measurements
Now for the fun part: planning. A well-thought-out design saves you from “Wait, this won’t fit my fridge!” panic later.
Step 1: Measure Your Space
- Leave 36–42 inches of clearance around the island for walking and opening cabinets.
- Measure the island’s footprint (length x width). My 6-crate island was 36”x24”—perfect for my 8’x10’ kitchen.
- Check ceiling height if adding shelves or a hanging rack.
Example: My kitchen has a 30-inch-wide gap between the fridge and wall. I designed the island to fit there, with a 6-inch overhang for bar stools.
Step 2: Choose Your Crate Layout
Crates can be arranged in endless ways. Here are the most practical:
- Stacked vertically: 2–3 crates high. Ideal for tall storage (pots, appliances).
- Horizontal rows: Crates side-by-side. Great for wide counter space.
- Mixed layout: Combine vertical stacks with horizontal rows. Use for L-shaped islands.
- Open shelves: Leave some crates open for baskets or cookbooks.
Pro tip: Sketch a rough layout on graph paper or use a free tool like Roomstyler. I once designed an L-shaped island with three crates tall on one leg and two on the other. It looked intentional, not lopsided.
Step 3: Plan for Storage & Function
Think about what you’ll store:
- Closed storage: Use crates as cabinets. Add plywood backs or doors.
- Open storage: Great for frequently used items (spices, cutting boards).
- Pull-outs: Install drawer slides inside crates for deep storage.
- Countertop: Add a solid wood or butcher block top for prep space.
My island has two crates with plywood backs (for pots), one open crate (for fruit), and a butcher block top. The open crate is my “grab-and-go” zone for snacks.
Building Your Island: Tools, Materials & Assembly
Let’s build! This is the most satisfying part—watching your vision come together.
Tools & Materials Checklist
- Crates: 4–8 (depending on size/layout)
- Sandpaper: 80-grit (rough) and 120-grit (smooth)
- Wood filler: For gaps or cracks
- Wood glue: For extra stability
- Screws: 1.5-inch wood screws (2–4 per crate)
- Drill/driver: With Phillips bit
- Level: To prevent wobbles
- Measuring tape: For alignment
- Paint/stain/sealant: Your choice (see “Finishing” section)
- Optional: Plywood, hinges, drawer slides, casters (wheels)
Note: Buy extra screws. I once ran out mid-project and had to make a midnight hardware store run. Not fun.
Step-by-Step Assembly
Work on a clean, flat surface (garage floor, driveway, or large table).
- Sand the crates: Remove rough edges and splinters. Focus on corners and tops. Wipe with a damp cloth to remove dust.
- Fill gaps: Use wood filler on cracks. Let it dry, then sand smooth.
- Arrange crates: Place them in your chosen layout. Use a level to check alignment. Shim with cardboard or wood scraps if needed.
- Secure crates: Drill pilot holes, then screw crates together. Use wood glue for extra strength. For example, screw the front crate to the back crate, then stack the next row on top.
- Reinforce (critical!): Add 1×2 or 2×2 wood braces across seams. Screw them into the crate sides. This prevents racking (side-to-side wobble).
- Add a top: Attach a butcher block, solid wood, or plywood top with screws from below. Leave a 1–2 inch overhang for bar stools.
Pro tip: Pre-drill all holes to avoid splitting the wood. My first island cracked because I didn’t—lesson learned.
Reinforcement: Making It Rock-Solid
Crates are lightweight. Without reinforcement, they’ll wobble like a Jenga tower. Here’s how to fix it:
- Cross-bracing: Add 1×2 wood strips diagonally across seams. Screw them into crate sides.
- Back panel: Attach a thin plywood sheet to the island’s back. Screw it into crate edges.
- Base plate: Add a plywood base under the crates. Screw crates into it.
My island has cross-braces on all four sides and a ¼-inch plywood back. It’s rock-solid, even with a 20-lb stand mixer on top.
Finishing Touches: Paint, Stain & Style
Now for the fun part—making it yours. The finish can make or break the look.
Paint vs. Stain vs. Seal
- Paint: Hides imperfections, adds color. Use latex or chalk paint. I painted my island white for a clean, bright look.
- Stain: Enhances wood grain. Use gel stain for even coverage. Great for rustic or industrial styles.
- Seal: Protects raw wood. Use polyurethane, beeswax, or food-safe oil (like mineral oil).
Pro tip: Test finishes on a scrap crate first. I once used a dark walnut stain on pine crates—it looked muddy. A lighter oak stain fixed it.
Step-by-Step Finishing
- Clean the surface: Wipe with a damp cloth. Let dry.
- Prime (if painting): Use a wood primer. Let dry.
- Apply finish: Paint or stain in thin, even coats. Let dry between layers.
- Seal: Apply 2–3 coats of sealant. Sand lightly between coats for smoothness.
For a farmhouse look, I dry-brushed white paint over raw wood. It looked weathered, not “I ran out of paint.”
Styling Your Island
- Countertop: Add a butcher block, marble, or laminate top. Secure with screws from below.
- Hardware: Attach knobs or pulls to crate fronts. Use adhesive hooks for towels.
- Lighting: Hang pendant lights above the island. Use a plug-in sconce if no wiring.
- Decor: Add a vase, fruit bowl, or cookbook stand. Keep it functional—don’t clutter the surface.
My island has a reclaimed wood top, brass knobs, and a hanging herb planter. It’s stylish but still usable.
Upgrades & Customizations (Optional but Awesome)
Ready to level up? These upgrades make your make kitchen island out of wooden crates project feel truly custom.
Add Mobility with Casters
- Attach locking casters (wheels) to the island’s base. Use 2-inch casters for smooth rolling.
- Secure them with screws into the crate corners.
- Lock the wheels when stationary.
I added casters to my island. Now I can move it to clean or reconfigure my kitchen in minutes.
Install Drawers or Shelves
- Drawers: Use drawer slides inside crates. Cut a plywood front and attach a knob.
- Shelves: Add adjustable shelves with shelf pins. Great for cookbooks or spices.
My spice drawer slides smoothly and holds 30 jars. No more digging through a cluttered cabinet.
Integrate a Sink or Stove
- Sink: Cut a hole in the countertop. Install a drop-in sink. Add plumbing (or use a freestanding basin).
- Stove: Not recommended for crates—they’re not heat-safe. Use a portable induction cooktop instead.
Note: This requires advanced plumbing/electrical skills. Hire a pro if unsure.
Lighting & Electrical
- Under-cabinet lighting: Use LED strips inside crates. Battery-powered options avoid wiring.
- Power outlets: Install a surface-mounted outlet box on the island’s side. Hire an electrician for hardwiring.
I added a USB outlet for charging phones while cooking. It’s a game-changer.
Final Thoughts: Love Your Crate Island—Flaws and All
Building a kitchen island from wooden crates isn’t about perfection. It’s about creating something useful, personal, and you. My first island had a wobbly leg (fixed with a shim) and uneven paint (fixed with a second coat). But it’s still my favorite part of the kitchen.
This project teaches you to problem-solve, adapt, and celebrate small wins. When a friend asks, “Where’d you get that island?” you get to say, “I made it.” That’s priceless.
So grab those crates, dust off your drill, and start building. Your dream kitchen island is just a weekend away. And when you’re done? Pour yourself a glass of wine, sit at your new island, and toast to your DIY victory. You’ve earned it.
Frequently Asked Questions
How do I make a kitchen island out of wooden crates?
To make a kitchen island out of wooden crates, start by sourcing sturdy crates (like wine or produce crates), sanding them smooth, and arranging them into a stable base. Secure them with screws, add casters for mobility, and finish with a countertop (e.g., butcher block) for a functional surface.
Are wooden crates strong enough for a kitchen island?
Yes, wooden crates can be strong enough for a kitchen island if you use thick, high-quality crates and reinforce them with wood glue and screws. For extra durability, consider adding a frame or cross-supports inside the crate structure.
Can I customize the height of a wooden crate kitchen island?
Absolutely! You can adjust the height of your make kitchen island out of wooden crates by stacking crates vertically or using legs or casters. Standard countertop height is 36 inches, but tailor it to your comfort or design needs.
How do I make my wooden crate island look professional?
Sand all surfaces thoroughly, stain or paint the crates to match your kitchen décor, and seal them with polyurethane for protection. Adding a sleek countertop and decorative hardware (like handles) elevates the island’s polished look.
Do I need to anchor a wooden crate kitchen island?
It’s not always necessary, but anchoring is recommended if you live in a high-traffic or earthquake-prone area. Use L-brackets to secure the island to the floor or wall for added stability and safety.
Can I add storage to my wooden crate kitchen island?
Yes! The open design of crates makes them ideal for storage—add baskets, bins, or shelves inside for utensils, cookbooks, or pantry items. You can also attach hooks or racks to the sides for extra functionality.