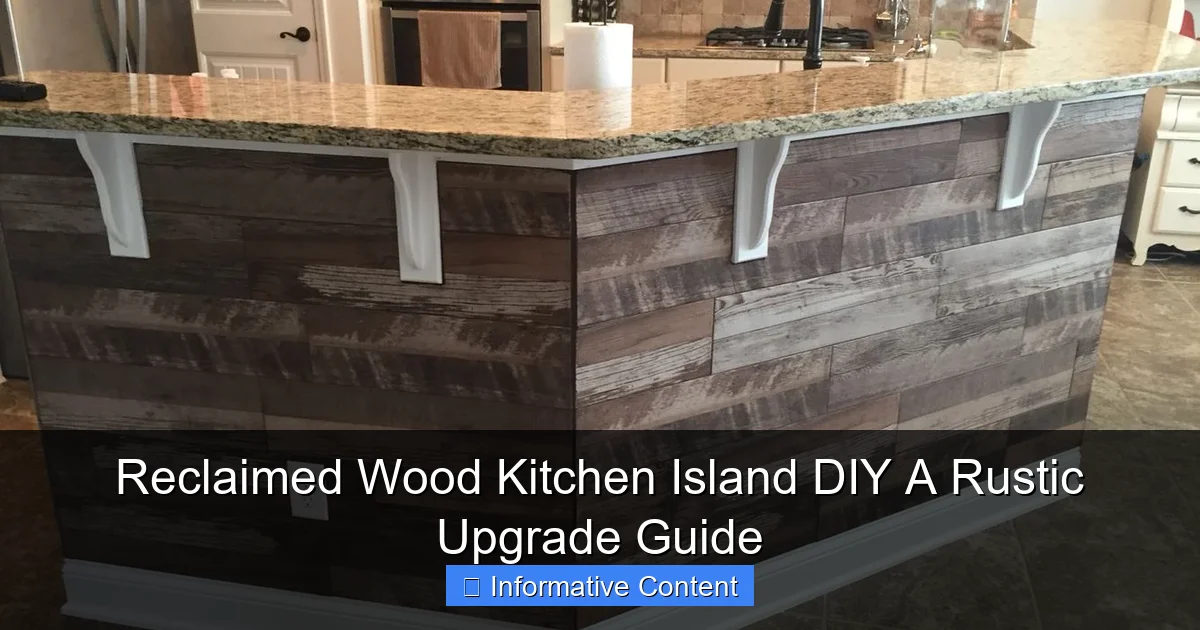
Featured image for reclaimed wood kitchen island diy
Image source: i.pinimg.com
Transform your kitchen with a reclaimed wood kitchen island DIY project that adds rustic charm and eco-friendly appeal. This hands-on guide walks you through sourcing, building, and finishing reclaimed wood to create a stunning, one-of-a-kind centerpiece. Perfect for weekend warriors and design lovers, this upgrade delivers high-impact style with sustainable materials and personalized flair.
Key Takeaways
- Source responsibly: Use salvaged wood from barns or pallets to ensure sustainability and character.
- Prep thoroughly: Clean, sand, and treat reclaimed wood to remove debris and prevent pests.
- Plan dimensions: Measure your kitchen space to design a functional, well-proportioned island.
- Reinforce structure: Use metal brackets or hardwood frames for lasting stability and support.
- Seal properly: Apply food-safe sealant to protect the wood from spills and wear.
- Mix materials: Combine with metal or stone for a modern-rustic aesthetic and durability.
📑 Table of Contents
- Why Reclaimed Wood Kitchen Islands Are Worth the Effort
- Understanding Reclaimed Wood: What It Is and Why It Matters
- Planning Your Reclaimed Wood Kitchen Island DIY Project
- Step-by-Step Building Process: From Frame to Finished Island
- Finishing and Sealing: Protecting Your Reclaimed Wood Masterpiece
- Cost Breakdown and Time Investment: What to Expect
- Final Thoughts: Your Kitchen, Your Story
Why Reclaimed Wood Kitchen Islands Are Worth the Effort
There’s something deeply satisfying about bringing history into your home. When I first laid eyes on a reclaimed wood kitchen island DIY project at a friend’s farmhouse-style kitchen, I was hooked. The rich grain, the subtle cracks, the faded paint remnants—each piece told a story. It wasn’t just a countertop; it was a conversation starter. That’s when I realized: a kitchen island made from reclaimed wood isn’t just a functional upgrade—it’s a soulful transformation. Whether you’re drawn to rustic charm, eco-friendly design, or just want to add character to a bland space, this project hits all the right notes.
But let’s be honest: DIY projects can feel intimidating. You might wonder, “Can I really build this?” or “Where do I even start with reclaimed wood?” I’ve been there. My first attempt involved a warped barn beam and a sander that nearly took my hand off. But over time, I learned the tricks—where to source wood, how to handle imperfections, and how to make it all come together without breaking the bank. This guide is my way of sharing what worked (and what didn’t) so you can create a stunning reclaimed wood kitchen island with confidence. No fancy tools required, just patience, a little elbow grease, and a vision.
Understanding Reclaimed Wood: What It Is and Why It Matters
What Exactly Is Reclaimed Wood?
Reclaimed wood is lumber salvaged from old buildings, barns, factories, or even shipping pallets. It’s not “used” wood—it’s rescued wood. Think of it as vintage timber with a past life. Unlike new lumber, which is often milled from young trees, reclaimed wood comes from old-growth forests. That means it’s denser, more stable, and packed with character. You’ll see features like nail holes, saw marks, and natural patina that simply can’t be faked with stain or paint.
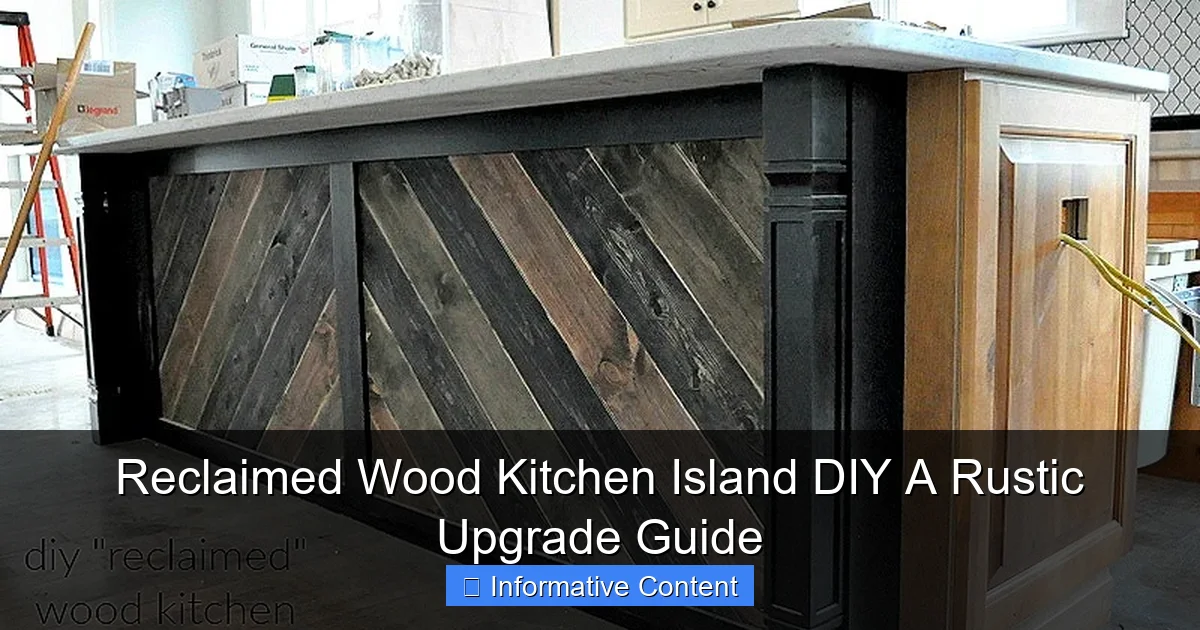
Visual guide about reclaimed wood kitchen island diy
Image source: cleverlyinspired.com
The beauty lies in its imperfections. Each piece is unique. One board might have a knotty texture, another might show decades of weathering. When you build a reclaimed wood kitchen island DIY, you’re not just adding storage and counter space—you’re embedding history into your daily life.
Environmental and Aesthetic Benefits
Choosing reclaimed wood isn’t just stylish—it’s sustainable. According to the U.S. Environmental Protection Agency, construction and demolition waste accounts for over 600 million tons annually. By reusing wood, you’re helping divert material from landfills and reducing the demand for new timber. It’s a small act with big impact.
But let’s talk aesthetics. Reclaimed wood brings warmth and depth to a kitchen. It pairs beautifully with stainless steel, concrete, or even glossy cabinets. Whether your style leans toward modern farmhouse, industrial, or boho, this wood adapts. I once used salvaged oak from a 1920s schoolhouse for a kitchen island. The result? A piece that looked like it had always belonged—yet felt fresh and functional.
Common Types of Reclaimed Wood (And Where to Find Them)
- Barn wood: Often pine or oak, with weathered gray or brown tones. Look for local barn demolitions or salvage yards.
- Factory flooring: Dense hardwoods like maple or heart pine. These are great for heavy-duty islands.
- Shipping pallets: Free and abundant, but inspect carefully for chemical treatments (avoid “MB” markings).
- Old beams and joists: Thick and sturdy, perfect for structural supports or decorative accents.
- Demolition wood: Check Craigslist, Facebook Marketplace, or local salvage companies. Always ask about the wood’s origin.
Pro tip: When sourcing, bring a moisture meter. Reclaimed wood should be under 12% moisture content to avoid warping later. If it’s higher, let it acclimate in your garage or workshop for a few weeks.
Planning Your Reclaimed Wood Kitchen Island DIY Project
Measuring and Designing for Your Space
Before you start cutting or sanding, measure your kitchen. Ask yourself: Where will the island sit? How much walking space do you need? The National Kitchen and Bath Association recommends at least 36–42 inches of clearance around an island for comfortable movement.
Sketch a rough design on graph paper or use free tools like SketchUp Free or RoomSketcher. Consider these key elements:
- Dimensions: Standard height is 36 inches (counter height), but you can go 42 inches for a bar-style island.
- Shape: Rectangular, square, or L-shaped? Think about traffic flow and functionality.
- Storage: Open shelves, closed cabinets, or a mix? I love open shelving for displaying cookbooks and vintage dishes.
- Overhang: Allow 12–15 inches for seating if you plan to add stools.
I once rushed into a project without measuring. The island ended up blocking the fridge door. Lesson learned: measure twice, build once.
Choosing the Right Base: Frame vs. Cabinetry
Your island’s base is the foundation—literally. You have two main options:
- Frame-based: Build a simple wood or metal frame (2x4s or angle iron). This is lighter, easier to move, and great for open designs. Use it if you want a “floating” look or plan to add casters.
- Cabinet-based: Use pre-made kitchen cabinets (IKEA or Home Depot) or build custom ones. This adds storage and a polished look but requires more skill and weight-bearing support.
For my first island, I used an old dresser as the base. It gave me drawers and a vintage vibe, but it wasn’t perfectly level. A frame would’ve been sturdier. If you’re new to DIY, start with a frame—you can always add cabinet doors later.
Tools and Materials Checklist
Here’s what you’ll likely need (don’t panic—most are basic):
- Essential tools: Tape measure, level, circular saw, drill, clamps, sander (orbital or belt), safety goggles, dust mask.
- Fasteners: Wood screws (2.5–3 inches), pocket hole screws, wood glue.
- Base materials: 2x4s for frame, plywood or MDF for cabinetry (if using).
- Reclaimed wood: Enough for the top (at least 1.5 inches thick) and any decorative accents.
- Finishing supplies: Wood conditioner, stain or sealant, brushes, rags.
Money-saving tip: Borrow tools from neighbors or rent from hardware stores. I once borrowed a table saw for a weekend—saved $200!
Step-by-Step Building Process: From Frame to Finished Island
Prepping the Reclaimed Wood
This step is crucial—and often underestimated. Reclaimed wood is dirty, rough, and may have nails or splinters. Here’s how to prep it:
- Remove nails and debris: Use a pry bar and metal detector. Even small metal fragments can ruin your sander.
- Clean thoroughly: Scrub with a stiff brush and mild soap. Let it dry completely (24–48 hours).
- Sand gradually: Start with 60-grit paper to remove old paint and rough spots, then move to 120-grit for smoothness. Avoid over-sanding—you want to preserve character.
- Check for pests: Look for holes or sawdust (signs of termites). If unsure, freeze wood for 72 hours or treat with borate solution.
One time, I skipped the cleaning step. The wood smelled like a barn for weeks. Not ideal. Take your time here—it pays off.
Building the Frame (The Heart of Your Island)
Let’s build a simple rectangular frame (48” x 24” x 36”) using 2x4s:
- Cut four 48” pieces (long sides) and four 20” pieces (short sides).
- Assemble the bottom rectangle: Use 3” screws to join corners. Check for squareness with a speed square.
- Add vertical supports: Cut 32” 2x4s and attach them every 16” inside the frame (for stability).
- Build the top rectangle: Repeat step 2, then attach it to the vertical supports.
- Add cross-bracing: Cut diagonal 2x4s and screw them from the top to bottom corners (prevents racking).
For extra strength, use pocket holes (Kreg Jig) to hide screws. This keeps the frame clean and professional-looking.
Attaching the Reclaimed Wood Top
This is where your island starts to shine. But there’s a catch: reclaimed wood is rarely perfectly flat. Here’s how to handle it:
- Arrange boards: Lay them on the frame, leaving 1/8” gaps for expansion. Play with grain patterns and color variations—mix light and dark for visual interest.
- Secure from underneath: Use 2” wood screws through the frame into the boards. Avoid face-screwing (it looks messy).
- Fill gaps (optional): Use epoxy or wood filler for a seamless look. I prefer leaving small gaps—they add authenticity.
- Trim edges: Cut off excess wood with a circular saw. Sand edges smooth.
My trick: Use a router to round the top edges slightly. It makes the island safer and more inviting to lean on.
Adding Storage and Finishing Touches
Now for the fun part—customization:
- Open shelves: Cut reclaimed wood to size and attach with L-brackets. Add a lip to prevent items from sliding off.
- Casters: Install locking casters (3” or 4”) if you want mobility. Ensure the frame is strong enough to support the weight.
- Back panel: Use thinner reclaimed wood or beadboard to hide pipes or wiring.
- Lighting: Add under-cabinet LEDs or pendant lights above the island. It transforms the space at night.
I once added a pull-out trash bin using an old wooden crate. It was quirky, functional, and saved floor space. Think outside the box!
Finishing and Sealing: Protecting Your Reclaimed Wood Masterpiece
Choosing the Right Finish
Your finish is the armor that protects the wood. But it also defines the look. Here are the best options for a reclaimed wood kitchen island DIY:
- Polyurethane (water-based): Clear, durable, and low odor. Apply 3–4 coats. Great for heavy use.
- Hardwax oil (e.g., Rubio Monocoat): Natural look, easy to repair. Needs reapplication every 1–2 years.
- Tung oil: Penetrates deeply, enhances grain. Takes 2–3 weeks to cure fully.
- Stain + sealant: Use a gel stain (less drippy) for color, then top with polyurethane. I used a walnut stain on my island—it deepened the wood’s warmth.
Caution: Test finishes on a scrap piece first. Some woods react oddly to sealants.
Application Tips for a Flawless Finish
- Sand between coats: Use 220-grit paper to remove dust nibs. Wipe with a tack cloth.
- Apply thin coats: Thick coats bubble and peel. Use a foam brush or lint-free rag.
- Ventilate well: Open windows and wear a mask. Some finishes (like oil-based polyurethane) are strong.
- Let it cure: Wait 24–72 hours before placing heavy items on the island.
One mistake I made: I applied polyurethane in a dusty garage. The finish looked like a sandstorm. Now I finish in a clean, dry space—even if it means waiting for a calm day.
Maintaining Your Island Over Time
Reclaimed wood is tough, but it needs care:
- Wipe spills immediately. Water can cause stains or warping.
- Use coasters and cutting boards. Even sealed wood scratches easily.
- Reapply wax or oil every 6–12 months (especially for hardwax finishes).
- Inspect for loose screws or wobbly legs. Tighten as needed.
After two years, my island still looks new—just with a few more character marks. That’s the beauty of reclaimed wood: it ages gracefully.
Cost Breakdown and Time Investment: What to Expect
Average Costs for a DIY Reclaimed Wood Island
Here’s a realistic budget for a 4’x2’ island (based on U.S. prices):
| Item | Low Cost | Mid Cost | High Cost |
|---|---|---|---|
| Reclaimed wood (top & accents) | $50 (salvaged pallets) | $150 (local salvage yard) | $300 (specialty supplier) |
| Base frame (2x4s, screws) | $30 | $50 | $80 |
| Finish (stain, sealant) | $20 | $40 | $60 |
| Tools (rental or purchase) | $0 (borrowed) | $100 (basic kit) | $300 (premium tools) |
| Hardware (casters, brackets) | $15 | $30 | $50 |
| Total | $115 | $370 | $790 |
Note: Prices vary by region. Shop around—I saved $75 by buying wood during a salvage yard’s “end of season” sale.
Time Commitment: From Start to Finish
Expect to spend:
- Sourcing wood: 1–3 days (depending on availability).
- Prepping wood: 1–2 days (cleaning, sanding).
- Building frame: 1 day (if experienced), 2 days (beginner).
- Assembling top: Half a day.
- Finishing: 2–3 days (with drying time).
Total: 5–10 days (spread over 2–3 weekends). It’s not a weekend project, but it’s manageable with a steady pace.
Common Pitfalls (And How to Avoid Them)
- Using green or wet wood: Leads to warping. Always check moisture content.
- Skipping the sanding step: Results in splinters and poor finish adhesion.
- Overloading the frame: Reclaimed wood is heavy. Reinforce with extra supports.
- Ignoring expansion gaps: Wood moves with humidity. Leave 1/8” between boards.
I once ignored the expansion rule. The wood cracked in winter. Lesson learned: respect the wood’s nature.
Final Thoughts: Your Kitchen, Your Story
Building a reclaimed wood kitchen island DIY isn’t just about adding a piece of furniture—it’s about creating a legacy. Every scratch, every nail hole, every grain tells a story. Maybe it’s the story of a barn that stood for a century. Or the tale of a factory that powered a town. When you place that island in your kitchen, you’re not just upgrading your space—you’re honoring the past.
And the best part? It’s entirely within reach. You don’t need a workshop full of tools or a degree in carpentry. You need curiosity, patience, and the willingness to learn from mistakes. I’ve had my share of blunders—crooked frames, uneven tops, finishes that peeled. But each one taught me something. Now, my island isn’t just functional; it’s a reflection of my journey.
So, what are you waiting for? Grab a tape measure, find some old wood, and start building. Your kitchen—and your future self—will thank you. And when friends ask, “Where did you get that island?” you’ll smile and say, “I made it.” That’s the magic of DIY.
Frequently Asked Questions
What is a reclaimed wood kitchen island DIY, and why should I consider it?
A reclaimed wood kitchen island DIY involves building a kitchen island using salvaged wood from old barns, furniture, or industrial sites. It’s an eco-friendly, budget-friendly way to add rustic charm and unique character to your kitchen while reducing waste.
Where can I find reclaimed wood for my kitchen island DIY project?
You can source reclaimed wood from salvage yards, demolition sites, online marketplaces like Craigslist or Facebook Marketplace, or even local woodworking shops. Always inspect for nails, rot, and structural integrity before purchasing.
How do I prepare reclaimed wood for a kitchen island DIY build?
Clean the wood thoroughly, remove nails or debris, and sand it to smooth rough surfaces. If needed, kiln-dry or air-dry the wood to prevent warping, and treat it with a food-safe sealant for kitchen safety.
What tools do I need to build a reclaimed wood kitchen island?
Essential tools include a saw, drill, sander, measuring tape, level, and clamps. For added durability, consider a pocket-hole jig or wood planer to ensure precise joins and a professional finish.
Can I customize the size and design of my reclaimed wood kitchen island?
Absolutely! A DIY reclaimed wood kitchen island lets you tailor dimensions, height, storage (shelves, drawers), and even add features like casters for mobility. Sketch a plan first to ensure it fits your space and needs.
How do I maintain a reclaimed wood kitchen island to preserve its rustic look?
Regularly dust and clean with a damp cloth, avoiding harsh chemicals. Reapply a food-safe oil or wax every 6–12 months to protect the wood and enhance its natural patina over time.