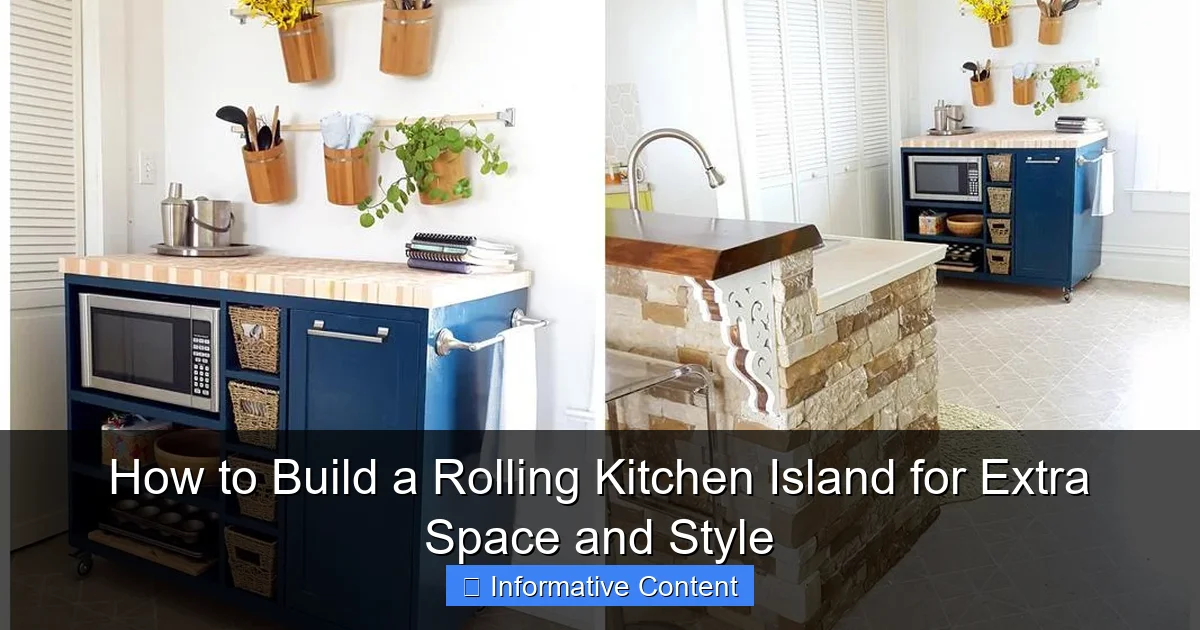
Featured image for rolling kitchen island build
Image source: learn.kregtool.com
Maximize your kitchen’s functionality and style with a custom rolling kitchen island that delivers extra prep space, storage, and mobility—all tailored to your layout. Built with durable materials and lockable casters, this DIY solution combines practicality and modern design for seamless everyday use.
Key Takeaways
- Plan your design: Measure your space and sketch a layout before building.
- Choose durable materials: Opt for hardwood or stainless steel for longevity.
- Add locking casters: Ensure mobility and stability with high-quality wheels.
- Maximize storage: Include shelves, drawers, or hooks for functionality.
- Customize the finish: Paint or stain to match your kitchen’s aesthetic.
- Secure countertops properly: Use brackets or adhesive for a wobble-free surface.
📑 Table of Contents
- Why a Rolling Kitchen Island Is a Game-Changer
- Planning Your Rolling Kitchen Island Build
- Materials and Tools You’ll Need
- Step-by-Step Rolling Kitchen Island Build
- Design Ideas and Customization Tips
- Common Mistakes to Avoid and Pro Tips
- Rolling Kitchen Island Cost Comparison
- Final Thoughts: Your Rolling Kitchen Island Build Journey
Why a Rolling Kitchen Island Is a Game-Changer
Let’s be honest: the kitchen is the heart of the home. It’s where coffee is brewed in the morning, where late-night snacks are quietly raided, and where family and friends gather for meals that last hours. But if you’re like me—someone who loves to cook but is constantly bumping elbows with the counter or searching for a place to set down that hot dish—you’ve probably thought about how to squeeze just a little more space out of your kitchen.
That’s where a rolling kitchen island build comes in. It’s not just a piece of furniture; it’s a flexible, stylish, and practical solution that adds workspace, storage, and even seating—all while being easy to move when you need to open up the floor. Whether you’re working with a tiny galley kitchen or a sprawling open-concept space, a rolling island can adapt to your needs. And the best part? You don’t need to be a master carpenter to build one. With some basic tools, a few weekends, and a dash of creativity, you can craft a custom island that fits your space, style, and budget.
Planning Your Rolling Kitchen Island Build
Assess Your Kitchen Layout and Needs
Before you even pick up a tape measure, take a good look at your kitchen. Where do you feel cramped? Is it during meal prep? When entertaining? Or maybe when you’re trying to load the dishwasher while someone’s cooking? A rolling kitchen island can solve these problems, but only if you plan it right.
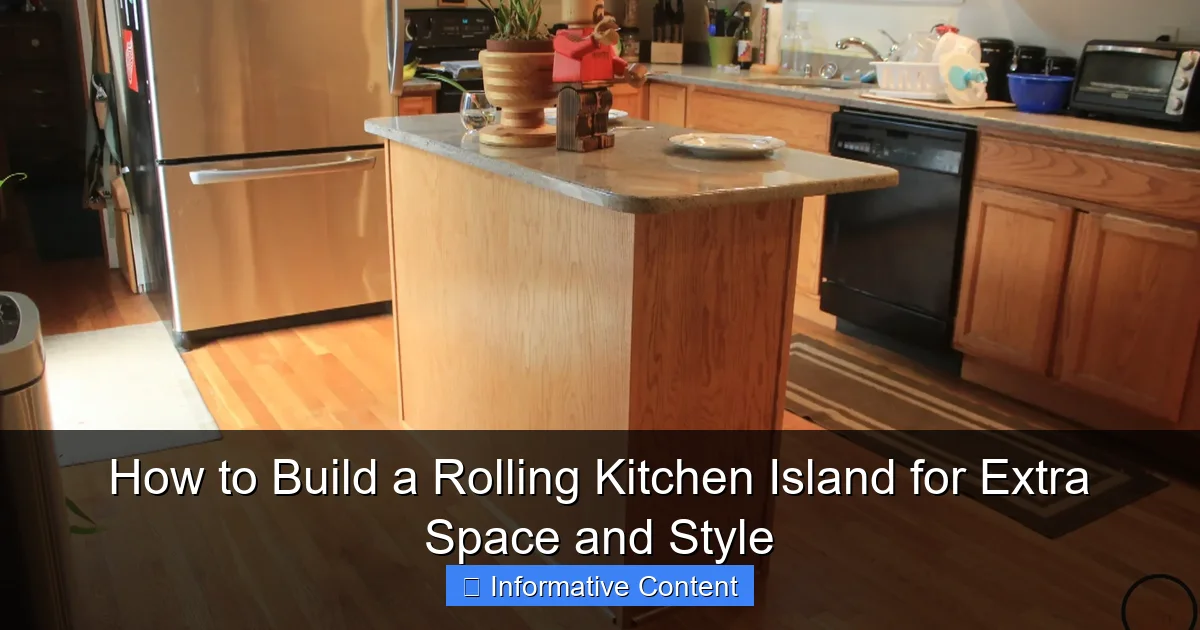
Visual guide about rolling kitchen island build
Image source: i2.wp.com
Ask yourself:
- How much extra counter space do I need?
- Do I want storage for pots, pans, or small appliances?
- Would I like to add barstools for seating?
- Will the island need to fit through a doorway or around corners?
For example, I once helped a friend build an island for her narrow kitchen. She needed extra prep space but didn’t want to block her only walkway. We ended up designing a slim, 24-inch-deep island with open shelving and a fold-down leaf for extra counter space—perfect for taco night, then tucked away when not in use.
Choose the Right Dimensions
Size matters. A rolling kitchen island should be large enough to be useful but small enough to be mobile. Here’s a quick guide:
- Height: 36 inches (standard counter height) is ideal for food prep. If you want seating, consider a 42-inch bar height with matching stools.
- Width: 30–48 inches is typical. Wider islands offer more workspace but may be harder to maneuver.
- Depth: 24–30 inches gives you room for prep and storage. Deeper islands can double as a breakfast bar.
- Clearance: Leave at least 36 inches of walkway space around the island. Less than that, and you’ll feel boxed in.
Pro tip: Sketch your kitchen layout on graph paper or use a free online tool like SketchUp Free to visualize how the island will fit. This helps avoid costly mistakes.
Pick a Style That Matches Your Kitchen
Your rolling kitchen island should feel like it belongs, not like it was dropped from another planet. Consider your kitchen’s existing style:
- Modern kitchens: Sleek lines, stainless steel, or matte black finishes.
- Farmhouse or rustic: Reclaimed wood, shaker cabinets, or a butcher block top.
- Industrial: Exposed metal legs, pipe fittings, or concrete countertops.
- Scandinavian: Light wood, white finishes, and minimalist design.
I once built a mid-century modern island for my sister using walnut plywood and hairpin legs. It matched her retro-inspired kitchen perfectly and became the room’s focal point. Style matters—it’s not just about function.
Materials and Tools You’ll Need
Essential Materials for a Durable Build
Choosing the right materials is key to a long-lasting rolling kitchen island. Here’s what you’ll likely need:
- Frame: 2×4 or 2×6 lumber for a sturdy base. Plywood or MDF (medium-density fiberboard) for cabinet panels.
- Countertop: Butcher block (easy to install, warm look), quartz (durable, modern), or even a repurposed door (budget-friendly).
- Wheels: Locking casters (at least 3 inches tall) for mobility and stability. I recommend locking swivel casters—they let you move the island easily but stay put when needed.
- Hardware: Hinges, drawer slides, knobs/pulls, and corner brackets for assembly.
- Finishing: Sandpaper, wood stain or paint, and polyurethane or food-safe sealant (especially for butcher block).
For a budget build, I once used leftover 3/4-inch birch plywood for the frame and a salvaged oak tabletop. With a little sanding and a dark walnut stain, it looked high-end—and cost under $100.
Must-Have Tools for the Project
You don’t need a full workshop, but these tools make the job easier and safer:
- Circular saw or jigsaw: For cutting wood to size.
- Drill/driver: For assembling frames and attaching hardware.
- Tape measure and square: Precision is crucial for a level island.
- Clamps: To hold pieces together while glue dries.
- Sander or sanding block: For a smooth finish.
- Stud finder (optional): If you plan to anchor the island to the floor temporarily.
Don’t have a saw? Many home improvement stores (like Home Depot or Lowe’s) offer free cutting services if you buy materials from them. Just bring your measurements.
Optional Upgrades for Function and Style
Want to go beyond the basics? Consider these upgrades:
- Built-in outlets: Install a power strip inside a cabinet for blenders, slow cookers, or charging phones.
- Wine rack or spice shelf: Great for small kitchens with limited wall space.
- Pull-out trash bin: Keeps waste out of sight but within reach.
- Butcher block oil: If using wood, apply mineral oil every few months to prevent drying and cracking.
My favorite upgrade? A fold-down leaf on one side. It’s perfect for extra prep space or as a quick coffee bar—then folds up to save space.
Step-by-Step Rolling Kitchen Island Build
Step 1: Build the Base Frame
Start with the foundation. Cut 2x4s to create a rectangular frame that matches your desired island size. For example, for a 36×24-inch island:
- Cut two 36-inch boards (sides).
- Cut two 24-inch boards (ends).
Assemble the frame using wood glue and 2.5-inch screws. Reinforce corners with corner brackets. Then, add cross-supports every 12–16 inches to prevent sagging. Attach the frame to a plywood or MDF back panel for extra stability.
Pro tip: Pre-drill holes to avoid splitting the wood, especially near edges.
Step 2: Add the Sides, Front, and Back Panels
Measure and cut your cabinet panels (3/4-inch plywood or MDF) to fit:
- Sides: 36 inches tall x 24 inches deep.
- Front and back: 36 inches tall x 36 inches wide (if your island is 36 inches long).
Attach panels with wood glue and screws. Use clamps to hold them in place. For a seamless look, fill screw holes with wood filler, then sand smooth.
For doors or drawers, leave openings where needed. I recommend 1/8-inch gaps on all sides for smooth operation.
Step 3: Install the Wheels (Casters)
This is critical for mobility and safety. Attach locking casters to each corner of the base frame. Use 3-inch screws to ensure they’re secure. If your island is heavy, add a fifth caster in the center for extra support.
Test the island by moving it around. It should glide smoothly and lock firmly. If it wobbles, check that all casters are level.
Step 4: Add the Countertop
Place your countertop (butcher block, quartz, etc.) on the frame. Center it, leaving a 1-inch overhang on all sides for a finished look. Secure it with screws from underneath, or use construction adhesive for a seamless finish.
For butcher block: Sand with 120-grit paper, then apply 2–3 coats of food-safe mineral oil or polyurethane. Let dry between coats.
Step 5: Install Doors, Drawers, and Hardware
Attach cabinet doors with hinges. Use a hinge jig (or a scrap wood spacer) to ensure even gaps. Install drawer slides according to the manufacturer’s instructions—most are side-mount and require precise alignment.
Finish by adding knobs or pulls. I like to use a template (a piece of cardboard with holes) to space them evenly.
Step 6: Sand, Finish, and Seal
Sand the entire island with 120-grit paper, then 220-grit for a smooth finish. Wipe away dust with a tack cloth. Apply your chosen finish:
- Paint: Use a high-quality latex or chalk paint for a durable finish.
- Stain: Apply with a brush or rag, then seal with polyurethane.
- Sealant: For butcher block, use food-safe mineral oil or a water-based sealant.
Let the finish cure for at least 48 hours before using the island.
Design Ideas and Customization Tips
Maximize Storage with Smart Features
Small kitchens need every inch of storage. Try these space-saving ideas:
- Vertical dividers: For baking sheets, cutting boards, or trays.
- Pull-out shelves: For heavy pots or appliances.
- Hidden spice racks: Install a small door on the end for spices.
- Wine bottle cubbies: Use angled shelves to store bottles.
I once built an island with a pull-out cutting board. It doubled as a prep surface and saved counter space. Brilliant, right?
Choose the Perfect Countertop
The countertop is the star of your rolling kitchen island. Consider these options:
- Butcher block: Warm, natural look. Requires regular oiling. Great for cutting and food prep.
- Quartz: Durable, stain-resistant, and low maintenance. Pricier but worth it for heavy use.
- Marble: Elegant but porous. Needs sealing and care.
- Laminate: Budget-friendly. Many modern options mimic stone or wood.
- Repurposed materials: Old doors, barn wood, or concrete countertops (if you’re adventurous).
For a rental-friendly option, I once used a thick cutting board as a removable countertop. Easy to clean, easy to replace.
Add Lighting for Ambiance and Function
Don’t overlook lighting. A small LED strip under the countertop or a pendant light above the island can:
- Highlight prep areas.
- Add warmth to the room.
- Create a cozy dining nook.
For my own island, I installed a rechargeable LED puck light inside a cabinet. It’s perfect for late-night snacking without turning on the bright overheads.
Common Mistakes to Avoid and Pro Tips
Don’t Skimp on the Wheels
Cheap casters = wobbly island = spilled soup. Invest in locking, heavy-duty casters (rated for at least 100 lbs each). Test them before assembly.
Measure Twice, Cut Once (Then Measure Again)
Even a 1/8-inch error can throw off the whole build. Use a square to ensure corners are 90 degrees. Check measurements at multiple points.
Balance Weight and Mobility
Too much weight (e.g., marble countertop + full cabinets) can make the island hard to move. Distribute weight evenly—heavier items near the casters. Add a fifth caster for stability if needed.
Seal Wood Surfaces Properly
Butcher block or raw wood can absorb spills, odors, and bacteria. Seal with food-safe oil or polyurethane. Reapply every 3–6 months.
Think About Clearance
Even with casters, the island needs room to move. Test it in your kitchen before finalizing. Can you open drawers fully? Reach the sink? Walk around comfortably?
Rolling Kitchen Island Cost Comparison
| Component | Budget Option ($) | Mid-Range Option ($$) | High-End Option ($$$) |
|---|---|---|---|
| Frame (2x4s, plywood) | 20–40 | 40–80 | 80–150 |
| Countertop | 50 (laminate or repurposed) | 100–200 (butcher block) | 300+ (quartz or marble) |
| Casters (locking) | 20 (basic) | 40 (heavy-duty) | 60 (premium) |
| Hardware (hinges, pulls) | 10–20 | 30–50 | 75+ |
| Finishing (paint, sealant) | 15–30 | 30–60 | 100+ (premium finishes) |
| Total (approx.) | 115–180 | 240–440 | 615+ |
Note: Prices vary by region and material availability. Always get multiple quotes.
Final Thoughts: Your Rolling Kitchen Island Build Journey
Building a rolling kitchen island isn’t just about adding space—it’s about adding freedom. Freedom to rearrange your kitchen, to host more guests, to cook without feeling cramped. And the best part? You get to design it exactly how you want it. No compromises.
I’ll never forget the first time I rolled my own island into the kitchen. It was a simple 30×24-inch design with butcher block and locking wheels. But that extra counter space made all the difference. Suddenly, I could prep salads while my partner cooked pasta, and we had room for the kids to set the table. It became the hub of our home.
So, whether you’re a DIY newbie or a seasoned builder, I encourage you to take the leap. Start small. Plan carefully. And don’t be afraid to make it your own. A rolling kitchen island build isn’t just a project—it’s an investment in how you live, cook, and connect. And that’s worth every sawdust-covered hour.
Frequently Asked Questions
How do I start building a rolling kitchen island?
Begin by planning your design and measuring your space to ensure the island fits. Choose durable materials like butcher block or stainless steel for the countertop and sturdy casters for mobility. A well-planned rolling kitchen island build balances functionality and style.
What tools and materials are needed for a rolling kitchen island build?
Essential tools include a saw, drill, level, and measuring tape, while materials typically involve wood or metal for framing, casters, screws, and a countertop. For a polished look, consider adding cabinet doors, shelves, or a backsplash. Always prioritize locking wheels for stability.
Can I customize a rolling kitchen island to match my kitchen style?
Absolutely! Paint or stain the base to complement your cabinetry, and select countertop materials (like granite, wood, or quartz) that align with your kitchen’s aesthetic. Adding hardware or open shelving can further personalize your rolling kitchen island.
How do I ensure my rolling kitchen island is stable and safe?
Use locking casters and anchor the island to the floor if needed. Distribute weight evenly by placing heavier items (like appliances) over the wheels, and avoid overloading shelves or drawers to prevent tipping.
What are the benefits of a rolling kitchen island compared to a fixed one?
A rolling island offers flexibility—move it for extra workspace, entertaining, or cleaning. It’s ideal for small kitchens where permanent fixtures limit mobility, and you can easily relocate it if you renovate or move homes.
How much does it cost to build a rolling kitchen island?
Costs vary widely ($100–$500+) based on materials and size. DIY builds with basic wood and casters are budget-friendly, while premium countertops or custom features increase the price. Planning a detailed rolling kitchen island build helps control expenses.