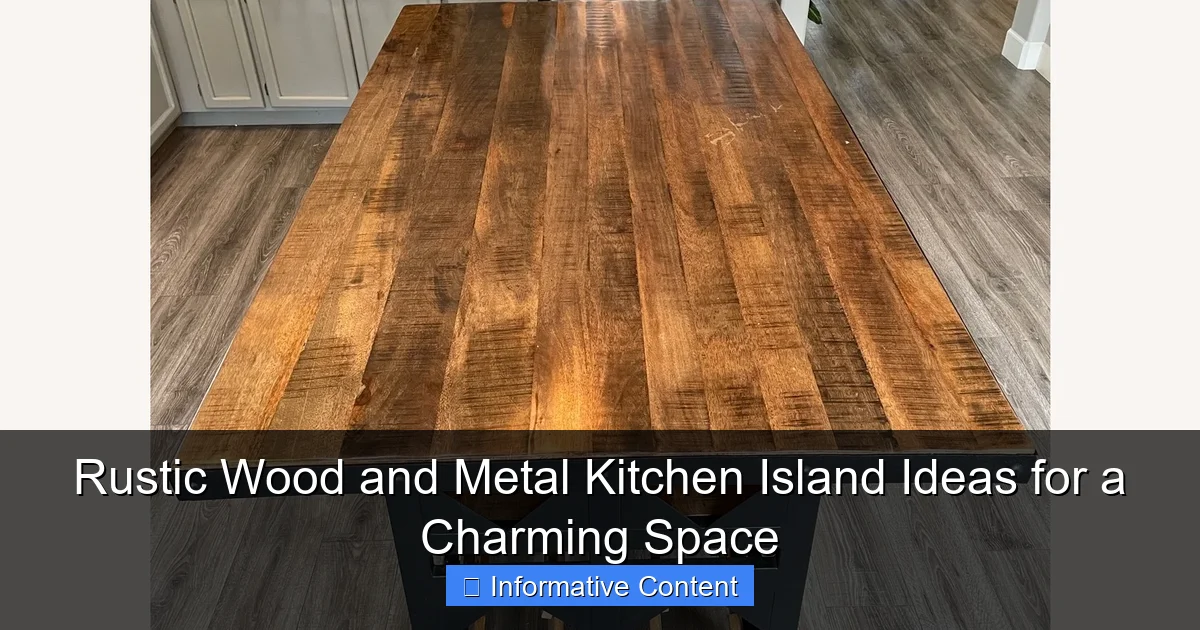
Featured image for rustic wood and metal kitchen island
Image source: d6qwfb5pdou4u.cloudfront.net
Rustic wood and metal kitchen islands blend timeless charm with rugged durability, creating a warm, inviting focal point in any kitchen. Combining weathered wood with industrial metal accents, these islands offer both style and function—perfect for adding storage, seating, and character to your space. Ideal for farmhouse, cottage, or modern-rustic interiors, they strike the perfect balance between cozy and contemporary.
Key Takeaways
- Blend materials wisely: Combine rustic wood and metal for a balanced, durable kitchen island.
- Prioritize reclaimed wood: Use weathered or reclaimed wood for authentic charm and sustainability.
- Choose complementary metals: Opt for black iron, copper, or brass to enhance rustic appeal.
- Add functional details: Include open shelving, towel bars, or hooks for practicality and style.
- Seal and protect surfaces: Apply food-safe sealants to wood to prevent stains and wear.
- Mix finishes thoughtfully: Pair matte metal with distressed wood to avoid visual clutter.
📑 Table of Contents
- Why Rustic Wood and Metal Kitchen Islands Are a Game-Changer
- The Beauty of Rustic Wood: Warmth and Character
- The Strength and Style of Metal Accents
- Designing Your Ideal Rustic Wood and Metal Kitchen Island
- DIY vs. Pre-Made: Weighing Your Options
- Styling Tips to Make Your Island a Focal Point
- Top Rustic Wood and Metal Kitchen Island Ideas (With Real Examples)
Why Rustic Wood and Metal Kitchen Islands Are a Game-Changer
Imagine walking into your kitchen and being greeted by a warm, inviting island that blends the charm of a countryside farmhouse with the durability of industrial design. That’s exactly what a rustic wood and metal kitchen island brings to the table—literally and figuratively. Whether you’re remodeling your kitchen or simply craving a cozy, lived-in vibe, this hybrid style has become a go-to for homeowners who want functionality without sacrificing character. I remember the first time I saw one in a friend’s kitchen: the rich grain of the reclaimed wood paired with the cool, matte finish of black metal legs instantly made the space feel both modern and nostalgic. It was love at first sight.
What makes this combination so special is its versatility. Rustic wood and metal kitchen islands can adapt to almost any decor style—from modern farmhouse to industrial chic, or even a cozy cottage aesthetic. They’re not just about looks, either. These islands often come with clever storage solutions, seating options, and built-in features that make meal prep and entertaining easier. Whether you’re a seasoned home chef or someone who just enjoys a good cup of coffee in a beautiful space, a rustic wood and metal kitchen island can transform your kitchen into a hub of comfort and style. And the best part? You don’t need a massive budget to make it happen. With a little planning and creativity, you can find or build one that fits your space and lifestyle perfectly.
The Beauty of Rustic Wood: Warmth and Character
Types of Wood That Shine in Rustic Designs
When it comes to rustic wood, not all lumber is created equal. The type of wood you choose will set the tone for your entire kitchen island. Reclaimed wood is a top pick for many because of its history, texture, and eco-friendly appeal. Each plank carries unique imperfections—knots, grain patterns, and even old nail holes—that tell a story. I once visited a local artisan who used barn wood from the 1800s to build a kitchen island. The depth of color and subtle weathering gave it a soul that new wood simply can’t replicate.
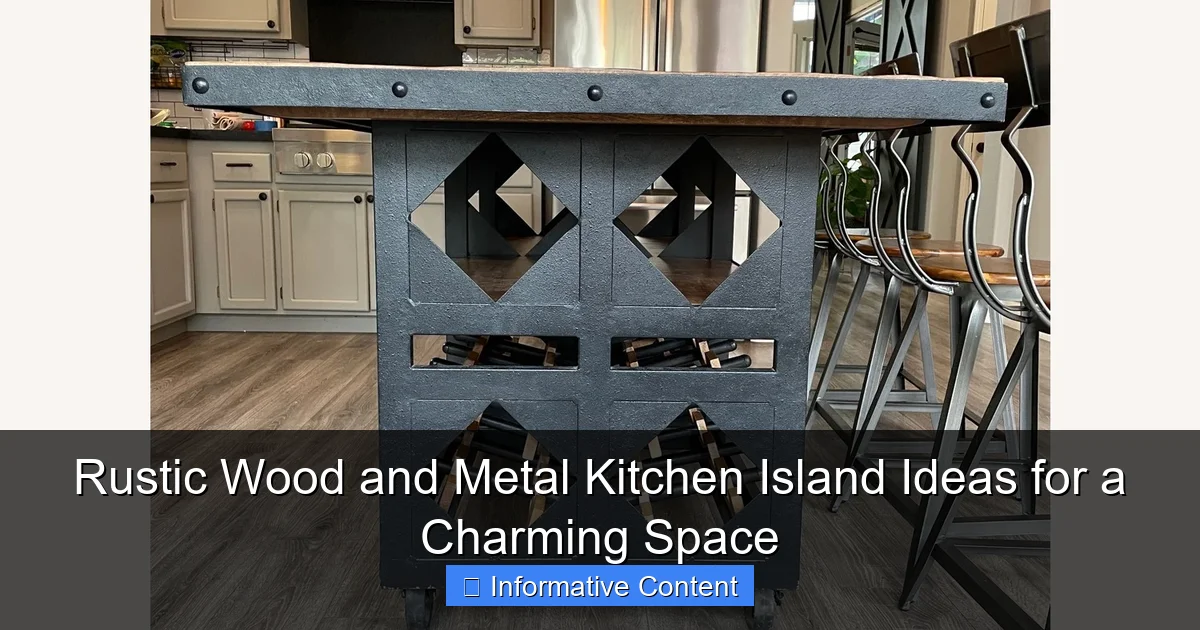
Visual guide about rustic wood and metal kitchen island
Image source: d6qwfb5pdou4u.cloudfront.net
- Reclaimed pine: Light, affordable, and full of character. Great for a softer, farmhouse feel.
- Reclaimed oak: Denser and more durable. Offers a richer color and deeper grain—perfect for a more formal rustic look.
- Walnut: A darker, luxurious option. Works well in modern-rustic blends where elegance meets ruggedness.
- Barn wood: Often weathered and grayed, ideal for a vintage, cottage-inspired kitchen.
Tip: If you’re buying new wood, look for “character-grade” lumber. It includes knots, grain variations, and slight imperfections that mimic the look of reclaimed wood without the higher price tag.
Finishes That Enhance the Natural Look
How you finish the wood plays a big role in how your island ages and feels. A matte or satin sealant preserves the wood’s natural texture while protecting it from spills and scratches. I’ve found that a simple water-based polyurethane works well—it doesn’t yellow over time like oil-based finishes can.
For a more authentic rustic vibe, consider a white-washed or gray-stained finish. These techniques let the grain show through while softening the overall color, making the island feel lighter and more airy—ideal for small kitchens. On the other hand, a rich walnut oil finish deepens the color and brings out the wood’s natural warmth, perfect for larger, open-concept spaces.
One thing to keep in mind: avoid high-gloss finishes. They tend to look too modern and can detract from the rustic charm. Instead, go for a soft, hand-rubbed look that feels organic and lived-in.
How Wood Affects the Mood of Your Kitchen
Wood has a unique ability to make a space feel warm and welcoming. In kitchen islands, this is especially valuable because the kitchen is often the heart of the home. A rustic wood top invites people to gather—whether it’s for a quick breakfast or a long chat over wine.
I once helped a client choose a reclaimed pine island for her small urban kitchen. She was worried it would make the space feel darker, but once installed, the light wood actually reflected the natural light from the window, making the room feel bigger and more open. The key was balancing the wood with lighter walls and metal accents.
Pro tip: If you have a dark or north-facing kitchen, opt for lighter wood tones. In sunny, south-facing kitchens, you can go bolder with darker stains without making the room feel heavy.
The Strength and Style of Metal Accents
Popular Metal Types and Their Aesthetic Impact
Metal is the backbone of a rustic wood and metal kitchen island—literally. It provides structural support, but it also adds a sleek, industrial contrast that keeps the design from feeling too “country.” The most common metals used are:
- Black iron: Matte, bold, and timeless. Great for farmhouse and industrial styles.
- Stainless steel: Shiny and modern. Works well in transitional kitchens where you want a mix of old and new.
- Brushed nickel: Softer and more refined. Ideal for a cozy, cottage-style kitchen.
- Corten steel: Rust-colored and textured. Perfect for a dramatic, art-inspired look (but requires sealing to prevent staining).
<
I once saw a kitchen with a black iron base and a live-edge walnut top. The contrast was stunning—the dark, geometric legs grounded the organic wood top, creating a perfect balance. It felt both rugged and elegant.
Metal Legs, Frames, and Hardware: Function Meets Flair
Metal isn’t just for the base. You can use it in drawer pulls, cabinet hinges, and even as decorative inlays on the island’s sides. For example, a simple island with black iron hairpin legs and matching drawer pulls creates a cohesive, minimalist look. Or, go bolder with a full iron frame that wraps around the island, giving it an almost sculptural quality.
One of my favorite tricks is using metal brackets as both support and design. Exposed iron corner braces add an industrial touch while reinforcing the structure. They’re especially useful if you’re building a DIY island—no need to hide the hardware!
For seating, consider metal bar stools with wood seats. This combo ties the island and stools together visually while offering comfort and durability. I’ve seen this work beautifully in open-plan kitchens where the island doubles as a breakfast bar.
Durability and Maintenance Tips for Metal Components
One of the biggest perks of metal is its resilience. Iron and steel won’t warp, crack, or stain like wood can. But they do require a little care to prevent rust and scratches.
- Wipe spills immediately, especially with acidic liquids like lemon juice or vinegar.
- Use coasters under drinks and hot pans to avoid marks.
- For iron bases, apply a clear metal sealant every 1–2 years to prevent rust.
- Stainless steel can be cleaned with a microfiber cloth and a mild cleaner—avoid abrasive pads.
Bonus: metal ages beautifully. Over time, iron develops a subtle patina that adds to the rustic charm. Just don’t confuse this with actual rust—keep it sealed if you want to prevent deterioration.
Designing Your Ideal Rustic Wood and Metal Kitchen Island
Size and Layout: Making It Work for Your Space
Before you fall in love with a design, ask: Will it fit? Kitchen islands need at least 36–42 inches of clearance on all sides for comfortable movement. In small kitchens, a compact island (30–36 inches wide) with a single overhang for seating can be a lifesaver. In larger spaces, go bold with a 48+ inch island that includes storage, prep space, and room for 4–6 bar stools.
I once helped a family with a narrow galley kitchen. We chose a slim island (24 inches deep) with a drop-leaf extension. When not in use, it folded flat against the wall. When needed, it extended to seat two—perfect for weekend pancakes.
Pro tip: Use painter’s tape to map out the island’s footprint on your floor. Walk around it. Sit at it. Make sure it feels natural before you commit.
Storage Solutions That Blend Form and Function
Storage is where rustic wood and metal kitchen islands really shine. You can hide clutter while keeping essentials within reach. Here are some smart ideas:
- Open shelving: Use reclaimed wood shelves with black iron brackets. Display cookbooks, baskets, or vintage jars.
- Deep drawers: Ideal for pots, pans, and utensils. Add soft-close glides for a luxury feel.
- Wine racks: Metal grids on the side or under the counter are stylish and practical.
- Trash pull-out: Keep the bin hidden but accessible. Use a wooden drawer front to match the island.
<
One client wanted to hide her coffee station. We added a lift-up door on the side of the island with a built-in shelf for the grinder, beans, and mugs. It looked like a regular cabinet until she opened it—genius!
Seating and Overhangs: Creating a Gathering Spot
The overhang is where your island becomes more than just a work surface—it becomes a social hub. A standard overhang is 12 inches, but 15–18 inches gives more legroom for taller stools.
For seating, match the metal of your island to the stools. Black iron legs? Black metal stools. Brushed nickel base? Nickel-finish stools. This creates visual harmony. And don’t forget comfort—cushioned seats or backless designs with contoured wood seats make a big difference during long chats.
I love islands with a split-level counter: one side for prep, the other for eating. It’s a subtle way to define zones without walls.
DIY vs. Pre-Made: Weighing Your Options
Building Your Own: Pros, Cons, and Tools You’ll Need
DIY is a great option if you want full control over materials, size, and design. I’ve built two islands myself—and while it was rewarding, it wasn’t easy. You’ll need:
- Basic carpentry tools (circular saw, drill, sander, clamps)
- Wood and metal supplies (lumber, metal legs, fasteners)
- Patience (and maybe a friend for heavy lifting)
The biggest pro? Cost savings. You can build a high-quality island for 30–50% less than buying one. Plus, you can customize every detail—like a built-in knife block or a charging station.
The downside? Time and skill. If you’re not confident with power tools, start with a simple design (like a tabletop with metal legs). And always seal the wood properly to prevent warping.
Buying Pre-Made: What to Look for in Quality and Craftsmanship
Pre-made islands are perfect if you’re short on time or tools. But not all are created equal. Look for:
- Solid wood tops (not veneers or particle board)
- Thick metal legs (at least 1.5 inches in diameter)
- Smooth finishes (no rough edges or splinters)
- Adjustable levelers (to keep the island steady on uneven floors)
I once bought a pre-made island online that looked great in photos but arrived with wobbly legs and a veneer top that chipped easily. Lesson learned: read reviews, check return policies, and if possible, see it in person.
Brands like Pottery Barn, West Elm, and even Etsy artisans offer beautiful, high-quality options. Just be ready to pay more for craftsmanship.
Custom-Built Islands: When It’s Worth the Investment
If you have a unique space or specific needs, a custom-built island might be the best choice. A local carpenter or metalworker can create something tailored to your kitchen’s dimensions, style, and storage needs.
For example, a client wanted an island with a built-in induction cooktop and a sink. The carpenter designed a U-shaped island with a metal base and a reclaimed wood countertop that wrapped around the appliances. It was a showstopper—and worth every penny.
Custom doesn’t always mean expensive. Some artisans offer semi-custom options, like choosing your wood stain and metal finish on a standard design. It’s a great middle ground.
Styling Tips to Make Your Island a Focal Point
Lighting: The Key to Setting the Mood
Good lighting can make or break your island’s vibe. Pendant lights are a classic choice—hang 2–3 above the island, 30–36 inches apart, with the bottom of the shade 30–36 inches above the counter.
For a rustic look, try black iron or copper pendants with exposed bulbs. I love the look of vintage-style Edison bulbs—they add warmth and a touch of nostalgia. If your kitchen has high ceilings, consider a single large lantern-style fixture for drama.
Under-cabinet lighting is another smart addition. It illuminates the countertop for prep work and creates a soft glow at night.
Decor and Accessories: Adding Personality
Your island isn’t just for cooking—it’s a canvas for your personality. Start with a large wooden bowl for fruit or a ceramic pitcher for flowers. Add a small plant (like a succulent or herb) for a pop of green.
For a cozy touch, drape a woven runner or a chunky knit throw over the side. And don’t forget functional decor: a vintage cutting board, a set of cast iron skillets, or a wooden utensil holder.
One of my favorite tricks? Use a metal tray to corral everyday items like salt, pepper, and oils. It keeps the counter tidy and adds a polished look.
Balancing Rustic with Modern Elements
Rustic doesn’t mean outdated. You can blend old and new for a fresh, timeless look. Pair your wood and metal island with:
- Modern appliances (stainless steel fridge, induction cooktop)
- Neutral backsplash (white subway tile, gray stone)
- Minimalist bar stools (black metal with wood seats)
The key is balance. Too much rustic can feel cluttered; too much modern can feel cold. Aim for a 60/40 or 70/30 split—more rustic, with modern accents to ground the space.
Top Rustic Wood and Metal Kitchen Island Ideas (With Real Examples)
| Style | Wood Type | Metal Type | Best For | Price Range |
|---|---|---|---|---|
| Farmhouse | Reclaimed pine | Black iron hairpin legs | Small to medium kitchens | $800–$1,500 |
| Industrial | Reclaimed oak | Black iron frame | Open-concept kitchens | $1,200–$2,500 |
| Modern Rustic | Walnut | Brushed nickel legs | Large kitchens with modern appliances | $1,500–$3,000 |
| Cottage | White-washed barn wood | Brass or copper accents | Sunlit kitchens, coastal homes | $900–$1,800 |
| DIY Project | New character-grade pine | Pre-made black iron legs | Homeowners on a budget | $400–$800 |
Whether you’re drawn to the simplicity of a DIY pine island or the elegance of a custom walnut design, a rustic wood and metal kitchen island offers a timeless blend of warmth, strength, and style. It’s more than a piece of furniture—it’s a gathering place, a workspace, and a reflection of your home’s personality. By choosing quality materials, thoughtful design, and a layout that suits your lifestyle, you can create a kitchen island that’s not just functional, but truly charming. So go ahead—embrace the grain, the metal, and the magic of rustic design. Your kitchen (and your guests) will thank you.
Frequently Asked Questions
What are the benefits of a rustic wood and metal kitchen island?
A rustic wood and metal kitchen island combines durability with timeless charm, offering sturdy construction and a warm, inviting aesthetic. The blend of natural wood and industrial metal adds character to your kitchen while providing functional storage and workspace.
How do I style a rustic wood and metal kitchen island in a modern kitchen?
Balance the rustic elements by pairing the island with sleek countertops, minimalist bar stools, and modern lighting fixtures. Use neutral tones or pops of color to create contrast while letting the island’s natural textures remain the focal point.
Can a rustic wood and metal kitchen island work in small kitchens?
Yes! Opt for a compact or mobile rustic wood and metal kitchen island to maximize space without sacrificing style. Look for designs with open shelving or built-in storage to keep clutter at bay.
What types of wood and metal are best for a rustic kitchen island?
Reclaimed wood, pine, or oak paired with black iron, brushed steel, or copper accents are popular choices for a rustic kitchen island. These materials age beautifully and enhance the vintage-inspired look.
Are rustic kitchen islands easy to clean and maintain?
Most rustic kitchen islands with sealed wood and powder-coated metal require only a damp cloth for cleaning. Regularly oiling wooden surfaces helps preserve their luster and prevents wear over time.
Where can I find unique rustic wood and metal kitchen island ideas?
Explore home decor blogs, Pinterest, or artisan marketplaces for DIY inspiration and handcrafted designs. Custom builders can also tailor a rustic wood and metal kitchen island to fit your space and style.