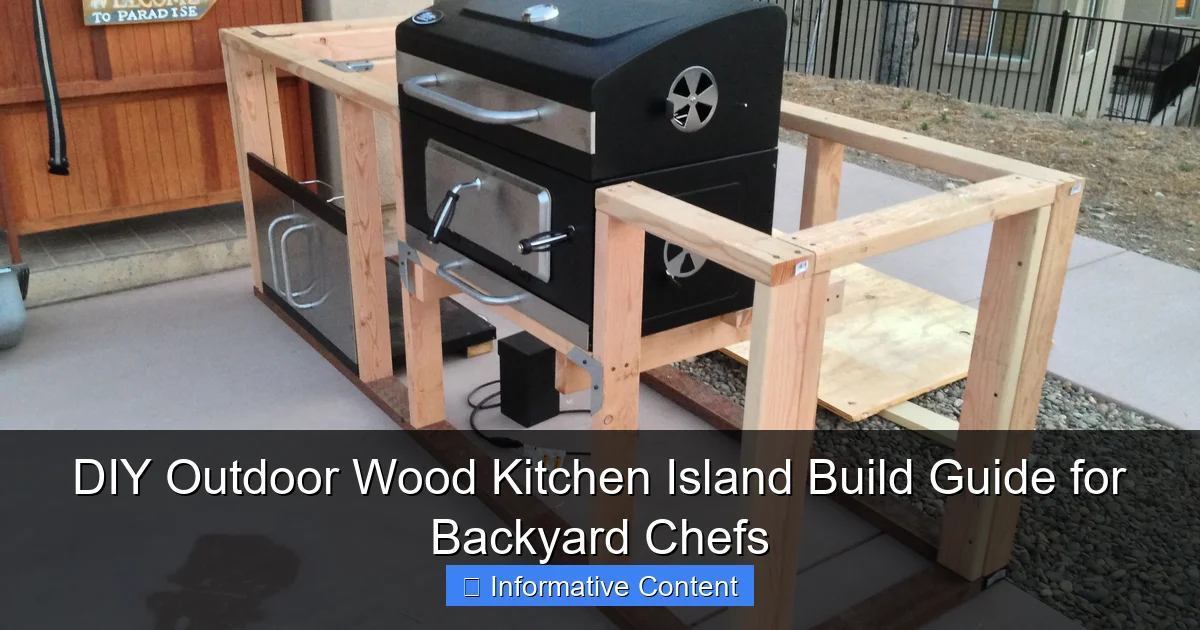
Featured image for diy outdoor wood kitchen island
Image source: i.pinimg.com
Transform your backyard into a chef’s paradise with this step-by-step DIY outdoor wood kitchen island build guide, designed for grilling enthusiasts and entertainers alike. Featuring weather-resistant materials, customizable storage, and built-in prep space, this project delivers professional-grade functionality using simple tools and beginner-friendly techniques. Perfect for elevating your outdoor cooking experience—without breaking the bank.
Key Takeaways
- Plan carefully: Measure your space and sketch a design before buying materials.
- Choose durable wood: Opt for cedar or teak to withstand outdoor elements.
- Prep for weather: Seal all surfaces with waterproofing products for longevity.
- Include storage: Add shelves or cabinets to keep tools organized and dry.
- Level the base: Use adjustable feet or shims for stability on uneven ground.
- Add mobility: Install casters with locks for easy movement and positioning.
- Maintain regularly: Reapply sealant yearly to preserve wood and finish.
📑 Table of Contents
- Why Every Backyard Chef Needs a DIY Outdoor Wood Kitchen Island
- Planning Your DIY Outdoor Wood Kitchen Island: Start Smart
- Tools, Materials, and Budget: What You’ll Need
- Step-by-Step Build Process: From Frame to Finish
- Design Ideas to Personalize Your Island
- Maintenance and Longevity: Keep Your Island Looking Sharp
- Final Thoughts: Your Outdoor Kitchen, Your Way
Why Every Backyard Chef Needs a DIY Outdoor Wood Kitchen Island
Picture this: golden sunset, the sizzle of marinated chicken on the grill, and the smell of fresh herbs wafting through the air. You’re not just cooking outside—you’re *entertaining*. But if you’re like me, you’ve probably spent more time running back and forth between your indoor kitchen and your grill than actually enjoying the party. That’s where a DIY outdoor wood kitchen island comes in. It’s not just a luxury; it’s a game-changer for anyone who loves to cook and host outdoors.
When I first started hosting summer barbecues, I realized how much time I wasted hauling plates, utensils, and condiments from the kitchen. I’d forget the tongs, drop the sauce bottle, and end up with a charred mess. Sound familiar? After building my first outdoor kitchen island from scratch, my entire cooking experience transformed. No more indoor-outdoor relay races. Now, everything I need is within arm’s reach—prep space, storage, and even a built-in cooler. And the best part? I did it all myself, on a budget, with basic tools. If you’ve ever dreamed of creating a functional, stylish outdoor cooking hub, this guide will walk you through every step—from planning to final sealant.
Planning Your DIY Outdoor Wood Kitchen Island: Start Smart
Before you grab a hammer, take a breath. A well-planned project saves time, money, and frustration. Think of your outdoor kitchen island like a puzzle—each piece has to fit perfectly with your space, needs, and lifestyle.
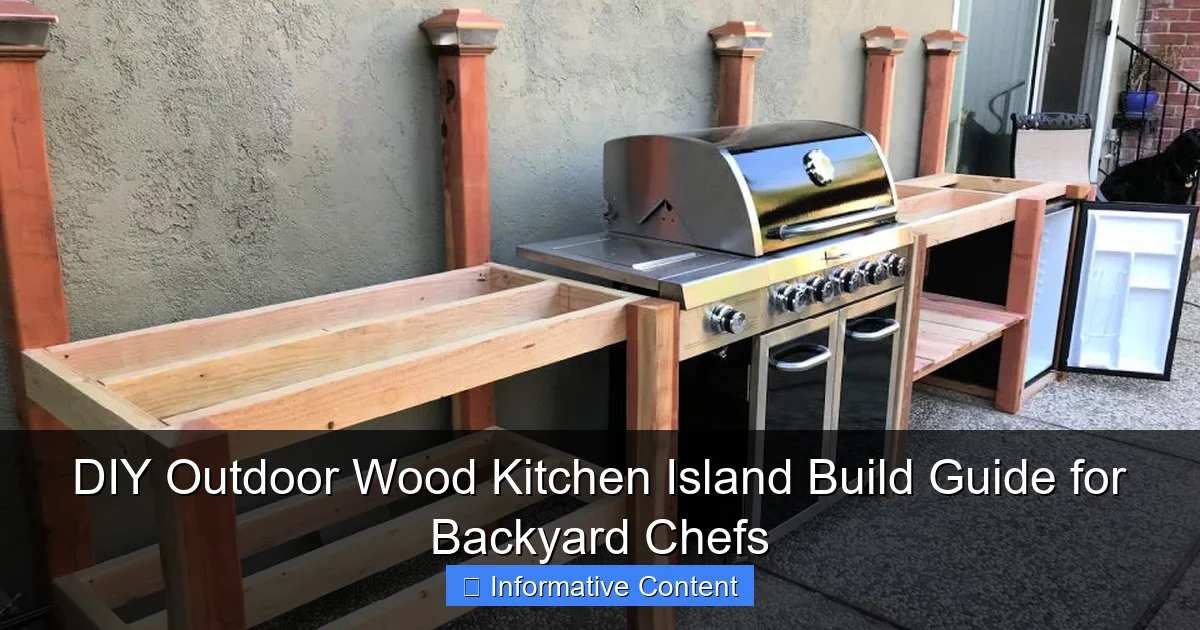
Visual guide about diy outdoor wood kitchen island
Image source: blitsy.com
Assess Your Backyard Layout
Start by measuring your outdoor space. You’ll need at least 3 feet of clearance on all sides for safe movement, especially when grilling. Consider the sun’s path—will your island be in direct sunlight all day? If so, plan for shade solutions like a pergola or umbrella. Also, check local building codes. Some areas require permits for permanent outdoor structures, especially if you’re adding plumbing or electrical.
Pro tip: Use painter’s tape to outline your island’s footprint on the ground. This “mock-up” helps visualize scale and flow. I once taped out a 6-foot island and realized it blocked my grill access. A simple tweak saved me from a costly rebuild.
Define Your Must-Have Features
What do you *really* need? Every backyard chef is different. Here are common features to consider:
- Prep surface: At least 24 inches deep for cutting and mixing.
- Storage: Drawers or cabinets for utensils, spices, and grill tools.
- Sink: Great for washing veggies or rinsing hands, but requires plumbing.
- Cooler or mini-fridge: Keeps drinks and marinades cold without indoor trips.
- Grill integration: Some islands are built around a freestanding grill.
- Seating: Add a countertop overhang with bar stools for social cooking.
I skipped a sink (plumbing was too complex) but added a built-in cooler. My guests love grabbing drinks without interrupting the cook—a small win that makes a big difference.
Choose Your Wood Type Wisely
Not all wood survives the outdoors. Here’s a quick breakdown:
- Cedar: Naturally rot-resistant, lightweight, and aromatic. A bit pricey but worth it for long-term durability.
- Redwood: Similar to cedar but harder to source. Excellent moisture resistance.
- Pressure-treated pine: Budget-friendly but can warp over time. Seal it thoroughly.
- Marine-grade plywood: For hidden frames or shelves. Resists moisture but not UV damage.
I used cedar for my island’s exterior and pressure-treated pine for the internal frame. The combo kept costs low while ensuring longevity.
Tools, Materials, and Budget: What You’ll Need
You don’t need a full workshop to build a sturdy outdoor kitchen island. A few essentials will do, and many can be borrowed or rented.
Essential Tools (No Fancy Gear Required)
- Circular saw or miter saw (for cutting wood)
- Drill with driver bits
- Tape measure and carpenter’s square
- Clamps (to hold pieces in place)
- Sander (orbital or hand-held)
- Level (for a wobble-free base)
- Safety gear (gloves, goggles, ear protection)
Real talk: I used a $50 circular saw from a big-box store and a hand-me-down drill. You don’t need pro tools—just patience and care.
Materials List (Customizable to Your Design)
- 4×4 pressure-treated posts (for legs)
- 2×4 and 2×6 cedar boards (for frame and countertop)
- 1/2-inch marine-grade plywood (for cabinet backs and shelves)
- Exterior-grade screws (3-inch for frame, 1.5-inch for trim)
- Exterior wood glue (for extra joint strength)
- Waterproof wood sealant (oil-based or polyurethane)
- Drawer slides and cabinet hinges (if adding storage)
- Optional: Tile, stone veneer, or stainless steel for countertop
My first island cost about $300 in materials (using reclaimed wood for the countertop). You can go higher-end with stone or metal, but wood keeps it warm and inviting.
Budget-Friendly Tips
- Shop end-of-season sales: Lumber prices drop in late summer.
- Use reclaimed wood: Check local salvage yards for character-rich pieces.
- Skip pre-made hardware: Build simple shelves instead of fancy organizers.
- Borrow tools: Ask friends or use tool libraries.
I found a stack of cedar planks at a construction site’s “free pile”—score! Just sand and seal thoroughly.
Step-by-Step Build Process: From Frame to Finish
Now, the fun part: building! I’ll walk you through my proven method. This design is modular, so you can adapt it to your needs.
Step 1: Build the Base Frame
Start with a 24-inch high frame (standard countertop height). Use 4×4 posts for legs and 2x4s for the top/bottom rails. Assemble the rectangle with exterior screws and wood glue. Reinforce corners with metal brackets. Use a level to ensure it’s perfectly flat—uneven legs cause wobbly countertops.
My mistake: I once rushed this step and ended up with a crooked island. Lesson learned: take time to level *before* attaching the next piece.
Step 2: Add Support Beams and Shelves
For a 6-foot island, add a center support beam (2×4) to prevent sagging. Attach 1/2-inch plywood shelves between the legs for storage. Use cleats (small wood strips) to secure shelves—no sagging!
For a cooler compartment, leave an open section and line it with food-safe plastic or stainless steel.
Step 3: Install the Countertop
For a classic wood look, glue and screw 2×6 cedar boards side-by-side. Sand thoroughly and seal *before* attaching. For durability, consider a tile or stone veneer over plywood. I used reclaimed teak for my countertop—beautiful, but required extra sanding to smooth the old finish.
Pro tip: Leave a 1/8-inch gap between boards for expansion in humid weather.
Step 4: Build and Install Storage
For drawers: Use 1/2-inch plywood. Attach slides to the frame, then build the drawer box to fit snugly. For cabinets: Cut doors from cedar and attach with exterior hinges. Add magnetic latches to keep them closed in wind.
I made a “hidden” drawer for grilling tools—no more rusted tongs on the counter!
Step 5: Seal and Protect
This step is *critical*. Sand the entire island with 120-grit paper. Wipe away dust. Apply 2-3 coats of exterior sealant, sanding lightly between coats. Use a brush for corners and a roller for flat surfaces. I prefer oil-based sealants (like tung oil)—they penetrate deeper than polyurethane.
Warning: Don’t skip sealing. My first island warped after one rainy season because I rushed this step.
Design Ideas to Personalize Your Island
Your island should reflect your style. Here are ways to make it uniquely yours—without breaking the bank.
Countertop Upgrades
- Butcher block: Warm, rustic, and knife-friendly. Re-sand and reseal annually.
- Tile mosaic: Use outdoor-rated tiles for a colorful, easy-to-clean surface.
- Concrete overlay: Pour a thin layer over plywood for a modern look.
- Reclaimed wood: Adds character. Seal thoroughly to prevent splinters.
I love my teak countertop, but if I were building today, I’d try a tile-and-wood hybrid—tile for the prep zone, wood for serving.
Storage Hacks for Backyard Chefs
- Vertical spice rack: Mount a small cedar board with spice jars.
- Tool caddy: Use a magnetic strip for metal utensils.
- Hanging hooks: Install under the countertop for aprons or towels.
- Pull-out trash bin: Keep cleanup easy.
My favorite hack? A “condiment carousel” in a drawer—no more lost bottles!
Lighting and Ambiance
- String lights: Drape around the island for evening gatherings.
- Under-counter LED strips: Illuminate the prep area.
- Solar-powered path lights: Guide guests at night.
I added solar puck lights under my overhang—perfect for late-night burgers.
Maintenance and Longevity: Keep Your Island Looking Sharp
Wood is beautiful but needs care. Follow these tips to protect your investment.
Seasonal Maintenance Checklist
| Season | Task |
|---|---|
| Spring | Inspect for warping, loose screws, or sealant cracks. Tighten hardware. Clean with mild soap and water. |
| Summer | Reapply sealant if needed (especially after heavy rain). Check drawer slides for debris. |
| Fall | Remove leaves and debris from under the island. Store cushions (if any). |
| Winter | Cover with a breathable tarp (not plastic). Move to a sheltered area if possible. |
I learned the hard way: my first island’s sealant cracked after one winter because I used a non-breathable cover. Moisture built up and caused mildew. Now I use a canvas tarp with ventilation flaps.
Quick Fixes for Common Issues
- Wobbly legs: Add shims under one leg or tighten all screws.
- Sticky drawers: Clean slides with a damp cloth and dry thoroughly.
- Water spots: Sand lightly and reseal.
- Sun damage: Sand and refinish if the wood looks bleached.
For minor scratches, rub with a walnut (yes, the nut!)—its oils help blend the mark.
When to Replace vs. Repair
Wood can last 10+ years with care. Replace if:
- Legs are cracked or rotting
- Countertop has deep gouges or warping
- Sealant fails repeatedly despite maintenance
I’ve repaired my island twice in 5 years—once for a warped shelf and once for a loose drawer. Both took under an hour.
Final Thoughts: Your Outdoor Kitchen, Your Way
Building a DIY outdoor wood kitchen island isn’t just about creating a workspace—it’s about crafting a lifestyle. It’s the freedom to cook without indoor distractions. The joy of sharing meals under the stars. The pride of saying, “I built this.” My island has hosted everything from birthday parties to quiet family dinners, and it’s become the heart of my backyard.
Remember: perfection isn’t the goal. I still have a slightly uneven drawer and a few battle scars from early mistakes. But those flaws? They’re part of the story. Your island should feel lived-in, not like a showroom piece. So embrace imperfections. Use what you have. And don’t wait for “perfect” conditions—start today.
Whether you’re a seasoned DIYer or a first-timer, this project is doable. Break it into steps. Celebrate small wins (like your first perfectly level frame). And most importantly, cook on it! The best way to test your island is by grilling a burger, slicing a tomato, and pouring a drink—all without leaving your outdoor oasis. Happy building, backyard chef. Your kitchen adventure starts now.
Frequently Asked Questions
What materials do I need to build a DIY outdoor wood kitchen island?
You’ll need pressure-treated or cedar wood for durability, stainless steel screws, a weatherproof sealant, countertop materials (like tile or stone), and basic tools such as a saw, drill, and level. Don’t forget outdoor-rated cabinet hardware for storage compartments. These materials ensure your DIY outdoor wood kitchen island withstands weather and heavy use.
How do I make my outdoor wood kitchen island weather-resistant?
Use rot-resistant wood like cedar or redwood, and apply a high-quality exterior sealant every 1-2 years. Elevate the base slightly with adjustable feet or a concrete pad to prevent water pooling. This protects your DIY outdoor wood kitchen island from moisture damage and warping.
Can I add a sink or grill to my DIY outdoor kitchen island?
Yes! Plan for plumbing and gas line access during construction, and use waterproof underlayment for sinks. Ensure your design includes proper ventilation for grills and check local codes for safety requirements. This transforms your island into a fully functional outdoor cooking hub.
What are the best countertop options for an outdoor wood kitchen island?
Granite, slate, or concrete countertops are durable and heat-resistant, while porcelain tiles offer a budget-friendly alternative. Seal natural stone regularly to prevent stains. Choose materials that complement your island’s design and withstand outdoor elements.
How much does it cost to build a DIY outdoor wood kitchen island?
Costs range from $300 to $1,000+, depending on materials (e.g., premium wood vs. treated pine) and add-ons like sinks or grills. DIY saves labor costs, and repurposing materials can lower expenses. Budget wisely for long-term durability.
What design tips maximize functionality in a small outdoor kitchen island?
Incorporate fold-down shelves, built-in trash bins, or pull-out cutting boards to save space. Use vertical storage for utensils and opt for multi-level countertops to separate prep and cooking zones. Prioritize compact, versatile features for efficient use of limited space.