
Featured image for diy rustic wood kitchen island
Image source: i.pinimg.com
Transform your kitchen with a stunning DIY rustic wood kitchen island that adds charm, functionality, and value to your home—no expert skills required. This easy build guide walks you through simple steps, affordable materials, and customizable designs to create a one-of-a-kind centerpiece that perfectly fits your space and style.
Key Takeaways
- Plan carefully: Measure your space and sketch a design before starting.
- Choose quality wood: Use reclaimed or solid wood for durability and rustic charm.
- Prep materials properly: Sand and seal wood to prevent warping and stains.
- Use simple joinery: Pocket holes or butt joints make assembly beginner-friendly.
- Add functional storage: Include shelves, hooks, or drawers for practical use.
- Finish with care: Apply wax or oil to enhance grain and protect surfaces.
📑 Table of Contents
Why a DIY Rustic Wood Kitchen Island is the Heart of Your Home
There’s something magical about a rustic wood kitchen island. It’s not just a piece of furniture—it’s a gathering spot, a workspace, and often the emotional center of the home. I remember the first time I hosted a dinner party in my tiny kitchen. The counter space was barely enough for prep, and my guests hovered awkwardly near the stove. That night, I vowed to build a kitchen island that could double as a prep zone and a conversation hub. Fast-forward six months, and I had a DIY rustic wood kitchen island made from reclaimed barn wood, complete with a butcher block top and open shelving. It transformed not just the look of my kitchen, but how we used it.
If you’ve ever felt cramped in your kitchen or wished you had a spot to gather with family over coffee, a rustic wood island could be your answer. The best part? You don’t need to be a master woodworker or spend a fortune. With the right plan, tools, and a weekend (or two), you can build a beautiful, functional island that adds charm, storage, and value to your home. This guide walks you through every step—from choosing materials to adding the finishing touches—so you can create a space that feels warm, lived-in, and uniquely yours.
Planning Your DIY Rustic Wood Kitchen Island
Assess Your Kitchen Layout and Needs
Before you pick up a hammer, take a good look at your kitchen. Where do you want the island to go? How much space do you have? A good rule of thumb is to leave at least 36 to 42 inches of clearance around the island so people can move comfortably. If you’re tight on space, consider a smaller island with wheels (more on that later).
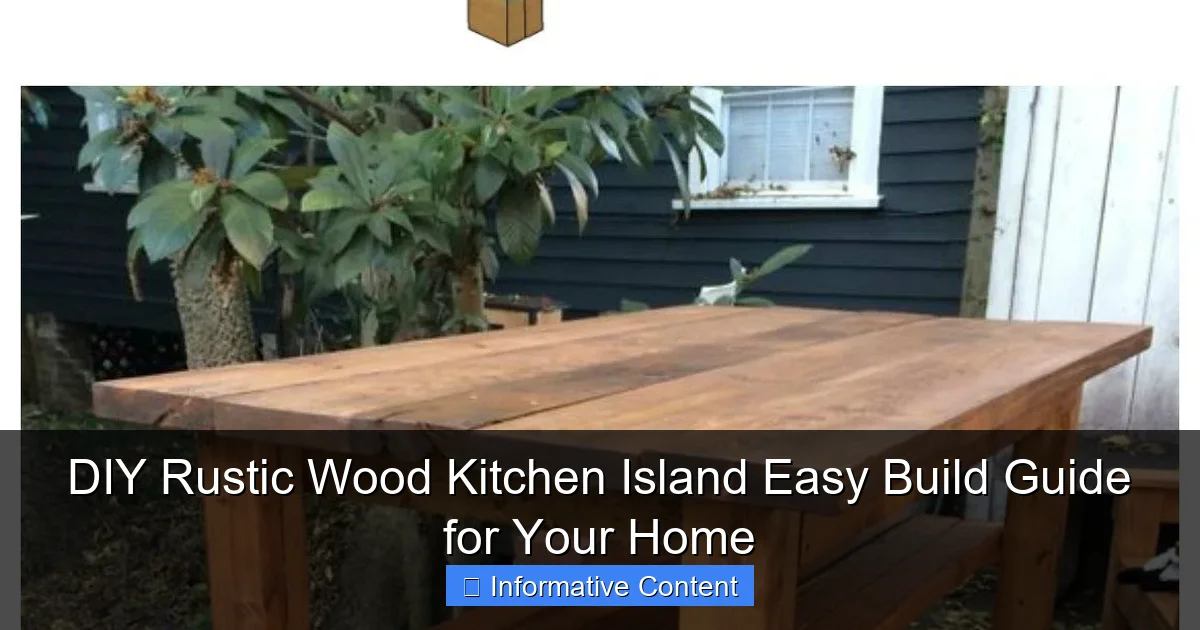
Visual guide about diy rustic wood kitchen island
Image source: i.pinimg.com
Think about how you use your kitchen. Do you need extra counter space for baking? Storage for pots and pans? A breakfast bar? For example, my island has a 12-inch overhang on one side for two bar stools—perfect for quick meals. I also added open shelves below for cookbooks and baskets of onions and potatoes. Make a list of your must-haves. This will guide your design and keep you from overbuilding (or underbuilding) your island.
Choosing the Right Size and Shape
Kitchen islands come in all shapes and sizes. The most common are rectangular, but L-shaped or U-shaped islands can work in larger kitchens. For a rustic look, stick to clean lines and simple geometry—no need for fancy curves unless you’re feeling ambitious.
- Small kitchens (under 150 sq ft): Aim for 30–40 inches wide and 20–30 inches deep. Add casters (wheels) for flexibility.
- Medium kitchens (150–250 sq ft): 40–60 inches wide and 30–40 inches deep. You can include a sink or cooktop if space allows.
- Large kitchens (250+ sq ft): Go bold—60+ inches wide with multiple zones (prep, dining, storage).
Pro tip: Tape off the island’s footprint on your floor with painter’s tape. Live with it for a day. Does it block traffic? Feel too big or too small? Adjust before cutting any wood.
Deciding on Style and Features
“Rustic” means different things to different people. Some love the raw, weathered look of reclaimed wood. Others prefer a more polished farmhouse vibe. Here’s how to nail the style:
- Reclaimed wood: Full of character—knots, cracks, and nail holes. Best for a true rustic feel.
- New wood with distressing: Sand edges, use a wire brush, and apply a dark wax to mimic age.
- Butcher block countertop: Adds warmth and is great for food prep. Maple or walnut are durable choices.
- Open vs. closed storage: Open shelves show off baskets and jars. Closed cabinets hide clutter. I used both—open shelves for daily-use items and a small cabinet for less attractive tools.
Also, consider adding a breakfast bar (overhang of 10–12 inches) or a drop-down leaf for extra space when needed. One reader told me they added a fold-down leaf to their island—perfect for holiday dinners when space is tight.
Materials and Tools You’ll Need
Wood Selection: Rustic Doesn’t Mean Rough
For a DIY rustic wood kitchen island, your wood choice is key. But “rustic” doesn’t mean you have to use splintery, warped boards. Here are your best options:
- Reclaimed barn wood: Authentic and full of history. Look for local salvage yards or online marketplaces. Sand well to remove dirt and old finishes.
- Pine or poplar (new wood): Affordable and easy to work with. Use a wire brush and dark stain to fake the rustic look.
- Oak or maple: Great for countertops—hard, smooth, and resistant to knife marks.
- Butcher block slabs: Pre-made countertops (sold at big-box stores) save time. Just sand and seal.
For my island, I used reclaimed pine for the base and a 1.5-inch-thick maple butcher block for the top. The contrast was stunning—rough wood below, smooth surface above. I also added metal pipe legs (from a local hardware store) for an industrial-rustic hybrid look.
Essential Tools for the Build
You don’t need a full workshop, but here’s what I recommend:
- Power tools: Circular saw or miter saw, drill/driver, orbital sander, Kreg Jig (for pocket holes).
- Hand tools: Tape measure, square, clamps, chisels, hammer.
- Safety gear: Safety glasses, ear protection, dust mask.
- Fasteners and hardware: Wood screws (2.5” and 1.25”), pocket hole screws, L-brackets, wood glue, sandpaper (80, 120, 220 grit).
Pro tip: Rent a miter saw if you don’t own one. It makes precise angle cuts a breeze. And always wear safety gear—sawdust and flying wood chips are no joke.
Optional Upgrades and Add-Ons
Want to level up your island? Consider these extras:
- Casters (wheels): 2-inch locking casters make the island mobile. Great for small kitchens.
- Pull-out drawers or trays: Use full-extension drawer slides for easy access.
- Metal pipe legs or brackets: Adds an industrial edge. I used 2-inch black iron pipes—simple and sturdy.
- Under-cabinet lighting: LED strip lights under the countertop add ambiance and task lighting.
One friend added a built-in wine rack to her island. Another installed a small prep sink. These upgrades take more time, but they’re worth it if you use them daily.
Step-by-Step Construction Guide
Step 1: Cut and Assemble the Frame
Start with the base frame. This is the skeleton of your island. I used 2x4s for the legs and 2x6s for the horizontal supports. Here’s how:
- Cut four legs (your desired height—mine were 34 inches for a standard counter height).
- Cut two front/back aprons (length of island minus 3 inches for the legs).
- Cut two side aprons (width of island minus 3 inches).
- Use a Kreg Jig to drill pocket holes at the ends of the aprons.
- Assemble the rectangle: Attach aprons to legs with 2.5-inch pocket hole screws and wood glue. Use a square to keep corners at 90 degrees.
Pro tip: Clamp everything before screwing. A misaligned corner is hard to fix later.
Step 2: Add the Sides and Back Panels
Now cover the frame with rustic wood. I used 6-inch-wide reclaimed pine boards. Here’s the process:
- Measure and cut boards to fit the front, sides, and back.
- Pre-drill holes to avoid splitting (especially in reclaimed wood).
- Attach boards to the frame with 1.25-inch screws every 6–8 inches. Stagger seams for a more natural look.
- For a “floating” effect, leave a 1/4-inch gap between boards.
I left the back panel open to add shelves later. You can also use beadboard or shiplap for a different texture.
Step 3: Install the Countertop
This is the fun part! For my butcher block top:
- Place the countertop on the frame. Center it, leaving a 1-inch overhang on all sides.
- Secure it with L-brackets underneath (one at each corner and every 16 inches).
- Sand the top with 80, 120, and 220-grit sandpaper. Wipe clean.
- Apply food-safe mineral oil or butcher block conditioner. I reapply every 3 months to keep it looking fresh.
For a reclaimed wood top, seal with polyurethane or a mix of linseed oil and beeswax. Avoid water-based finishes—they can raise the grain.
Step 4: Add Shelves, Drawers, or Cabinet Doors
Storage is what makes an island functional. For my open shelves:
- Cut shelf boards to size (I used 1×12 pine).
- Install shelf pins or cleats inside the frame. Use a level to ensure shelves are flat.
- Add metal brackets for extra support (optional).
For a drawer:
- Build a drawer box with 1/2-inch plywood.
- Attach full-extension slides to the frame and drawer.
- Add a rustic wood front and a simple knob.
I used a mix of open shelves (for display) and a small cabinet (for hiding junk). The cabinet had a reclaimed wood door with a vintage latch—total cost: $12.
Finishing Touches for a True Rustic Look
Sanding, Staining, and Sealing
Don’t skip this step! Even reclaimed wood needs love. Here’s my process:
- Sand: Start with 80-grit to smooth rough spots. Finish with 220-grit for a buttery feel.
- Clean: Wipe with a damp cloth. Let dry completely.
- Stain (optional): I used a dark walnut gel stain on the base. It enhanced the grain without hiding the character.
- Seal: For the base, I used matte polyurethane (2 coats). For the countertop, mineral oil every 3 months.
Pro tip: Test stains and finishes on scrap wood first. I once ruined a board by applying too much stain—less is more!
Adding Rustic Details and Hardware
Little touches make a big difference. Try these:
- Distressing: Hit edges with a hammer or chain to create dents. Use a wire brush to rough up the surface.
- Dark wax: Apply with a cloth to deepen crevices and give an aged look.
- Hardware: Black iron pulls, vintage latches, or leather straps. I used 4-inch iron bin pulls—$3 each at a salvage shop.
- Legs: Metal pipes, hairpin legs, or chunky turned wood. I love the contrast of rough wood with sleek metal.
One reader added a “live edge” slab to her island top. It cost a bit more, but the organic shape became the focal point of her kitchen.
Lighting and Accessories
Your island isn’t complete without the right lighting. I hung two vintage-style pendant lights above mine—perfect for evening meals. For a budget-friendly option, use clip-on LED lights under the countertop.
Accessories matter too:
- Place a wooden cutting board or a ceramic pitcher on the countertop.
- Fill open shelves with woven baskets, cast-iron skillets, or a small herb garden.
- Add a chalkboard or corkboard for notes and recipes.
My island has a small hook for my favorite apron—functional and decorative.
Common Mistakes to Avoid and Pro Tips
Don’t Skip the Planning Phase
I’ve seen too many DIYers jump straight into cutting wood. Big mistake. A poorly planned island can:
- Block kitchen traffic.
- Look out of scale with your space.
- Have awkward storage (e.g., shelves too high to reach).
Take the time to sketch your design, measure twice, and tape the footprint. One friend built an island that was 6 inches too wide—she had to redo the entire frame.
Balance Rustic with Functionality
Rustic wood is beautiful, but it can be fragile. Avoid:
- Using soft wood for countertops: Pine scratches easily. Use hardwood or butcher block instead.
- Over-distressing: Too many dents and cracks can make the island look broken, not charming.
- Skimping on sealing: Unsealed wood absorbs spills and stains. Seal every 6 months.
Pro tip: For high-wear areas (like the countertop), use a durable finish. I love Rubio Monocoat—it’s eco-friendly and resists water and heat.
Data Table: Cost Comparison for DIY vs. Pre-Made Rustic Islands
| Component | DIY Cost (Average) | Pre-Made Cost (Average) | DIY Savings |
|---|---|---|---|
| Wood (reclaimed pine + butcher block) | $150–$250 | $400–$800 | 50–60% |
| Hardware (screws, brackets, pulls) | $50–$100 | $100–$200 | 40–50% |
| Countertop (butcher block or live edge) | $100–$300 | $300–$1,000 | 60–70% |
| Tools (rental or purchase) | $0–$200 | N/A | N/A |
| Total | $300–$850 | $800–$2,000+ | 60% average savings |
Note: DIY costs vary by location and wood source. Reclaimed wood from salvage yards is often cheaper than new lumber.
Pro Tips from Experienced DIYers
- Work in stages: Build the frame one day, attach panels the next, etc. Rushing leads to mistakes.
- Ask for help: Lifting a heavy countertop is easier with two people.
- Embrace imperfections: Rustic means “not perfect.” A slightly uneven shelf adds character.
- Label parts: Use painter’s tape to mark which board goes where. Saves time during assembly.
One reader shared that she built her island with her teenage son. It became a bonding project—and a lifelong memory.
Final Thoughts: Your Island, Your Story
Building a DIY rustic wood kitchen island isn’t just about adding storage or counter space. It’s about creating a piece of furniture that tells a story—your story. Every scratch, every knot, every handmade drawer pull becomes part of your home’s history. I still smile when I see the small chip in the countertop where my daughter dropped a spoon. It’s not a flaw; it’s a memory.
This project is totally doable, even if you’re new to DIY. Start small. Use simple tools. And don’t be afraid to ask for help. The best part? You’ll save hundreds (or thousands) compared to buying a pre-made island. Plus, you’ll have the pride of saying, “I built that.”
So grab your tape measure, dust off your saw, and get started. Your dream kitchen is just a weekend away. And when you’re sipping coffee at your new island, surrounded by loved ones, you’ll know it was worth every minute. Happy building!
Frequently Asked Questions
What materials do I need to build a DIY rustic wood kitchen island?
You’ll need reclaimed or new wood planks, a saw, sandpaper, wood screws, a drill, stain or paint, and a sealant. Adding casters or a butcher block top can enhance functionality and style. This project is perfect for using leftover materials or affordable lumber.
How do I ensure my rustic wood kitchen island is sturdy?
Use a solid wood frame (like 2x4s) for support and reinforce joints with screws or wood glue. Adding cross braces or a back panel will prevent wobbling and ensure long-term durability.
Can I customize the size of my DIY rustic wood kitchen island?
Absolutely! Adjust the dimensions based on your kitchen layout and needs—just ensure the base is level and the top is securely attached. A standard height is 36 inches, but tailor it to your preference.
What tools are essential for building a DIY rustic wood kitchen island?
Essential tools include a circular or miter saw, drill, tape measure, level, and sanding block. Optional tools like a pocket hole jig or clamps can simplify assembly and improve precision.
How do I finish the wood to achieve a rustic look?
Sand the wood lightly to smooth edges, then apply a dark walnut or gray stain for an aged effect. Seal with matte polyurethane or wax to protect the surface while maintaining the rustic charm.
Can I add wheels to my rustic wood kitchen island for mobility?
Yes! Install locking casters on the base for easy movement and stability. Ensure the wheels are rated for your island’s weight and match the rustic aesthetic with black or antique-style hardware.