Featured image for this comprehensive guide about how to build kitchen island cabinets
Image source: uscabinetsonline.com
The kitchen isn’t just a place to cook; it’s the heart of the home, a gathering spot, a homework station, and often, the command center for daily life. And at the center of many modern kitchens stands the majestic kitchen island. More than just a workspace, a well-designed island provides crucial storage, additional seating, and enhances the overall flow and aesthetics of your culinary domain. But what if you dream of a custom island, one that perfectly fits your space and needs, without the hefty price tag of a professional build or the limitations of pre-made options?
The answer, dear DIY enthusiast, lies in learning how to build kitchen island cabinets yourself. Embarking on this project might seem daunting at first glance, but with the right guidance, tools, and a dash of determination, you can create a stunning and highly functional piece that not only saves you a significant amount of money but also fills you with immense pride. Imagine having a kitchen island precisely tailored to your desired dimensions, storage requirements, and aesthetic preferences – a true reflection of your personal style.
This comprehensive guide will walk you through every step of the process, from initial design concepts to the final finishing touches. We’ll cover everything you need to know to successfully build custom kitchen island cabinets that look professional and stand the test of time. Get ready to unleash your inner carpenter and transform your kitchen with a DIY project that adds incredible value and functionality.
Quick Answers to Common Questions
Can I really build kitchen island cabinets myself?
Absolutely! Building your own kitchen island cabinets is a totally achievable DIY project for many homeowners, even beginners. With a clear plan and the right guidance, you’ll be surprised how satisfying and cost-effective it can be!
What are the most essential tools I’ll need to get started?
You’ll mostly need basic woodworking tools like a circular saw (or table saw if you have one), a drill, a tape measure, a level, and some clamps. These will be your best friends when constructing your kitchen island cabinets.
What’s the best material to use for the frame of my kitchen island cabinets?
Plywood is generally the top choice for the sturdy frame of your kitchen island cabinets due to its stability, strength, and affordability. For finished surfaces, you can then add veneer plywood, MDF, or solid wood.
How do I figure out the right size and layout for my kitchen island cabinets?
Start by carefully measuring your kitchen space, ensuring you have adequate clearance for walking and opening appliance doors. Think about the primary function of your kitchen island cabinets – seating, storage, or a workstation – to guide your design choices.
What’s the very first step once I decide to build kitchen island cabinets?
The crucial first step is planning and design! Sketch out your ideas, determine the dimensions, and decide on the features and style you want for your new kitchen island cabinets before you even buy a single piece of wood.
📋 Table of Contents
- Why Build Your Own Kitchen Island Cabinets? The Benefits Are Abundant!
- Planning and Design: The Foundation of Your Dream Island
- Gathering Your Tools and Materials
- The Step-by-Step Guide to Building Your Kitchen Island Cabinets
- Finishing Touches and Installation
- Budgeting Your DIY Kitchen Island Cabinet Project
- Conclusion: Your Dream Kitchen Island Awaits!
Why Build Your Own Kitchen Island Cabinets? The Benefits Are Abundant!
Deciding to build kitchen island cabinets yourself is more than just a home improvement project; it’s an investment in your home and your skills. The advantages extend far beyond mere cost savings.
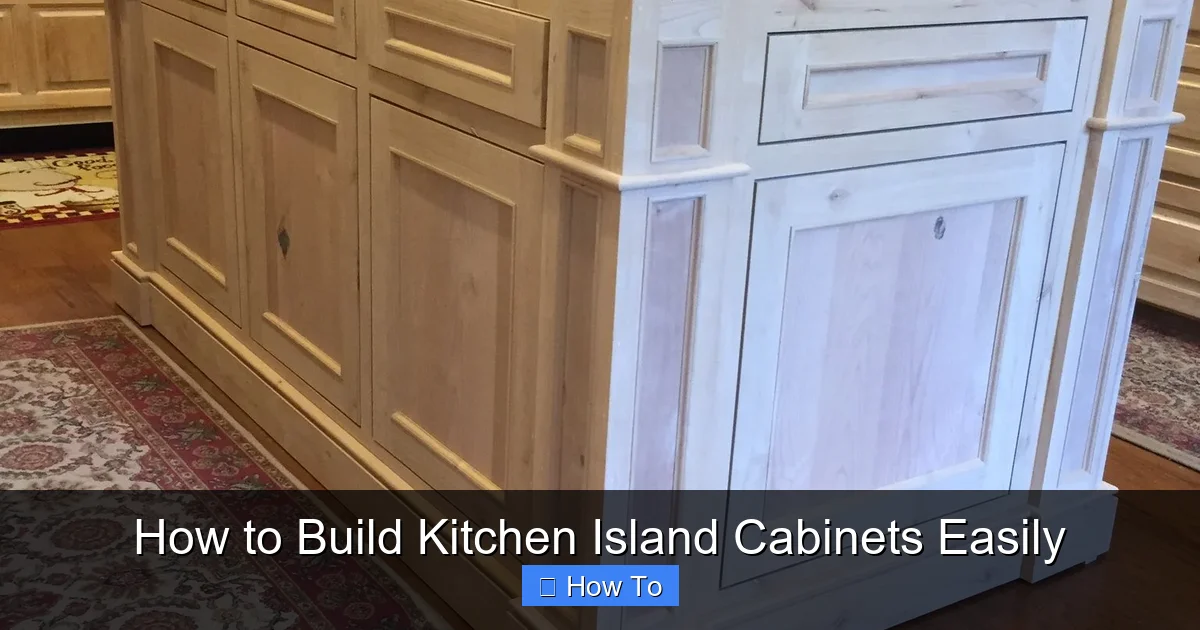
Learn more about how to build kitchen island cabinets – How to Build Kitchen Island Cabinets Easily
Image source: i.pinimg.com
Customization Beyond Compare
- Tailored Dimensions: No more trying to fit a standard-sized island into an awkward space. You can build your island to the exact length, width, and height that perfectly suits your kitchen layout and your family’s needs.
- Personalized Storage Solutions: Do you need deep drawers for pots and pans? Open shelving for cookbooks? A dedicated wine rack? Perhaps a built-in waste bin? When you DIY kitchen island cabinets, you dictate every detail, ensuring your island serves your specific storage requirements.
- Aesthetic Harmony: Match your existing cabinetry, experiment with a complementary style, or create a bold focal point. You have complete control over materials, finishes, and hardware, ensuring your island seamlessly integrates with or dramatically elevates your kitchen’s design.
Significant Cost Savings
One of the most compelling reasons to build your own kitchen island cabinets is the financial benefit. Pre-made islands, especially those with custom features, can be incredibly expensive. Hiring a contractor to build a custom island can further inflate costs due to labor. By taking on the project yourself, you can:
| Project Aspect | DIY Estimates & Details | Important Notes |
|---|---|---|
| Difficulty Level | Moderate to Advanced | Basic box construction is simpler; adding drawers, doors, or custom features increases complexity significantly. |
| Estimated Time | 30-60 Hours | Varies based on design complexity, existing skill level, and tool availability. This includes planning, cutting, assembly, and finishing. |
| Material Cost | $300 – $1,500+ (for cabinet carcass & hardware) | Excludes countertop, appliances, and plumbing. Primary costs include plywood, lumber, fasteners, hinges, drawer slides, and finishes. |
| Required Tools | Table saw, Miter saw, Drill, Sander, Clamps, Measuring tools, Safety gear | Precision cuts are crucial for a professional look. Specialized jigs (e.g., pocket hole jig) can simplify assembly. |
| Skill Level | Basic to Intermediate Woodworking | Familiarity with accurate measurements, joinery techniques, and power tool safety is essential for success. |
- Save on Labor: Labor costs often account for 30-50% of a remodeling project. Doing it yourself eliminates this significant expense.
- Control Material Costs: You choose the materials, allowing you to balance quality with budget. You can opt for high-end plywood and solid wood or find more economical alternatives without compromising structural integrity.
On average, a homeowner can save between 30% to 60% by building their own kitchen island compared to purchasing a pre-fabricated unit or hiring a professional. According to Remodeling Magazine’s Cost vs. Value Report, even a minor kitchen remodel can recoup around 77.6% of its cost, and adding functional, custom elements like an island can significantly enhance that value.
The Satisfaction of a DIY Project
There’s an undeniable sense of accomplishment that comes with creating something beautiful and functional with your own hands. Every time you chop vegetables, gather around for a meal, or store items in your new island, you’ll be reminded of your skill and effort. It’s a truly rewarding experience that adds a unique story to your home.
Planning and Design: The Foundation of Your Dream Island
Before you even pick up a saw, meticulous planning and design are paramount. This stage will save you time, money, and frustration down the line. A well-thought-out plan ensures your DIY kitchen island cabinets are functional, beautiful, and perfectly suited to your space.

Learn more about how to build kitchen island cabinets – How to Build Kitchen Island Cabinets Easily
Image source: domesticblonde.com
Assess Your Space and Needs
Consider the following critical questions:
- Size and Placement: How much space do you have? You’ll need at least 36-42 inches of clearance around all sides of the island for comfortable movement. A common island depth is 24-30 inches, and length can vary greatly. Standard countertop height is 36 inches, but you might consider a raised bar seating area.
- Primary Function: Will it be mainly for food prep? Dining? Storage? A combination? This will dictate the design.
- Storage Requirements: List everything you want to store in your island. This helps determine the number and size of drawers, shelves, and cabinets.
- Appliances/Utilities: Do you want a sink, cooktop, or dishwasher in your island? If so, you’ll need to factor in plumbing and electrical considerations, which might require professional assistance.
- Seating: If you plan for seating, how many people? Allow at least 24 inches of width per person and 12-15 inches of overhang for comfortable legroom.
Sketching and Blueprints for Your Kitchen Island Cabinets
Once you have a clear vision, it’s time to translate it into a design. You don’t need to be an architect; a detailed sketch will suffice. For more complex designs, free online kitchen planners or even graph paper can be incredibly helpful.
- Draw from multiple angles: Include a top-down view showing dimensions, and front/side views detailing cabinet doors, drawers, and shelving.
- Label everything: Mark dimensions, material choices, and any specific features.
- Consider modularity: Often, building separate cabinet boxes and then joining them together is easier than one massive unit. This also makes future modifications simpler.
Material Selection for Cabinet Building
The choice of materials will impact the durability, appearance, and cost of your kitchen island cabinets.
- Cabinet Carcass: Plywood is generally superior to MDF or particle board for structural integrity, moisture resistance, and screw-holding power. High-grade ¾-inch hardwood plywood (like birch or maple) is an excellent choice.
- Face Frames: Solid hardwood (poplar, maple, oak, cherry) is ideal for face frames as it offers strength and stability for attaching doors and drawers.
- Drawer Boxes: ¾-inch plywood for sides and ½-inch for bottoms. Dovetail joints are strongest, but dadoes and screws also work well.
- Door Panels: Plywood, MDF, or solid wood panels. Shaker style (rail and stile) is popular and relatively easy to build.
- Countertop: Butcher block (DIY-friendly), laminate, granite, quartz, or concrete. Choose based on aesthetics, durability, and budget.
Gathering Your Tools and Materials
Having the right tools and high-quality materials will make your project go smoothly and ensure a professional finish. Don’t skimp here; good tools are an investment.
Essential Tools for Building Kitchen Island Cabinets
- Measuring and Marking:
- Tape Measure
- Pencil
- Speed Square or Combination Square
- Long Straight Edge (4-foot level or similar)
- Marking Knife (for precise cuts)
- Cutting Tools:
- Circular Saw with a good quality blade (for breaking down plywood sheets)
- Table Saw (highly recommended for accurate, repeatable cuts, especially for face frames and dados)
- Miter Saw (for precise crosscuts on face frame pieces)
- Jigsaw (for curves or cutouts, if needed)
- Drilling and Fastening:
- Cordless Drill/Driver
- Impact Driver
- Drill Bit Set
- Countersink Bit
- Kreg Jig (pocket hole jig – highly recommended for strong, hidden joinery)
- Clamps (bar clamps, C-clamps – you can never have too many!)
- Shaping and Finishing:
- Router with bits (for edge profiles, dadoes, rabbets)
- Orbital Sander with various grits of sandpaper
- Wood Glue
- Screws (various sizes for plywood, face frames, hardware)
- Nail Gun (brad or finish nailer for trim and decorative pieces)
- Safety Gear:
- Safety Glasses
- Hearing Protection
- Dust Mask
Material Checklist (Quantities will vary by design)
- ¾-inch Hardwood Plywood (for cabinet carcasses)
- ½-inch Plywood (for drawer bottoms, possibly shelving)
- Solid Hardwood Stock (for face frames, door stiles/rails)
- Wood Glue
- Wood Screws (various sizes, self-tapping recommended)
- Pocket Hole Screws (if using a Kreg Jig)
- Drawer Slides (full extension recommended)
- Cabinet Hinges (concealed hinges are popular for a clean look)
- Cabinet Pulls/Knobs
- Edge Banding (for exposed plywood edges)
- Wood Filler
- Sandpaper (various grits)
- Primer and Paint/Stain and Topcoat
- Countertop Material
- Baseboard or Toekick Material
The Step-by-Step Guide to Building Your Kitchen Island Cabinets
This is where your vision truly comes to life. We’ll break down the construction of your DIY kitchen island cabinets into manageable stages.
Step 1: Cut Plywood for Cabinet Carcasses
Based on your detailed plans, carefully cut all the plywood panels for the sides, bottoms, tops (if applicable), and shelves of your individual cabinet boxes. Precision here is crucial. Use a circular saw with a straight edge guide or a table saw for straight, clean cuts. Label each piece as you cut it.
Step 2: Assemble the Cabinet Boxes
This is the core structure. You have several options for joining the plywood:
- Pocket Hole Joinery: The easiest and strongest DIY method. Drill pocket holes in the ends of your bottom and top panels, then attach them to the side panels with wood glue and pocket hole screws.
- Dado Joints: For a very strong, traditional joint, cut dadoes (grooves) into the side panels to receive the top and bottom panels. This requires a router or table saw. Secure with glue and screws.
- Butt Joints with Reinforcement: Simplest but weakest. Join panels at the edges, secure with glue and screws. Add corner blocks or cleats for extra strength.
Ensure all boxes are perfectly square as you assemble them using a square and clamps. Use a damp cloth to wipe away any excess glue before it dries.
Step 3: Build and Attach Face Frames
Face frames provide structural integrity, a finished look, and a sturdy surface for attaching doors and drawers. Cut your solid hardwood stock to the dimensions for the vertical stiles and horizontal rails. Assemble them using pocket holes, dowels, or mortise and tenon joints (if you’re feeling advanced). Dry-fit them first, then apply glue and screws/clamps.
Once assembled, attach the face frames to the front of your cabinet boxes, flush with the top and sides. Use wood glue and clamps, then secure with brad nails or screws from the inside of the cabinet.
Step 4: Construct Drawers and Doors (If Applicable)
Building Drawers
Drawers add immense functionality. Cut the sides, front, back, and bottom of each drawer box from plywood. Common joinery methods for drawers include:
- Pocket Holes: For quick and easy assembly.
- Dadoes/Rabbets: Stronger, especially for the drawer bottom.
- Dovetails: The strongest and most elegant, but require advanced tools/skills.
Install drawer slides into the cabinet boxes first, ensuring they are level and parallel. Then, install the corresponding slides onto your drawer boxes. Test fit each drawer for smooth operation.
Building Cabinet Doors
Shaker style doors are popular and relatively simple. Cut stiles (vertical pieces) and rails (horizontal pieces) from solid hardwood. Create a shallow groove (rabbet or dado) along the inside edge of each piece to hold a flat panel (typically ¼-inch plywood or MDF). Assemble the frame with glue and pocket holes/dowels, inserting the panel (which should float freely, not glued) into the grooves.
Alternatively, you can purchase pre-made doors and simply finish them to match your island.
Step 5: Assemble the Island Structure
If you’ve built multiple cabinet boxes, now is the time to join them together. Clamp them side-by-side, ensuring the face frames are flush. Drill pilot holes and use cabinet screws (specifically designed for this purpose) to connect the adjacent cabinet sides from the inside. This creates a strong, cohesive unit for your custom kitchen island.
Step 6: Finishing Touches – Sanding, Edge Banding, and Painting/Staining
- Sanding: Thoroughly sand all surfaces, working your way through progressively finer grits (e.g., 80, 120, 180, 220). This is critical for a professional finish.
- Edge Banding: Apply iron-on edge banding to any exposed plywood edges for a seamless, finished look. Trim with an edge banding trimmer.
- Cleaning: Wipe down all surfaces with a tack cloth to remove dust.
- Finishing: Apply a high-quality primer if painting, then several thin coats of paint, sanding lightly between coats. If staining, apply wood conditioner (if using softwoods), then stain, and protect with multiple coats of clear topcoat (polyurethane, lacquer).
- Hardware: Install drawer pulls, knobs, and hinges onto your doors and drawers.
Finishing Touches and Installation
Your kitchen island cabinets are almost complete! Now for the final steps to make them fully functional and secure.
Install the Countertop
Whether you’re installing a DIY butcher block or having a stone fabricator install granite or quartz, proper countertop installation is key. For butcher block, secure it to the cabinet base from underneath using screws through cleats or directly through the cabinet top rails. Allow for wood movement if using solid wood. If hiring professionals for stone, ensure your island structure is level and strong enough to support the weight.
Add Baseboard or Toekick
A toekick (a recessed area at the base) improves ergonomics and gives the island a finished, built-in look. Cut and attach ¾-inch plywood or matching trim to create a recess of about 3-4 inches deep and 3-4 inches high. This is typically painted or stained to match the cabinets.
Secure the Island to the Floor
This step is crucial for safety and stability, especially if your island is large or has a heavy countertop.
- Locate Floor Joists: Use a stud finder to locate floor joists in the area where your island will sit.
- Anchor the Island: Drill pilot holes through the bottom of the cabinet base (inside the cabinet) and into the floor joists. Use long lag screws or robust construction screws to securely fasten the island to the floor. If you can’t hit a joist, consider using toggle bolts or similar heavy-duty anchors, but directly into joists is best.
Budgeting Your DIY Kitchen Island Cabinet Project
One of the biggest advantages of building your own island is cost control. While prices vary greatly by region and material choices, here’s an estimated breakdown to help you budget for your kitchen island cabinet build.
Estimated Cost Breakdown (Example for a 60″ x 30″ island with basic features)
| Item | Estimated DIY Cost Range | Notes |
|---|---|---|
| Hardwood Plywood (¾” & ½”) | $200 – $500 | Higher grade plywood increases cost. |
| Solid Hardwood (Face Frames, Stile/Rail) | $100 – $300 | Poplar is cheaper than maple or oak. |
| Drawer Slides & Hinges | $80 – $250 | Full extension, soft-close hardware costs more. |
| Cabinet Pulls/Knobs | $30 – $150 | Depends on quantity and style. |
| Wood Glue, Screws, Fasteners | $30 – $80 | Essential consumables. |
| Sanding Supplies | $15 – $40 | Sandpaper, tack cloth. |
| Paint/Stain & Topcoat | $50 – $150 | Quality finishes can add up. |
| Countertop Material (DIY Butcher Block) | $150 – $500 | Prefab laminate or solid wood slabs. Stone will be significantly more. |
| TOTAL ESTIMATED DIY COST | $660 – $1970 | Excludes major tools you may already own. |
| Professional Custom Build (Comparable) | $2500 – $7000+ | Includes materials, labor, and profit margin. |
Note: These are estimates and can vary based on market prices, material choices, and complexity of design.
Maximizing Savings
- Shop Sales: Keep an eye out for discounts on plywood and hardwood.
- Reclaimed Materials: If appropriate for your style, using reclaimed wood can be cost-effective and add character.
- Tool Rental: If you only need a specific tool for this one project (e.g., a table saw), consider renting instead of buying.
- Smart Hardware Choices: While quality hardware is worth the investment, you can find good options at various price points.
Conclusion: Your Dream Kitchen Island Awaits!
Learning how to build kitchen island cabinets is an incredibly rewarding endeavor that offers unparalleled customization, significant cost savings, and the immense satisfaction of creating something beautiful and functional with your own hands. From the initial design sketches to the final installation of your chosen countertop, each step brings you closer to a kitchen that truly reflects your style and meets your family’s unique needs.
Remember, patience, precision, and adherence to safety guidelines are your best friends throughout this process. Don’t be afraid to take your time, double-check measurements, and ask for help if needed. The effort you invest will pay dividends in a stunning, durable, and highly personalized kitchen island that will be the focal point of countless memories for years to come.
So, gather your tools, finalize your plans, and embark on this exciting DIY journey. Your dream custom kitchen island is within reach, waiting for you to bring it to life!
Frequently Asked Questions
What’s the best way to start planning my kitchen island cabinets project?
Begin by measuring your available space and considering the primary function of your island. Decide on the dimensions, desired storage solutions, and overall aesthetic to ensure it complements your existing kitchen design. This initial planning phase is crucial for a successful build.
What materials are recommended for building durable kitchen island cabinets?
High-quality plywood (like Baltic birch or cabinet-grade plywood) is generally recommended for the carcass due to its strength and stability. For faces and doors, you can choose solid wood, MDF, or a combination, depending on your desired finish and budget.
What essential tools will I need to build my own kitchen island cabinets?
You’ll need basic woodworking tools such as a tape measure, circular saw (or table saw for more precision), drill, and clamps. A router can be very helpful for dados and joinery, while a nail gun speeds up assembly.
Is building custom kitchen island cabinets a project for beginners, or do I need prior woodworking experience?
While some basic woodworking skills are beneficial, building straightforward kitchen island cabinets can be achievable for motivated beginners with good instructions. Start with simpler designs, and be prepared to learn and take your time with precise measurements and cuts.
How do I ensure my DIY kitchen island cabinets are sturdy and properly anchored?
Proper joinery, such as dados, rabbets, or pocket screws, is essential for structural integrity. Once assembled, anchor the island securely to the floor, especially if it will have a heavy countertop or be used as a primary workspace.
Can I easily incorporate features like drawers, open shelving, or a waste bin pull-out into my custom island cabinets?
Absolutely! Designing your own kitchen island cabinets allows for full customization to fit your specific needs. Plan these features early in the design phase to account for necessary internal dimensions and hardware.