Quick Answers to Common Questions
What type of cabinets work best for this project?
Standard base cabinets are your go-to when you’re learning how to build a kitchen island using cabinets. You can use new stock cabinets for a fresh look or repurpose existing ones for a budget-friendly option.
Do I need special tools to build a kitchen island using cabinets?
Not at all! Most of the tools you’ll need are common household items like a drill, level, measuring tape, and possibly a saw for trim. This project is surprisingly accessible for DIYers.
How do I secure the cabinets together and to the floor?
You’ll want to securely fasten your base cabinets to each other with screws through the face frames. For stability, consider anchoring the island to the floor using cleats or brackets, especially if you plan to add a heavy countertop.
What’s the secret to making my DIY kitchen island look professional?
It’s all about the finishing touches! Adding decorative end panels, filler strips, and a cohesive toe kick will hide seams and give your “how to build kitchen island using cabinets” project that custom, built-in appearance.
Can I add an overhang for seating when building my kitchen island?
Absolutely! Creating an overhang for bar stools is a popular feature. Just be sure to incorporate proper support, like corbels or steel brackets, to safely support the extended countertop.
📋 Table of Contents
How to Build Kitchen Island Using Cabinets Easily
The kitchen, often considered the heart of the home, is where culinary creativity meets family gatherings. At the center of many dream kitchens lies the versatile **kitchen island** – a hub for cooking, dining, entertaining, and extra storage. While a custom-built island can come with a hefty price tag, did you know you can create a stunning and functional **kitchen island using cabinets**? This DIY approach not only saves a significant amount of money but also allows for unparalleled customization, ensuring your island perfectly fits your space, style, and needs.
Embarking on a **DIY kitchen island** project might seem daunting at first, but with the right guidance, it’s a rewarding endeavor that can transform your kitchen’s aesthetics and functionality. By repurposing or purchasing standard base cabinets, you can construct a sturdy foundation that looks professionally installed. This comprehensive guide will walk you through every step, from initial planning and design to the final touches, helping you create a **custom kitchen island** that’s both beautiful and practical. Get ready to unleash your inner builder and create the kitchen centerpiece you’ve always wanted!
Why Build a Kitchen Island Using Cabinets?
Opting to **build a kitchen island using cabinets** is a smart choice for many homeowners. It combines practicality with personalization, offering several compelling advantages over traditional custom-built options.
Cost-Effectiveness
One of the most significant benefits of using cabinets for your **kitchen island construction** is the cost savings. New base cabinets are considerably less expensive than custom cabinetry, and if you opt for repurposed or used cabinets, your savings multiply. You can find excellent deals at salvage stores, Habitat for Humanity ReStores, or online marketplaces, drastically reducing your material budget. This makes a **DIY kitchen island from base cabinets** an excellent option for **kitchen island on a budget**.
Customization Potential
When you **build a kitchen island using cabinets**, you’re not just assembling parts; you’re designing a piece that perfectly reflects your taste. You have complete control over:
- Layout: Arrange cabinets in various configurations to suit your space.
- Finish: Paint, stain, or veneer your cabinets to match existing decor or introduce a fresh look.
- Functionality: Incorporate specific storage solutions, seating, or even small appliances.
This level of customization is challenging and expensive to achieve with pre-fabricated islands.
Enhanced Storage & Functionality
A **cabinet kitchen island** naturally provides ample storage. Unlike open-shelf islands, cabinets offer enclosed space to keep your kitchen organized and clutter-free. You can integrate drawers, pull-out shelves, or even a hidden trash bin. Beyond storage, a **DIY kitchen island** can serve multiple functions:
- An extra prep surface for cooking.
- A casual dining area with bar stools.
- A dedicated homework or craft station.
- A convenient spot for small appliances like a microwave or wine cooler.
According to recent surveys, enhanced storage is a top priority for homeowners considering kitchen renovations, and a **kitchen island with storage** fits this need perfectly.
DIY Satisfaction
There’s immense satisfaction in looking at a finished project and knowing you built it with your own hands. Building your own **kitchen island from base cabinets** is a rewarding experience that not only saves money but also boosts your confidence in tackling home improvement projects. It’s a testament to your creativity and resourcefulness.
Planning Your Dream Kitchen Island
Thorough planning is the cornerstone of any successful DIY project, and building a **kitchen island using cabinets** is no exception. Taking the time to plan ensures your island is functional, aesthetically pleasing, and fits seamlessly into your kitchen layout.
Measure Your Space
Before you buy a single cabinet, measure your kitchen. Consider:
- Kitchen Size: Ensure there’s enough space around the island for comfortable movement. A minimum of 36-42 inches of clearance on all sides is generally recommended, especially in high-traffic areas or near appliances like dishwashers and ovens.
- Island Dimensions: Determine the ideal length, width, and height. Standard counter height is 36 inches, but a bar-height section can be 42 inches.
- Existing Layout: How will the **kitchen island design** impact workflow between your sink, stove, and refrigerator (the “kitchen triangle”)?
Determine Your Needs & Functionality
What will your **custom kitchen island** primarily be used for?
- Storage: Do you need deep drawers for pots, shelves for cookbooks, or a pantry pull-out?
- Seating: How many people do you want to accommodate? Will you need an overhang for bar stools?
- Appliances: Will you integrate a sink, dishwasher, cooktop, or microwave? Plan for plumbing and electrical access early.
- Workspace: Will it be a primary food prep area or a casual workspace?
Thinking through these aspects will guide your **cabinetry island** selection and layout.
Choose Your Cabinets
This is where the “using cabinets” part comes in!
- New Base Cabinets: Readily available at home improvement stores. You can buy them unfinished to paint yourself, or pre-finished to match existing kitchen cabinets.
- Repurposed Cabinets: An eco-friendly and budget-friendly option. Look for sturdy, good-condition cabinets from old kitchens, salvage yards, or online. They might require cleaning, sanding, and a fresh coat of paint.
- Style: Decide on the cabinet style (Shaker, flat-panel, raised-panel) that complements your kitchen’s aesthetic.
Common choices include 24-inch deep base cabinets. You might use two back-to-back for a deeper island, or three side-by-side for a longer one.
Design & Layout Sketch
Once you have your measurements and cabinet choices, sketch out your island design. This doesn’t need to be professional-grade; a simple drawing helps visualize the layout. Include:
- Placement of each cabinet unit.
- Dimensions of the overall island.
- Location of any overhangs for seating.
- Potential electrical outlets or plumbing.
This sketch will be your blueprint for the **kitchen island construction**.
Budgeting for Your Project
Create a detailed budget, including:
- Cabinets (new or used)
- Lumber for framing/support
- Countertop material
- Finishing materials (paint, stain, trim, hardware)
- Fasteners (screws, shims)
- Tools (if you don’t already own them)
- Any plumbing or electrical work by professionals
A typical **DIY kitchen island** can save you 30-50% compared to a custom build, especially if you handle most of the labor yourself.
Gathering Your Materials and Tools
Having all your materials and tools ready before you begin the **install kitchen island** process will save you time and frustration.
Essential Materials
- Base Cabinets: The foundation of your island.
- Lumber: 2x4s for structural support and toe kicks, plywood for back/side panels if needed.
- Screws: Wood screws (1 1/4″ to 2 1/2″) for joining cabinets and attaching lumber.
- Shims: For leveling cabinets on uneven floors.
- Countertop: Butcher block, laminate, granite, quartz, or concrete.
- Trim & Molding: For a finished look (base molding, crown molding if applicable).
- Adhesive: Construction adhesive for panels, wood glue for joints.
- Paint/Stain & Primer: To finish the cabinets and any new lumber.
- Hardware: Handles, pulls, hinges (if replacing).
- Outlet Boxes & Wiring: If adding electrical outlets (consult an electrician).
Necessary Tools
- Measuring Tape & Pencil: For accurate measurements and markings.
- Level: Crucial for ensuring your island is perfectly level.
- Drill/Driver: With various bits for pre-drilling and driving screws.
- Saw: Circular saw, miter saw, or jigsaw for cutting lumber and panels.
- Sander & Sandpaper: For smoothing surfaces before painting/staining.
- Safety Gear: Safety glasses, gloves, dust mask.
- Stud Finder: If securing to a wall or floor joists.
- Caulking Gun & Caulk: For sealing gaps.
- Clamps: To hold cabinets together while securing.
- Router (Optional): For decorative edge profiles on panels.
Step-by-Step Guide to Building Your Kitchen Island
Now for the exciting part – bringing your **kitchen island ideas** to life! Follow these steps carefully to ensure a sturdy and beautiful **cabinet kitchen island**.
Step 1: Prepare Your Cabinets
If using existing or unfinished cabinets:
- Clean them thoroughly.
- Remove all doors and drawers.
- Sand all surfaces that will be painted or stained.
- Apply a primer, then paint or stain them in your chosen color. Allow adequate drying time between coats.
- Reinstall hinges, doors, and drawer slides after painting is complete (but leave doors/drawers off until the island is fully assembled).
Step 2: Assemble the Island Base
This is where your chosen **base cabinet island** configuration comes together.
- Position Cabinets: Place your cabinets in their desired configuration on the floor. If you’re using two rows of cabinets back-to-back, ensure they are perfectly aligned.
- Join Cabinets: Use clamps to hold adjacent cabinet faces together, ensuring they are flush. Pre-drill pilot holes through the face frame of one cabinet into the other, then secure them with 1 1/4-inch cabinet screws. Repeat for all connecting cabinets.
- Build a Support Frame (if needed): If your island will have a large overhang for seating, or if you’re joining cabinets back-to-back, you’ll need a sturdy support frame. Build a simple 2×4 frame that sits underneath the countertop, extending out to support the overhang. This frame can also be used to create the toe kick area. Attach the frame securely to the top of your assembled cabinets with screws.
Step 3: Secure the Island to the Floor (if permanent)
For a permanent **kitchen island**, securing it to the floor is crucial for stability.
- Locate Floor Joists: Use a stud finder to locate floor joists in the area where your island will sit.
- Level the Island: Place your assembled cabinets in their final position. Use your level and shims underneath the toe kick area to ensure the entire structure is perfectly level and plumb. This is critical for proper countertop installation and cabinet door function.
- Anchor to Floor: Once level, pre-drill pilot holes through the bottom of the cabinet base (inside the cabinet) and into the floor. If possible, drive long screws (3-inch or more) directly into the floor joists. If not hitting a joist, use toggle bolts or heavy-duty anchors designed for flooring.
Pro Tip: If you have finished flooring, use construction adhesive on the base of the cabinet before screwing it down for extra stability without damaging the floor.
Step 4: Finish the Base (Panels, Trim, Toe Kicks)
This step transforms raw cabinets into a finished **custom kitchen island**.
- Install Back and Side Panels: If your cabinets aren’t finished on the sides or back (common for base cabinets designed to be against a wall), you’ll need to add decorative panels. Cut plywood or MDF to size, ensuring a neat fit. You can rout the edges for a decorative profile. Secure these panels with wood glue and finish nails or screws from the inside of the cabinet.
- Add Toe Kicks: Measure and cut 1×4 or 2×4 lumber for the toe kick around the base of the island. Attach with finish nails or screws. This creates a clean, recessed base.
- Apply Trim: Use decorative trim or molding to cover any seams, edges, or the top of the toe kick for a polished look. Secure with finish nails and wood glue.
Step 5: Install the Countertop
The countertop is the crown jewel of your **kitchen island**.
- Measure & Cut (if DIY): If using a material like butcher block or laminate that you’re cutting yourself, accurately measure and cut it to size, allowing for any desired overhangs (typically 1-1.5 inches on non-seating sides, 10-12 inches for seating).
- Position Countertop: Carefully place the countertop on top of your finished island base. Ensure it’s perfectly centered with the desired overhangs.
- Secure Countertop:
- Wood/Butcher Block: Use “L” brackets or pre-drill upward through the top supports of your cabinets into the underside of the countertop with screws (make sure screws aren’t too long!).
- Stone/Laminate: For heavier countertops like granite or quartz, professional installation is often recommended to ensure proper support and leveling. For laminate, you can use construction adhesive and screws from underneath.
Step 6: Add Finishing Touches
These final details bring your **cabinet kitchen island** to life.
- Paint/Stain & Caulk: Touch up any paint or stain as needed. Caulk any gaps between panels, trim, and the countertop for a seamless look.
- Install Hardware: Attach cabinet pulls and knobs.
- Install Electrical Outlets: If you planned for outlets, have a qualified electrician install them. This is a crucial step for **kitchen island functionality**.
- Reinstall Doors & Drawers: Adjust hinges and drawer slides for smooth operation.
Customization & Advanced Tips for Your Cabinet Island
Building a **kitchen island using cabinets** is just the beginning. There are countless ways to personalize and enhance its functionality.
Seating & Overhangs
For comfortable seating, aim for a countertop overhang of at least 10-12 inches. If you plan to seat multiple people, ensure your island is long enough to provide about 24-30 inches of width per person. A sturdy support frame underneath the overhang is essential, especially for heavy countertops.
Integrating Appliances
If your **base cabinet island** will house a microwave, wine fridge, or even a small sink, plan for the correct cabinet sizes and necessary utilities (electrical, plumbing). Always check appliance specifications for cutout dimensions.
Electrical Outlets
Modern building codes often require electrical outlets on **kitchen islands**, especially if there isn’t an existing outlet within a certain distance. This is incredibly convenient for small appliances, charging phones, or laptops. Consult an electrician to ensure safe and code-compliant installation.
Choosing the Right Countertop
The countertop defines the island’s look and feel.
- Butcher Block: Warm, natural, and DIY-friendly. Requires regular oiling.
- Laminate: Affordable, wide range of patterns, easy to clean.
- Quartz/Granite: Durable, elegant, but heavier and typically requires professional installation.
- Concrete: Modern, industrial look, can be DIY but labor-intensive.
Back Panels & Decorative Elements
Don’t forget the “back” of the island – the side facing the living area. This is a prime spot for decorative elements.
- Shiplap or Beadboard: Adds a charming, rustic, or coastal feel.
- Open Shelving: Display cookbooks, decorative items, or wine bottles.
- Faux Doors/Drawers: Maintain a consistent look with the working side of the island.
- Wainscoting: Adds classic architectural detail.
Maintenance and Longevity of Your DIY Island
Once your **kitchen island from base cabinets** is complete, a little care goes a long way in preserving its beauty and functionality for years to come.
Regular Cleaning
Just like the rest of your kitchen, your island will see a lot of action.
- Countertop: Clean according to its material type (e.g., gentle soap for stone, specialized cleaner for butcher block).
- Cabinetry: Wipe down regularly with a damp cloth to remove grease and food splatters. For painted cabinets, use non-abrasive cleaners to avoid damaging the finish.
Protecting Your Countertop
The countertop is the most vulnerable part of your island.
- Always use cutting boards, trivets, and coasters to protect against scratches, heat, and moisture rings.
- Wipe up spills immediately, especially on porous materials like wood or natural stone, to prevent staining.
- If you have a wood countertop, re-oil it periodically (every 1-3 months, depending on use) to maintain its finish and prevent drying/cracking.
Addressing Wear and Tear
Over time, your **cabinet kitchen island** might show signs of wear.
- Scratches/Dings: Minor scratches on painted cabinets can often be touched up with matching paint. Deeper damage might require light sanding and a fresh coat.
- Loose Screws: Periodically check screws, especially those joining cabinets and securing the countertop, and tighten as needed.
- Gaps in Caulk: Re-caulk any areas where the caulk has cracked or pulled away, especially around the sink if integrated.
With proper care, your **DIY kitchen island** will remain a cherished and central feature of your home for many years.
Estimated Kitchen Island Project Costs
To give you a clearer idea of the investment, here’s a general cost estimate breakdown for building a **kitchen island using cabinets**. Please note, these are approximate figures and can vary widely based on material choices, geographical location, and whether you use new or repurposed items.
| Item | Estimated Cost Range (USD) | Notes |
|---|---|---|
| Base Cabinets (2-3 units) | $300 – $1,500+ | New RTA (Ready-to-Assemble) or stock cabinets. Repurposed can be $50-$300. |
| Lumber (2x4s, plywood, trim) | $100 – $300 | For framing, toe kicks, back/side panels. |
| Countertop (approx. 4’x8′) | $200 – $2,000+ | Laminate ($200-$500), Butcher Block ($300-$800), Quartz/Granite ($800-$2000+). |
| Hardware (pulls, hinges if needed) | $50 – $200 | Depends on quantity and style. |
| Paint/Stain & Primer | $50 – $150 | High-quality kitchen cabinet paint. |
| Fasteners (screws, shims) | $30 – $80 | Assorted wood screws, cabinet screws, shims. |
| Electrical Outlets & Wiring | $100 – $300+ | Materials only. Professional installation can add $200-$500+. |
| Tools (if purchased new) | $0 – $500+ | If you already own basic DIY tools, this cost is minimal. |
| TOTAL ESTIMATED COST | $830 – $5,000+ | Varies greatly based on choices and labor. DIY saves significantly on labor. |
As you can see, the range is broad, but even on the higher end, a DIY **kitchen island from base cabinets** is often significantly cheaper than a fully custom-built alternative, which can easily start at $5,000 and go upwards of $15,000 or more, depending on materials and complexity.
Conclusion
Building a **kitchen island using cabinets** is a fantastic way to add functionality, storage, and style to your kitchen without breaking the bank. From the initial spark of an idea to the final turn of a screwdriver, this project empowers you to create a truly personalized space that enhances your daily life. The satisfaction of crafting something with your own hands, coupled with the significant cost savings and endless customization possibilities, makes it an incredibly rewarding DIY endeavor.
By carefully planning your design, gathering the right materials and tools, and following our step-by-step guide, you can confidently construct a beautiful and durable **DIY kitchen island** that becomes the central hub of your home. So, gather your courage, embrace the creative process, and get ready to enjoy your stunning new **custom kitchen island** for years to come! What are you waiting for? Your dream kitchen island is just a few cabinets and a little effort away!
Frequently Asked Questions
What’s the first step when planning to build a kitchen island using cabinets?
The initial step involves careful planning of your island’s size and function. Measure your kitchen space to ensure adequate clearance, and decide what features you want, such as seating, storage, or a sink, to best utilize your new kitchen island.
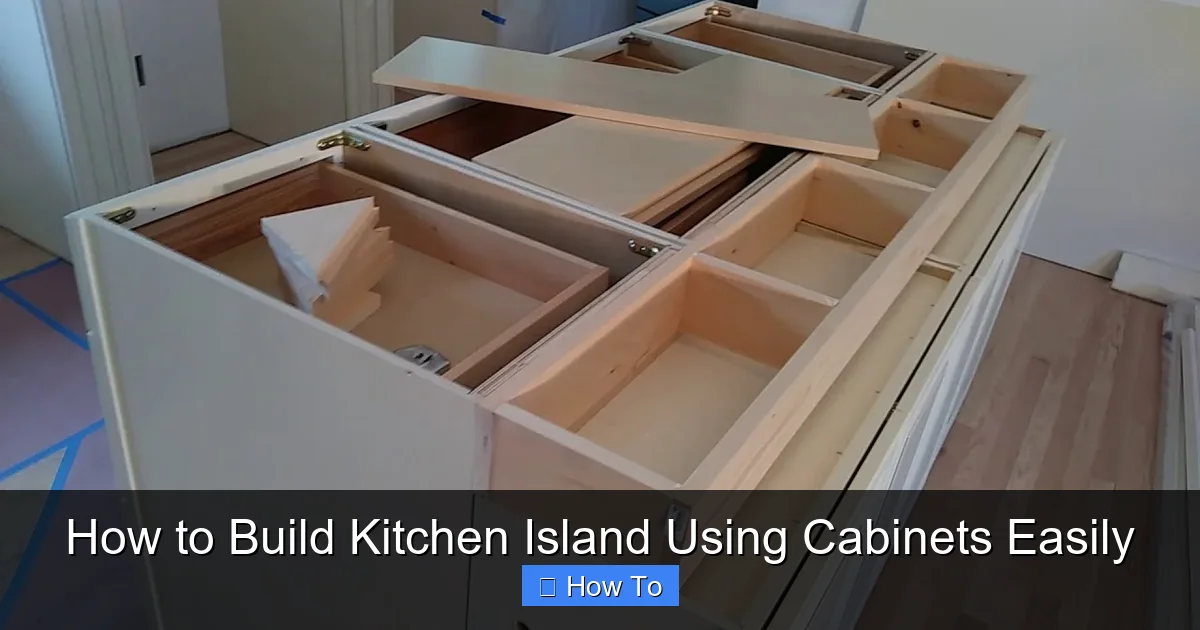
Learn more about how to build kitchen island using cabinets – How to Build Kitchen Island Using Cabinets Easily
Image source: i.ytimg.com
What types of cabinets are best for building a kitchen island?
Base cabinets are ideal for building a kitchen island, as they provide the structural foundation and storage. You can use new stock cabinets, semi-custom options, or even repurpose existing ones, depending on your budget and desired aesthetic for your DIY kitchen island.
How do I secure the cabinets when building a kitchen island?
First, build a sturdy base or platform (e.g., from 2x4s and plywood) slightly smaller than your combined cabinet footprint, and secure it to the floor. Then, position your chosen cabinets on this base, screwing them together from the inside to create a unified and stable structure for your island.
What materials do I need to build a kitchen island using cabinets, besides the cabinets themselves?
Beyond your selected cabinets, you’ll need materials for the base (like 2x4s and plywood), screws, shims for leveling, and materials for finishing the back and sides, such as decorative panels or beadboard. Don’t forget your chosen countertop material and appropriate adhesive or fasteners.
How do I finish the exposed back and sides of my DIY kitchen island?
To give your kitchen island built using cabinets a polished look, you can attach decorative panels, beadboard, or wainscoting to the exposed areas. Ensure these panels are cut to size and securely attached, then prime and paint them to match your existing cabinetry or a new design.
Can I add a countertop overhang for seating on my DIY kitchen island?
Yes, adding a countertop overhang for seating is a popular feature when you build a kitchen island using cabinets. You’ll need to ensure your chosen countertop is wide enough and consider adding corbels or steel support brackets to safely support the extended portion.