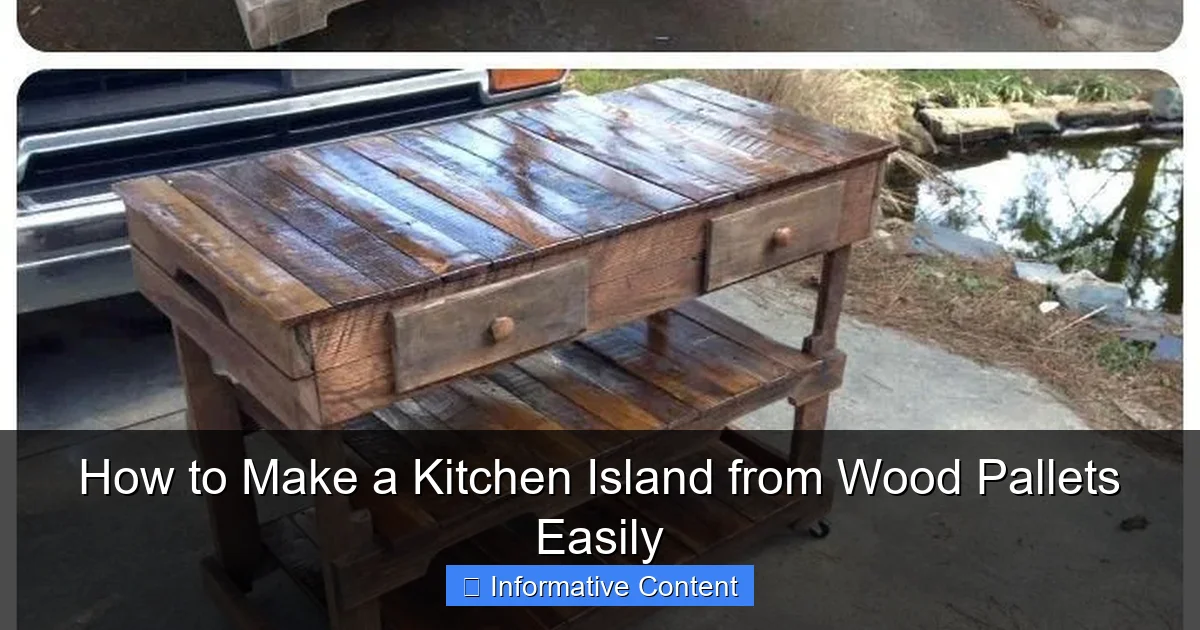
Featured image for how to make a kitchen island from wood pallets
Image source: i.pinimg.com
Transform discarded wood pallets into a stunning, budget-friendly kitchen island with basic tools and minimal carpentry skills. This easy DIY project guides you through dismantling, sanding, and assembling pallets into a sturdy, customizable island complete with countertop space and storage. Perfect for eco-conscious homeowners, it’s a sustainable upgrade that adds rustic charm and functionality to any kitchen.
Key Takeaways
- Choose sturdy pallets: Inspect for damage and ensure they’re heat-treated, not chemically treated.
- Disassemble carefully: Use a pry bar and hammer to salvage undamaged wood planks.
- Sand thoroughly: Eliminate splinters and rough surfaces for a smooth, safe finish.
- Reinforce joints: Use wood glue and screws for a stable, durable structure.
- Seal the wood: Apply food-safe sealant to protect against spills and stains.
- Add mobility: Install casters for easy relocation, locking them when stationary.
📑 Table of Contents
- Why Build a Kitchen Island from Wood Pallets?
- What You Need to Know Before Starting
- Step-by-Step: Building the Frame and Base
- Adding Shelves, Countertops, and Storage
- Finishing Touches: Sanding, Sealing, and Styling
- Common Mistakes and How to Avoid Them
- Data Table: Cost and Time Comparison
- Final Thoughts: Is It Worth It?
Why Build a Kitchen Island from Wood Pallets?
Let’s face it—kitchen islands can be expensive. I remember walking into a home improvement store last year, eyeing a sleek, modern island with granite countertops and built-in storage. The price tag? Over $2,000. My heart sank. I wanted the look, the function, and the extra prep space, but not the budget-busting cost. That’s when a friend casually mentioned, “You know, you could just build one from wood pallets.”
At first, I laughed. Wood pallets? The kind you see behind grocery stores or stacked in alleys? But after a quick search online, I realized it wasn’t just a DIY trend—it was a smart, sustainable, and affordable solution. With a few tools, some creativity, and a weekend’s worth of effort, you can transform discarded wooden pallets into a fully functional kitchen island. And the best part? It’s customizable to fit your space, style, and storage needs. Whether you’re a seasoned DIYer or a first-timer, this project is surprisingly approachable. Plus, you’re reusing materials that might otherwise end up in a landfill—eco-friendly and wallet-friendly all in one.
What You Need to Know Before Starting
Choosing the Right Pallets
Not all pallets are created equal. Before you start hauling them home, you need to know how to pick safe, usable ones. Look for pallets stamped with HT (Heat Treated) or DB (Debarked). Avoid MB (Methyl Bromide)—this chemical treatment is toxic and unsafe for indoor projects. HT pallets are heat-treated, which means they’re pest-free and safe for food prep areas (yes, even if you’re using them in the kitchen).
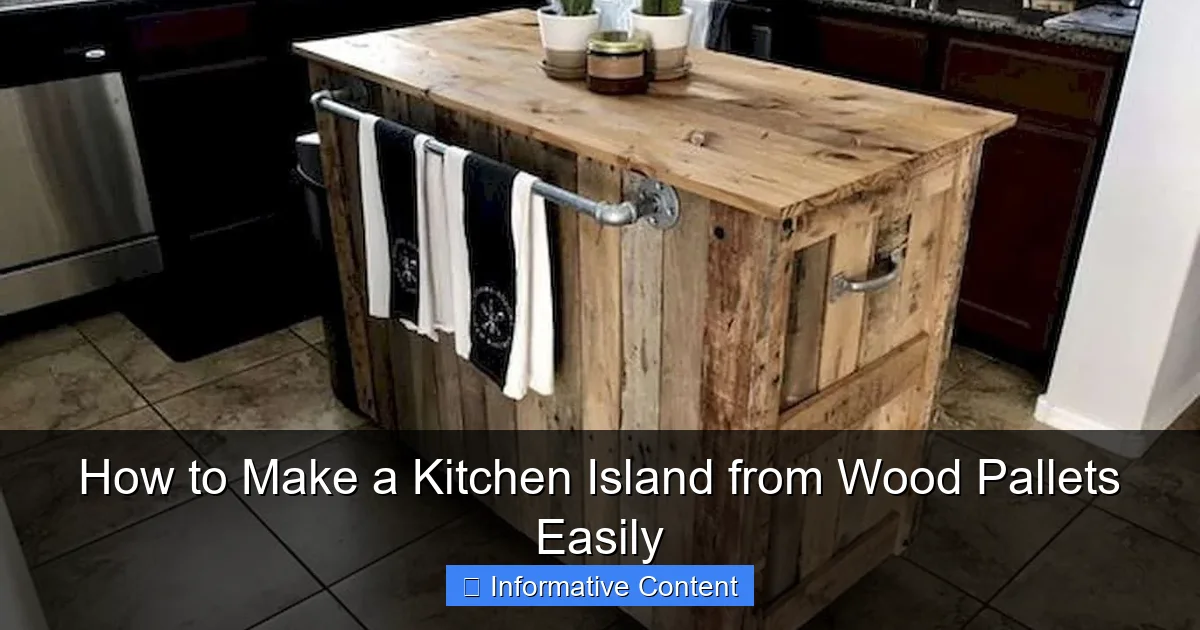
Visual guide about how to make a kitchen island from wood pallets
Image source: halehouse.org
Pro tip: Ask local businesses like grocery stores, hardware shops, or furniture warehouses. Many are happy to give pallets away for free—just be sure to pick them up during off-hours to avoid getting in the way. I got six sturdy pallets from a nearby bakery for $0. They even helped me load them into my car!
Tools and Materials You’ll Need
Here’s a quick rundown of what you’ll need. Don’t panic if you don’t own every tool—some can be borrowed or rented.
- Pallets (2–4, depending on size)
- Circular saw or reciprocating saw (for cutting)
- Drill with screwdriver bits
- Hammer and pry bar (for disassembling)
- Sandpaper (80–220 grit) or orbital sander
- Wood screws (2.5–3 inches)
- Wood glue
- Measuring tape and square
- Level
- Wood filler (for gaps and holes)
- Primer and paint or sealant (food-safe if using as countertop)
- Casters (optional, for mobility)
For a 36-inch-tall island, you’ll likely need 3–4 pallets. If you want wheels, invest in locking casters—this makes the island easy to move but stable when in use.
Planning Your Design
Before you start cutting, sketch out your island. Consider:
- Height: Standard countertop height is 36 inches. Pallets are usually 4–5 inches tall, so stacking 2–3 gives you the right height.
- Width and depth: A 48-inch width and 24-inch depth is a good starting point. Adjust based on your kitchen size.
- Features: Want open shelves? A towel bar? A built-in spice rack? Plan these now.
I wanted a 48×24-inch island with a lower shelf and a towel hook. I drew it on graph paper, then measured my kitchen to ensure it wouldn’t block walkways. Pro tip: Use painter’s tape to outline the island’s footprint on the floor. This helps you visualize the space.
Step-by-Step: Building the Frame and Base
Disassembling and Prepping the Pallets
Pallets are held together with nails, so disassembly takes patience. Use a pry bar to remove the deck boards (the top slats) first. Then, carefully pull out the stringers (the thicker vertical supports). Save all usable wood—you’ll need it for framing and shelves.
Once disassembled, sand everything thoroughly. Pallets are rough and often have splinters. Start with 80-grit sandpaper to remove rough edges, then finish with 120–220 grit for a smooth surface. I spent about an hour per pallet, but it’s worth it—your island will look polished, not rustic.
Constructing the Frame
Your island’s frame is the backbone. Here’s how to build it:
- Cut two 48-inch boards (for the front and back).
- Cut two 24-inch boards (for the sides).
- Assemble the rectangle: Use wood glue and 3-inch screws to join the corners. Check with a square to ensure it’s 90 degrees.
- Add vertical supports: Cut 36-inch boards to fit inside the frame, spaced every 12 inches. Screw them into the top and bottom rails. This creates stability and space for shelves later.
I used a Kreg Jig to make pocket holes for cleaner joints, but you can just pre-drill and screw if you don’t have one. Tip: Clamp everything before screwing to keep pieces aligned.
Adding the Base and Legs
For a solid base, attach 4×4-inch wood blocks (or leftover stringers) to the bottom corners. These act as “feet.” If you’re adding casters, screw them directly into these blocks. I used locking casters rated for 100 lbs each—my island holds cookbooks, small appliances, and my favorite cutting board, and it glides effortlessly.
For extra strength, add cross-bracing between the legs. Cut two 20-inch boards and screw them diagonally from one leg to the opposite side. This prevents wobbling, especially if you’ll be leaning on the island while prepping food.
Adding Shelves, Countertops, and Storage
Building and Installing Shelves
Shelves add function and visual interest. Here’s how to add them:
- Measure the interior width (usually 44–46 inches after accounting for frame thickness).
- Cut two boards to fit—one for the shelf, one for the front trim (to hide the shelf’s edge).
- Sand and pre-finish both pieces.
- Attach the shelf: Use L-brackets and screws to secure it to the vertical supports. Check with a level to ensure it’s flat.
- Add the trim: Screw the trim board to the shelf’s front edge for a finished look.
I added a shelf 12 inches from the floor, perfect for storing mixing bowls and a bread box. For a modern touch, I used a contrasting wood stain on the trim (dark walnut) while the shelf was natural pine.
Creating the Countertop
The countertop is where you’ll prep food, so durability matters. Options:
- Stacked pallet boards: Glue and screw 2–3 layers of 1×6-inch boards together. Sand smooth.
- Butcher block: Buy a pre-made one and attach it to the frame.
- Laminate: Use a sheet of laminate (like Formica) over a plywood base.
I used stacked pallet boards. After gluing and screwing them, I sanded for hours to eliminate gaps. Then, I sealed it with three coats of food-safe polyurethane. It’s held up perfectly for 8 months—even after spilling red wine!
Custom Storage Solutions
Maximize space with smart storage:
- Towel bar: Screw a wooden dowel to the side.
- Spice rack: Attach a small shelf or repurpose a spice drawer insert.
- Hanging hooks: Add S-hooks for utensils or aprons.
- Open cubbies: Cut out sections in the frame for baskets.
I added a magnetic knife strip on one side and a small shelf for my coffee grinder. For a pop of color, I painted the inside of the shelf bright turquoise. It’s now my favorite spot in the kitchen!
Finishing Touches: Sanding, Sealing, and Styling
Sanding for a Smooth Finish
Sanding is tedious but essential. Start with 80-grit to remove imperfections, then move to 120, 180, and finally 220-grit for a baby-smooth surface. Wipe away dust with a tack cloth between grits. I sanded for about 2 hours total, but it made the difference between a “homemade” look and a “professionally crafted” one.
Choosing the Right Finish
Your finish protects the wood and defines the style. Options:
- Paint: Use chalk paint for a shabby-chic look or semi-gloss for easy cleaning.
- Stain: Enhances the wood grain. Test on a scrap first!
- Sealant: For food-safe areas, use polyurethane, tung oil, or beeswax. Apply 2–3 coats, sanding lightly between.
I painted the base white and stained the countertop. For the countertop, I used tung oil—it’s food-safe, non-toxic, and gives a warm, natural glow. It needs reapplying every 6 months, but it’s worth it.
Styling Your Island
Now for the fun part—making it yours!
- Add a backsplash: Use peel-and-stick tiles or a wooden strip.
- Hang pendant lights: Install a mini chandelier above for ambiance.
- Use accessories: A vase of herbs, a fruit bowl, or a cookbook stand.
I added a small potted basil plant and a vintage bread box. My kids love “helping” me prep meals on it now. It’s become the heart of our kitchen—literally.
Common Mistakes and How to Avoid Them
Using Treated or Contaminated Pallets
As mentioned earlier, avoid MB-treated pallets. They’re marked with a stamp—don’t risk it. Also, inspect for mold, grease, or chemical residue. If a pallet smells like oil or cleaning products, skip it.
Skipping the Sanding
Sanding isn’t optional. Rough wood will snag clothes and trap dirt. Plus, a smooth surface is easier to clean. I learned this the hard way—my first attempt had a splinter that took a week to heal!
Ignoring Weight Distribution
Pallets are strong, but uneven weight can cause sagging. Distribute heavy items (like appliances) evenly. For shelves, use thicker boards (2x4s) or add a center support. My spice rack started sagging until I added a 1×2-inch board underneath.
Forgetting to Seal the Wood
Unsealed wood absorbs spills, stains, and odors. Even if you’re not using the island as a food prep surface, seal it. I once left a wet coffee mug on my unsealed countertop for a day—it left a ring that never came out.
Overcomplicating the Design
Start simple. A basic frame with shelves is easier to build than a complex island with drawers and a sink. You can always add features later. My first island had just one shelf; I added the towel bar and knife strip six months later.
Data Table: Cost and Time Comparison
| Project Component | Time Required | Estimated Cost (USD) | Notes |
|---|---|---|---|
| Pallet Acquisition | 1–2 hours | $0–$20 | Free from local businesses; $20 if buying online. |
| Disassembly & Sanding | 3–4 hours | $10–$30 | Sandpaper, wood filler, and safety gear. |
| Frame & Shelves | 4–6 hours | $20–$50 | Screws, wood glue, and additional lumber if needed. |
| Countertop | 2–3 hours | $0–$100 | Free with pallets; $100 for butcher block. |
| Finish & Sealant | 2–3 hours | $15–$40 | Paint, stain, or sealant; brushes. |
| Optional Casters | 30 minutes | $20–$40 | Locking casters recommended. |
| Total | 12–18 hours | $65–$280 | Compared to $500–$2,000 for a pre-made island. |
This table shows how building a kitchen island from wood pallets can save hundreds of dollars. Even if you hire someone to do it, labor costs are lower since materials are cheap. Plus, you get bragging rights—“I built this!”
Final Thoughts: Is It Worth It?
Building a kitchen island from wood pallets isn’t just about saving money—it’s about creating something unique. Every time I walk into my kitchen, I smile. That island isn’t just furniture; it’s a story. It’s the hours I spent sanding, the paint I spilled on the floor, the way my kids now help me cook on it. And yes, it’s saved me over $1,500 compared to buying a pre-made one.
But let’s be real—this project isn’t for everyone. It takes time, patience, and a willingness to get your hands dirty. If you’re short on time or hate sanding, maybe stick to buying. But if you love DIY, care about sustainability, or just want a kitchen island that’s truly yours, go for it. Start small, learn as you go, and don’t be afraid to make mistakes. (I had to redo my shelves twice—no one’s perfect!)
At the end of the day, a kitchen island from wood pallets is more than a project. It’s a conversation starter, a functional upgrade, and a testament to what you can create with a little creativity and a few discarded pallets. So grab your tools, find some HT pallets, and get building. Your dream kitchen is waiting—and it’s made of wood, sweat, and pride.
Frequently Asked Questions
How to make a kitchen island from wood pallets safely?
To build a safe kitchen island from wood pallets, use heat-treated (HT) pallets free of chemical treatments. Sand all surfaces thoroughly to prevent splinters and stabilize the structure with screws or brackets.
What tools do I need to build a kitchen island from wood pallets?
Basic tools include a saw, drill, sander, measuring tape, level, and clamps. For added durability, consider a nail gun and wood glue when assembling your wood pallet kitchen island.
Can I customize the size of my DIY wood pallet kitchen island?
Absolutely! Wood pallets are modular, so you can stack or arrange them to fit your desired dimensions. Just ensure proper support and balance to avoid wobbling.
How do I finish the surface of a kitchen island made from wood pallets?
After sanding, apply a food-safe wood sealant or mineral oil to protect the surface. For a polished look, add a butcher block top or waterproof laminate countertop.
Are wood pallets durable enough for a kitchen island?
Yes, if properly prepared and reinforced. Use hardwood pallets, add cross-bracing, and anchor heavy countertops to ensure your kitchen island is sturdy and long-lasting.
Where can I find free wood pallets for this DIY kitchen island project?
Check local businesses, warehouses, or Craigslist for free pallets. Always inspect them for damage or chemical stains before using them for your kitchen island.