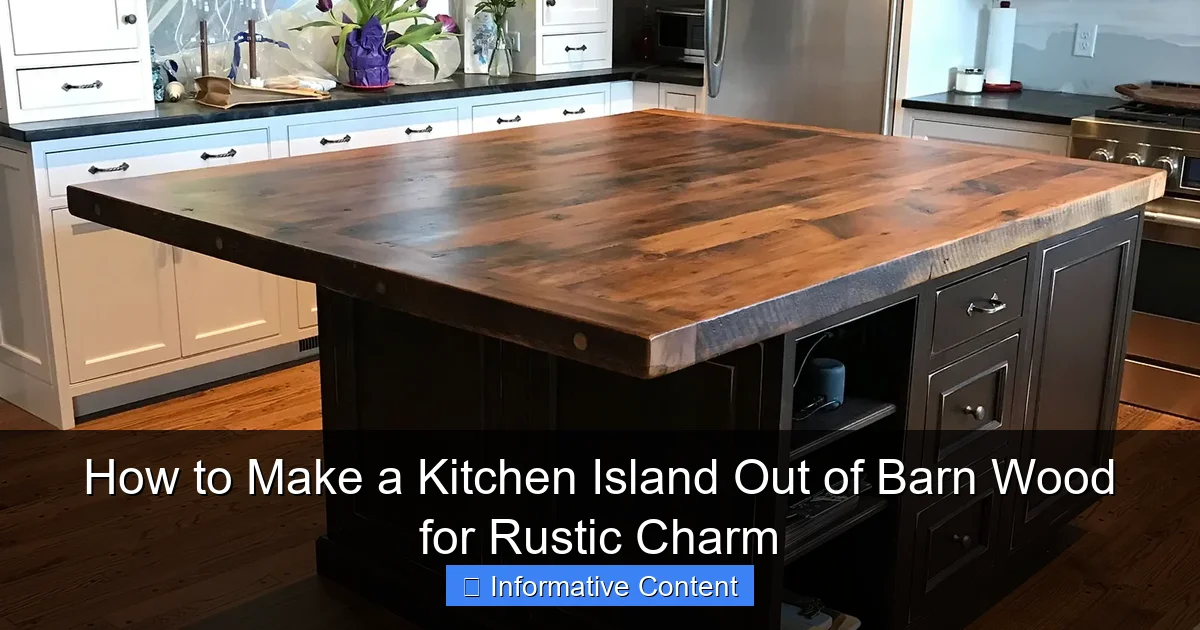
Featured image for how to make a kitchen island out of barn wood
Image source: i2.wp.com
Transform reclaimed barn wood into a stunning kitchen island by carefully selecting weathered planks, reinforcing them for stability, and crafting a custom base with built-in storage. Add rustic charm with visible grain, iron hardware, and a food-safe finish that highlights the wood’s history while ensuring durability for daily use. This DIY project blends vintage character with modern functionality.
Key Takeaways
- Choose weathered barn wood: Opt for aged, durable planks to enhance rustic appeal and longevity.
- Prep wood carefully: Clean, sand, and seal barn wood to prevent splinters and preserve its charm.
- Plan island dimensions: Measure your kitchen space to ensure the island fits functionally and aesthetically.
- Use sturdy framing: Reinforce with a solid wood or metal base for lasting structural support.
- Add functional features: Incorporate storage, seating, or outlets for practicality without sacrificing style.
- Finish with natural tones: Apply matte or clear sealant to highlight the wood’s authentic grain and color.
📑 Table of Contents
Why a Barn Wood Kitchen Island Is the Ultimate Rustic Statement
If you’ve ever walked into a farmhouse-style kitchen and felt an instant sense of warmth, comfort, and timeless charm, chances are a barn wood kitchen island was the star of the show. There’s something deeply grounding about reclaimed wood—its weathered grain, rich history, and subtle imperfections tell a story. And when that story becomes part of your kitchen, it transforms more than just a workspace; it becomes a centerpiece, a conversation starter, and a daily reminder of nature’s beauty.
Making a kitchen island out of barn wood isn’t just about aesthetics—it’s about sustainability, craftsmanship, and creating a space that feels uniquely yours. Whether you’re renovating an old cottage, updating a modern kitchen with rustic flair, or just love the idea of giving old materials new life, this project is both rewarding and surprisingly doable. I’ve built a few of these myself, and let me tell you: the satisfaction of seeing your vision come to life, plank by plank, is unmatched. But like any DIY project, it requires planning, patience, and a few insider tips to avoid common pitfalls. So let’s dive into how to make a kitchen island out of barn wood that’s not only beautiful but also functional, durable, and full of rustic charm.
1. Sourcing and Preparing Your Barn Wood
The foundation of any great barn wood project is, of course, the wood itself. But not all barn wood is created equal. Finding the right material is half the battle—and the most exciting part for many DIYers.
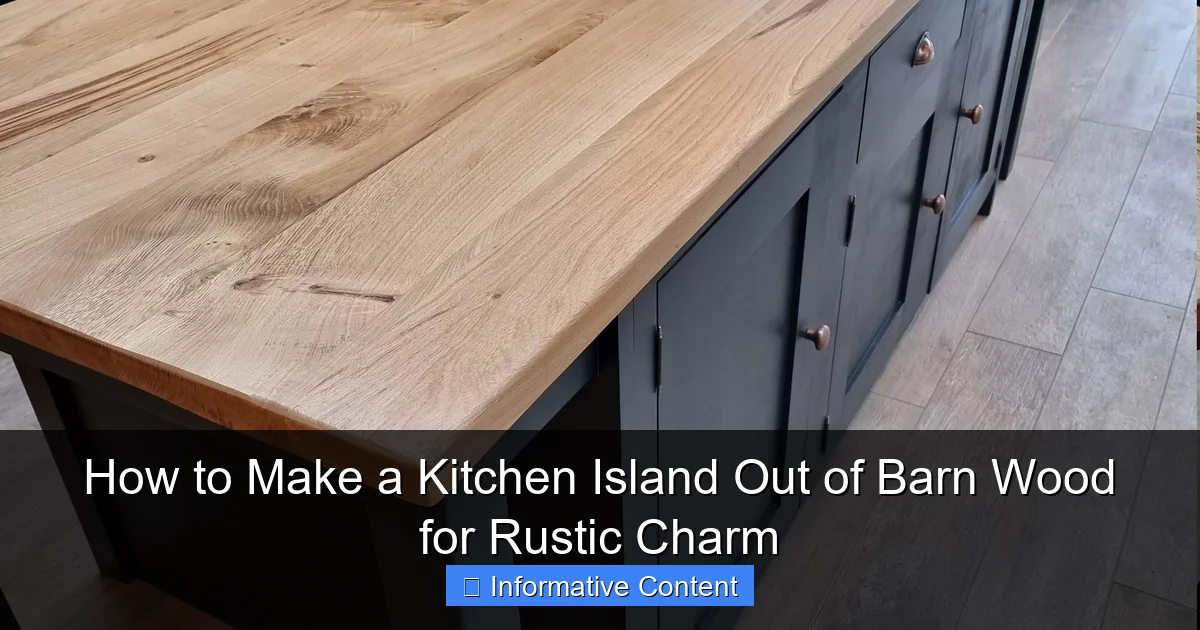
Visual guide about how to make a kitchen island out of barn wood
Image source: i.etsystatic.com
Where to Find Authentic Barn Wood
Authentic reclaimed barn wood comes from old agricultural structures—barns, sheds, silos—that have weathered decades of sun, rain, wind, and snow. This aging process creates the signature gray, silver, or warm brown tones that make barn wood so desirable.
- Demolition sites or salvage yards: These are goldmines. Many salvage companies specialize in reclaimed wood and will let you pick through stacks. I once found a batch of 100-year-old oak from a Pennsylvania dairy barn—perfect for a kitchen island top.
- Online marketplaces: Etsy, Facebook Marketplace, and Craigslist often have sellers offering reclaimed wood by the board foot. Just make sure to ask for photos and details about the wood’s origin and condition.
- Local farmers or property owners: If you live in a rural area, consider knocking on doors. Many old barns are being torn down, and owners are often happy to let you take the wood for free (or a small fee).
- Reclaimed wood suppliers: Companies like Reclaimed DesignWorks or Longleaf Lumber offer pre-sanded, kiln-dried barn wood with certifications for safety and sustainability.
What to Look for in Quality Barn Wood
Not every piece of old wood is suitable for a kitchen island. Here’s what to check:
- Species: Oak, pine, poplar, and maple are common in barns. Oak is the most durable—ideal for countertops. Pine is softer but easier to work with and has a lovely grain.
- Moisture content: Reclaimed wood must be properly dried. Look for kiln-dried options or test with a moisture meter (ideally under 10%). Wet wood will warp or crack.
- Structural integrity: Avoid boards with large cracks, rot, or insect damage. Minor checks (surface cracks) are normal and add character—just don’t compromise stability.
- Finish and treatment: Some old barns were treated with creosote or lead-based paint. Avoid these unless you’re certain they’re safe. Test with a lead paint kit if unsure.
Prepping the Wood for Your Island
Once you’ve got your wood, it’s time to prep it. This step is crucial—especially for a kitchen, where hygiene and durability matter.
- Remove nails and hardware: Use a pry bar, pliers, and a metal detector to find and remove old nails. Sanding over a nail can ruin your tools and create sparks.
- Clean thoroughly: Brush off dirt and debris. For deeper grime, use a mild solution of vinegar and water. Avoid harsh chemicals—they can damage the wood’s patina.
- Sand carefully: Start with 80-grit to remove splinters and rough spots, then move to 120-grit for a smooth finish. Don’t over-sand—you want to preserve the weathered texture.
- Seal or stabilize (optional): Some DIYers apply a light coat of wood stabilizer to prevent further cracking. This is especially helpful for very dry or brittle wood.
Pro tip: Label your boards as you prep them. It’ll make assembly much easier later on. And always wear safety gear—dust masks, goggles, and gloves are non-negotiable.
2. Designing Your Barn Wood Kitchen Island
Now that your wood is ready, it’s time to design. This is where you balance form and function. A kitchen island isn’t just a pretty face—it needs to support your cooking, storage, and lifestyle.
Choosing the Right Size and Shape
Measure your kitchen carefully. A good rule of thumb: leave at least 36–42 inches of walking space around the island. For a standard kitchen, aim for:
- Small island: 24–36 inches wide, 48–60 inches long (great for tight spaces)
- Medium island: 36–48 inches wide, 60–72 inches long (fits most homes)
- Large island: 48+ inches wide, 72+ inches long (ideal for open-concept kitchens)
Shape matters too. Rectangular islands are most common, but L-shaped or U-shaped designs can maximize counter space. If you’re adding a sink or cooktop, factor in plumbing and electrical needs.
Deciding on Features and Functionality
Think about how you use your kitchen. Do you need:
- Storage? Drawers, cabinets, open shelves, or a pantry-style pull-out.
- Appliances? A built-in microwave, wine fridge, or cooktop. Make sure your island has proper ventilation and power access.
- Mobility? Casters or locking wheels let you move the island for cleaning or entertaining.
< Seating? A countertop overhang (at least 12 inches) with bar stools. Standard counter height is 36 inches; bar height is 42 inches.
Sketching Your Design
Don’t skip this step. Even a simple sketch on graph paper helps visualize proportions and features. I like to draw my design to scale, then use painter’s tape on the floor to “place” the island and walk around it. This helps spot awkward placements before cutting wood.
- Use a notebook or free design tools like SketchUp Free or Roomstyler.
- Label each section: countertop, base, legs, overhang, etc.
- Include measurements, material thickness, and hardware placement.
Real-life example: My first barn wood island was 48 inches long with a 24-inch overhang for seating. I added two deep drawers and a cabinet with a barn door. I used reclaimed pine for the base and oak for the top—best of both worlds: affordability and durability.
3. Building the Frame and Base
The frame is the skeleton of your island—it needs to be strong, level, and able to support the weight of the wood, countertop, and daily use.
Choosing Materials for the Frame
While the barn wood is for the visible parts, the frame can be made from new lumber for strength and consistency. I recommend:
- 2x4s or 2x6s for the base frame: These provide excellent support and are easy to work with.
- 1/2-inch or 3/4-inch plywood for the cabinet box: Use cabinet-grade plywood for durability and a smooth surface.
- Hardwood for legs or supports (optional): If you want exposed legs, use oak or maple to match the barn wood aesthetic.
Step-by-Step Frame Construction
Here’s how I build a sturdy base:
- Cut the base frame: Use 2x4s to create a rectangle (or square) that matches your island’s footprint. Add cross supports every 16 inches for stability.
- Assemble with pocket screws or corner braces: Pre-drill holes to prevent splitting. Clamp pieces together before fastening.
- Attach the plywood sides and back: Screw 3/4-inch plywood panels to the frame. Leave the front open for doors/drawers.
- Add a plywood top (for countertop support): This creates a flat surface for attaching your barn wood countertop later.
- Install adjustable legs or casters: For floor protection and height adjustment. Locking casters are great for mobility.
Adding Storage Features
Now’s the time to install:
- Drawer slides: Use full-extension, soft-close slides for smooth operation. Mount them to the frame before adding drawer boxes.
- Cabinet doors: Hinge them to the frame. For a rustic look, use strap hinges or barn door hardware.
- Shelves: Install adjustable or fixed shelves for flexible storage.
Tip: Use a level and square throughout. A wobbly frame will make the whole island unstable. Check for level on both axes before moving on.
4. Crafting the Barn Wood Countertop
The countertop is the crown jewel of your island. It’s what people see, touch, and use daily. Making a barn wood countertop requires care, but the result is worth it.
Joining the Boards
You’ll likely need to glue multiple boards together to create a wide, seamless surface.
- Arrange boards: Lay them out on a flat surface. Mix widths and grain patterns for a natural look. Avoid placing two knots side by side—they can weaken the joint.
- Edge-join with biscuits or dowels: This aligns boards and prevents warping. I prefer biscuits—they’re easy to use and create strong joints.
- Apply wood glue: Use a high-quality, waterproof glue like Titebond III. Spread evenly on the edges.
- Clamp tightly: Use pipe or bar clamps every 8–10 inches. Wipe off excess glue immediately with a damp rag.
- Let dry 24 hours: Don’t rush this step. A strong bond takes time.
Finishing the Surface
Once dry, sand the countertop starting with 100-grit, then 150-grit. Round the edges slightly for a softer feel.
- For food-safe surfaces (if using for prep): Use a food-grade mineral oil and beeswax blend. Reapply every 3–6 months.
- For durability and water resistance: Apply 3–5 coats of water-based polyurethane. Sand lightly between coats with 220-grit.
- For a matte, natural look: Try a hardwax oil like Rubio Monocoat. It’s eco-friendly and enhances the wood’s grain.
Attaching the Countertop
Secure the countertop to the base with:
- Z-clips or figure-8 fasteners: These allow the wood to expand and contract without cracking.
- Hidden screws through the frame: Pre-drill holes and countersink screws. Cover with wooden plugs if desired.
Pro tip: Leave a 1/4-inch expansion gap between the back edge and wall. Wood moves with humidity, and this prevents buckling.
5. Finishing Touches and Styling
Now comes the fun part—making your island feel like part of your home.
Hardware and Accents
Choose hardware that complements the rustic vibe:
- Drawer pulls: Wrought iron, antique brass, or hammered copper.
- Hinges: Strap hinges or hidden euro hinges with a matte black finish.
- Legs or brackets: Cast iron or black metal for an industrial touch.
Lighting and Electrical
Don’t forget the ambiance. Install:
- Pendant lights: Hang 2–3 over the island. Aim for 30–36 inches above the countertop.
- Under-cabinet lighting: LED strips add task lighting and highlight the wood grain.
- Power outlets: Install a pop-up outlet or grommet for small appliances.
Styling the Island
Decorate with purpose:
- A wooden cutting board: Matches the island and is functional.
- Herbs in vintage tins or mason jars: Brings life and utility.
- A woven basket: Holds fruit or kitchen towels.
- A statement bowl: Filled with seasonal decor or lemons.
6. Maintenance and Long-Term Care
Your barn wood island is an investment. With proper care, it can last decades.
Daily and Weekly Care
- Wipe spills immediately: Especially water, wine, or acidic foods.
- Use cutting boards: Never cut directly on the wood.
- Clean with mild soap and water: Avoid harsh cleaners. Dry thoroughly.
Seasonal Maintenance
- Reapply finish every 6–12 months: Especially in dry climates.
- Check for loose hardware: Tighten screws and hinges as needed.
- Inspect for cracks or warping: Address small issues early to prevent big repairs.
Dealing with Damage
Minor scratches? Light sanding and a coat of oil usually fix it. Deep gouges can be filled with wood filler or a wax stick. Embrace small imperfections—they add character.
| Maintenance Task | Frequency | Tools/Materials | Notes |
|---|---|---|---|
| Wipe down surface | Daily | Soft cloth, mild soap | Always dry immediately |
| Deep clean | Weekly | Vinegar solution, microfiber cloth | Rinse with water and dry |
| Reapply oil/finish | Every 6–12 months | Mineral oil, polyurethane, or hardwax oil | Lightly sand first |
| Inspect hardware | Every 3 months | Screwdriver, level | Check for wobbles or loose parts |
| Check for warping | Seasonally | Tape measure, straightedge | Address early with clamps or humidity control |
Building a kitchen island out of barn wood is more than a DIY project—it’s a labor of love. You’re not just creating furniture; you’re crafting a piece of history, sustainability, and personal expression. From sourcing the wood to choosing the perfect hardware, every decision reflects your style and values.
The best part? No two barn wood islands are the same. Your imperfections, your choices, your story—they’re all built into the grain. Whether you’re serving breakfast, hosting friends, or just enjoying a quiet cup of coffee, your island will stand as a testament to craftsmanship and rustic charm.
So gather your tools, find that perfect batch of reclaimed wood, and get started. It might take time, but the result is a kitchen centerpiece that’s as functional as it is beautiful. And when someone asks, “Where did you get that island?” you can smile and say, “I made it—with a little help from an old barn.”
Frequently Asked Questions
How do I choose the right barn wood for a kitchen island?
Look for barn wood that’s sturdy, free of rot, and has a consistent thickness for structural integrity. Prioritize reclaimed oak or pine, as they’re durable and easy to work with when building a kitchen island out of barn wood.
Can I build a kitchen island out of barn wood without professional tools?
Yes, basic tools like a saw, drill, level, and sander are sufficient for assembling a DIY kitchen island. Just ensure you measure accurately and pre-drill holes to prevent splitting the aged wood.
How do I prepare barn wood for a kitchen island to ensure safety?
Clean the wood thoroughly with a wire brush, sand off rough edges, and apply a food-safe sealant to protect against moisture and stains—especially important if using the island for food prep.
What’s the best way to attach barn wood to a kitchen island frame?
Use wood screws or pocket-hole joinery to secure the barn wood planks to a sturdy base frame (like plywood or 2x4s). Leave small gaps between planks to allow for natural wood expansion.
How do I add functional features (like shelves or cabinets) to a barn wood kitchen island?
Build a simple frame with standard lumber for shelves or cabinet boxes, then clad the exterior with barn wood for rustic charm. Reinforce with brackets for added support.
How do I maintain a kitchen island made of barn wood over time?
Wipe spills promptly, avoid harsh cleaners, and reapply a wood-safe sealant every 1–2 years. Regularly check for loose screws or wear, especially if you frequently use your barn wood kitchen island.