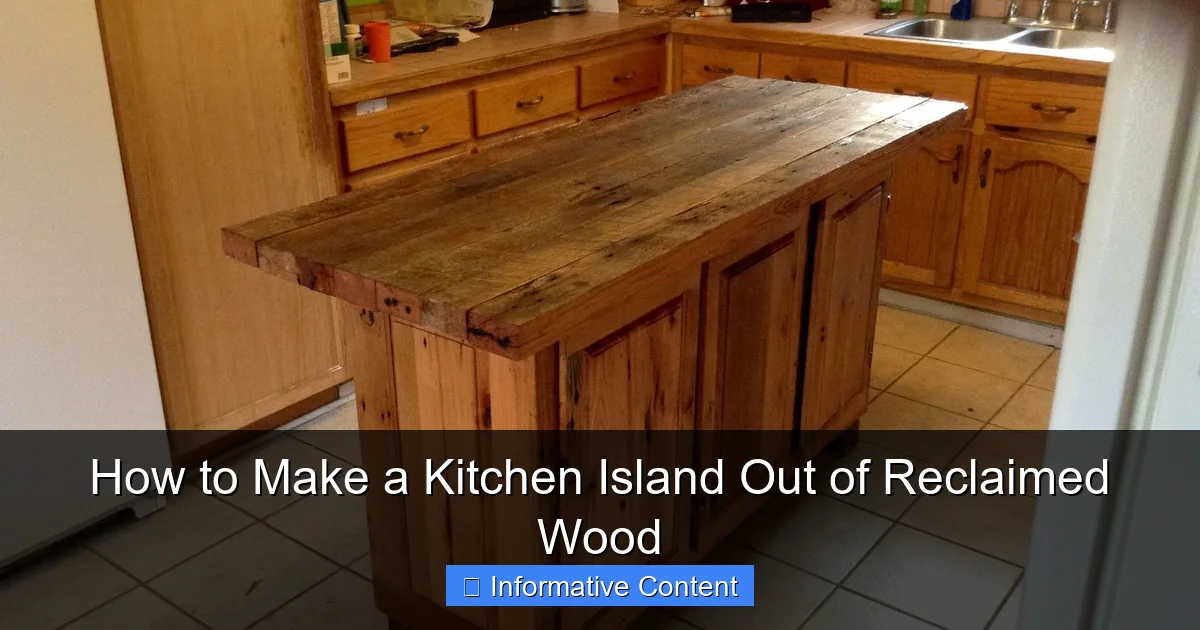
Featured image for how to make a kitchen island out of reclaimed wood
Image source: i.pinimg.com
Transform your kitchen with a stunning, eco-friendly island made from reclaimed wood—sustainable, stylish, and full of character. This DIY project guides you through selecting weathered lumber, building a sturdy base, and sealing the surface for long-lasting beauty and function. Perfect for adding rustic charm and extra workspace, a reclaimed wood island is a rewarding upgrade that blends craftsmanship with environmental responsibility.
Key Takeaways
- Source quality wood: Find solid, pest-free reclaimed wood from trusted suppliers.
- Plan dimensions carefully: Design island size to fit your kitchen layout perfectly.
- Sand and seal thoroughly: Prep wood with deep cleaning and protective finishes.
- Reinforce for durability: Use metal brackets and hardwood for long-lasting stability.
- Add functional features: Include storage, seating, or outlets for practicality.
- Match your style: Stain or paint to complement existing kitchen decor.
📑 Table of Contents
Why a Reclaimed Wood Kitchen Island is Worth the Effort
Imagine walking into your kitchen and being greeted by a warm, rustic centerpiece that tells a story. That’s the magic of a kitchen island made from reclaimed wood. It’s not just a functional upgrade—it’s a conversation starter, a nod to sustainability, and a way to bring character into your home. I still remember the first time I saw a reclaimed wood island at a friend’s house. The knots, the weathered texture, the faint scent of history—it felt alive. That’s when I knew I wanted one too.
But let’s be honest: building anything from reclaimed wood isn’t as simple as picking up a few boards from the hardware store. It’s a labor of love. You’ll need patience, a bit of creativity, and a willingness to embrace imperfections. The good news? The result is worth every splinter. Whether you’re a seasoned DIYer or a beginner with a vision, this guide will walk you through the process step by step. And don’t worry—I’ll share the mistakes I made along the way so you can avoid them.
Planning Your Reclaimed Wood Kitchen Island
Assessing Your Space and Needs
Before you start hunting for wood, take a good look at your kitchen. How much space do you have? Do you want a small prep island or a large one with seating? Measure the area where you plan to place the island, leaving at least 36 inches of clearance on all sides for walking and opening cabinets. Pro tip: Use painter’s tape to outline the island’s footprint on your floor. This gives you a real-life sense of its size and helps you spot potential layout issues early.
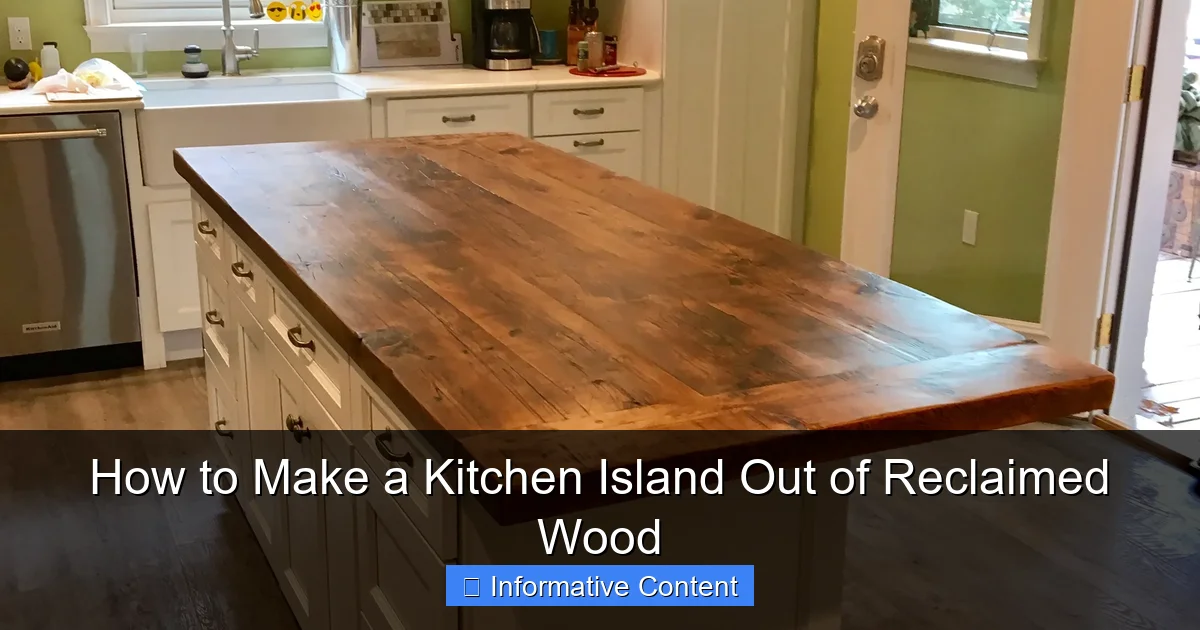
Visual guide about how to make a kitchen island out of reclaimed wood
Image source: images.custommade.com
Think about functionality, too. Will you need storage shelves? A built-in wine rack? A butcher block countertop? For example, I wanted my island to double as a breakfast bar, so I designed it with overhangs for stools. But if you’re short on space, a compact island with pull-out drawers might be better. Write down your must-haves and nice-to-haves—this list will guide your design later.
Setting a Realistic Budget
Reclaimed wood isn’t cheap, but it’s often more affordable than buying new hardwoods. Prices vary widely depending on the source and type of wood. For instance, barn wood might cost $3–$8 per square foot, while antique heart pine can run $10–$15. Don’t forget to budget for hardware (casters, hinges, brackets), finishes (stain, sealant), and tools if you don’t already own them.
Here’s a tip: scour local salvage yards, Craigslist, and Facebook Marketplace for deals. I once found a stack of vintage oak flooring for $200—less than half the retail price. But be prepared to haggle. And always inspect the wood for rot, nails, or insect damage before buying. A little extra time upfront saves headaches later.
Design Inspiration and Sketching
Now comes the fun part: sketching your island. Start with rough pencil drawings, focusing on dimensions, storage, and style. Are you going for farmhouse charm, industrial edge, or mid-century modern? Pinterest and Instagram are great for inspiration, but don’t copy a design exactly—adapt it to your space and skill level.
I made the mistake of overcomplicating my first sketch with intricate details I couldn’t execute. Keep it simple. A rectangular base with a few shelves or drawers is easier to build (and more forgiving for beginners). Use graph paper to scale your sketch, or try free design tools like SketchUp Free. Once you’re happy with the design, create a cut list: a detailed breakdown of every piece you’ll need, including lengths, widths, and quantities.
Sourcing and Preparing Reclaimed Wood
Where to Find Reclaimed Wood
Reclaimed wood comes from old barns, factories, warehouses, and even demolished homes. Your best bet? Local salvage yards or demolition companies. Call ahead to ask about inventory—some yards specialize in certain types of wood or finishes. For example, I found my island’s base at a salvage yard that salvaged old gym bleachers. The wood was sturdy, already sanded, and had a unique patina.
Online marketplaces are another option. Check Etsy, eBay, or specialized sites like ReclaimedFloors.com. But shipping costs can be steep, so factor that into your budget. If you’re on a tight budget, consider upcycling old furniture. A discarded dresser or pallet can yield usable wood (just be sure it’s structurally sound).
Inspecting and Cleaning the Wood
Never skip this step. Reclaimed wood often hides surprises: nails, screws, mold, or pests. Here’s my inspection checklist:
- Check for metal: Run a strong magnet over the wood. If it sticks, there’s a nail or staple you’ll need to remove.
- Look for rot or cracks: Tap the wood with a hammer. Hollow sounds mean rot. Deep cracks? Avoid unless you’re okay with patching them.
- Inspect for bugs: Look for tiny holes (powderpost beetles) or sawdust piles. If you spot signs, freeze the wood for 72 hours to kill pests.
Cleaning is equally important. Use a wire brush or belt sander to remove dirt and old finishes. For stubborn grime, a mix of white vinegar and water (1:1) works well. Let the wood dry completely before sanding—moisture can warp it.
Sanding and Preparing for Use
Reclaimed wood is rarely smooth. Sanding is essential for a safe, splinter-free surface. Start with 80-grit sandpaper to remove old paint or varnish, then work up to 120- or 150-grit for a smooth finish. A random orbital sander saves time, but for tight spaces, a sanding sponge does the trick.
Pro tip: Sand *with* the grain, not against it. It’s tempting to rush, but uneven sanding creates rough patches. After sanding, wipe the wood with a damp cloth to remove dust. Let it dry, then inspect again. If you find gaps or small holes, fill them with wood filler. I like using epoxy filler—it’s durable and blends well with aged wood.
Building the Island Base
Cutting and Assembling the Frame
Your island’s base is its skeleton. For stability, use 2x4s or 2x6s for the frame, even if your top and sides are reclaimed wood. Start by cutting the legs (typically 34–36 inches tall for standard counter height) and cross supports. Use a miter saw for clean, precise cuts.
Assemble the frame with pocket screws or wood glue and clamps. I prefer pocket screws—they’re strong and hide well. For example, my island’s legs are 36 inches tall, with a 2×4 stretcher at the top and bottom for support. If you want mobility, attach casters *before* assembling the frame. Heavy-duty locking casters (rated for 100+ lbs each) prevent wobbling.
Attaching the Reclaimed Wood Sides
Now comes the fun part: cladding the frame with reclaimed wood. Cut your boards to size, leaving 1/8-inch gaps between them for expansion. Attach them with 1.25-inch finish nails or screws, driving them through the back of the frame. Pro tip: Pre-drill holes to avoid splitting the wood, especially near the ends.
For a seamless look, stagger the boards like brickwork. If your wood has uneven thickness, plane it with a hand plane or belt sander until it’s flush. I once used boards from an old fence—some were 1 inch thick, others 1.25 inches. Sanding them down took time, but the result was worth it.
Adding Storage (Optional)
Want shelves or drawers? Install them before cladding the sides. For shelves, add cleats (small wood strips) to the frame for support. For drawers, use pre-made drawer slides or build simple boxes with plywood. I added two open shelves to my island for cookbooks and baskets. They’re easy to access and add storage without closing off the space.
For a farmhouse look, use reclaimed wood for the shelves too. If you’re short on time, buy pre-finished shelves and stain them to match your island. Just remember: reclaimed wood expands and contracts with humidity, so leave a 1/4-inch gap between shelves and the frame.
Creating the Countertop
Choosing the Right Wood for the Top
The countertop is your island’s workhorse. It needs to be durable, flat, and food-safe. Reclaimed wood is ideal, but avoid softwoods like pine for heavy use. Hardwoods like oak, maple, or walnut are better. I used 2-inch-thick reclaimed oak for my countertop—it’s tough enough for chopping and has a beautiful grain.
If you can’t find thick reclaimed wood, glue multiple boards together. Use a biscuit joiner or dowels for alignment, and clamp them tightly. Let the glue cure for 24 hours before sanding.
Sealing and Finishing
Reclaimed wood is porous, so sealing is crucial. For a food-safe finish, I recommend:
- Butcher block oil: Food-grade mineral oil or walnut oil. Reapply every 3–6 months.
- Food-safe polyurethane: A more durable option. Apply 3–4 thin coats, sanding lightly between them.
- Epoxy resin: Creates a waterproof, glass-like finish. Ideal for wet areas (but overkill for most islands).
I used a mix: three coats of oil-based polyurethane for durability, followed by a monthly oil rub. It’s held up great for two years, even with daily use. Avoid water-based finishes—they can raise the wood grain and look cloudy on reclaimed wood.
Attaching the Countertop
Secure the countertop to the base with brackets or Z-clips. Never glue it—wood needs to expand and contract. I used four L-brackets, one at each corner, and added felt pads to prevent scratches. For extra stability, install a cleat (a thin wood strip) along the back edge to support overhangs.
For a waterfall effect (where the countertop wraps around the sides), cut the ends at a 45-degree angle and attach them with biscuits or splines. It’s tricky but stunning—my neighbor’s waterfall island gets compliments every time someone visits.
Finishing Touches and Styling
Adding Functional Features
Make your island work harder with smart additions:
- Pull-out trash bin: A must for small kitchens. Use a pre-made slide or build your own.
- Wine rack: Use reclaimed wood to match your island’s style.
- Electrical outlets: Hire an electrician to add a GFCI outlet for blenders or coffee makers.
- Butcher block cutting board: A removable section for chopping. I cut mine from the same reclaimed oak as the countertop.
I added a small spice rack on the side of my island—it’s within reach when cooking and saves drawer space. Use rare-earth magnets to hold jars or knives.
Styling Your Island
Now for the fun part: styling! A reclaimed wood island looks great with:
- Farmhouse sinks: A white apron sink complements the rustic wood.
- Metal accents: Black iron legs, copper pendant lights, or stainless steel stools.
- Greenery: A small herb garden in vintage pots adds life.
- Textiles: A linen runner or woven basket for storage.
My island’s stools have black metal legs and leather seats—they tie in with the wood’s warmth and the kitchen’s modern fixtures. Keep the styling simple; let the wood shine.
Maintenance and Long-Term Care
Daily and Seasonal Upkeep
Reclaimed wood requires more care than new wood. Here’s my maintenance routine:
- Daily: Wipe with a damp cloth and mild soap. Dry immediately.
- Monthly: Oil the countertop (if using oil-based finish). Buff with a soft cloth.
- Annually: Sand and reseal the countertop if it looks dry. Check screws and tighten if needed.
Humidity is your enemy. In winter, run a humidifier to prevent cracks. In summer, use a dehumidifier if your kitchen is damp. I keep a hygrometer on my island to monitor humidity—it’s saved me from warping more than once.
Repairing Damage
Scratches, dents, and water rings happen. For shallow scratches, rub with a walnut (yes, the nut!) or apply a wax filler. For water rings, sand lightly and reseal. Dents can be steamed with a damp cloth and iron—the wood fibers will swell and rise.
Major damage? Replace the board. I once dropped a cast-iron pan, leaving a deep dent. I cut out the damaged section and spliced in a new piece. No one can tell!
| Maintenance Task | Frequency | Recommended Product |
|---|---|---|
| Wipe down | Daily | Mild soap + water |
| Oil countertop | Monthly | Butcher block oil |
| Reseal countertop | Annually | Food-safe polyurethane |
| Check hardware | Quarterly | Adjustable wrench |
Final Thoughts: Your Island, Your Story
Building a reclaimed wood kitchen island is more than a DIY project—it’s a way to create a piece of furniture that’s uniquely yours. Every scratch, knot, and nail hole tells a story. Mine has a faint mark where a child carved their initials into the wood decades ago. I love that history.
Yes, it takes time. Yes, you’ll make mistakes (I still cringe at the first drawer I built crooked). But the result is a kitchen island that’s not just functional but soulful. It’s the kind of piece that makes guests pause and say, “Where did you find this?”
So grab your tools, embrace the imperfections, and get started. And when you’re done, pour yourself a glass of wine, sit at your island, and admire your handiwork. You’ve just added a piece of art to your home—one that will last for generations.
Frequently Asked Questions
How do I choose the right reclaimed wood for a kitchen island?
Look for sturdy, kiln-dried reclaimed wood with minimal warping or rot, such as oak, pine, or barn wood. Ensure it’s free of nails and contaminants to avoid safety hazards during cutting and sanding.
Can I build a kitchen island out of reclaimed wood without professional tools?
Yes, you can use basic tools like a circular saw, drill, and sander, but a table saw or planer helps for precision. Renting tools or repurposing old furniture parts can reduce costs while working with reclaimed wood.
How do I prepare reclaimed wood for a kitchen island?
Clean the wood thoroughly, remove old nails or staples, and sand it smooth. Apply a food-safe sealant or wax to protect the surface from moisture and stains, especially if used for food prep.
What design considerations should I keep in mind for a reclaimed wood kitchen island?
Balance aesthetics and function: ensure the island height matches standard countertops (36–39 inches) and include storage or overhangs for seating. Reclaimed wood’s unique character works best with rustic or farmhouse-style kitchens.
How do I ensure my reclaimed wood kitchen island is structurally stable?
Reinforce the frame with a sturdy base (e.g., plywood or metal brackets) and attach the reclaimed wood securely using wood glue and screws. Add cross-supports underneath to prevent sagging over time.
Is a reclaimed wood kitchen island eco-friendly?
Absolutely! Using reclaimed wood reduces deforestation and landfill waste. Just source it responsibly from salvage yards or deconstructed buildings to maintain its environmental benefits.