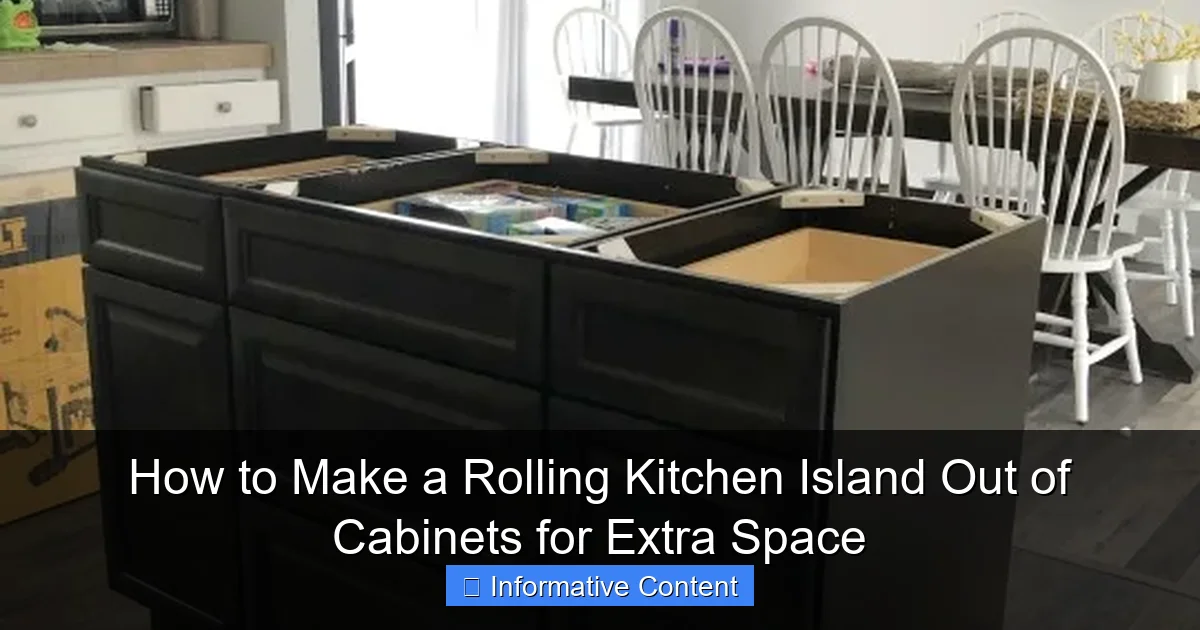
Featured image for make a rolling kitchen island out of cabinets
Image source: justcallmehomegirl.com
Transform unused cabinets into a versatile rolling kitchen island to instantly boost storage, prep space, and mobility in your kitchen. With basic tools and casters, you can customize height, layout, and style—making it a budget-friendly, high-impact upgrade for small or evolving spaces.
Key Takeaways
- Repurpose old cabinets: Use sturdy base cabinets for a durable rolling island base.
- Add casters wisely: Install locking swivel casters for mobility and stability.
- Maximize storage: Customize shelves and drawers to fit your kitchen needs.
- Choose a countertop: Pick materials like butcher block for style and function.
- Secure components: Anchor countertops and cabinets to prevent shifting during use.
- Personalize with paint: Match your kitchen’s aesthetic with a fresh finish.
📑 Table of Contents
- Why a Rolling Kitchen Island Could Be Your Best Kitchen Upgrade Yet
- What You Need to Know Before You Start
- Tools and Materials: What You’ll Need
- Step-by-Step: Building Your Rolling Island
- Design Tips to Maximize Function and Style
- Common Mistakes and How to Avoid Them
- Real-Life Examples and Inspiration
- Final Thoughts: Is It Worth It?
Why a Rolling Kitchen Island Could Be Your Best Kitchen Upgrade Yet
Let’s be real: most kitchens are tight on space. Whether you’re cooking for a family, hosting friends, or just trying to find room for your coffee maker, countertop real estate is precious. I remember standing in my own kitchen one morning, balancing a bowl of cereal on the edge of the sink because there was no room left on the counter. That’s when I had a lightbulb moment: what if I could make a rolling kitchen island out of cabinets?
Not only would it give me extra storage and prep space, but I could move it around whenever I needed. No more bumping into a fixed island when I’m trying to open the fridge. No more cluttered counters. Just flexibility, function, and a little DIY pride. And the best part? You don’t need to be a master carpenter to pull it off. With some basic tools, a few cabinets, and a weekend of work, you can build a rolling kitchen island that looks professional and solves your space problems.
What You Need to Know Before You Start
Before you rush to the hardware store, it’s important to understand the basics. A rolling kitchen island made from cabinets isn’t just slapping wheels on a box. It’s about balance, stability, and smart design. Let’s walk through the key considerations so your island doesn’t wobble, tip, or become a tripping hazard.
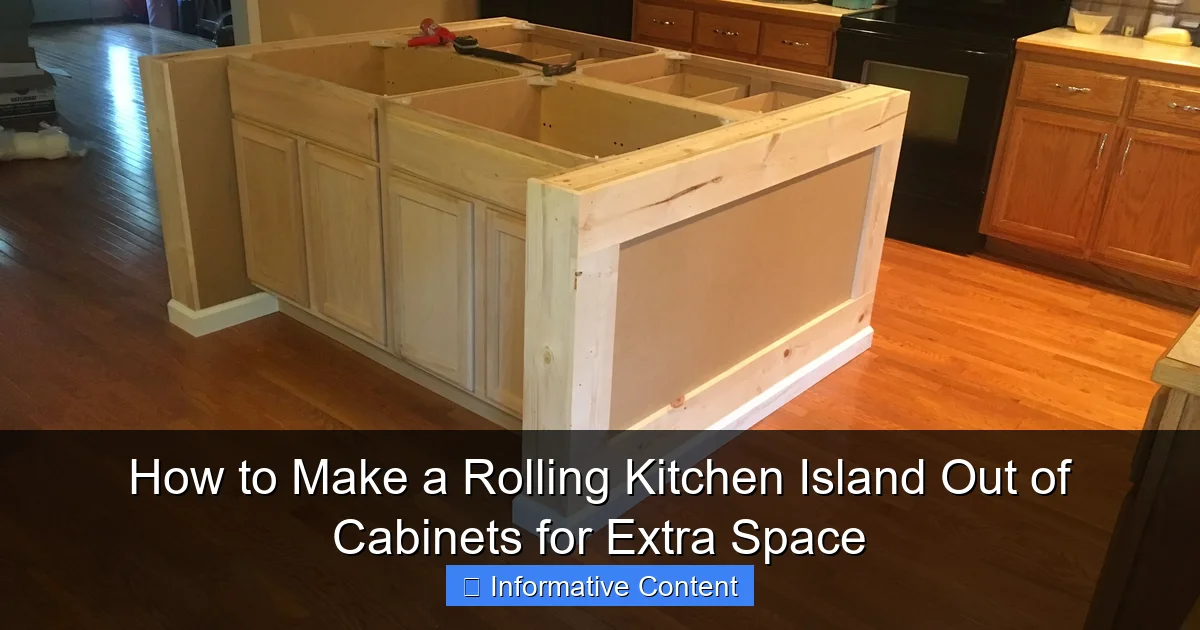
Visual guide about make a rolling kitchen island out of cabinets
Image source: i.pinimg.com
Assess Your Space and Needs
Start by measuring your kitchen. How much open floor space do you have? Where do you usually prep food? Do you need more countertop, storage, or both? For example, if you’re tight on drawer space, go for cabinets with drawers. If you need a place to store small appliances, consider deeper cabinets with open shelving or a pull-out rack.
Think about traffic flow, too. You want your island to be useful, not a roadblock. A good rule of thumb: leave at least 36 inches of clearance on all sides. That way, you can open cabinet doors, walk around, and even pull out a step stool without bumping into anything.
Choose the Right Cabinets
You can use brand-new stock cabinets or repurpose old ones. I actually used two base cabinets from a local cabinet shop that were slightly damaged on one side—perfect for the back of the island where no one sees. The savings? Over $200. But here’s the thing: not all cabinets are equal.
- Base cabinets (24″ deep, 34.5″ high) are ideal. They’re sturdy and the right height for most countertops.
- Wall cabinets are shallower (12–14″) and taller. They work if you’re building a taller island or want open shelving, but they’re less stable on their own.
- Drawer base or sink base cabinets add function. A sink base can hold a small prep sink (if you’re plumbing it), while drawer bases give you easy access to utensils.
Pro tip: If you’re using two cabinets side by side, make sure they’re the same height. Uneven cabinets = wobbly island. Trust me, I learned that the hard way.
Plan for Weight and Stability
Kitchen islands get heavy—especially when you fill them with pots, pans, and appliances. That’s why you need to think about weight distribution. Heavier items (like cast iron cookware) should go on the bottom shelves. Lighter items (like spices or dish towels) can go on top.
Also, consider adding a back panel (like plywood or beadboard) to connect the two cabinets. This helps prevent racking (side-to-side wobbling) and gives you a surface to mount hooks or a towel bar.
Tools and Materials: What You’ll Need
Now that you’ve got your plan, let’s talk supplies. You don’t need a full workshop, but having the right tools makes the job easier and safer.
Essential Tools
- Circular saw or table saw (for cutting wood)
- Drill/driver with bits
- Tape measure
- Level (a 24″ or 48″ one works best)
- Screwdriver set
- Pencil
- Clamps (2–4, to hold pieces together while assembling)
- Jigsaw (optional, for cutting curves or notches)
If you don’t have a saw, many home improvement stores will cut wood for you—just bring your measurements. I once had a guy at the lumber department cut my plywood to size while I picked out cabinet knobs. Saved me an hour!
Materials List
- 2 base cabinets (or more, depending on size)
- 3/4″ plywood (for countertop and back panel)
- 1×4 or 1×6 boards (for trim and edge banding)
- Heavy-duty casters (4 total: 2 locking, 2 non-locking)
- Wood glue
- 3″ wood screws
- 1-1/4″ wood screws (for trim)
- Sandpaper (120 and 220 grit)
- Wood filler
- Primer and paint (or wood stain and sealant)
- Countertop edge molding (optional)
- Drawer pulls or knobs (if cabinets don’t have them)
Casters are the secret weapon here. Look for ones rated for at least 100 pounds each. I used 4″ casters with ball-bearing wheels from Amazon. They glide smoothly over tile and even my slightly uneven hardwood. The locking ones keep the island in place when I’m chopping onions.
Budget Breakdown
You can keep this project under $300 if you shop smart. Here’s a rough estimate:
- Cabinets: $100–$200 (used or discounted)
- Plywood (4×8 sheet): $30–$50
- Casters: $40–$60
- Trim and molding: $20–$30
- Paint/stain: $20–$40
- Hardware: $15–$30
Total: $225–$410. Not bad for a custom piece that doubles your kitchen storage!
Step-by-Step: Building Your Rolling Island
Alright, let’s get building. This is the fun part—where you turn raw materials into a functional kitchen upgrade. I’ll walk you through each step with tips from my own experience.
Step 1: Assemble the Base
Start by placing your two cabinets side by side, face down on a flat surface (like a garage floor or large table). Use clamps to hold them together. Then, cut a piece of 3/4″ plywood to match the width and depth of the combined cabinets (usually 48″ wide x 24″ deep for two standard cabinets). This will be your back panel.
Apply wood glue to the back edges of both cabinets. Place the plywood panel over them and secure it with 3″ screws every 6–8 inches. This creates a rigid frame that prevents wobbling. Let the glue dry for at least an hour before moving on.
Step 2: Add the Casters
Now, flip the cabinet assembly over so it’s face up. Use your level to make sure it’s flat. Mark where each caster will go—one near each corner, about 2–3 inches from the edge. This keeps the weight balanced.
Pre-drill holes to avoid splitting the wood. Attach the casters with the screws provided. Make sure the two locking casters are on the same side (I put mine on the side facing the sink, so I can lock it in place while washing dishes).
Pro tip: If your floor is uneven, use shims under the casters. I had to add a tiny piece of cardboard under one wheel to stop the island from rocking.
Step 3: Build the Countertop
Measure the top of your cabinet base. Cut a piece of 3/4″ plywood to fit, with an overhang of 1–2 inches on the front and sides (but not the back, unless you want it flush with the wall). For example, if your cabinets are 48″ x 24″, cut the countertop to 50″ x 26″.
Sand the edges smooth. Apply edge banding (pre-glued veneer tape) to the exposed plywood edges for a finished look. Iron it on with a household iron or use a hair straightener. Trim the excess with a utility knife.
Attach the countertop to the cabinets with 1-1/4″ screws from underneath. Use 4–6 screws, evenly spaced. Don’t over-tighten—you don’t want to crack the wood.
Step 4: Add Trim and Finishing Touches
This is where your island starts to look like a real piece of furniture. Cut 1×4 or 1×6 boards to fit around the bottom edge of the cabinets (the “skirt”). Attach them with wood glue and 1-1/4″ screws. This hides the casters and gives a polished look.
Add a decorative edge to the countertop. I used a simple bullnose molding, glued and nailed on with a brad nailer. You can also use a router to round the edges yourself.
Fill screw holes and seams with wood filler. Let it dry, then sand smooth. Prime the entire island, then paint or stain. I used a semi-gloss white paint for a clean, modern look. Let it cure for 24–48 hours before using.
Step 5: Customize for Function
Now, make it yours. Add drawer pulls, a towel bar, or even a spice rack. I drilled a hole in the side and mounted a magnetic knife strip. You can also attach a small shelf to the back panel for cookbooks or plants.
For extra countertop space, consider adding a pull-out cutting board or a fold-down leaf (great for small kitchens).
Design Tips to Maximize Function and Style
A rolling kitchen island isn’t just about utility—it should look good, too. Here are some design hacks I’ve picked up to make your island both beautiful and practical.
Choose a Countertop Material
Plywood works fine, but you can upgrade. I’ve seen people use:
- Butcher block (warm, natural look; needs oiling)
- Quartz or laminate (durable, low maintenance)
- Tile (great for heat resistance; can chip)
- Concrete (poured-in-place or precast) (heavy but modern)
If you’re on a budget, paint your plywood countertop with chalkboard paint for a fun writing surface (perfect for grocery lists).
Use the Back Panel Wisely
The back panel isn’t just for stability. Turn it into a functional surface:
- Mount a pegboard for hanging tools
- Install a small shelf for cookbooks
- Add hooks for aprons or oven mitts
- Paint it with magnetic paint and use it as a message board
I added a narrow spice rack to mine. Now I can see all my spices at a glance.
Match Your Kitchen Aesthetic
Your island should feel like part of the room. If you have a farmhouse kitchen, use shaker-style cabinets and a butcher block top. For a modern look, go for flat-panel cabinets and a sleek quartz countertop.
Paint color matters. Match the island to your cabinets for a built-in look, or contrast it (like navy blue on white cabinets) for a bold statement.
Light It Up
Add under-cabinet lighting for ambiance and task lighting. Battery-powered LED strips are easy to install and last for months. I put mine under the countertop edge—now my island glows softly at night.
Common Mistakes and How to Avoid Them
Even the best DIYers make mistakes. Here are the ones I’ve seen (and made myself)—and how to dodge them.
Ignoring Weight Distribution
Putting heavy items on top shelves can make your island top-heavy. Always store pots, cast iron, and appliances on the bottom. Use upper shelves for light items like dish towels or small jars.
Skipping the Back Panel
Without a back panel, your cabinets can twist and rack. This leads to wobbly doors and a shaky island. Always use a plywood or solid wood panel to brace the structure.
Choosing the Wrong Casters
Cheap casters squeak, stick, or break under load. Invest in quality. Look for:
- Ball-bearing wheels (for smooth movement)
- Locking brakes (for safety)
- Swivel capability (for tight spaces)
I once used casters from a discount store. They lasted three months. Lesson learned.
Not Leveling the Island
An unlevel island wobbles and makes cooking frustrating. Use a level on the countertop and adjust the casters or add shims until it’s perfectly flat.
Forgetting Ventilation
If you plan to add a small stove or induction burner, make sure there’s ventilation. You may need to cut a hole in the back panel for a fan or vent.
Real-Life Examples and Inspiration
Here’s a quick look at how different people have customized their rolling islands:
| Homeowner | Island Size | Features | Materials | Cost |
|---|---|---|---|---|
| Sarah (urban apartment) | 36″ x 24″ | Pull-out trash bin, spice rack, towel bar | Stock base cabinet, butcher block top | $275 |
| Mike (farmhouse kitchen) | 48″ x 30″ | Open shelves, wine rack, drop-leaf table | Salvaged cabinets, quartz countertop | $390 |
| Lena (small galley kitchen) | 24″ x 24″ | Fold-down leaf, magnetic knife strip | Drawer base cabinet, painted plywood | $210 |
| Carlos (rental kitchen) | 48″ x 24″ | Removable backsplash, under-cabinet lighting | New stock cabinets, laminate countertop | $320 |
These examples show how flexible a rolling island can be. Whether you need a tiny helper for a small kitchen or a full-featured prep station, you can adapt the design to fit your needs.
Final Thoughts: Is It Worth It?
Absolutely. A rolling kitchen island made from cabinets is one of the most practical, affordable, and rewarding DIY projects you can do. It’s not just about extra space—it’s about freedom. Freedom to move your workspace when you need it. Freedom to customize it exactly how you want. And freedom to take it with you if you ever move (yes, I’ve done it).
Yes, it takes time and effort. You might make a mistake or two. But every time I roll my island into the center of the kitchen for a big dinner party, I smile. I made that. And it works perfectly.
So grab your tools, pick out some cabinets, and give it a try. Your kitchen (and your sanity) will thank you. And who knows? You might just start a new tradition of DIY kitchen upgrades. After all, the best kitchens aren’t just beautiful—they’re built with heart.
Frequently Asked Questions
How do I turn old cabinets into a rolling kitchen island?
To make a rolling kitchen island out of cabinets, start by selecting sturdy base cabinets and reinforcing the bottom with plywood. Attach locking casters to the base for mobility and stability. Finish by adding a countertop and sealing edges for a polished look.
What type of cabinets work best for a rolling kitchen island?
Stock or semi-custom base cabinets are ideal for a rolling kitchen island because they’re durable and designed to hold weight. Avoid tall pantry cabinets unless you add cross-bracing to prevent tipping when moved.
Can I build a rolling kitchen island without power tools?
Yes, you can assemble a rolling kitchen island using hand tools like a drill, screwdriver, and clamps. Pre-drilled cabinet components and peel-and-stick countertop edging simplify the process for beginners.
How do I ensure my rolling kitchen island is stable?
Use heavy-duty locking casters rated for at least 100 lbs each and anchor the island to wall studs when in use. For added safety, install a center support beam if using long or wide cabinets.
What’s the easiest way to customize a rolling kitchen island?
Paint or stain cabinets before assembly, then add trim, hardware, or a contrasting countertop to match your kitchen decor. Include open shelves or towel bars for extra functionality.
Can I make a rolling kitchen island with wheels that lock securely?
Absolutely—opt for 360-degree swivel casters with brakes, which allow smooth movement and prevent unwanted shifting. Ensure wheels are mounted directly to a solid base for maximum stability.