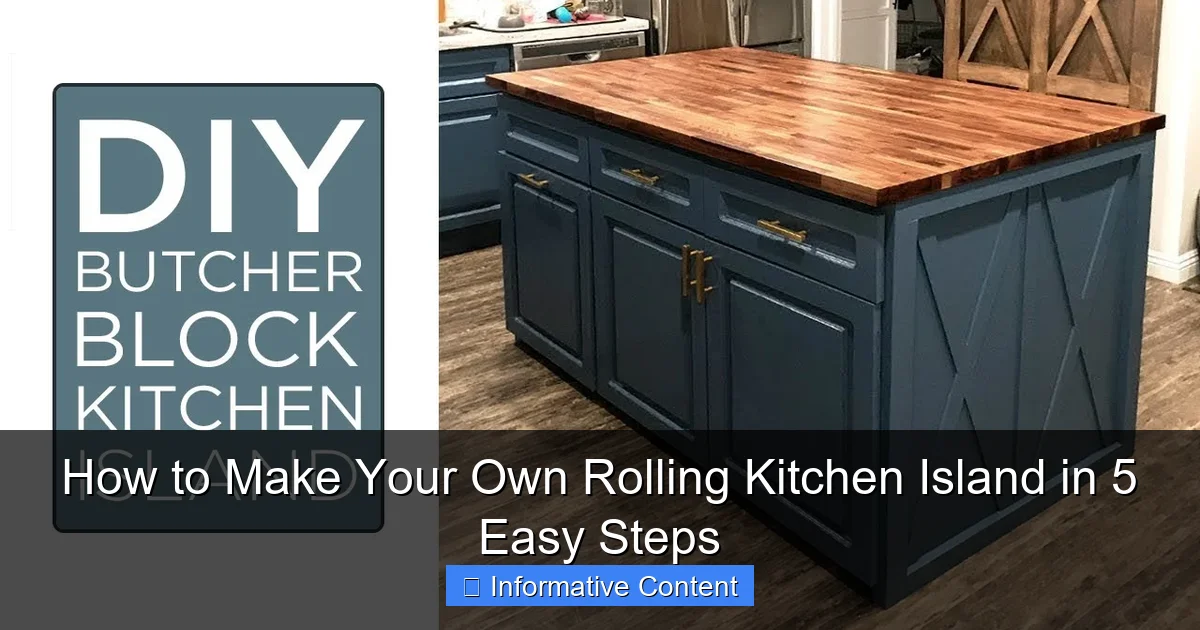
Featured image for make your own rolling kitchen island
Image source: i.ytimg.com
Transform your kitchen with a custom rolling island you can build in just 5 simple steps—no expert skills required. This DIY project combines affordability, mobility, and personalized style to maximize prep space and storage, all on lockable casters for seamless use. Perfect for small kitchens or flexible layouts, your homemade island delivers big impact with minimal effort.
Key Takeaways
- Plan dimensions first: Measure your space to ensure the island fits and rolls easily.
- Choose durable materials: Opt for hardwood or plywood for long-lasting countertops and frames.
- Add locking casters: Install heavy-duty wheels with locks for mobility and stability.
- Pre-drill all holes: Prevent wood splitting by drilling pilot holes before assembling.
- Seal the surfaces: Apply food-safe sealant to protect countertops from spills and stains.
- Include storage features: Add shelves or hooks for utensils to maximize functionality.
📑 Table of Contents
- Why a Rolling Kitchen Island Is a Game-Changer
- Step 1: Plan Your Design and Gather Materials
- Step 2: Build the Frame and Base
- Step 3: Install the Countertop and Trim
- Step 4: Customize with Storage and Features
- Step 5: Finish, Test, and Enjoy
- Cost Breakdown and Time Investment
- Final Thoughts: Why DIY Is Worth It
Why a Rolling Kitchen Island Is a Game-Changer
Let’s be honest: kitchens are the heart of the home, but they’re not always built for convenience. Whether you’re working with a small galley kitchen or a spacious open-concept layout, counter space can feel like a luxury. I remember spending hours prepping meals in my old apartment, constantly shuffling cutting boards, bowls, and utensils just to make room. That’s when I realized I needed a rolling kitchen island—a mobile, multi-functional workhorse that could adapt to my needs.
What I love about a rolling kitchen island is its flexibility. Need more counter space? Roll it in. Want to clear the area for cleaning? Push it aside. Hosting a dinner party? Use it as a serving station. It’s not just about storage or prep—it’s about making your kitchen work for you, not against you. The best part? You don’t need to spend hundreds on a pre-made one. With a few tools and some basic materials, you can make your own rolling kitchen island in just a few hours. And trust me, the satisfaction of building something so useful? Priceless.
Step 1: Plan Your Design and Gather Materials
Start with Your Needs
Before you pick up a saw or drill, take a moment to think: what do you actually need from your rolling kitchen island? Are you short on counter space? Do you need extra storage for pots, pans, or pantry items? Maybe you’d like a small prep sink or a built-in spice rack. Your design should reflect your daily habits.
Visual guide about make your own rolling kitchen island
Image source: carvewright.com
For example, I wanted mine to double as a prep station and a breakfast bar, so I added a small overhang for stools. My neighbor, on the other hand, needed more storage, so she built hers with deep drawers and open shelving. The key is to tailor it to your lifestyle. Sketch out a rough plan, including dimensions, features, and materials. Even a simple drawing on paper helps!
Choose the Right Materials
Here’s where you can get creative—but also practical. For the frame and base, you’ll want something sturdy. Plywood or solid wood (like pine or poplar) works well. For the countertop, consider:
- Plywood with a laminate finish: Affordable and easy to cut, but not as durable as stone.
- Butcher block: Warm, attractive, and great for food prep, but requires regular sealing.
- Quartz or granite: High-end and durable, but heavier and more expensive.
For the base, I used 3/4-inch plywood for the sides and back, with 1/2-inch plywood for the shelves. The countertop was a pre-cut butcher block (I’m lazy like that). If you’re on a budget, reclaimed wood or even an old door can work beautifully.
Don’t Forget the Wheels
The magic of a rolling kitchen island is in its mobility. You’ll need locking casters (wheels) that can handle the weight of your island. Look for heavy-duty casters rated for at least 100 pounds each. I used four 3-inch swivel casters with locks—two on each end. They cost about $15 each but are worth every penny. Pro tip: buy casters with a rubber coating to protect your floors.
Step 2: Build the Frame and Base
Cut and Assemble the Frame
Now it’s time to get hands-on. Start by cutting your plywood to size. For a standard island (36 inches tall, 30 inches wide, and 24 inches deep), you’ll need:
- Two side panels (36” x 24”)
- One back panel (30” x 36”)
- One bottom shelf (30” x 24”)
- One middle shelf (30” x 24”)
- One top frame (30” x 24”)
Use a circular saw or table saw to cut the pieces. Sand the edges smooth to avoid splinters. Then, assemble the frame using pocket screws or wood screws. I prefer pocket screws because they hide the hardware and give a clean look. Clamp the pieces together, pre-drill holes, and screw them in place. Add wood glue for extra strength.
Reinforce and Add Shelves
Once the frame is assembled, reinforce it with corner braces or L-brackets—especially at the top, where the countertop will sit. This prevents wobbling. Next, install the shelves. Use shelf pins or cleats to support them. For a cleaner look, I used 1×2 pine strips as cleats. Attach them to the inside of the frame, then slide the shelf in. Secure with screws from underneath.
Attach the Casters
Flip the frame upside down and attach the casters to the corners. Make sure they’re aligned evenly so the island doesn’t wobble. Use washers and nuts to secure them tightly. Test the movement—it should glide smoothly. If one caster feels loose, double-check the screws. This step is crucial: a wobbly island is a safety hazard!
Step 3: Install the Countertop and Trim
Choose and Prepare the Countertop
Your countertop is the star of the show. If you’re using butcher block, sand it lightly and apply a food-safe oil (like mineral oil or tung oil) to protect it. For laminate, just wipe it clean. If you’re using a heavy stone countertop, you might want to pre-attach it to a plywood sub-base for easier handling.
Secure the Countertop
Place the countertop on the frame, making sure it’s centered. Leave a small overhang (1-2 inches) on all sides for a finished look. Attach it with screws from underneath—use at least four screws, one near each corner. For extra stability, add a few more along the edges. If your countertop is heavy, have a friend help you lift it into place.
Add Trim and Finishing Touches
Trim gives your island a polished, custom look. I used 1×2 pine strips around the edges of the shelves and the base. Miter the corners for a seamless finish. Attach with wood glue and brad nails, then sand smooth. You can also add a beadboard back panel for a cottage-style vibe—just cut it to size and attach with nails or adhesive.
Step 4: Customize with Storage and Features
Maximize Storage with Drawers and Baskets
Empty shelves are great, but drawers and baskets keep things organized. I added two shallow drawers (12” x 20”) under the countertop for utensils and cutting boards. Use drawer slides (like full-extension ball-bearing slides) for smooth operation. For deep shelves, I used woven baskets—perfect for storing onions, potatoes, or cleaning supplies. They’re easy to pull out and hide clutter.
Add Functional Extras
Think about the little things that make life easier. Here are some ideas:
- Towel bars: Attach a wooden dowel or metal rod to the side for hanging dish towels.
- Spice racks: Install small shelves or magnetic strips for spice jars.
- Hooks: Add hooks for aprons, oven mitts, or reusable bags.
- Charging station: Drill a small hole in the back and run a power strip for phones or tablets.
My favorite feature? A small wine rack built into the side. It holds three bottles—perfect for impromptu dinner parties!
Consider a Prep Sink (Optional)
If you want to go all-in, you can add a small stainless steel or ceramic prep sink. This requires plumbing work, so it’s best for experienced DIYers or those willing to hire a plumber. You’ll need to cut a hole in the countertop, install the sink, and connect it to your kitchen’s water supply and drain. It’s a big upgrade but makes food prep so much easier.
Step 5: Finish, Test, and Enjoy
Sand and Stain or Paint
Before you start using your island, give it a final sanding with 120-grit sandpaper. Remove all dust with a damp cloth. Now, decide on a finish:
- Stain: Enhances the wood grain. Use a pre-stain conditioner for even absorption.
- Paint: Great for a modern look. Use a primer first, then two coats of semi-gloss paint for durability.
- Sealant: Apply a polyurethane or wax finish to protect the wood from spills and scratches.
I used a dark walnut stain and two coats of satin polyurethane. It took about two days to dry completely, but the result was worth it—rich color and a smooth, wipeable surface.
Test for Stability and Function
Now, the moment of truth: test your island. Push it around to make sure it rolls smoothly. Open drawers and shelves to check for smooth operation. Load it with pots, pans, and countertop appliances to see if it wobbles. If it does, tighten the screws or add more support. Lock the casters and make sure they hold securely.
Style It to Match Your Kitchen
Your rolling kitchen island is functional, but it should also look good. Add a few decorative touches:
- A tray of fresh herbs or a vase of flowers
- A small lamp or string lights for ambiance
- A chalkboard or magnetic board for notes and recipes
I added a small plant and a stack of cookbooks—it instantly felt like part of the kitchen.
Cost Breakdown and Time Investment
One of the best things about building your own rolling kitchen island is the cost savings. Here’s a rough estimate of what you might spend:
| Item | Cost (USD) | Notes |
|---|---|---|
| Plywood (3/4″ and 1/2″) | $60-$100 | Depends on quality and size |
| Butcher block countertop | $100-$200 | Pre-cut saves time |
| Locking casters (4) | $50-$80 | Heavy-duty for stability |
| Drawer slides and hardware | $30-$50 | Full-extension for easy access |
| Wood glue, screws, sandpaper | $20-$30 | Basic supplies |
| Stain/paint and sealant | $20-$40 | Choose durable finishes |
| Total | $280-$500 | Much cheaper than pre-made |
Time-wise, plan for about 1-2 weekends, depending on your experience. The actual building takes 4-6 hours, but drying times (for glue, stain, or paint) add extra days. If you’re short on time, consider pre-cutting materials at the store or using a pre-made countertop.
Final Thoughts: Why DIY Is Worth It
Building your own rolling kitchen island isn’t just about saving money—it’s about creating something that’s uniquely yours. You get to choose the size, style, and features that fit your life. And when you roll it into your kitchen, you’ll feel that quiet pride of having built something functional and beautiful with your own hands.
Of course, it’s not all smooth sailing. You might hit a snag—maybe the drawers don’t slide smoothly, or the stain looks uneven. But those are part of the process. Every mistake is a lesson, and every fix makes you a better DIYer. Plus, you can always tweak it later. Add more shelves, change the paint, or upgrade the wheels. It’s a project that grows with you.
So, grab your tools, sketch out your plan, and get started. Whether you’re a seasoned builder or a first-timer, making your own rolling kitchen island is one of the most rewarding projects you’ll ever tackle. And when you’re done? Pour yourself a glass of wine, roll it into place, and enjoy the extra space—you’ve earned it.
Frequently Asked Questions
How do I make my own rolling kitchen island on a budget?
To make your own rolling kitchen island affordably, repurpose materials like old cabinets, wooden crates, or pallets for the base, and use casters for mobility. Opt for affordable countertop materials such as butcher block or laminate to keep costs low.
What tools and materials do I need to build a rolling kitchen island?
You’ll need basic tools like a drill, saw, measuring tape, and screws, along with materials such as plywood, casters, a countertop, and paint or stain. Adding a backsplash or towel bars is optional for extra functionality.
Can I customize the size and design of my rolling kitchen island?
Yes! One of the biggest advantages of a DIY rolling kitchen island is customization—adjust the height, width, and storage to fit your space. Include shelves, hooks, or even a spice rack for a personalized touch.
How do I ensure my DIY rolling kitchen island is stable and safe?
Use sturdy casters (preferably locking ones) and reinforce the frame with cross-bracing or corner braces. Test stability by gently shaking the island before loading it with heavy items.
What are the best wheels (casters) for a rolling kitchen island?
Choose heavy-duty, lockable casters with a weight rating that exceeds your island’s load. Rubber or polyurethane wheels are ideal for smooth movement without scratching floors.
Can I add storage features to my homemade rolling kitchen island?
Absolutely! Incorporate drawers, open shelves, or even a built-in wine rack to maximize utility. Use baskets or dividers inside cabinets to organize utensils, pots, or pantry items efficiently.