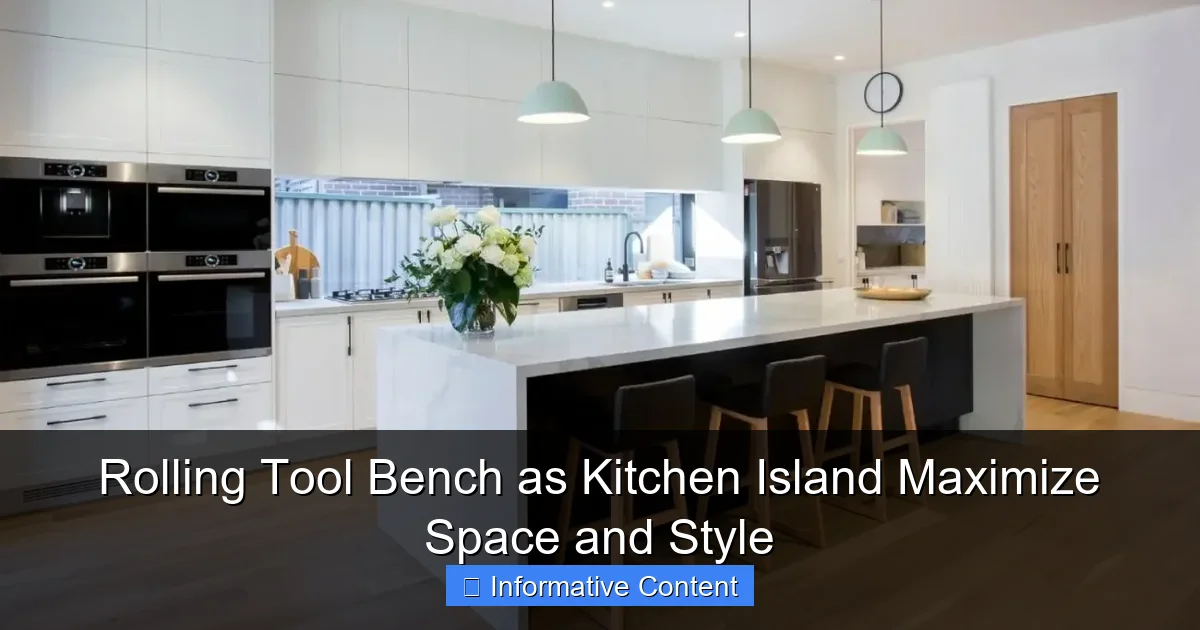
Featured image for rolling tool bench as kitchen island
Image source: stoneinteriors.com.au
Transform your kitchen with a rolling tool bench as a stylish, multifunctional island that maximizes space and adds industrial-chic flair. Equipped with durable casters, ample storage, and a sturdy worktop, it effortlessly doubles as a prep station, dining bar, or mobile pantry—perfect for compact or evolving kitchens.
Key Takeaways
- Maximize space: Use a rolling tool bench as a mobile kitchen island for extra prep and storage.
- Multi-functional design: Repurpose durable tool benches for cooking, dining, or entertaining with ease.
- Mobility matters: Locking casters ensure stability while allowing flexible kitchen layout changes.
- Style upgrade: Choose wood or metal finishes to match your kitchen’s aesthetic effortlessly.
- Smart storage: Utilize drawers and shelves to organize utensils, cookware, or pantry items neatly.
- Budget-friendly: Save by converting a tool bench instead of buying a custom kitchen island.
📑 Table of Contents
- Why a Rolling Tool Bench Might Be Your Kitchen’s New Best Friend
- The Smart Appeal of Repurposing a Rolling Tool Bench
- Choosing the Right Rolling Tool Bench for Your Kitchen
- Transforming the Look: Making It Feel Like a Kitchen Island
- Maximizing Functionality: How to Use Your Bench Like a Pro
- Real-Life Examples: Inspiration from DIYers Like You
- Final Thoughts: Is a Rolling Tool Bench Right for You?
Why a Rolling Tool Bench Might Be Your Kitchen’s New Best Friend
Let’s face it—kitchen space is a hot commodity. Whether you live in a cozy apartment, a small house, or just have a kitchen that’s more “cozy” than “spacious,” every inch counts. I remember when I first moved into my 800-square-foot apartment. The kitchen was barely big enough for a fridge and a sink, let alone a proper island. I wanted a central spot to prep meals, store essentials, and maybe even have a cup of coffee while scrolling through recipes. But traditional kitchen islands? Too big, too expensive, and not flexible enough for my ever-changing needs.
Then, a lightbulb moment: what if I repurposed something built for durability and mobility—like a rolling tool bench? I started researching, tinkering, and eventually transformed a heavy-duty tool bench into a stylish, functional kitchen island. Not only did it save me money, but it also gave me a unique piece that sparked conversations at every dinner party. And the best part? It’s on wheels. I can roll it out of the way when I need floor space or pull it closer to the stove when I’m cooking. If you’re short on space, love DIY projects, or just want something different, using a rolling tool bench as a kitchen island might be the smart, stylish solution you’ve been looking for.
The Smart Appeal of Repurposing a Rolling Tool Bench
More Than Just a Workbench
Tool benches are built for toughness. They’re designed to handle heavy tools, resist spills, and endure years of use in garages and workshops. But that same rugged construction makes them ideal for kitchen life. Think about it: your kitchen sees spills, heat, moisture, and constant use. A tool bench can handle all that—and more. Unlike flimsy kitchen carts or particleboard islands, a metal or solid wood tool bench won’t warp, crack, or wobble.

Visual guide about rolling tool bench as kitchen island
Image source: scandinavianprofiles.com.au
When I first looked at my tool bench, I saw potential. The thick wood top? Perfect for chopping veggies. The metal frame? Sturdy enough to hold a microwave, toaster, and a stack of cookbooks. The locking casters? A game-changer for moving it around. And the drawers? Deep, spacious, and built to last. I didn’t need to buy a new island—I just needed to see the tool bench in a new light.
Space-Saving and Mobile
One of the biggest advantages of using a rolling tool bench as a kitchen island is mobility. Traditional islands are permanent. Once they’re in, they’re in. But with wheels, your “island” can be wherever you need it. Need more floor space for a yoga session? Roll it to the side. Cooking a big meal and need extra counter space near the stove? Wheel it in. Hosting a party and want a drink station? Roll it to the living room.
This flexibility is especially helpful in small kitchens or open-concept homes. I’ve used mine as a breakfast bar, a baking station, and even a temporary desk during remote work days. The wheels make it a true multi-tasker. Just make sure the casters lock securely—no one wants their island sliding across the floor mid-stir-fry!
Cost-Effective and Eco-Friendly
Let’s talk numbers. A high-quality kitchen island can cost anywhere from $500 to $2,000, depending on materials and size. A solid rolling tool bench? Often $200–$400. That’s a huge saving—especially when you consider that many tool benches come with features like built-in power strips, pegboards, and extra storage. Plus, you’re repurposing something that might otherwise sit in a garage collecting dust. That’s not just smart—it’s sustainable.
I bought my bench for $250 on sale and spent another $75 on paint, drawer liners, and a few small upgrades. Total cost: $325. For that price, I got a durable, customizable, and stylish kitchen centerpiece. Not to mention, I avoided contributing to fast furniture waste. Win-win.
Choosing the Right Rolling Tool Bench for Your Kitchen
Size and Dimensions Matter
Not all tool benches are created equal. Before you buy, measure your kitchen. How much floor space do you have? Where will the island go? Can it fit through doorways and hallways when you move it? A bench that’s too wide will block traffic. One that’s too tall might interfere with overhead cabinets.
I recommend a bench that’s 30–36 inches high (standard counter height), 24–30 inches deep, and 48–72 inches long. My bench is 60 inches long—perfect for two stools on one side and storage on the other. If you have a tiny kitchen, consider a compact 36-inch model. For larger spaces, go for 72 inches or even a double-width bench if you want serious prep space.
Material and Build Quality
Tool benches come in two main types: metal frame with wood top or all-metal construction. Both have pros and cons.
- Wood-top benches look warmer and more kitchen-friendly. They’re great for chopping, but make sure the wood is sealed or treated to resist water and stains. I used a polyurethane sealant to protect mine.
- All-metal benches are ultra-durable and easy to clean. They’re perfect if you love a modern, industrial look. But they can feel cold and may not be ideal for food prep unless you add a cutting board.
Look for solid construction—thick steel legs, reinforced corners, and smooth-rolling casters. Avoid benches with flimsy particleboard tops or plastic drawers. These won’t hold up in a busy kitchen.
Storage and Functional Features
Think about what you need to store. Do you need drawer space for utensils? A shelf for appliances? Hooks for towels or pot holders? Many tool benches come with:
- Multiple drawers (great for cutlery, spices, or baking tools)
- Open shelves (perfect for cookbooks, mixing bowls, or small appliances)
- Side pegboards or rails (ideal for hanging utensils, oven mitts, or even a wine glass rack)
- Built-in power strips (handy for charging phones or running blenders)
My bench has three deep drawers, two open shelves, and a pegboard on one side. I use the top drawer for knives and cutting boards, the middle for measuring cups and spoons, and the bottom for bulk spices and coffee supplies. The shelves hold my stand mixer, toaster, and a stack of cookbooks. The pegboard? It’s where I hang my favorite whisks, ladles, and even a small herb garden in pots.
Transforming the Look: Making It Feel Like a Kitchen Island
Painting and Finishing Touches
Tool benches often come in basic colors—black, gray, or industrial green. If you want it to blend into your kitchen, a fresh coat of paint can work wonders. I chose a soft sage green for my bench to match my kitchen’s earthy palette. It instantly felt more “home” and less “garage.”
Here’s my quick painting guide:
- Clean the surface with soapy water and let it dry.
- Sand lightly with 120-grit sandpaper to help paint adhere.
- Wipe away dust with a tack cloth.
- Apply a primer (especially important for metal or dark colors).
- Paint with a durable, kitchen-safe paint—I used a semi-gloss latex for easy cleaning.
- Let it dry for 24 hours before using.
For a rustic look, try whitewashing or staining the wood top. For a modern vibe, go bold with navy, charcoal, or even a two-tone design (e.g., dark base, light top).
Adding Kitchen-Friendly Accessories
Small upgrades make a big difference. Here are a few ideas I’ve tried:
- Cutting board topper: I added a thick, removable cutting board that sits on top. It’s perfect for prep work and protects the bench surface.
- Drawer liners: I used non-slip liners to keep drawers from rattling. For a pop of color, I added patterned contact paper to the inside of the drawers.
- Bar stools: I bought two low-back stools in black metal to match the bench. They’re comfortable and tuck neatly underneath when not in use.
- Lighting: I strung a small LED strip under the top shelf for ambient light—great for evening cooking.
- Decor: A small plant, a jar of wooden spoons, or a stack of cookbooks adds warmth and personality.
One of my favorite touches? A magnetic knife strip I mounted on the side. It’s functional, saves drawer space, and looks cool. Plus, my knives are always within reach.
Sealing and Protecting the Surface
Kitchen life is messy. Spills, heat, and sharp tools can damage even the toughest bench. To protect your investment:
- Seal wood tops with polyurethane, beeswax, or food-safe mineral oil.
- Use trivets or hot pads under hot pots and pans.
- Wipe up spills immediately—especially acidic ones like lemon juice or vinegar.
- For metal tops, apply a food-safe sealant to prevent rust and stains.
I reapply mineral oil to my wood top every three months. It keeps the wood hydrated and looking rich. For the metal frame, I wipe it down weekly with a damp cloth and a mild cleaner.
Maximizing Functionality: How to Use Your Bench Like a Pro
Smart Storage Solutions
Organization is key. I use the “zoning” method—grouping similar items together based on how I use them. For example:
- Prep zone: Top drawer—knives, cutting boards, graters, peelers.
- Cooking zone: Middle drawer—measuring cups, spoons, tongs, spatulas.
- Baking zone: Bottom drawer—whisks, rolling pins, cookie cutters.
- Appliance zone: Shelves—stand mixer, blender, toaster.
- Entertaining zone: Pegboard—wine opener, bottle opener, cocktail shaker.
I also use small bins and drawer dividers to keep everything in place. For spices, I use labeled glass jars on a lazy Susan in one drawer. It’s easy to spin and find what I need.
Creating a Multi-Functional Island
Your bench can do more than hold things—it can do things. Here’s how I use mine:
- Prep station: I roll it next to the sink or stove for chopping, mixing, and assembling dishes.
- Dining spot: With two stools, it’s a cozy breakfast nook or a place for a quick lunch.
- Entertainment hub: During parties, I set up a charcuterie board, drinks, and snacks on top. The wheels make it easy to move around.
- Workspace: When I work from home, I use it as a laptop desk. I even added a small monitor stand.
- Laundry helper: In a pinch, I’ve used it to sort and fold laundry in the kitchen.
The key is to think beyond the kitchen. A rolling bench is a blank canvas for your lifestyle.
Power and Tech Upgrades
Many tool benches come with built-in outlets or USB ports. If yours doesn’t, consider adding a power strip with surge protection. I mounted mine on the back of the bench, hidden but accessible. It powers my toaster, blender, and phone charger.
For tech lovers, you can also add:
- A tablet mount for following recipes hands-free.
- A small speaker for music while cooking.
- LED strip lights under the shelves for ambiance.
Just make sure cords are managed—use clips or ties to keep them tidy and safe.
Real-Life Examples: Inspiration from DIYers Like You
You’re not alone in this idea. I’ve seen amazing transformations from other DIYers who’ve turned tool benches into kitchen islands. Here are a few standout examples:
The Urban Apartment Makeover
Sarah, a graphic designer in Chicago, lives in a 600-square-foot apartment. Her kitchen had zero island space. She bought a 48-inch metal tool bench, painted it navy blue, and added a butcher block topper. She uses it for meal prep, as a coffee bar, and even as a temporary desk. “It’s the MVP of my tiny kitchen,” she says. “I can roll it to the window for morning coffee or tuck it against the wall when I need floor space.”
The Farmhouse Kitchen Upgrade
Mark and Lisa in Tennessee wanted a rustic island but didn’t want to spend $1,500. They found a vintage wood-top bench at a flea market for $100. They sanded it, stained it with walnut, and added vintage casters. Now, it’s the centerpiece of their kitchen. They use it for Sunday pancake breakfasts and holiday baking. “It’s not just an island,” Lisa says. “It’s a memory maker.”
The Small Kitchen Hack
Javier in Miami has a galley kitchen. He chose a compact 36-inch bench with a fold-down side shelf. When he needs extra space, he flips it open. When not in use, it folds flat against the bench. “It’s like magic,” he laughs. “I get island space without losing my walking room.”
| Project | Bench Type | Key Upgrades | Cost | Best For |
|---|---|---|---|---|
| Urban Apartment | 48″ metal frame | Navy paint, butcher block, power strip | $350 | Small spaces, renters |
| Farmhouse Kitchen | 60″ vintage wood | Stain, vintage casters, drawer liners | $200 | Rustic or vintage style |
| Small Kitchen Hack | 36″ compact | Fold-down shelf, magnetic knife strip | $275 | Galley kitchens, tight layouts |
Final Thoughts: Is a Rolling Tool Bench Right for You?
Let’s be honest—repurposing a tool bench isn’t for everyone. If you love traditional, built-in islands or have a large kitchen with room to spare, this might not be the best fit. But if you’re short on space, love DIY projects, or want a unique, functional centerpiece, a rolling tool bench could be your kitchen’s secret weapon.
It’s not just about saving money (though that’s a big plus). It’s about smart design, flexibility, and creativity. You’re not buying a cookie-cutter island—you’re building something that fits your life, your style, and your space. And the best part? You can change it anytime. Paint it a new color. Add new accessories. Roll it to a new spot. Your kitchen island doesn’t have to be permanent—it can be whatever you need, whenever you need it.
So, next time you’re browsing tool benches, don’t just think “garage.” Think “kitchen island.” Think “coffee bar.” Think “dinner party hub.” With a little imagination, a rolling tool bench can become the heart of your home—durable, stylish, and always on the move.
Frequently Asked Questions
Can a rolling tool bench really work as a kitchen island?
Yes, a rolling tool bench can double as a stylish and functional kitchen island, especially in small spaces. Its sturdy build, storage compartments, and mobility make it ideal for food prep, cooking, or extra counter space.
What features should I look for in a rolling tool bench as a kitchen island?
Prioritize a model with a smooth, heat-resistant top (like stainless steel or wood), locking casters for stability, and ample storage drawers or shelves. A rolling tool bench as kitchen island should also complement your kitchen’s aesthetic.
Is a rolling tool bench safe to use near stovetops or sinks?
As long as the bench has a heat- and water-resistant surface (e.g., stainless steel or sealed wood), it’s safe. Just avoid placing hot pots directly on non-heat-resistant materials and wipe spills promptly.
How do I keep a rolling tool bench from looking out of place in my kitchen?
Choose a bench with a design that matches your kitchen’s style, such as rustic wood or industrial metal. Add decorative elements like a hanging towel, plants, or a butcher block top to blend it seamlessly.
Can I customize a rolling tool bench for kitchen use?
Absolutely! Add hooks for utensils, replace casters with larger wheels for easier movement, or attach a backsplash. These tweaks enhance functionality while maintaining the bench’s rolling tool bench as kitchen island versatility.
How do I clean and maintain a rolling tool bench used as a kitchen island?
Wipe the surface with mild soap and water daily, and avoid abrasive cleaners that damage finishes. Regularly check and tighten bolts or casters to ensure long-term durability.