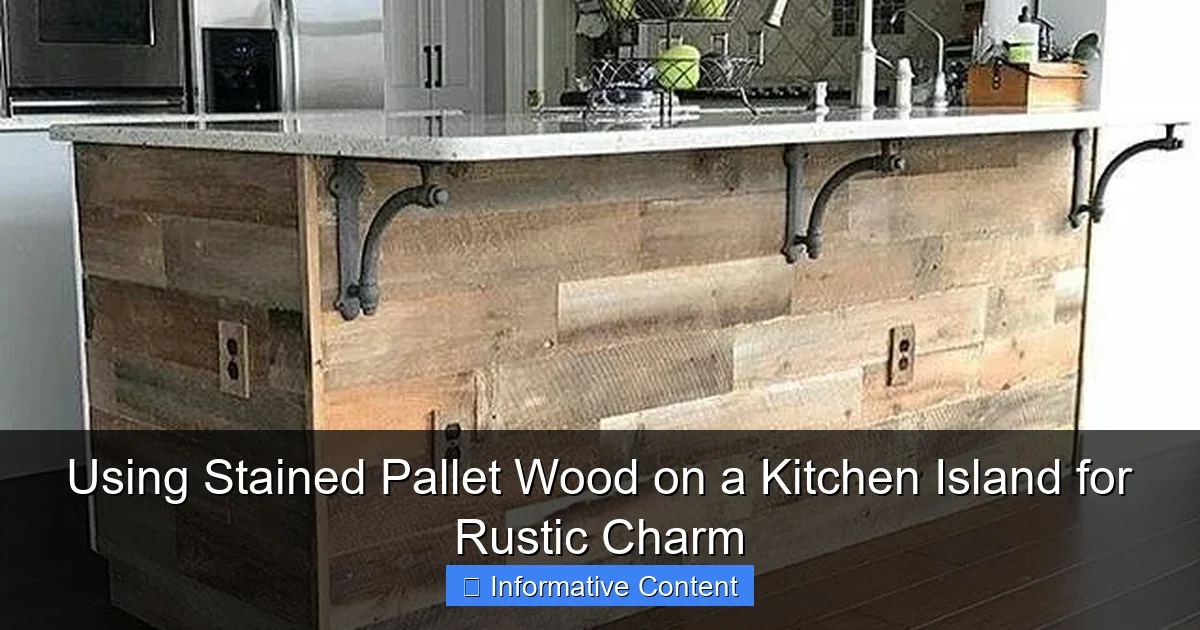
Featured image for using stained pallet wood on a kitchen island
Image source: i.pinimg.com
Transform your kitchen island with stained pallet wood for an affordable, eco-friendly rustic upgrade. This DIY-friendly material adds warmth and character when properly sanded, stained, and sealed, offering a reclaimed look without the high cost. Ideal for farmhouse or industrial styles, stained pallet wood brings unique grain patterns and a personalized touch to your kitchen’s centerpiece.
Key Takeaways
- Choose weathered pallet wood: Opt for aged, sturdy planks to enhance rustic appeal.
- Sand thoroughly: Remove splinters and rough spots for a smooth, safe finish.
- Stain for durability: Apply quality wood stain to protect and enrich the grain.
- Seal the surface: Use polyurethane to guard against spills and daily wear.
- Pair with modern elements: Balance rustic wood with sleek hardware or countertops.
- Inspect for safety: Ensure pallets are heat-treated (HT) and free of harmful chemicals.
📑 Table of Contents
- Why Stained Pallet Wood is the Secret Ingredient for a Rustic Kitchen Island
- 1. Sourcing and Preparing Pallet Wood: The Foundation of Your Project
- 2. Staining Techniques: How to Achieve the Perfect Rustic Look
- 3. Design Ideas: From Farmhouse to Industrial Chic
- 4. Practical Considerations: Durability, Maintenance, and Safety
- 5. Budget Breakdown: How Much Does It Really Cost?
- 6. Common Mistakes to Avoid (And How to Fix Them)
- Final Thoughts: Is Stained Pallet Wood Right for Your Kitchen Island?
Why Stained Pallet Wood is the Secret Ingredient for a Rustic Kitchen Island
Imagine walking into your kitchen and being greeted by a warm, inviting island that feels like it was plucked straight from a countryside cottage. That’s the magic of using stained pallet wood on a kitchen island. It’s not just about saving money—though that’s a nice bonus—it’s about creating a space that tells a story. A few years ago, I helped my sister redo her dated kitchen island with reclaimed pallet wood, and the transformation was nothing short of jaw-dropping. The grain patterns, the subtle imperfections, and the earthy tones turned what was once a bland countertop into a conversation starter.
Rustic charm is more than a design trend; it’s a lifestyle choice. It’s about embracing authenticity, sustainability, and a touch of nostalgia. And when it comes to achieving that look, few materials offer the same bang for your buck as stained pallet wood. Whether you’re a DIY newbie or a seasoned woodworker, this material is surprisingly forgiving and endlessly customizable. But before you dive in, let’s unpack everything you need to know—from sourcing the right pallets to sealing the deal with the perfect stain.
1. Sourcing and Preparing Pallet Wood: The Foundation of Your Project
Finding Safe, High-Quality Pallets
Not all pallets are created equal. Some carry chemicals or pests, while others are too beat up to use. Here’s how to spot the good ones:
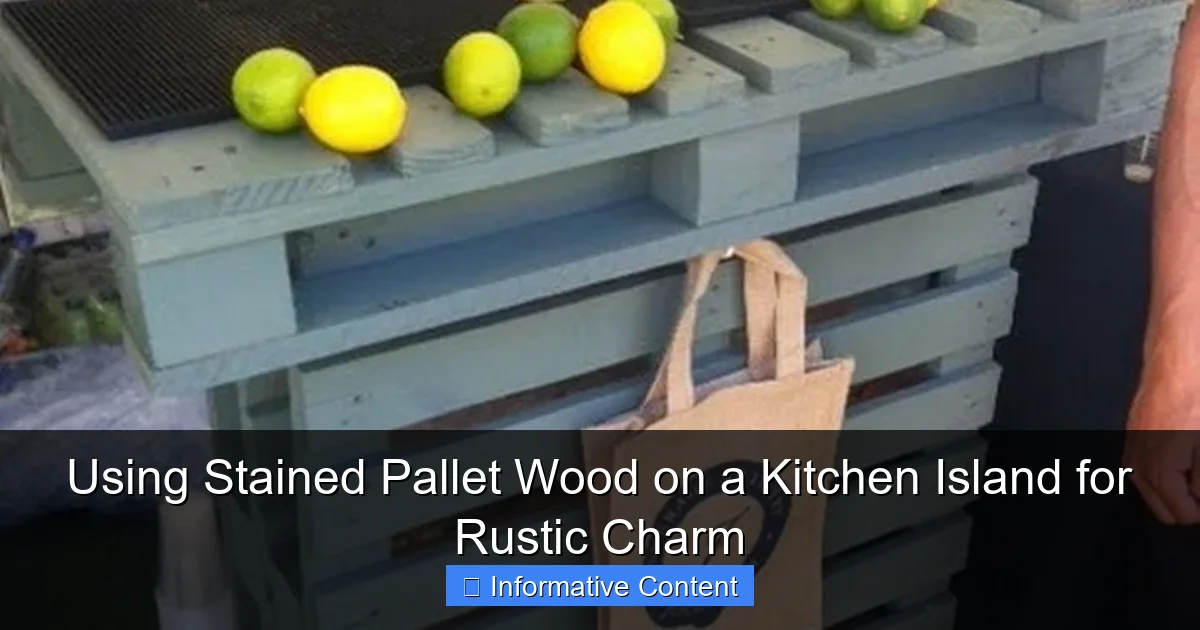
Visual guide about using stained pallet wood on a kitchen island
Image source: palletswoodenprojects.com
- Look for the “HT” stamp: This means the wood was heat-treated, not chemically fumigated (which can leave toxic residues). Avoid pallets with “MB” (methyl bromide).
- Check for damage: Splinters, cracks, or warped boards are a no-go. You want sturdy, straight pieces.
- Ask local businesses: Grocery stores, warehouses, and lumber yards often have pallets they’ll give away for free. A quick “Hey, do you have any spare pallets?” can save you hours of searching.
Pro tip: My friend scored 20 pristine pallets from a hardware store just by asking. The manager even helped load them into her truck!
Cleaning and Disassembling Pallets
Once you’ve got your pallets, it’s time to prep the wood. This step is crucial—dirty or splintered wood can ruin your finish.
- Remove debris: Brush off dirt, nails, and staples. A wire brush works wonders.
- Disassemble carefully: Use a pry bar or hammer to remove boards. If nails are stubborn, cut them with a hacksaw.
- Sand thoroughly: Start with 80-grit sandpaper to smooth rough edges, then work up to 120-grit for a polished surface.
Real talk: I once skipped the sanding step (lazy, I know), and the result was splinters *everywhere*. Learn from my mistakes—sand like your life depends on it.
2. Staining Techniques: How to Achieve the Perfect Rustic Look
Choosing the Right Stain
Stain isn’t just about color—it’s about enhancing the wood’s natural character. Here’s a quick guide:
- Oil-based stains: Deepen grain patterns and last longer. Great for high-traffic areas like kitchen islands.
- Water-based stains: Dries faster and has less odor. Ideal for quick projects.
- Gel stains: Thicker consistency, perfect for uneven wood (common in pallets).
Example: For my sister’s island, we used an oil-based walnut stain. It brought out the wood’s knots and grain, giving it that “weathered barn door” vibe.
Application Tips for a Flawless Finish
Staining pallet wood can be tricky—the wood absorbs stain unevenly. Here’s how to avoid blotchiness:
- Test on scrap wood first: Every batch of pallet wood is different. Test your stain on a hidden piece to see how it reacts.
- Use a pre-stain conditioner: This helps the wood absorb stain evenly (especially important for softwoods like pine).
- Apply in thin layers: Use a brush or rag, working with the grain. Wipe off excess stain to prevent streaks.
- Let it dry fully: Wait at least 24 hours between coats. Rushing this step = sticky, uneven results.
Pro tip: For a more rustic look, try a “two-tone” technique: stain some boards dark and others light, then arrange them randomly for a patchwork effect.
3. Design Ideas: From Farmhouse to Industrial Chic
Farmhouse Kitchen Island
Think whitewashed wood, apron sinks, and vintage hardware. For this look:
- Use distressed white or gray stain to mimic shabby-chic finishes.
- Add black iron brackets for support and contrast.
- Pair with open shelving made from more pallet wood.
Example: A friend of mine stained her island in a whitewash finish, then added a reclaimed wood countertop. The result? A Pinterest-worthy farmhouse vibe.
Industrial-Style Island
Exposed metal, raw wood, and a “lived-in” feel. To pull this off:
- Stain the wood in dark walnut or ebony for contrast.
- Use black metal legs or pipes as supports.
- Keep the top unsealed or lightly sealed for a rougher texture.
Pro tip: If you’re feeling bold, add a metal inlay (like a copper strip) between wood boards for an unexpected twist.
Coastal or Scandinavian Minimalism
For a lighter, breezier feel:
- Use bleached or light oak stain.
- Add white or pastel paint accents (e.g., on the island base).
- Pair with marble or quartz countertops for contrast.
4. Practical Considerations: Durability, Maintenance, and Safety
Sealing the Wood: The Key to Longevity
Stained wood is beautiful, but it’s not indestructible. A good sealant protects it from spills, scratches, and moisture.
- Polyurethane: Durable and glossy. Ideal for high-use areas. Apply 2-3 coats, sanding lightly between layers.
- Wax: Gives a soft, matte finish. Needs reapplication every few months but is easy to fix if scratched.
- Epoxy resin: For a glass-like, waterproof finish (great if you’re using the island as a food prep surface).
Real talk: I used wax on my first pallet project. It looked great… until my cat knocked over a glass of red wine. Polyurethane is now my go-to.
Maintenance Tips
Stained pallet wood is low-maintenance, but it’s not “set it and forget it.” Here’s how to keep it looking fresh:
- Wipe spills immediately: Even sealed wood can absorb moisture.
- Use cutting boards: Don’t chop directly on the island (duh, but worth saying).
- Reapply sealant yearly: Especially if you cook a lot or have kids.
Addressing Safety Concerns
Some folks worry about using pallet wood in kitchens. Here’s the truth:
- Chemical safety: As long as you use HT-stamped pallets and seal the wood properly, it’s safe for food prep.
- Splinter risk: Sanding and sealing eliminate this. Just don’t skip those steps!
- Weight support: Pallet wood is sturdy, but if your island is heavy (e.g., with stone counters), add extra supports like metal brackets or a plywood base.
5. Budget Breakdown: How Much Does It Really Cost?
One of the biggest perks of using pallet wood is the price tag. But how much will you actually spend? Here’s a real-world example:
| Item | Cost (USD) | Notes |
|---|---|---|
| Pallets (5-10) | $0-$20 | Free from local businesses, or $2-$5 each at flea markets. |
| Stain (1 gallon) | $20-$40 | Oil-based walnut stain (covers 150-200 sq ft). |
| Sealant (polyurethane, 1 quart) | $15-$30 | Enough for 2-3 coats on a standard island. |
| Sandpaper (assorted grits) | $10-$15 | Or use a power sander rental (~$20/day). |
| Brushes/rags | $5-$10 | Cheap foam brushes work fine for staining. |
| Hardware (screws, brackets) | $10-$20 | For assembling the island frame. |
| Total | $60-$135 | Compare to $500+ for a pre-made island! |
Pro tip: If you’re on a tight budget, skip the stain and seal the wood with clear polyurethane. The natural grain still looks beautiful!
6. Common Mistakes to Avoid (And How to Fix Them)
Using Chemically Treated Pallets
Mistake: Grabbing the first pallet you see, only to realize it’s full of toxic chemicals.
Fix: Always check for the “HT” stamp. When in doubt, skip it.
Skipping the Sanding Step
Mistake: Staining rough, splintery wood.
Fix: Sand until it’s smooth to the touch. A power sander saves time (and your arms).
Overlooking Sealant
Mistake: Thinking “stain is enough” and ending up with water rings.
Fix: Seal with polyurethane or epoxy. Even if you like a matte finish, a light coat of wax adds protection.
Uneven Stain Application
Mistake: Blotchy, uneven color.
Fix: Use a pre-stain conditioner and apply stain in thin, even layers. Work in small sections.
Ignoring Weight Support
Mistake: Building an island that sags or wobbles.
Fix: Use a plywood or metal base, and add extra supports under heavy countertops.
Final Thoughts: Is Stained Pallet Wood Right for Your Kitchen Island?
So, is using stained pallet wood on a kitchen island worth it? In my experience, absolutely—but with a caveat. It’s perfect if you’re:
- Looking for a budget-friendly way to add rustic charm.
- Comfortable with DIY projects (or have a handy friend).
- Okay with a little imperfection (because let’s face it, that’s part of the charm).
But if you’re expecting a flawless, high-gloss finish or need a zero-maintenance surface, you might be better off with a pre-made island. That said, there’s something deeply satisfying about creating a piece that’s uniquely yours. Every knot, every grain tells a story—one of reclaimed wood, elbow grease, and a kitchen that finally feels like home.
So go ahead, grab those pallets, and get to work. Just don’t forget to sand. Seriously. Your hands (and your guests) will thank you.
Frequently Asked Questions
Is stained pallet wood safe for a kitchen island?
Yes, as long as the wood is properly sanded, sealed with a food-safe finish, and free from contaminants like chemicals or mold. Using pallet wood in the kitchen requires extra prep to ensure durability and hygiene.
How do I prepare pallet wood for a kitchen island with a stained finish?
Start by disassembling and sanding the wood to remove splinters and rough patches, then apply a wood conditioner before staining. Seal with a polyurethane or epoxy resin to protect against moisture and daily wear.
Can I use stained pallet wood on a kitchen island without warping?
To prevent warping, acclimate the wood indoors for 48 hours before building and use a high-quality sealant on all sides. Avoid direct water exposure and maintain consistent indoor humidity.
What type of stain works best for pallet wood kitchen islands?
Gel stains or water-based wood stains are ideal for stained pallet wood on a kitchen island, as they offer even color and work well on reclaimed wood’s uneven texture. Always follow with a durable topcoat.
How do I clean and maintain a stained pallet wood kitchen island?
Wipe spills immediately with a damp cloth and use a mild soap solution for regular cleaning. Reapply a protective finish annually to preserve the stained pallet wood’s rustic charm.
Will stained pallet wood hold up to heavy use on a kitchen island?
When properly sealed and reinforced with a sturdy base, stained pallet wood can handle daily kitchen activities. Opt for hardwoods like oak or maple pallets for better durability.