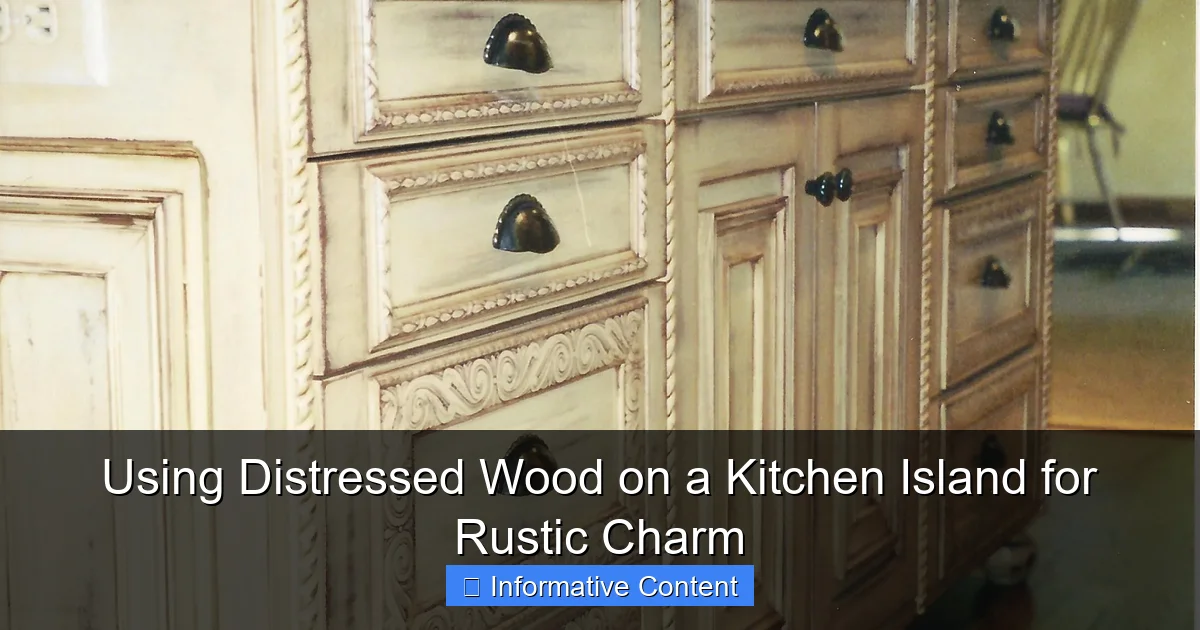
Featured image for using distressed wood on a kitchen island
Image source: i.pinimg.com
Using distressed wood on a kitchen island instantly infuses rustic charm and timeless character into your space. This weathered material adds warmth, texture, and a touch of vintage appeal, making the island a stunning focal point. Perfect for farmhouse, cottage, or modern-rustic styles, distressed wood pairs beautifully with metal accents and natural finishes for a cohesive, inviting kitchen design.
Key Takeaways
- Choose reclaimed wood: Opt for sustainable, character-rich materials with natural imperfections.
- Balance textures: Pair distressed wood with sleek countertops for visual contrast.
- Seal properly: Use food-safe sealants to protect wood in high-traffic areas.
- Highlight craftsmanship: Let hand-distressed details shine by avoiding over-accessorizing.
- Warm lighting: Enhance rustic charm with pendant lights or exposed Edison bulbs.
- Limit color clashes: Stick to earthy tones to maintain cohesive, cozy aesthetics.
📑 Table of Contents
- Why Distressed Wood Works Wonders for Kitchen Islands
- What Makes Distressed Wood So Appealing?
- Choosing the Right Type of Distressed Wood
- Designing the Island: Style, Size, and Function
- Maintenance and Care: Keeping Your Island Looking Great
- Real-Life Examples and Inspirations
- Final Thoughts: Is Distressed Wood Right for You?
Why Distressed Wood Works Wonders for Kitchen Islands
Let’s be honest: the kitchen is the heart of the home. It’s where coffee gets brewed, pancakes are flipped, and late-night heart-to-hearts happen over a glass of wine. So, when it comes to designing this space, you want something that feels warm, lived-in, and full of character. That’s where using distressed wood on a kitchen island comes in.
Distressed wood isn’t just a design trend—it’s a storytelling tool. Each nick, scratch, and weathered groove tells a tale of time, use, and authenticity. When applied to a kitchen island, it instantly transforms the space from sterile and modern to cozy and inviting. Think of it as the equivalent of your favorite pair of worn-in jeans: not perfect, but perfectly comfortable and full of charm.
What Makes Distressed Wood So Appealing?
The Emotional Pull of Weathered Wood
There’s something deeply human about imperfection. A brand-new, flawless surface can feel cold, almost clinical. But distressed wood? It feels like home. It carries the warmth of age, the softness of time, and a sense of history. When you run your hand over the grain, you’re not just touching wood—you’re touching memories.
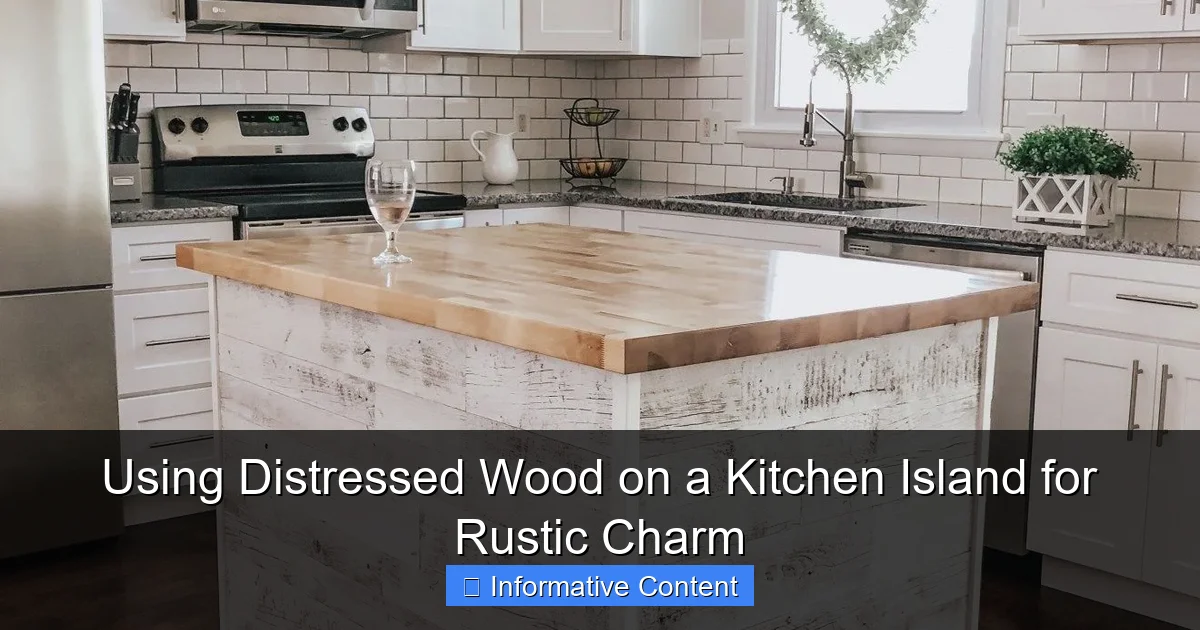
Visual guide about using distressed wood on a kitchen island
Image source: i.pinimg.com
For many homeowners, using distressed wood on a kitchen island is a way to bring soul into a space that’s often dominated by stainless steel, glass, and polished stone. It’s a visual and tactile contrast that grounds the room and makes it feel more personal. Whether you live in a modern loft or a century-old farmhouse, distressed wood adds a layer of emotional depth that’s hard to replicate.
Visual Texture and Dimension
One of the biggest advantages of distressed wood is its texture. Unlike smooth countertops that reflect light evenly, distressed wood has peaks and valleys that catch light differently. This creates natural shadows and highlights, giving your kitchen island a sense of movement and depth.
For example, imagine a kitchen with white shaker cabinets and a black quartz countertop. It’s sleek and clean, but maybe a little too perfect. Now, swap that countertop for a distressed wood kitchen island with a whitewashed finish. The contrast is instant. The island becomes the focal point, drawing the eye and adding visual interest without overwhelming the space.
And here’s a pro tip: pair distressed wood with natural light. The way sunlight hits the grain at different times of day creates a dynamic look that changes with the seasons. It’s like having a living piece of art in your kitchen.
Versatility Across Design Styles
You might think distressed wood only works in rustic or farmhouse kitchens—but that’s far from true. In fact, it’s incredibly versatile. Whether your style is coastal cottage, industrial, Scandinavian, or even modern minimalist, distressed wood can adapt.
- Farmhouse/Country: A reclaimed pine island with visible knots and a matte finish fits right in with apron sinks and vintage lighting.
- Coastal: A light, weathered oak island with a bleached finish evokes beach house vibes—perfect with white cabinets and navy accents.
- Industrial: Pair a dark, heavily distressed walnut island with black metal legs and exposed bulbs for an edgy, urban look.
- Modern: Use a sleek, low-distress oak island with clean lines and a subtle whitewash for a fresh, airy feel.
The key is in the execution. The amount of distressing, the wood species, and the finish all play a role in how the piece fits into your overall design.
Choosing the Right Type of Distressed Wood
Wood Species: What Works Best?
Not all wood is created equal when it comes to distressing. Some species take the treatment better than others. Here’s a quick guide:
-
<
- Oak: Durable and grainy, oak holds distressing marks beautifully. White oak is more water-resistant, making it ideal for kitchen islands.
- Pine: Soft and easy to distress, but more prone to dents and scratches. Best for low-traffic kitchens or if you want a “well-loved” look from day one.
- Walnut: Rich, dark, and luxurious. Walnut distresses more subtly, so it’s great for a refined rustic look.
- Reclaimed Barn Wood: Already distressed by time and weather, this is the ultimate in authenticity. Just make sure it’s properly sealed and stabilized.
- Ash or Hickory: Strong and stable, with a pronounced grain that shows off distressing details.
When using distressed wood on a kitchen island, consider durability. You’ll be placing hot pots, cutting boards, and coffee mugs on it. Pine might look charming, but it won’t hold up as well as oak or walnut in a busy kitchen.
Distressing Techniques: DIY vs. Professional
There are two main ways to get the distressed look: buy pre-distressed wood or do it yourself. Let’s break it down.
Pre-Distressed (Professional): This is the easiest option. Companies like Reclaimed Design Works or Woodland Creek specialize in artisan-distressed wood. They use techniques like wire brushing, chain dragging, and hand-scraping to create authentic wear patterns. The finish is usually sealed with food-safe, water-resistant coatings. Price? Higher, but worth it for consistency and durability.
DIY Distressing: If you’re handy (or know someone who is), you can distress wood yourself. Here’s a simple method:
- Sand the wood lightly to open the grain.
- Use a wire brush to deepen the grain lines.
- Drag a chain or screwdriver across the surface for random nicks.
- Apply a dark wax or glaze into the grooves, then wipe off the surface to highlight the texture.
- Seal with polyurethane or a food-safe oil (like tung or walnut oil).
One friend of mine, Sarah, built her own island using reclaimed barn wood from a local salvage yard. She spent a weekend distressing it with a hammer and wire brush, then sealed it with three coats of matte polyurethane. “It wasn’t perfect,” she told me, “but that’s what made it special. Every mark felt like part of the story.”
Finish Matters: Matte, Satin, or Gloss?
The finish you choose affects both the look and function of your island.
- Matte: Hides fingerprints and smudges. Best for a cozy, rustic feel. However, it may not be as water-resistant.
- Satin: A happy medium. Offers some sheen while still feeling warm and inviting. Great for most kitchens.
- Gloss: Reflective and modern, but shows every scratch and water spot. Use sparingly—maybe just on the top surface for durability.
For a kitchen island, I usually recommend a satin or matte finish with a food-safe, water-resistant sealant. It keeps the wood looking natural while protecting it from spills and daily wear.
Designing the Island: Style, Size, and Function
Island Size and Proportions
Size matters—especially in a kitchen. A distressed wood kitchen island should fit the room, not dominate it. Here are some general guidelines:
- Small kitchens (under 150 sq ft): Opt for a narrow island (24–30 inches deep) or a rolling cart with a distressed wood top. Keeps the space open.
- Medium kitchens (150–250 sq ft): A 36–48 inch wide island works well. Add overhang for seating (12–18 inches).
- Large kitchens (250+ sq ft): Go big! A 60+ inch island with seating, storage, and even a sink or cooktop can become the centerpiece.
Pro tip: Always leave at least 36 inches of clearance around the island for easy movement. You don’t want to feel cramped when cooking or entertaining.
Seating and Overhangs
One of the best things about a kitchen island? It doubles as a casual dining spot. But the overhang needs to be just right.
- For bar stools (30-inch height): 12-inch overhang.
- For counter-height stools (24-inch height): 10-inch overhang.
And don’t forget comfort. A distressed wood overhang with a rounded edge feels better against your legs than a sharp corner. Some people add a metal edge banding for durability and style.
My sister installed a 42-inch island with a 15-inch overhang and three bar stools. She used reclaimed oak with a light gray stain. “It’s where the kids do homework and we eat breakfast,” she says. “The wood feels warm, not cold like stone.”
Storage and Utility Features
A great island isn’t just pretty—it’s practical. Think about what you need:
- Drawers and cabinets: Store pots, pans, or small appliances. Use distressed wood fronts to match the top.
- Open shelving: Display cookbooks, baskets, or plants. Great for a casual, airy look.
- Pull-out trash/recycling: Keeps the kitchen tidy.
- Built-in wine rack or spice drawer: Adds function without clutter.
One clever idea: use the base of the island for storage, but keep the top as a single, uninterrupted slab of distressed wood. This creates a seamless, organic look.
Maintenance and Care: Keeping Your Island Looking Great
Daily Cleaning Tips
Distressed wood isn’t high-maintenance, but it does need some love. Here’s how to keep it looking its best:
- Wipe spills immediately: Water and juice can stain or warp wood if left too long.
- Use a damp (not wet) cloth: Too much moisture can seep into the grain.
- Avoid harsh chemicals: Stick to mild dish soap and water. No ammonia or bleach.
- Microfiber cloths only: They won’t scratch the surface.
One mistake I see often? People use abrasive sponges or steel wool. That’s a big no-no—it can remove the finish and deepen the distressing in unwanted places.
Seasonal Maintenance
Wood expands and contracts with humidity. In winter, your island might develop small gaps or creaks. In summer, it might feel tighter.
- Humidity control: Keep indoor humidity between 35–55%. Use a humidifier in winter and a dehumidifier in summer if needed.
- Re-oiling (if unsealed): If you used oil-based finishes, reapply every 6–12 months. Wipe on, let sit, then buff off.
- Inspect the finish: Every few months, check for wear. If the sealant is cracking or peeling, sand lightly and reseal.
Sarah, my DIY friend, reseals her island every year with a fresh coat of polyurethane. “It’s like giving it a spa day,” she jokes. “It comes out looking brand new—but still with all its character.”
Repairing Minor Damage
Accidents happen. A dropped knife, a hot pan, or a spilled drink can leave marks. But with distressed wood, minor damage is often less noticeable than on a smooth surface.
- Small scratches: Rub with a walnut or pecan (yes, really!) or use a wood touch-up marker.
- Water rings: Mix baking soda and water, gently rub, then reseal.
- Dents: Place a damp cloth over the dent and iron on low heat. The steam can raise the wood fibers.
And here’s the silver lining: if the damage fits the “distressed” aesthetic, you can lean into it. Embrace the patina. It’s not damage—it’s character.
Real-Life Examples and Inspirations
Case Study: The Coastal Kitchen
Take the kitchen of Mark and Elena, a couple in Maine. They wanted a beachy, relaxed vibe. Their solution? A 48-inch island made from reclaimed pine, heavily distressed and finished with a bleached white wash. The base is painted in soft blue-gray, and they added open shelves with woven baskets.
“The wood feels like driftwood,” Mark says. “It’s not perfect, but it feels alive.” The island gets daily use—breakfast, homework, even cocktail prep—and still looks beautiful after two years.
Case Study: The Urban Loft
Then there’s David, a graphic designer in Brooklyn. His kitchen is small but sleek. He chose a 36-inch island with a walnut top, lightly distressed with wire brushing. The base is black steel, and the overhang seats two.
“I wanted warmth without sacrificing modern lines,” he explains. “The walnut gives it soul, but the clean base keeps it from feeling too rustic.” The wood has held up well to coffee spills and laptop use.
These examples show how using distressed wood on a kitchen island isn’t one-size-fits-all. It’s about matching the material to your lifestyle and aesthetic.
Cost Comparison Table
Here’s a quick look at average costs for different options:
| Type | Material Cost (per sq ft) | Installation (if custom) | Durability | Best For |
|---|---|---|---|---|
| Reclaimed Barn Wood | $15–$25 | $300–$800 | High (if sealed) | Authentic rustic |
| New Distressed Oak | $10–$18 | $200–$600 | Very High | Modern farmhouse |
| DIY Pine (distressed at home) | $3–$7 | $100–$300 (labor) | Medium | Budget-friendly charm |
| Pre-Finished Distressed Slab | $20–$35 | $400–$1,000 | High | High-end, low-maintenance |
Note: Prices vary by region and contractor. Always get multiple quotes.
Final Thoughts: Is Distressed Wood Right for You?
Let’s circle back to the heart of the matter: using distressed wood on a kitchen island is more than a design choice—it’s an investment in warmth, character, and everyday comfort. It’s not for everyone. If you crave a sleek, flawless look, you might find the imperfections distracting. But if you value authenticity, texture, and a space that feels lived-in, it’s a game-changer.
Think about your lifestyle. Do you cook daily? Entertain often? Have kids or pets? Distressed wood can handle it—especially when sealed properly. And the best part? It ages gracefully. Unlike a trendy quartz countertop that might feel dated in ten years, distressed wood only gets better with time.
So, if you’re renovating or building your dream kitchen, give distressed wood a serious look. Visit a salvage yard, talk to a local woodworker, or even try a DIY sample board. Touch it. Feel it. Imagine your mornings there. Because a kitchen isn’t just a room—it’s a feeling. And with distressed wood, that feeling is warm, welcoming, and uniquely yours.
Frequently Asked Questions
What are the benefits of using distressed wood on a kitchen island?
Distressed wood adds rustic charm and character to a kitchen island, creating a warm, inviting focal point. Its weathered texture hides scratches and wear, making it practical for high-traffic kitchens.
Is distressed wood durable enough for a kitchen island?
Yes, when properly sealed with polyurethane or wax, distressed wood is highly durable and resistant to moisture and spills. Just avoid leaving standing water on the surface to preserve the finish.
How do I maintain a kitchen island with distressed wood?
Regular dusting and occasional cleaning with a damp cloth are sufficient. Reapply a protective finish every 1–2 years to maintain durability and enhance the natural beauty of the distressed wood.
Can I mix distressed wood with modern kitchen elements?
Absolutely! Distressed wood pairs well with stainless steel, quartz countertops, or sleek cabinetry for a balanced, transitional look. The contrast adds depth and visual interest to your design.
What types of wood work best for a distressed kitchen island?
Reclaimed pine, oak, and walnut are popular choices due to their grain patterns and ability to hold distressing techniques. Reclaimed wood also adds sustainability and a unique, timeworn story.
Does using distressed wood on a kitchen island make it look outdated?
Not at all—distressed wood is timeless when styled thoughtfully. Pair it with modern hardware or minimalist decor to keep the look fresh while highlighting its rustic charm.