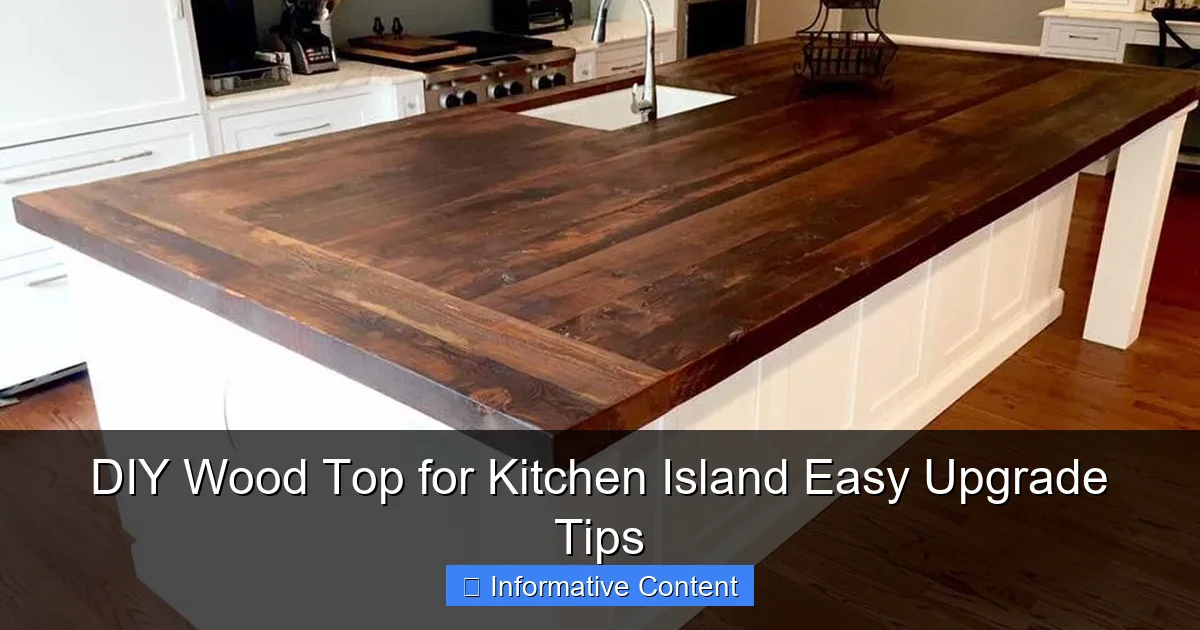
Featured image for diy wood top for kitchen island
Image source: i.pinimg.com
Transform your kitchen island with a DIY wood top—an affordable, stylish upgrade that adds warmth and character to your space. With basic tools and quality lumber, you can customize size, finish, and edge profile to match any decor, all while boosting functionality and resale value.
Key Takeaways
- Choose durable wood: Opt for hardwoods like maple or oak for longevity.
- Prep properly: Sand and seal wood to resist stains and moisture damage.
- Measure precisely: Ensure exact dimensions for a seamless fit on your island.
- Use quality finish: Apply food-safe oil or wax for a smooth, safe surface.
- Secure tightly: Anchor the top firmly to prevent shifting or warping.
- Maintain regularly: Reapply sealant every 6–12 months for lasting beauty.
📑 Table of Contents
- Why a DIY Wood Top for Kitchen Island Is the Upgrade You Didn’t Know You Needed
- Choosing the Right Wood for Your Kitchen Island Top
- Tools and Materials You’ll Need (No Overkill Here)
- Step-by-Step Build: From Boards to Beautiful Surface
- Finishing Options: Protecting Your Wood for Real Life
- Installation, Maintenance, and Long-Term Care
- Final Thoughts: A Project That Gives Back
Why a DIY Wood Top for Kitchen Island Is the Upgrade You Didn’t Know You Needed
Let’s be honest—kitchen islands are the unsung heroes of modern homes. They’re not just extra counter space; they’re where coffee is poured, homework is done, and late-night conversations happen. But over time, that factory-finished laminate or cheap veneer top can start to feel… well, a little uninspired. If you’ve been eyeing your island like it’s missing a soul, here’s a simple, budget-friendly fix: a DIY wood top for kitchen island.
I learned this the hard way. A few years ago, I replaced the tired Formica top on my kitchen island with a hand-built butcher block made from reclaimed pine. It took a weekend, cost under $150, and completely transformed the room. The warmth of natural wood, the grain catching the morning light, the subtle scent of beeswax after polishing—it felt like the heart of my home finally had a heartbeat. And the best part? It was easier than I thought. Whether you’re a seasoned DIYer or someone who’s just starting to trust their tape measure, this project is doable. In this guide, I’ll walk you through everything—from choosing the right wood to sealing it for years of family use—with tips, real-world examples, and a few hard-earned lessons.
Choosing the Right Wood for Your Kitchen Island Top
Not all wood is created equal, especially when it comes to kitchen islands. This surface will face spills, knife scratches, heat, and daily wear. So, picking the right material is the foundation of your project. Here’s how to make the smart choice without overcomplicating it.
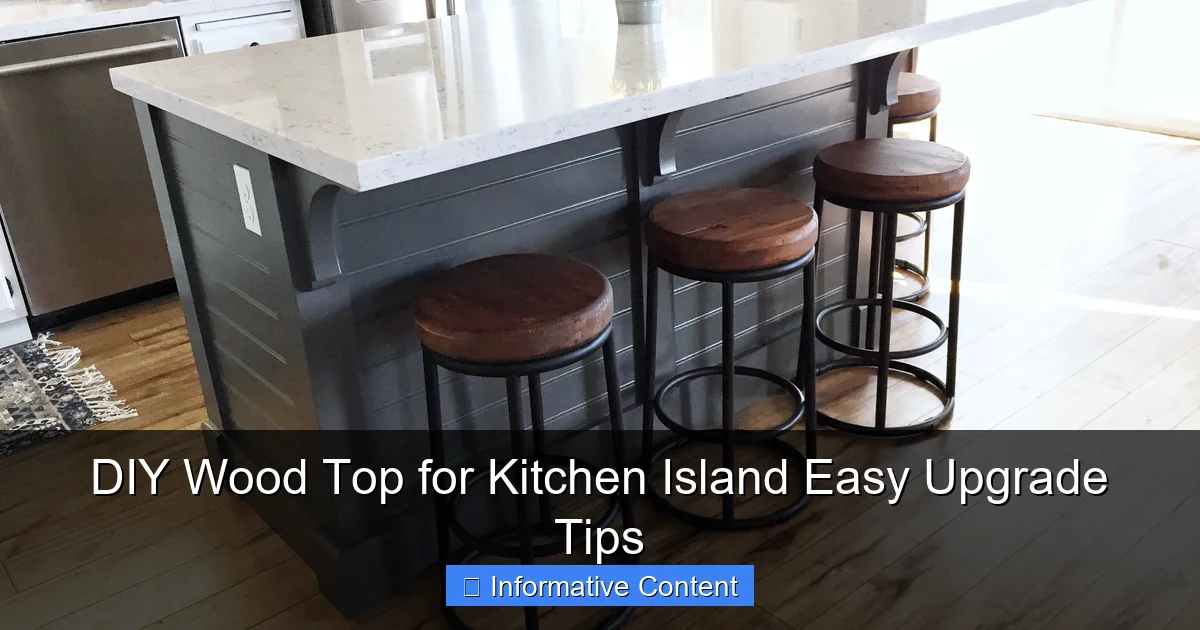
Visual guide about diy wood top for kitchen island
Image source: i.pinimg.com
Hardwood vs. Softwood: What’s the Difference?
Let’s start with the basics. Hardwoods (like maple, walnut, or oak) are denser, more durable, and naturally resistant to dents and scratches. They’re ideal for kitchen use. Softwoods (like pine or poplar) are lighter, easier to work with, and more affordable—but they dent more easily. If you’re new to DIY, softwood can be a great way to build confidence, but you’ll need to treat it more carefully.
Real-world example: A friend of mine used pine for her island top and loved the rustic look. But after six months, her kids’ homework sessions left noticeable indentations from pencils and textbooks. She ended up refinishing it with a harder oil-based sealant, which helped—but it was a reminder that softwood needs extra love.
Popular Wood Types and Their Pros/Cons
- Maple: Extremely hard, light color, minimal grain. Great for a clean, modern look. Resists scratches well. Slightly more expensive.
- Walnut: Rich, dark brown with beautiful grain. Naturally water-resistant. More affordable than maple but still durable. Adds warmth to any kitchen.
- Oak: Durable with a prominent grain pattern. Affordable and widely available. Can be a bit porous, so sealing is crucial.
- Pine: Soft, affordable, and easy to sand/stain. Best for a rustic or farmhouse style. Requires more maintenance.
- Birch: Affordable hardwood with a smooth finish. Good for staining. Slightly less durable than maple but still solid.
Pro tip: Buy your wood from a local lumberyard instead of big-box stores. You’ll get better quality, fresher cuts, and often, advice from experienced staff. I once saved 30% on walnut by buying a slightly imperfect board they were selling as “seconds”—it had a small knot, but once sanded and oiled, you couldn’t tell.
Pre-Made Butcher Block vs. Building Your Own
You can buy pre-made butcher block countertops (like those from IKEA or Home Depot), but they’re often expensive and limited in size. Building your own gives you total control over thickness, length, and wood type. Plus, it’s more satisfying.
For example, I needed a 40” x 72” top for my L-shaped island. Pre-made options were either too short or cost $400+. I bought five 8-foot maple boards, cut them to length, and joined them with biscuits. Total cost: $180. And I got to choose the exact grain pattern for the center panel.
Tools and Materials You’ll Need (No Overkill Here)
One of the biggest myths about DIY is that you need a full workshop. You don’t. For a DIY wood top for kitchen island, you can get by with a few key tools and materials. Let’s break it down.
Essential Tools
- Table saw or circular saw: For cutting boards to length and width. A straight edge guide helps if you don’t have a table saw.
- Jigsaw (optional): For cutting curves or notches around plumbing or outlets.
- Random orbital sander or sanding block: For smoothing the surface. Start with 80-grit, finish with 220-grit.
- Clamps: At least four bar clamps (24” or longer) to hold boards together during glue-up.
- Biscuit joiner or dowel jig: Optional but highly recommended. Biscuits align boards perfectly and add strength.
- Drill/driver: For attaching the top to the island base (if needed).
- Measuring tape, square, pencil: The basics.
Tip: If you don’t own a table saw, rent one from a local tool library or home improvement store. It’s worth it for clean, straight cuts.
Materials Checklist
- Wood boards: 1×6 or 1×8 boards (actual width: 5.5” or 7.25”). Plan for 10–20% extra length for mistakes.
- Wood glue: Use waterproof, exterior-grade glue (like Titebond III).
- Sandpaper: 80, 120, 180, and 220 grit.
- Sealer/finish: Choose based on use (more on this below).
- Wood filler: For filling gaps or knots.
- Protective gear: Safety glasses, dust mask, hearing protection.
Optional (But Helpful) Upgrades
- Router with round-over bit: Softens sharp edges—great for families with kids.
- Edge banding: If you’re using plywood, this hides the layers for a solid-wood look.
- Wood conditioner: Prevents blotchy staining, especially with softwoods.
Real talk: I skipped the biscuit joiner on my first try and used only clamps and glue. The boards shifted slightly during drying, leaving a small gap. It wasn’t a dealbreaker, but I learned my lesson: biscuits = precision.
Step-by-Step Build: From Boards to Beautiful Surface
Now comes the fun part: building your top. This process has a few key stages: cutting, joining, sanding, and finishing. Let’s go step by step.
Step 1: Measure and Cut
Measure your island’s surface. Add 1/8” to the length and width to allow for sanding and expansion. Cut your boards to size. Use a speed square to ensure 90-degree cuts. Pro tip: Label each board with a pencil (e.g., “Board 1 – Left End”) to keep track during glue-up.
Example: For a 36” x 60” island, I cut five maple boards to 36” long. I used a table saw with a crosscut sled for accuracy. Even a 1/16” gap between boards can cause problems later.
Step 2: Join the Boards
Apply wood glue to the edges of each board. Use clamps to hold them together, placing one every 12–18”. Wipe off excess glue immediately with a damp rag. If using biscuits, cut slots with your joiner, insert biscuits, then clamp. Let the glue dry for at least 4 hours (overnight is better).
Key tip: Alternate the direction of the boards’ grain (e.g., end-to-end) to reduce warping. I once ignored this and ended up with a slight “dip” in the center after a humid summer.
Step 3: Sand, Sand, Sand
Start with 80-grit to remove imperfections, then work up to 220-grit for a smooth finish. Sand with the grain, not across it. Use a sanding block for flat surfaces and a foam pad for edges. Wipe with a tack cloth between grits to remove dust.
Pro move: Wrap sandpaper around a wooden block for better pressure and less fatigue. I once spent 45 minutes hand-sanding a walnut top—my hands ached, but the result was worth it.
Step 4: Round the Edges (Optional)
Use a router with a 1/4” round-over bit to soften sharp corners. This makes the top safer and more comfortable to lean on. Run the router along all four edges, moving in the direction of the grain.
Step 5: Fill Gaps and Knots
If you have small gaps or knots, fill them with wood filler. Choose a stainable filler that matches your wood. Let it dry, then sand flush.
Step 6: Apply Finish
This is where your top becomes kitchen-ready. More on finishes below, but here’s the process:
- Clean the surface with a tack cloth.
- Apply finish with a foam brush or lint-free rag.
- Let dry, lightly sand with 220-grit, then apply a second coat.
- Repeat for a third coat if needed.
Warning: Never skip sanding between coats. I did this once and ended up with a rough, sticky surface. Lesson learned.
Finishing Options: Protecting Your Wood for Real Life
A beautiful wood top is only as good as its finish. The right sealant protects against spills, heat, and scratches while enhancing the wood’s natural beauty. Here are your best options.
Food-Safe Oils (Best for Frequent Use)
- Mineral oil + beeswax: Affordable, easy to apply, and food-safe. Reapply every 3–6 months. Not as durable as other options—best for low-traffic islands.
- Butcher block oil (mineral oil + natural waxes): A step up. Brands like Howard or John Boos offer blends with added protection. Still needs regular maintenance.
My experience: I used mineral oil on my first pine top. It looked great but darkened over time and needed reapplication every 4 months. For a busy kitchen, it’s a commitment.
Polyurethane (Durable and Low-Maintenance)
- Water-based poly: Dries clear, low odor, and resists yellowing. Apply 3–4 coats. Slightly less heat-resistant than oil-based.
- Oil-based poly: More durable, amber tint (warms wood color). Longer dry time, stronger fumes. Best for high-traffic kitchens.
Tip: Use a foam brush for water-based poly to avoid brush marks. I once used a regular brush and had streaks—had to sand and reapply.
Epoxy (For Extreme Durability)
Epoxy resin creates a thick, glass-like surface that’s nearly indestructible. It’s expensive and requires careful mixing, but it’s perfect for families with kids or heavy cooking. Brands like TotalBoat or MAS offer DIY kits.
Caution: Epoxy is not food-safe until fully cured (usually 7+ days). Use a food-safe topcoat if you’ll be preparing food directly on the surface.
Comparison Table: Finishes at a Glance
| Finish Type | Durability | Food-Safe? | Maintenance | Best For |
|---|---|---|---|---|
| Mineral Oil | Low | Yes | Reapply every 3–6 months | Low-traffic islands, rustic look |
| Butcher Block Oil | Medium | Yes | Reapply every 6–12 months | Everyday use, moderate traffic |
| Water-Based Poly | High | Yes (after curing) | Wipe clean; no reapplication | Modern kitchens, frequent use |
| Oil-Based Poly | Very High | Yes (after curing) | Wipe clean; no reapplication | High-traffic homes, families |
| Epoxy | Extreme | Yes (with food-safe topcoat) | Wipe clean; no reapplication | Heavy-duty use, statement pieces |
Final tip: Always test your finish on a scrap piece first. I once applied oil-based poly to walnut and hated the amber tone—had to sand it all off and switch to water-based.
Installation, Maintenance, and Long-Term Care
You’ve built and finished your DIY wood top for kitchen island—now what? Proper installation and care ensure it lasts for years.
Installing the Top
Most island bases have a frame or brackets. Place the top on the base and secure it with screws through the frame into the underside of the wood. Use 2–3 screws per side. Never glue it down—wood needs to expand and contract with humidity.
Pro tip: Add felt pads between the top and base to prevent scratches. I used self-adhesive pads from a hardware store—cheap and effective.
Daily Maintenance
- Wipe spills immediately with a damp cloth.
- Use trivets for hot pots and pans.
- Cut food on a cutting board, not directly on the wood.
- Clean with mild soap and water. Avoid harsh chemicals.
Long-Term Care
- Oiled tops: Reapply oil every 6–12 months (or when the wood looks dry).
- Polyurethane/epoxy tops: No reapplication needed. Sand and recoat if scratched.
- Sanding: Every 5–10 years, sand and refinish to restore the surface.
Real-life example: My maple top is 4 years old. I reapply butcher block oil once a year, and it still looks brand new. A friend with a polyurethane finish hasn’t touched hers in 3 years—still flawless.
Dealing with Damage
- Scratches: Light scratches can be sanded out. Deep ones may need filler.
- Stains: For oil finishes, sand lightly and reapply oil. For poly, sand and recoat.
- Warping: Rare, but if it happens, loosen the screws and let the wood adjust. Avoid drastic humidity changes.
Final Thoughts: A Project That Gives Back
Adding a DIY wood top for kitchen island isn’t just about looks—it’s about creating a space that feels like home. It’s the warmth under your coffee mug, the grain that catches your eye when you’re rushing to work, the pride in saying, “I made that.”
I won’t pretend it’s perfect. My first top had a slight bow in the middle, and I once spilled red wine and panicked. But wood forgives. With care, it ages like a good friend—developing character, not flaws. And the process? It’s meditative. Measuring, sanding, watching the grain emerge under the finish—it’s therapy with a purpose.
So, if you’ve been putting this off, stop. You don’t need to be a master craftsman. You just need a weekend, a few tools, and the willingness to try. Your kitchen (and your family) will thank you. And who knows? This might be the start of your DIY journey. Next stop: built-in shelves, maybe a reclaimed wood dining table? The possibilities are endless—and they all begin with one simple step: starting.
Frequently Asked Questions
What type of wood is best for a DIY wood top for kitchen island?
Hardwoods like maple, oak, or walnut are ideal for a DIY wood top for kitchen islands due to their durability and resistance to wear. These woods also offer beautiful grain patterns that enhance your kitchen’s aesthetic.
How do I seal a wooden kitchen island top to protect it from stains?
Apply a food-safe sealant like mineral oil, beeswax, or polyurethane to protect your DIY wood top from spills and moisture. Reapply every 4-6 weeks for high-traffic kitchens to maintain protection.
Can I install a DIY wood top on an existing kitchen island?
Yes! Simply measure your current island surface, cut the wood top to size, and secure it with construction adhesive or brackets. Ensure the base is level before installation for a seamless finish.
How thick should the wood be for a kitchen island countertop?
Aim for at least 1.5 to 2 inches thick for a sturdy DIY wood top that resists warping and supports heavy use. Thicker slabs (3+ inches) add a bold, rustic look but require stronger support.
What tools do I need to build a DIY wood top for a kitchen island?
Basic tools include a saw, sander, measuring tape, clamps, and drill. For finishing, you’ll need brushes or rags for sealant and safety gear like goggles and gloves.
How do I prevent my wooden kitchen island top from warping over time?
Use kiln-dried wood and apply sealant evenly on all sides (including edges) to minimize moisture absorption. Regular maintenance and avoiding prolonged water exposure also help prevent warping.