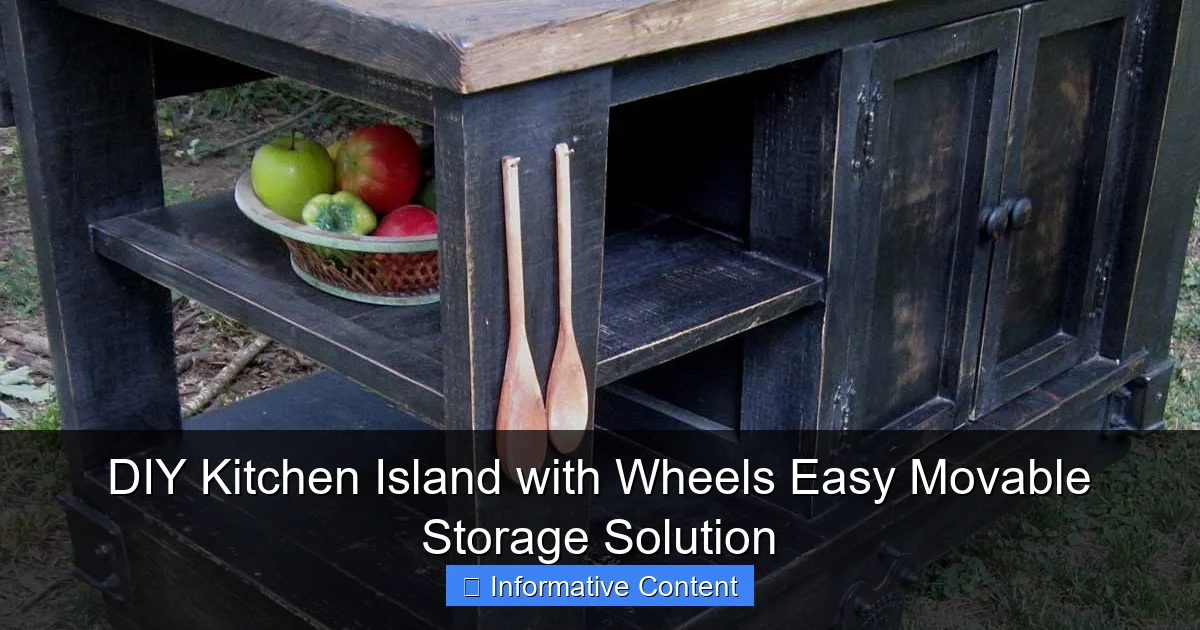
Featured image for diy kitchen island with wheels
Image source: familyhandyman.com
Transform your kitchen with a DIY kitchen island with wheels—an affordable, customizable, and easy-to-move storage solution that adds workspace and style in minutes. Perfect for small kitchens or renters, this portable island glides effortlessly on casters for flexible layouts and instant utility. No heavy lifting or permanent installation required!
Key Takeaways
- Maximize mobility: Use heavy-duty casters for smooth, stable movement.
- Prioritize storage: Add shelves and hooks for efficient space use.
- Measure first: Ensure fit by checking room dimensions before building.
- Choose durable materials: Opt for hardwood or stainless steel for longevity.
- Customize height: Match countertop height to your existing kitchen.
- Lock wheels securely: Install brakes to prevent unwanted island shifting.
📑 Table of Contents
- Why a DIY Kitchen Island with Wheels Might Be Your Best Upgrade Yet
- Benefits of a DIY Kitchen Island with Wheels
- Planning Your DIY Kitchen Island with Wheels: What You Need to Know
- Step-by-Step Guide to Building Your DIY Kitchen Island with Wheels
- Creative Ideas and Customizations for Your Rolling Island
- Maintenance, Safety, and Long-Term Care
- Real-World Examples and Inspiration
- Final Thoughts: Is a DIY Kitchen Island with Wheels Right for You?
Why a DIY Kitchen Island with Wheels Might Be Your Best Upgrade Yet
Let’s be honest: kitchens are the heart of the home. But if yours feels cramped, lacks storage, or simply doesn’t flow the way you’d like, you’re not alone. I remember when my own kitchen felt like a maze—every time I turned around, I bumped into something or couldn’t find a spot to prep dinner. Then, I discovered the DIY kitchen island with wheels—a game-changer that gave me extra counter space, storage, and mobility without breaking the bank or needing a full renovation.
Whether you’re renting, on a tight budget, or just love the idea of a customizable, movable kitchen centerpiece, a rolling kitchen island is one of the most practical upgrades you can make. Unlike built-in islands, which require plumbing, electrical work, and permanent installation, a DIY kitchen island with wheels is flexible, affordable, and surprisingly easy to build. Best of all? You can move it around to suit your needs—tuck it against the wall when you need more floor space, roll it into the middle for entertaining, or even wheel it outside for a summer cookout.
Benefits of a DIY Kitchen Island with Wheels
So why go the DIY route with wheels instead of buying a bulky, stationary island or hiring a contractor? The answer lies in flexibility, cost, and personalization. A DIY kitchen island with wheels isn’t just a piece of furniture—it’s a solution to common kitchen problems. Here’s what makes it such a smart choice.
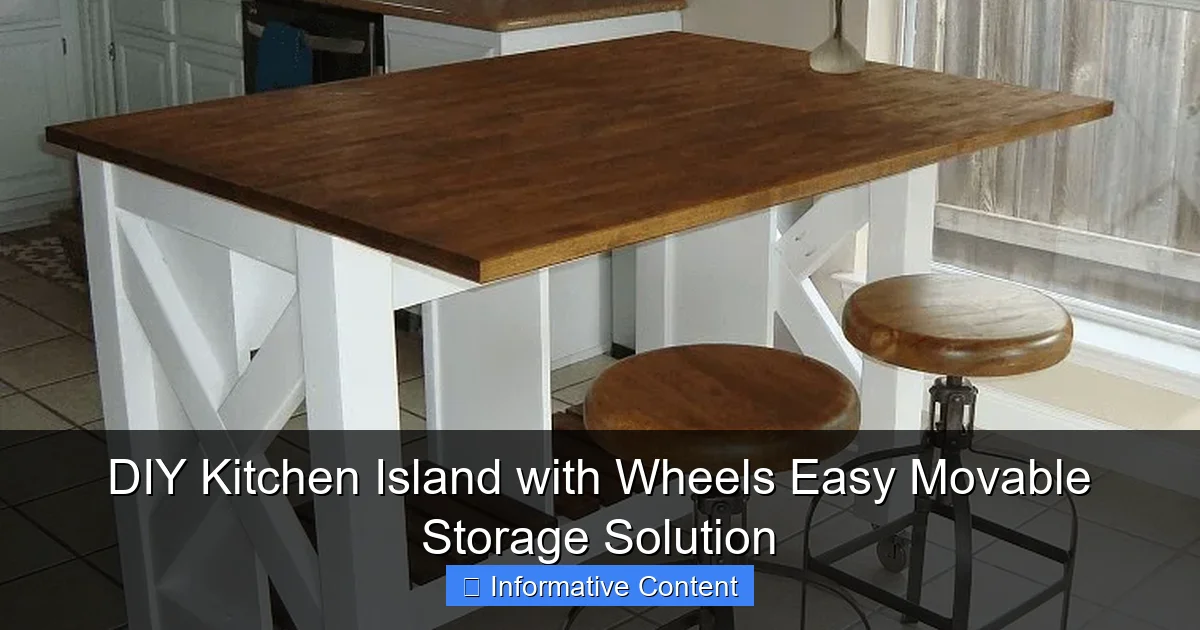
Visual guide about diy kitchen island with wheels
Image source: easyhometips.org
1. Mobility That Adapts to Your Lifestyle
One of the biggest perks is the freedom to move it. Imagine prepping dinner with your island in the center, then sliding it to the side when you want to vacuum. Or rolling it into the dining area to serve buffet-style meals. I’ve even used mine as a temporary bar during parties—just add a tray of drinks and some stools, and you’re set.
Wheels (also called casters) come in various types. Locking casters are ideal—they let you stabilize the island when in use and roll it freely when needed. Swivel wheels make turning easy, especially in tight spaces. Pro tip: choose wheels with rubber treads to avoid scratching hardwood or tile floors.
2. Extra Storage Without Permanent Changes
Most kitchens lack storage. A DIY island can solve that with shelves, drawers, and cabinets—all tailored to your needs. I added a spice rack on one side, a pull-out cutting board on top, and deep drawers for pots and pans. The best part? You can design it to fit your exact kitchen layout and storage habits.
For renters or those who don’t want to commit to a permanent fixture, this is a dream. No drilling into walls or floors. Just build, roll, and enjoy.
3. Cost-Effective and Customizable
Pre-made kitchen islands with wheels can cost anywhere from $300 to over $1,500. But building your own can bring the cost down to $150–$300, depending on materials. Plus, you control the design. Want a butcher block top? A farmhouse sink cutout? A wine rack? You can include it all—or keep it simple with open shelving for easy access.
I once built a mini island with a fold-down side table for my small kitchen. It doubled as a breakfast bar when extended and folded flat when not in use. Customization is the real power of DIY.
4. Aesthetic Flexibility
Your kitchen should reflect your style. A DIY island lets you choose finishes, colors, and materials that match your decor. Paint it navy blue for a modern look, stain the wood for a rustic vibe, or add a marble-look laminate countertop for elegance. I painted mine a soft sage green and added brass hardware—it’s now my favorite piece in the kitchen.
5. Eco-Friendly and Upcyclable
If you’re into sustainability, DIY is a great way to repurpose old furniture. I’ve seen people turn an antique dresser into a charming island by adding a countertop and wheels. Or use reclaimed wood from pallets for a rustic, eco-conscious build. Not only does this reduce waste, but it also adds character and history to your kitchen.
Planning Your DIY Kitchen Island with Wheels: What You Need to Know
Before you start hammering, take a moment to plan. A well-thought-out design saves time, money, and frustration. Here’s how to lay the groundwork for a successful build.
1. Measure Your Space
Start by measuring your kitchen. You’ll need at least 36–42 inches of clearance around the island for comfortable movement (the standard kitchen walkway width). If you’re tight on space, consider a smaller footprint—maybe 24″ deep and 36″ wide. Use painter’s tape on the floor to mark the island’s size and test how it feels in your kitchen.
Also, check ceiling height if you plan to add overhead lighting or a pot rack. And don’t forget door swings—make sure the island won’t block any cabinets or appliances when moved.
2. Choose the Right Height
Standard counter height is 36 inches. If you want a breakfast bar, go for 42 inches. For a prep surface, 36 inches is ideal. If you’re tall or short, adjust accordingly. I’m 5’10”, so I made my island 38 inches to reduce back strain while prepping.
Tip: If you plan to use stools, ensure there’s at least 10–12 inches between the seat and the island top for legroom.
3. Decide on Materials and Features
- Frame: Use 2x4s or 2x3s for a sturdy base. Plywood or MDF works for sides and shelves.
- Top: Butcher block, quartz, laminate, or even a repurposed door. Butcher block is affordable and easy to work with.
- Wheels: 3-inch locking casters (minimum) for stability. Look for ones rated for 100+ lbs per wheel.
- Storage: Drawers, open shelves, towel bars, spice racks—design based on what you use most.
- Back panel: Add a pegboard for hanging utensils or a magnetic knife strip.
I recommend sketching your design on paper or using free tools like SketchUp or Roomstyler to visualize it.
4. Set a Budget and Source Materials
Create a materials list and set a budget. Here’s a rough breakdown:
- Wood (frame, shelves): $50–$100
- Countertop: $30–$150 (butcher block is a sweet spot at $80)
- Wheels (4): $40–$80
- Hardware (hinges, drawer slides, screws): $30–$50
- Paint/stain/finish: $20–$40
Total: $170–$420. You can save by using scrap wood or buying pre-cut panels. Check Craigslist, Facebook Marketplace, or local lumber yards for deals.
5. Safety and Stability First
A rolling island must be stable. Use cross-bracing on the frame and secure all joints with pocket screws or corner braces. Make sure the wheels are rated for the total weight (including food, appliances, and you leaning on it). I once saw a poorly built island tip over when someone sat on it—not fun!
Also, sand all edges to prevent splinters and round over sharp corners for safety.
Step-by-Step Guide to Building Your DIY Kitchen Island with Wheels
Now for the fun part—building! This guide walks you through a simple but functional island. Adjust dimensions and features to fit your needs.
Materials and Tools Needed
- 2x4s (8 ft, 3–4 boards)
- ¾-inch plywood (1 sheet, for sides and shelves)
- Butcher block countertop (24″ x 36″, or custom size)
- 4 locking casters (3-inch, 100+ lb capacity)
- Pocket hole jig and screws (or wood glue and corner braces)
- Drawer slides (optional)
- Wood filler, sandpaper (120 and 220 grit)
- Stain or paint, polyurethane (for sealing)
- Tools: drill, saw (circular or table), clamps, measuring tape, level
Step 1: Build the Frame
- Cut two 2x4s to 34″ (height minus 2″ for wheels).
- Cut two 2x4s to 34″ (depth minus 2″ for overhang).
- Cut two 2x4s to 36″ (width).
- Assemble the base rectangle using pocket holes or corner braces. Reinforce with cross-bracing (diagonal 2×4 from corner to corner).
- Attach vertical supports every 16″ for shelf and side panel support.
Tip: Use a speed square to ensure all corners are 90 degrees.
Step 2: Add Shelves and Sides
- Cut plywood for sides (34″ high x 36″ wide) and shelves (22″ deep x 34″ wide).
- Attach sides to the frame using screws. Leave the back open for easy access.
- Install shelves at desired heights (I put one at 12″ and one at 24″). Use shelf pins or cleats for support.
Step 3: Install the Countertop
- Center the butcher block on the frame. Leave a 1″ overhang on the front and sides.
- Secure with screws from underneath. Pre-drill to avoid splitting.
- Sand the top with 120-grit, then 220-grit. Apply 2–3 coats of food-safe polyurethane (let dry between coats).
Step 4: Attach the Wheels
- Flip the island upside down. Place a wheel at each corner, 2″ from the edges.
- Mark screw holes and pre-drill. Attach with provided screws or bolts.
- Test mobility. If it wobbles, check for level or add shims under wheels.
Step 5: Add Finishing Touches
- Paint or stain the frame. I used a gray stain with a matte sealer for a modern look.
- Add drawer fronts, towel bars, or a pegboard back panel.
- Install a pull-out cutting board (cut a groove in the countertop and slide in a wooden board).
- Optional: Add LED strip lights under the countertop for ambiance.
Pro Tips for a Professional Look
- Use wood filler to cover screw holes and sand smooth.
- Round over the countertop edges with a router or sandpaper.
- Add furniture feet (small caps) to the wheels for a polished look.
- Label drawers or use glass fronts for easy identification.
Creative Ideas and Customizations for Your Rolling Island
Once you’ve built the base, the fun really begins. Here are some creative ways to make your DIY kitchen island with wheels uniquely yours.
1. Add a Fold-Down Table or Breakfast Bar
Use a piano hinge to attach a 12″ x 36″ board to one side. Add a fold-down leg or support chain. When open, it becomes a mini dining area. I use mine for coffee and toast in the mornings.
2. Install a Pull-Out Trash or Recycling Bin
Mount a trash can on drawer slides inside a cabinet. Pull it out when needed, slide it back when done. Great for small kitchens.
3. Create a Beverage Station
Add a small sink (with a portable water tank), a wine rack, and a mini fridge. Roll it to the patio for outdoor entertaining. I’ve seen people use this as a coffee bar with a built-in grinder and mug hooks.
4. Use Open Shelves for Display
Show off your favorite dishes, cookbooks, or plants. Add LED puck lights under shelves for a gallery effect.
5. Incorporate a Charging Station
Cut a small hole in the countertop and add a power strip inside a drawer. Now you can charge phones, tablets, or kitchen gadgets discreetly.
6. Make It Multi-Functional
One side for prep, one side for storage, and a drop-leaf on the end for extra space. I added a magnetic knife strip on the side and a spice rack on the back. It’s like a Swiss Army knife for the kitchen!
7. Go Vintage or Rustic
Repurpose an old table, dresser, or ladder. I saw a beautiful island made from a salvaged school desk—complete with a chalkboard top!
Maintenance, Safety, and Long-Term Care
A DIY kitchen island with wheels is built to last, but a little care goes a long way. Here’s how to keep it functional and beautiful.
1. Regular Cleaning and Upkeep
- Wipe down the countertop with a damp cloth and mild cleaner. Avoid harsh chemicals on wood.
- Check and tighten screws every few months.
- Inspect wheels for debris. Clean with a brush or compressed air.
- Reapply polyurethane to the countertop every 1–2 years, especially if used daily.
2. Wheel Maintenance
Wheels can squeak or seize over time. Lubricate with silicone spray or dry lube (never oil, which attracts dust). If a wheel wears out, replace it—don’t wait for it to fail.
3. Preventing Tipping
Never overload one side. Distribute weight evenly. If you plan to use it as a seating area, reinforce the frame with additional bracing.
For tall islands, consider adding a stabilizer bar that drops down when in use and flips up for mobility.
4. Protecting Floors
Rubber-tread wheels help, but you can also use furniture glides or a rug under the island to protect delicate flooring.
5. Seasonal Adjustments
In humid months, wood may expand. Leave a small gap between the countertop and frame to prevent warping. In dry months, use a humidifier if needed.
Real-World Examples and Inspiration
To inspire you, here’s a quick look at different types of DIY kitchen islands with wheels—each tailored to a specific need.
| Style | Best For | Key Features | Estimated Cost |
|---|---|---|---|
| Minimalist Prep Station | Small kitchens, renters | Open shelves, 24″ depth, butcher block top | $150–$200 |
| Entertaining Bar | Social kitchens, outdoor use | Fold-down table, wine rack, mini fridge | $250–$400 |
| Storage Powerhouse | Large families, meal preppers | Drawers, cabinets, spice rack, towel bar | $300–$500 |
| Rustic Farmhouse | Vintage lovers, cozy kitchens | Reclaimed wood, shaker-style doors, iron hardware | $200–$350 |
| Modern Utility | Tech-savvy cooks | Charging station, LED lighting, magnetic knife strip | $250–$450 |
Each of these was built by real people (including me!) with basic tools and a weekend. The key is to start simple and add features as you go.
Final Thoughts: Is a DIY Kitchen Island with Wheels Right for You?
After building and using my own DIY kitchen island with wheels, I can’t imagine my kitchen without it. It’s not just a storage solution—it’s a flexible, functional, and beautiful part of my daily life. Whether you’re short on space, love to entertain, or just want a project that makes your kitchen work better, this is one upgrade that delivers.
You don’t need to be a master carpenter. With basic tools, a solid plan, and a little patience, you can build an island that fits your kitchen, your style, and your budget. And because it’s on wheels, you can adapt it as your needs change. Move it for cleaning, reconfigure your kitchen, or even take it to a new home someday.
So, grab your tape measure, sketch out your dream island, and get building. The kitchen of your dreams might be just a weekend project away. And when you’re done? Roll it into place, pour a glass of wine, and enjoy the extra space, storage, and freedom that only a DIY kitchen island with wheels can provide.
Frequently Asked Questions
What materials do I need to build a DIY kitchen island with wheels?
You’ll need plywood or butcher block for the countertop, lumber for the frame, casters (locking wheels recommended), screws, wood glue, sandpaper, and a finish like stain or paint. For a budget-friendly option, repurpose an old table or cabinet and attach heavy-duty casters.
How do I ensure my DIY kitchen island with wheels is sturdy and safe?
Use thick lumber (like 2x4s) for the frame, reinforce joints with screws and wood glue, and install locking casters rated for your desired weight capacity. Test stability by gently rocking the island before loading it with items.
Can a movable kitchen island fit small kitchens?
Absolutely! A compact DIY kitchen island with wheels is ideal for small spaces since you can tuck it away when not in use. Opt for slim designs (under 24″ deep) and add vertical storage like hooks or shelves to maximize utility.
What type of wheels work best for a kitchen island?
Choose heavy-duty casters (at least 2″ wide) with locking mechanisms to prevent sliding. Swivel wheels offer better maneuverability, while rubber or polyurethane wheels protect floors and reduce noise.
How do I add storage to a DIY kitchen island with wheels?
Install open shelves, drawers, or cabinets for utensils, cookbooks, or pantry items. Add hooks or rails for hanging towels, pots, or cutting boards—just ensure the design balances weight to avoid tipping.
Can I customize the height of my DIY kitchen island?
Yes! Standard countertop height is 36″, but adjust the legs or base to match your needs (e.g., taller for prep work, shorter for dining). Use adjustable-height casters or cut legs to size before attaching wheels.